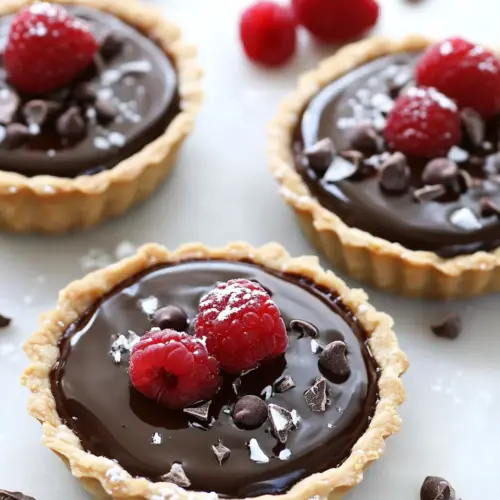
Chocolate Ganache Tarts
Chocolate Ganache Tarts are glossy, creamy, and satisfyingly rich with a crisp, buttery crust and silky ganache center. This easy yet elegant dessert delivers intense chocolate flavor and a hint of salt or fresh berries for balance, perfect for an easy weeknight treat or a small dinner party. Make it to impress with minimal fuss.
Equipment
- Mixing Bowl
- Saucepan
- Whisk
- Spatula
- tart pan with removable bottom
- Handheld Mixer
Ingredients
- 1 1/2 cups all-purpose flour Provide structure and body to the tart crust, forming the primary dry base that binds with fat to create a tender pastry; measure precisely for consistent texture and bake times. Combine with sugar and butter to develop a flaky, crumbly shell that holds the ganache filling without becoming soggy.
- 1/2 cup confectioners' sugar Sweeten and tenderize the crust while dissolving into the flour to help with a fine, delicate crumb; sift to avoid lumps and ensure even sweetness. Use sparingly to prevent an overly sweet pastry that would compete with the rich chocolate filling.
- 1/2 teaspoons salt Balance and enhance all flavors in both crust and filling while strengthening gluten slightly for better dough handling; dissolve into the dry mix to ensure even distribution. Adjust carefully to avoid over-salting, especially if using salted butter elsewhere in the recipe.
- 1/2 teaspoon ground cinnamon Add warm, aromatic depth to the crust with a subtle spice note that complements chocolate; sprinkle into the dry ingredients for an even flavor infusion. Use measured amounts so the cinnamon enhances without overwhelming the delicate pastry.
- Pinch of ground ginger Introduce a bright, slightly peppery warmth in trace amounts to lift the overall spice profile; grate or measure a pinch for controlled flavor. Keep quantity minimal to maintain a balanced backdrop for the chocolate and cinnamon.
- 1/2 cup (1 stick) unsalted butter, very cold, cubed Create flakiness and richness in the tart crust by coating flour particles and producing layers when cut into the mixture; keep very cold and cubed for optimal texture. Work quickly to prevent melting and chill dough as needed to preserve crispness after baking.
- 1 large egg yolk, lightly beaten Bind the crust dough together and add richness without extra moisture from whites; incorporate lightly beaten for a cohesive, pliable dough. Use minimal handling to maintain a tender, crumbly finished pastry.
- 8 ounces dark chocolate, finely chopped Provide the intense chocolate base for the ganache with deep cocoa flavor and smooth melting properties; finely chop to help melt evenly when combined with warm cream. Select high-quality dark chocolate for clean, robust chocolate notes and a glossy finish.
- 1 1/4 cups heavy cream Deliver fat and liquid to melt into the chocolate and create a smooth, silky ganache; heat gently to simmer before pouring over chopped chocolate. Use full-fat cream for stability and sheen in the final filling.
- 1/4 cup (1/2 stick) unsalted butter, at room temperature, cut into cubes Enrich the ganache and lend a glossy, velvety texture while adding a touch of buttery richness; add at room temperature so it emulsifies easily into the melted chocolate and cream. Cut into cubes to melt uniformly and help achieve a smooth, shiny finish.
- Flaky sea salt Provide a final savory contrast to the sweet, rich ganache by sprinkling sparingly on top; enhance chocolate flavor perception and add delicate crunch. Use flaky sea salt for visible flakes and clean bursts of saltiness.
- OR Present an explicit alternate option or divider indicating an alternative ingredient set; keep placement as a literal instruction marker within the ingredient list. Respect the original formatting to clarify that the following items are an alternative choice.
- 1 cup heavy cream Serve as a lighter cream option for a different ganache or for whipping to top the tarts; heat or whip as directed depending on use. Use precisely measured amounts to maintain the intended texture and richness of the alternative topping or filling.
- 2 tablespoons confectioners' sugar Provide a touch of sweetness and stabilizing fine sugar for whipping or dusting; sift to avoid grit and to ensure smooth incorporation into cream or as a light dust. Use measured tablespoons to balance topping sweetness without overpowering the tart.
- Fresh raspberries (about 1 cup) Offer a bright, tart garnish that cuts through the richness of the ganache and adds fresh color and texture; rinse gently and arrange atop cooled tarts just before serving. Use about a cup for consistent portioning and attractive presentation.
Instructions
- In a large bowl combine the flour, sugar, salt, and spices. Cut in the butter with your fingers until well incorporated. Some of the butter chunks will be sized like small pebbles, others like oatmeal flakes. Once incorporated, add in the egg yolk and bring the mixture together using a fork. The mixture will be quite shaggy, but don't worry! Dump the mixture into a tart pan with a removable bottom (or 4 mini tart pans with removable bottoms) and using your fingers, press the crust into the sides and on the bottom of the pan. Place the crust in the freezer and chill for one hour. This step is mandatory and important; it will keep the tart crust from puffing up too much while baking.: The air smells faintly of cinnamon and ginger as you whisk the dry ingredients together, creating a balanced base for the crust. This step is about even seasoning and distribution, which ensures every bite has consistent flavor. If one area has too much salt or spice, the bite will be off. A common mistake is skimping on mixing, which can leave pockets of unblended sugar or spice, creating uneven taste. Work with cold ingredients nearby so the butter stays firm as you move to the next step.
- While the tart shells are chilling, make your ganache!: As you pinch the cold, cubed butter into the dry mix, you should hear a faint rubbing sound and see pebbly fragments. The texture should resemble small pebbles and oatmeal flakes, which will form flaky layers when baked. The warmth of your hands should be minimal to prevent the butter from melting; if it gets too soft the crust will be dense. A common misstep is overworking, which creates a paste rather than a crumbly dough. Keep your movements quick and tactile to preserve those butter pockets.
- Add chopped chocolate to a medium bowl; set aside. In a small saucepan over medium heat, bring the cream to a low simmer. Pour half of the cream on top of the chocolate pieces and set aside for 1 minute. With a whisk begin to incorporate the melted chocolate into the cream. Slowly add the remaining cream and continue carefully whisking until smooth and glossy. Add in the butter and use a spatula to stir until the butter is completely melted. The mixture will be dark and glossy. Set aside, at room temperature, until needed.: The dough will be shaggy and slightly tacky as the yolk binds the flour and butter. Use a fork to draw the pieces together without overmixing, aiming for coherence rather than smoothness. The tactile cue is important, you should feel the dough come together but still see texture. Overworking now will develop gluten and result in toughness. If the mixture feels too dry, a teaspoon of cold water can help, but add sparingly.
- Place a rack in the upper third of the oven and preheat to 350 degrees (F). Butter a piece of tin foil (or 5 small pieces, if making mini tarts) and place the foil, butter side down, on top of the chilled tart shell. Bake for 20 minutes (or about 16 for the mini tarts) then remove the foil and bake for another 15 minutes (or about 13 for mini tarts), or until the tart shell is golden brown and firm. Cool shell(s) completely before filling with chocolate ganache. Once cooled, spread the chocolate ganache inside the tart (or divide it evenly among the mini tart shells). Carefully place the chocolate tarts in the fridge to set; about 1 hour for a whole tart and 30 minutes for the mini tarts.: As you press, the crust should compact and adhere to the pan with gentle pressure, forming an even layer with no thin spots. The visual cue is an even, smooth surface without cracks. Avoid stretching the dough as it can pull away during baking. A typical error is pressing too thin in some areas, which will brown and burn; keep the thickness uniform by checking with your eye and finger.
- Simply sprinkle a few flakes of sea salt on top of the wet chocolate ganache.: The coldness is crucial, and you will notice the dough firming under your touch, making it easier to handle and preventing puffing in the oven. This mandatory chill step reduces steam pockets and keeps the crust from shrinking. Skipping or shortening this rest often leads to a crust that puffs up and loses definition. Use this hour to prep your ganache ingredients so everything moves smoothly.
- In a medium-sized bowl using a handheld mixer, whisk together the heavy cream and sugar until soft peaks are formed. Generously dollop the cream in the center of the tart and top with fresh berries. Serve at once!: When you bring the heavy cream to a low simmer you will smell its warm dairy sweetness, a comforting scent that signals readiness. Pouring half the hot cream over the chopped dark chocolate melts the edges and allows gentle emulsification. The texture shifts from grainy to glossy as you whisk, and patience during this stage produces that signature shine. Rushing by using excessively hot cream can cause the chocolate to seize, so keep the simmer gentle and stir slowly.
- Add chopped chocolate to a medium bowl; set aside: The room will fill with a pure cocoa aroma as the warm cream hits the chocolate. After letting the initial cream sit for a minute to soften the pieces, whisk slowly to combine, then add the remaining cream in a thin stream. This slow integration helps form a stable emulsion. If the ganache looks grainy, continue whisking and warm gently in a bain marie, but avoid direct high heat which can break the emulsion. A frequent oversight is using chocolate that is not uniformly chopped, leading to uneven melting.
- In a small saucepan over medium heat, bring the cream to a low simmer: Watch for tiny bubbles forming at the edge of the pan and a gentle rising of steam, signals that the cream is ready. Heating too rapidly will scald the cream and alter flavor, so stay attentive. The sound is a soft hiss, not a violent boil. A common mistake is allowing a rolling boil which can create separation when mixed with chocolate later.
- Pour half of the cream on top of the chocolate pieces and set aside for 1 minute: This pause allows conduction heat to soften the chocolate gently, so when you whisk the mixture becomes glossy without seizing. The chocolate will look partially melted at first, and then gradually smooth as you incorporate. If you skip the rest and immediately whisk aggressively, you risk creating lumps. Patience at this moment yields a creamy, cohesive ganache.
- With a whisk begin to incorporate the melted chocolate into the cream: As you whisk you will feel the texture changing from thick to silky, and the aroma deepens into a concentrated chocolate scent. Move in small circles to build a smooth emulsion, then slowly add the remaining cream, maintaining a steady motion. If the ganache seems thin it may still firm as it cools; if it splits, warm gently and whisk to bring it back together. Overwhisking vigorously can introduce air bubbles, which may affect the glossy finish.
- Slowly add the remaining cream and continue carefully whisking until smooth and glossy: The final ganache should be dense, dark, and reflective, the surface catching light like a lacquer. This is the sensory reward for careful technique. If it appears dull, gentle warming and stirring can restore sheen. Avoid overheating which can degrade texture, and do not add cold liquids abruptly which will shock the emulsion.
- Add in the butter and use a spatula to stir until the butter is completely melted: The addition of room temperature unsalted butter brings silk and gloss, smoothing any remaining granular texture. Stir until fully incorporated, and you will notice the ganache deepening in color and shine. If the butter is too cold it may create lumps, so ensure it is softened. A typical error is adding the butter in large chunks which delays integration; smaller cubes incorporate more evenly.
- Set aside, at room temperature, until needed: The ganache will thicken as it cools and become scoopable. The aroma settles into a deep chocolate warmth and the surface calms to a glassy finish. If you refrigerate too quickly it can set too firm and become hard to spread; allow it to cool gradually on the counter to reach the right consistency for filling.
- Place a rack in the upper third of the oven and preheat to 350 degrees F: Positioning the rack helps the crust brown evenly on top without burning the bottom. The heat should be steady; an oven thermometer helps if your oven runs hot or cool. A common oversight is placing the tart too low, which can darken the bottom before the sides are set.
- Butter a piece of tin foil and place the foil, butter side down, on top of the chilled tart shell: The foil shields the crust from direct heat and prevents puffing while allowing edges to bake. Buttering the foil prevents it from sticking to the crust when you remove it mid bake. If you do not protect the shell it may blister or puff unevenly, so this small step prevents many headaches.
- Bake for 20 minutes then remove the foil and bake for another 15 minutes, or until the tart shell is golden brown and firm: During the first phase you will see the crust set and lose a raw appearance; after removing the foil the top will take on color and crispness. Listen for a faint crackling as edges firm, and look for an even golden tone. Underbaking yields a soft, fragile shell, while overbaking gives a dry, bitter edge. Watch closely in the final minutes to catch the perfect shade.
- Cool shell(s) completely before filling with chocolate ganache: As the tart cools the structure stabilizes, preventing the ganache from seeping into a warm crust and making it soggy. Cooling also helps the ganache set more predictably. A common mistake is filling a warm shell which leads to a runny center and loss of texture contrast.
- Once cooled, spread the chocolate ganache inside the tart: When you spread the ganache you should feel a smooth, slightly resistant glide of the spatula as the mixture levels into a sleek surface. A glossy shine should remain, reflecting light and signaling proper emulsion. If the ganache is too soft, chill briefly until it firms enough to hold shape; if too hard, let it soften slightly at room temperature.
- Carefully place the chocolate tarts in the fridge to set; about 1 hour for a whole tart and 30 minutes for the mini tarts: The chill brings the ganache to a sliceable firmness, and the kitchen cools with a faint chocolate aroma. Resist opening the fridge frequently, as temperature fluctuations can affect set. Leaving it too long is less problematic than under chilling, which leaves a gooey center.
- Simply sprinkle a few flakes of sea salt on top of the wet chocolate ganache: The salt dissolves slightly into the surface, creating tiny bursts of savory contrast against the sweet, deep chocolate. The visual of scattered crystals is also appealing. Over-salting is the main error here; a delicate hand achieves balance rather than dominance.
- In a medium sized bowl using a handheld mixer, whisk together the heavy cream and sugar until soft peaks are formed: If you choose to top with whipped cream, watch for the cream transforming from liquid to soft peaks, which should billow and hold a gentle curl. It should smell fresh and sweet, not heavy. Overwhipping will break the cream into grainy butter, so stop as soon as soft peaks appear.
- Generously dollop the cream in the center of the tart and top with fresh berries: The final presentation pops with color and texture contrast, and the cool cream offsets the rich ganache. The raspberries offer bright acidity and juiciness that complements the chocolate. Be mindful that berries release juices, so add them just before serving to avoid sogginess.
- Serve at once: When served, the tart presents a balance of texture and flavor that rewards the small effort you put in. Each forkful should show a clean slice of glossy ganache and crisp crust, the raspberry and cream adding their lift. The most common serving error is waiting too long after garnishing, which can allow toppings to wilt or bleed into the tart.
Notes
- Measure Flour Properly — Spoon the all purpose flour into the measuring cup and level it off rather than scooping, to avoid a heavy, dry crust that becomes tough when baked.
- Keep Butter Cold for the Crust — Cold, cubed unsalted butter creates flaky pockets; if the butter warms up, chill the mixture briefly before pressing into the pan.
- Chill the Shell Thoroughly — A full hour in the freezer firms the dough and helps it hold shape in the oven, preventing puffing and shrinkage.
- Use Evenly Chopped Chocolate — Finely chopped dark chocolate melts more uniformly when combined with warm heavy cream, yielding a silkier ganache.
- Warm the Cream Gently — Bring the heavy cream only to a low simmer to avoid scalding, which can negatively affect texture and flavor.
- Add Butter at the End — Stir in room temperature butter to the ganache last for added shine and richness, ensuring a smooth, glossy finish.
- Chill to Set Correctly — Allow about one hour for a whole tart and thirty minutes for minis to set in the fridge, which ensures clean slices.
- Finish Smart — Scatter Flaky sea salt on wet ganache or add whipped cream and Fresh raspberries right before serving for visual and flavor contrast.
- Watch Oven Position — Placing the tart in the upper third of the oven encourages even browning and prevents the bottom from overbaking.
- Prevent Overworking Dough — Handle the dough as little as possible to avoid developing gluten, which causes a tough crust.