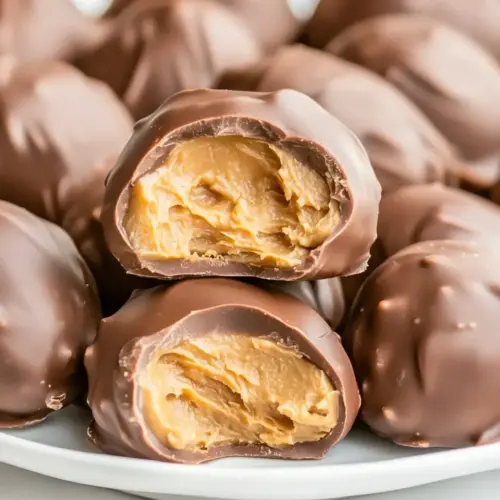
Chocolate Easter Eggs
Chocolate Easter Eggs are creamy peanut butter centers coated in smooth chocolate for a crunchy outer shell and tender interior, an easy springtime treat perfect for gifting. This recipe blends pantry staples into a simple, crowd pleasing confection that's ideal for holidays or casual gatherings, offering a balanced sweet and salty bite you'll want to make again.
Equipment
- Sheet Pan
- Parchment Paper
- Hand Mixer
- Mixing Bowl
- Cookie Cutter
- Heatproof Bowl
- Microwave
- Fork
Ingredients
- 1/2 cups salted butter (melted and cooled) Melted and cooled to provide a rich, smooth fat that adds moisture and helps bind the filling, contributing to a tender texture. Adds a subtle salty contrast that balances the sweetness of the other components and enhances overall flavor.
- 2 cups creamy peanut butter Creamy to create a smooth, cohesive filling with a rich, nutty flavor that forms the core of each egg. Supplies structure and mouthfeel, allowing the powdered sugar to be incorporated into a pliable dough for shaping.
- 1/4 cup granulated sugar Granulated to introduce a touch of granular sweetness and slight crunch while helping temper the intense richness of the peanut butter. Enhances overall sweetness balance and assists in achieving the desired consistency when mixed with butter and peanut butter.
- 1 tablespoon vanilla extract Vanilla to contribute warm, aromatic complexity that elevates the dessert’s overall flavor profile. Amplifies the perception of sweetness and rounds out both the peanut butter filling and the chocolate coating.
- 4 cups powdered sugar Powdered to absorb moisture and thicken the peanut butter mixture into a moldable, dough-like consistency ideal for forming eggs. Sweetens the filling smoothly without grittiness, ensuring a creamy interior contrast to the chocolate shell.
- 1 1/2 cups semi-sweet chocolate chips Semi-sweet to provide a slightly bitter chocolate layer that contrasts the sweet, nutty filling and creates depth of flavor. Melts into a glossy coating that sets firm around the peanut butter centers, offering structural integrity and classic chocolate taste.
- 1 1/2 cups milk chocolate chips Milk to offer a sweeter, creamier chocolate option that can be used alone or blended with semi-sweet to adjust sweetness and texture of the shell. Adds a milder cocoa flavor and softer snap when set, complementing the salty-sweet filling.
- 2 tablespoons shortening Shortening to stabilize melted chocolate, creating a smoother, glossier coating with improved workability and a thinner, shinier finish. Helps prevent bloom and ensures the chocolate sets with a pleasant texture suitable for dipping or molding.
Instructions
- Line a jelly roll or half sheet pan with parchment paper and set aside.: The sudden clean sound when parchment smooths across a pan previews how organized the process will feel, and using parchment prevents sticking so the chilled peanut layer lifts intact. You'll want to press firmly as you smooth the sheet, ensuring no air gaps, otherwise the filling may compress unevenly. A common mistake is skipping parchment, which makes removal frustrating and can break your cutouts.
- Using a hand mixer, beat together melted butter, peanut butter, granulated sugar, and vanilla extract until smooth and creamy. Beat in powdered sugar.: As the beaters spin you will hear a steady whir and see the mixture go from slightly separated to glossy and unified, which tells you the fats and sugars are emulsifying. The melted butter and peanut butter should combine into a silky base that holds soft peaks if you lift the beaters slightly. If the mix looks grainy, scrape the bowl and beat again; graininess often means the butter was not fully incorporated or the sugars were clumped.
- Press peanut butter mixture into sheet pan – spreading to about 1/2” thickness.: When you add the powdered sugar the texture will instantly thicken, and you'll notice a soft, dough like consistency that holds shape when pressed. Work at a low speed at first to avoid a cloud of sugar, then increase until the mixture is smooth. If your powdered sugar is lumpy, sift it first to avoid pockets of dry sugar in the filling.
- Place sheet pan in the freezer for 15 minutes.: Pressing the mixture creates a uniform layer that will slice cleanly, and you'll feel the mixture firm under your palms as the powdered sugar binds with the fats. Aim for consistent thickness so every egg is the same size, and use a spatula to smooth the surface until it is even and slightly glossy. Pressing too thin will make fragile cutouts, while too thick leads to oversized pieces that are harder to coat.
- Lift the parchment paper to remove the chilled peanut butter layer from the pan. Place a new sheet of parchment paper on the pan.: The freezer's cold hush will firm the filling, and after sitting you'll notice the surface lose its tackiness and the edges feel solid to the touch. This chill time sets the structure so the cookie cutter slices smoothly. Avoid leaving it longer than necessary, which can make the layer brittle and more likely to crack when cutting.
- Use a cookie cutter to cut out 1/2” thick Easter egg shapes from the chilled peanut butter layer.: The layer should come away cleanly with a soft snap as you lift, and replacing the parchment ensures you have a pristine surface for arranging cutouts. This step prevents condensation from the pan from marring the underside of the pieces. If the layer sticks, run a thin spatula along the edge and chill a few more minutes.
- Place cutouts on parchment lined sheet pan. Freeze for 30 minutes.: Press the cutter straight down to hear a muted thud, then wiggle slightly to release a neat shape; that crisp edge is your visual cue that the thickness was right. Cut confidently to avoid ragged edges, and gather the negative space to repress and cut again. Don’t twist the cutter, which can tear the shapes.
- Scoop up remnant peanut butter mixture, repress to 1/2” thickness, and cut out additional shapes.: The cold will firm each egg further so they hold up during dipping, and after freezing they will have a satisfying solidity when picked up, not a yielding softness. The temperature contrast between egg and melted chocolate helps the coating set quickly. Failing to chill sufficiently will cause the peanut butter to soften while dipping and deform the shape.
- After cutouts have chilled for 25 minutes, prepare the chocolate coating.: Use the leftover mixture efficiently by pressing it back to a consistent thickness and repeating the cutter step, which is both economical and satisfying. Work quickly so the scraps stay cold enough to cut cleanly. If remnants are too warm, refrigerate briefly before cutting to avoid ragged pieces.
- Combine semi-sweet and milk chocolate chips in a heatproof bowl. Dollop shortening over the top. Heat and stir in 30-second increments in the microwave until the chocolate is smooth and melted completely.: You will notice a faint snap when you tap a chilled cutout indicating readiness, and preparing the chocolate now uses that firmness to your advantage. Warmth from the coating process will melt the outer surface slightly and create a perfect bond between shell and filling. If you rush and the cutouts are still soft, they can collapse under the weight of the coating.
- Using a fork, lift one peanut butter cutout at a time and coat it completely with the melted chocolate. Tap excess chocolate off of the cutout and place it back onto the cookie sheet.: When the chips begin to melt the aroma of chocolate deepens, and gentle stirring will coax them into a satin, glossy pool. The small additions of shortening thin the chocolate and boost shine, making dipping easier. Microwave in short bursts to avoid overheating, which can make chocolate grainy or seize; stirring thoroughly between intervals is essential.
- Work in batches if the peanut butter cutout becomes soft quickly.: As you lower a cutout into the chocolate you will hear a soft splash, and the coating will flow around the edges before settling into a smooth finish. Tapping the fork removes drips and prevents messy pooling on the pan. If excess chocolate pools underneath, use a clean spatula to tidy the edge before it hardens.
- Allow chocolate to harden.: Dipping several pieces at once can warm them, so rotating between tray and freezer keeps pieces firm and your coating crisp. You will notice when the chocolate clings differently to a warm piece, leaving uneven coverage. If that happens, chill the batch briefly before continuing to maintain consistent texture.
- Serve!: The shell will go from glossy wet to a slight sheen and then to a firm snap as it sets, and that transformation is your cue that the eggs are ready to handle. Let them rest undisturbed so the chocolate cools evenly; moving them too soon can leave fingerprints or blemishes. If condensation forms, transfer to a cooler spot to finish setting slowly and avoid bloom.
- Serve!: When the chocolate is fully set you will hear a clean snap as you bite into an egg, revealing the soft, dense peanut butter core. Arrange on a platter or package for gifts, and enjoy the contrast of textures and balanced sweetness. A hasty serving while the shell is still tacky ruins the presentation, so be patient and wait for full set.
Notes
- Dip your cookie cutter in flour or sugar to avoid it getting sticky and messy, this keeps edges clean and makes repetitive cutting faster.
- Finish with sprinkles while the chocolate is still tacky to ensure they adhere, which gives a festive look perfect for baskets.
- Use different chocolates by swapping proportions of semi sweet and milk chips to shift the sweetness and depth of the shell flavor.
- Stir remaining chips until completely melted when you have just a few left, this helps you use up small amounts without waste.
- Chill in stages if you notice pieces softening during the dipping session, rotating trays through the freezer keeps a steady pace without stress.
- Package individually in small boxes or cello bags for gifting, tying with ribbon to keep them from shifting during transport.