Chocolate Chip Oatmeal Cookie Pancakes
Chocolate Chip Oatmeal Cookie Pancakes are chewy, slightly toasty pancakes studded with melty chocolate chips and a hint of brown sugar. These comforting pancakes are easy to make with pantry staples like oats and white whole wheat flour, resulting in a hearty, cookie like texture that works for breakfast or a sweet brunch. Try them for an easy weekend treat that everyone will love.
Equipment
- Mixing Bowl
- Whisk
- Skillet or griddle
- Spatula
- Cookie Scoop
Ingredients
- 1 cup white whole wheat flour Provide structure and a light whole-grain flavor while keeping the pancakes tender; white whole wheat flour adds fiber and a slightly nuttier taste compared to all-purpose flour. Combine evenly with dry ingredients to ensure consistent texture and to support leavening. Adjust quantity carefully to maintain batter thickness appropriate for pancakes.
- 3/4 cup oats Add hearty texture and chewiness while contributing whole-grain fiber and a mild nutty flavor; oats help mimic oatmeal cookie character in the pancakes. Stir into the dry mix or fold into batter to retain some bite without weighing the pancakes down. Choose rolled oats for texture or quick oats for a smoother crumb as preferred.
- 3 tbsp packed brown sugar Contribute gentle sweetness and a hint of molasses depth to echo cookie flavors without overpowering the batter; packed brown sugar also aids in browning. Dissolve into wet ingredients so sweetness distributes uniformly and promotes caramelization on the griddle. Use measured packing to maintain consistent sweetness across batches.
- 2 tsp baking powder Provide primary leavening by creating lift and lightness through acid-base reactions when combined with liquids and heat. Distribute evenly through dry ingredients to avoid uneven rising and to produce fluffy pancakes. Ensure freshness for optimal rise and to prevent dense or flat cakes.
- 1/2 tsp baking soda Support leavening and promote tender crumb while reacting with acidic buttermilk to create additional lift and subtle tang. Measure precisely because excess can affect flavor and texture, potentially leaving a metallic or soapy aftertaste. Mix with dry ingredients to activate properly when wet ingredients are added.
- 1/2 tsp salt Enhance overall flavor balance by rounding out sweetness and amplifying other flavors; salt also strengthens gluten for better structure. Dissolve it in the dry mix to ensure even seasoning throughout each pancake. Adjust slightly to taste but avoid over-salting which can dominate delicate pancake flavors.
- 1 large egg Bind the batter while adding moisture and richness, contributing to structure and a slightly custardy interior in each pancake. Beat briefly with sugars and liquids to incorporate air and ensure even distribution for consistent texture. Use fresh eggs for best emulsification and lift.
- 1 tbsp vanilla Impart aromatic vanilla flavor that deepens the cookie-like profile and enhances perceived sweetness without adding sugar. Mix into the wet ingredients so the fragrance disperses evenly through the batter. Use pure vanilla extract for natural flavor or vanilla paste for visible specks.
- 1 1/2 cups buttermilk Provide acidity and tang that reacts with baking soda for lift while contributing a tender, slightly tangy interior reminiscent of pancakes made with cultured milk. Whisk with eggs and oil to create a smooth, well-hydrated batter that cooks to a tender crumb. Maintain recommended temperature so curdling is avoided and batter remains cohesive.
- 3 tbsp canola oil Add fat to increase tenderness, moisture, and cooking browning; canola oil keeps pancakes light and neutral in flavor. Combine with wet ingredients for uniform dispersion and to prevent overworking the batter, which can toughen pancakes. Use measured oil to balance richness without making batter greasy.
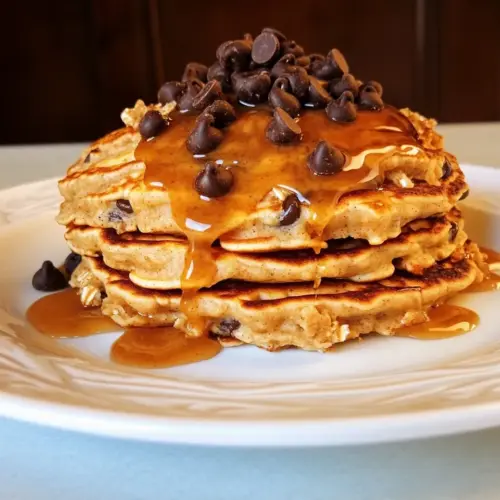
- chocolate chips to taste Introduce bursts of sweet, melty chocolate and a cookie-like finish; chocolate chips customize sweetness level and texture with every bite. Fold in gently to distribute pieces throughout the batter while avoiding overmixing that can deflate pancakes. Choose chip size and quantity to match desired chocolate intensity.
Instructions
- In a medium bowl, combine your white whole wheat flour, oats (you can grind in a food processor ahead of time if desired, but certainly not required), brown sugar, baking powder, baking soda and salt.: When the dry ingredients are whisked together you should notice a uniform pale tan color dotted with oat flecks, and a faint sweet scent from the brown sugar . This step is important because it evenly distributes the baking powder and baking soda , which prevents lumpy pockets of leavening that can create uneven rise. If you skip thorough mixing, some pancakes may puff more than others. A common mistake is over stirring the dry mix into the wet later, so keep these dry ingredients well blended now so you can combine gently later.
- In a separate bowl, mix together your egg, buttermilk, vanilla and oil.: As you whisk the egg into the buttermilk , the mixture will look smooth and slightly frothy, with a faint tang from the buttermilk . Adding the vanilla and canola oil gives a glossy sheen to the batter and carries aroma. This wet mixture ensures the liquids are evenly flavored and emulsified before they meet the dry mix. Avoid using cold ingredients straight from the fridge, because very cold wet ingredients can slow the chemical reaction of the leaveners and yield denser pancakes.
- Combine your wet and dry ingredients until just mixed (do not over mix).: When you fold the wet into the dry, aim for a shaggy batter with visible streaks of flour that disappear with a few gentle stirs; small lumps are fine. The texture should be thick but spoonable, not thin and runny. Over mixing activates gluten in the white whole wheat flour and will make the pancakes tough rather than tender. If you overwork the batter, the pancakes lose lightness, so stir until the ingredients are incorporated and stop.
- Heat a skilled or griddle to a medium low heat. Spray lightly with cooking spray.: You want the surface warm enough to make a gentle sizzle but not so hot that the outsides burn before the centers cook. At medium low heat you will get that comforting sizzling sound without aggressive browning, and the aroma of toasting oats will begin to fill the air. A common error is cooking too hot which causes dark exterior and undercooked middles. Adjust the heat if pancakes are browning too fast.
- Spoon batter into skillet (I use a large cookie scoop) and spread out batter into a circle.: As you drop batter onto the griddle it should hold its shape, slowly spreading to a neat circle. The surface will show tiny bubbles forming as it begins to cook, and the edges will firm up. Using a scoop creates uniformly sized pancakes so they cook evenly. Pressing the batter down aggressively will make them dense, so let the batter spread naturally for the best lift.
- If using chocolate chips, sprinkle a few on top of pancake prior to flipping.: When you add chocolate chips they create glossy little domes that melt into decadent pockets. The chips should slightly sink into the warm surface but still be visible, so you get those chocolate bites in each pancake. A frequent slip is adding too many chips which can weigh the pancake down, so use them sparingly to preserve structure.
- Cook for 1-2 minutes until the edges start to dry and appear lightly brown. When you can slip the spatula under the pancake with ease, it's ready to flip.: Watch for the edges to transition from glossy batter to matte, and for small bubbles to pop on the surface. The sound will change from steady sizzling to a softer hiss. These visual and auditory cues tell you the underside has set and the interior has begun to cook. Flipping too early will result in a batter that falls apart, while flipping too late leads to overly dark edges.
- Flip and cook second side of pancake for 1-2 minutes. Pancakes will be fairly solid and easily moved when done.: After flipping, you should see a golden brown underside and smell a nutty, toasted aroma. The second side cooks faster, so keep an eye on color and use a thin spatula to feel for springiness, which signals doneness. A common mistake is leaving them on too long which dries the interior out, so remove them when they bounce back slightly and look set.
- Pancakes can be served immediately, but also store well in the fridge or freezer. Let cool completely before adding to a freezer style bag to store.: Cooling is crucial to prevent condensation which can make pancakes soggy in storage; once cool they stack neatly and reheat with retained texture. When reheating from frozen, use a low oven or toaster to warm through and revive crisp edges. People often try to freeze them while warm which traps steam and ruins the texture, so resist that temptation and cool fully before packing.
Notes
- Swap oats texture: If you like a smoother pancake, pulse the oats in a food processor for a few quick pulses before adding to the dry mix, which blends them into the batter without eliminating all chew.
- Adjust chocolate level: For less sweetness, reduce the amount of chocolate chips or sprinkle them on only half the pancakes so some remain milder for those who prefer it.
- Substitute milk: If you do not have buttermilk, whisk regular milk with a teaspoon of lemon juice and let it sit for five minutes to add acidity and tenderizing properties similar to buttermilk.
- Make ahead batter: You can mix the dry ingredients and store them separately from the wet mix for up to two days in the fridge, then combine and cook when you are ready, which saves morning time.
- Control sweetness: Use less brown sugar in the dry mix if you want the pancakes to be more neutral and rely on toppings like syrup or fruit for added sweetness.
- Freeze for convenience: Cool pancakes completely before layering them in a freezer bag, separating layers with parchment if you plan to reheat individual portions.