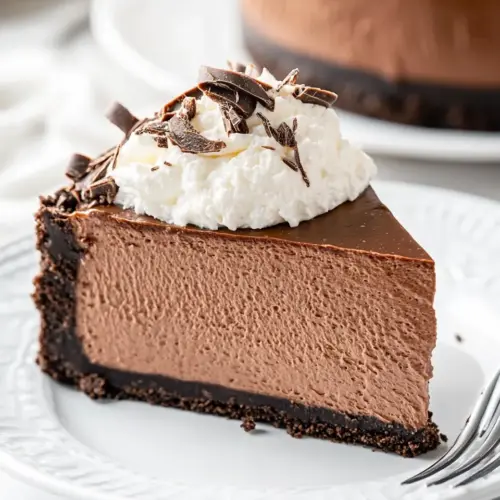
Chocolate Cheesecake
Chocolate Cheesecake is a creamy, rich dessert with intense dark chocolate flavor and a crisp chocolate cookie crust. This easy to love cheesecake balances silky cream cheese richness with glossy melted dark chocolate, making it perfect for celebrations or an easy weeknight treat that feels special. Make it for guests or a cozy night in, you will be glad you did.
Equipment
- 8 inch springform pan
- Roasting Pan
- Heatproof Bowl
- Food processor or blender
- Wire Rack
Ingredients
- 1 1/2 cups chocolate wafer cookie crumbs Provide a crunchy, chocolatey base for the cheesecake by forming a compact crust when combined with melted butter; press firmly into the pan to create structure for the filling. Add visual contrast and intensified chocolate flavor to support the creamy layers above. Works best when evenly distributed and chilled briefly to set before filling.
- 4 1/2 tablespoons unsalted butter, melted Bind the cookie crumbs to form a cohesive crust while adding a rich, buttery flavor that complements the chocolate. Melt thoroughly and pour over crumbs to ensure uniform texture and proper firmness after baking and chilling. Use measured amount to avoid an overly greasy or crumbly base.
- 2 cups dark chocolate, coarsely chopped Melt into the batter to deliver deep, intense chocolate flavor and smoothness; contributes to overall richness and glossy mouthfeel. Chop coarsely to encourage even melting and temper to avoid seizing when combined with warm ingredients. Choose high-quality dark chocolate for balanced bitterness and sweetness in the final cheesecake.
- 24 ounces cream cheese, softened to room temperature Provide the creamy, tangy base that defines cheesecake texture and structure; beat until smooth to eliminate lumps and create a silky filling. Bring to room temperature to ensure even incorporation with sugar and eggs, which prevents curdling and graininess. Use full-fat cream cheese for optimal richness and proper set after baking and chilling.
- 1 1/4 cups granulated sugar Sweeten the filling while helping to create a smooth texture when fully dissolved into the cream cheese; adds balance to the chocolate and tang from the cheese. Gradually add while beating to avoid overworking the batter and to ensure an even, glossy finish. Adjust slightly to taste but maintain the specified amount for intended sweetness.
- 3 tablespoons unsweetened cocoa powder Enhance and intensify chocolate flavor while contributing a deeper color and slight dryness that helps set the filling. Sift in to avoid lumps and combine thoroughly with the sugar and cream cheese for uniform distribution. Use unsweetened cocoa to control sweetness and bring nuanced chocolate notes without altering moisture content significantly.
- 4 large eggs plus 2 egg yolks, at room temperature Stabilize and enrich the filling by adding structure, moisture, and silkiness; whole eggs and extra yolks increase creaminess and help the cheesecake set without becoming rubbery. Bring to room temperature to blend smoothly and avoid creating pockets or overbeating air into the batter. Add slowly while mixing to prevent curdling and ensure homogeneous texture.
- 3/4 cup heavy cream, at room temperature Lighten and loosen the filling while adding richness and a velvety mouthfeel; helps create a custard-like consistency when incorporated at room temperature. Avoid whipping excessively to prevent too much air, which can cause cracks during baking. Use measured amount to balance creaminess without thinning the batter.
- 1 1/2 teaspoons vanilla extract Round out and amplify the dessert's aromatic profile with sweet, warm vanilla notes that enhance chocolate and dairy flavors. Add at room temperature and blend in near the end of mixing to preserve its fragrance. Use pure extract for best flavor clarity and stability during baking and chilling.
- Chocolate ganache for topping, optional Provide an optional shiny, decadent finish with an intense chocolate layer that adds richness and visual appeal; pour or spread over the cooled cheesecake for a glossy topping. Can be warmed slightly for pourability and chilled briefly to set, complementing the creamy interior with a contrasting texture. Use a balanced ganache recipe to avoid overly sweet or overly bitter contrast.
- Whipped cream for garnish, optional Offer an optional light, airy garnish that balances the dense cheesecake with a creamy, mildly sweet contrast; pipe or dollop just before serving for best texture. Enhance presentation and provide a palate-cleansing bite that pairs well with the rich chocolate and tangy cheese. Can be flavored lightly with vanilla or sugar to taste.
Instructions
- Preheat your oven to 325°F. Grease an 8-inch springform pan and wrap its outside with heavy-duty foil. This will help prevent leaks since the pan will be placed in a water bath.: The kitchen will smell faintly of warm tin as the oven comes to temperature, a calming backdrop to the start of the bake. Greasing the pan ensures the edges release cleanly, and wrapping with heavy duty foil prevents water from seeping into the crust during the water bath. You'll want the foil to be snug and overlap so steam does not find a seam. A common mistake is loose foil that allows water to drip in, which wets the crust and ruins texture, so take a minute to double wrap if your foil seems thin.
- In a bowl, mix the chocolate cookie crumbs with the melted butter. Press this mixture firmly into the bottom of the prepared pan. Bake for 10 minutes. Remove the pan and allow the crust to cool on a wire rack while keeping the oven on.: As you mix, the crumbs will shift from powdery to clump forming, and the scent will brighten as the butter binds the crumbs. Pressing firmly with the bottom of a measuring cup or glass compacts the crust into an even layer that holds when sliced, giving a satisfying crunch. During the short bake the edges will firm and a toasted aroma develops, signaling readiness. Avoid under pressing the crust, which leads to a crumbly base that falls apart when serving.
- Fill a medium pot 1/3 of the way full with water and bring it to a simmer over medium heat. Set a heatproof bowl on top of the pot (ensuring it does not touch the water). Add the chopped dark chocolate and stir occasionally until it is fully melted. Remove the bowl from the heat and set aside.: You will see the chocolate slowly glossy and smooth as it melts, releasing a deep, rich scent that hints at what is to come. The indirect heat keeps the chocolate from seizing and maintains a silky texture you can fold into the batter. Stir gently and consistently so the heat distributes evenly. A common issue is overheating the chocolate, which can make it grainy, so keep the water at a gentle simmer and remove promptly once glossy.
- In a food processor or high-powered blender, beat the cream cheese for about 2 minutes until smooth. Add the granulated sugar and cocoa powder; blend until the mixture is creamy. Then, add the eggs, egg yolks, and heavy cream and pulse just until combined. Fold in the melted dark chocolate and vanilla extract using a rubber spatula.: The scent will change from tangy dairy to a balanced chocolate custard as you bring these components together. Smooth cream cheese creates the foundation, and when the eggs are added they bind the structure while the heavy cream lends silkiness. Pulsing preserves a dense texture rather than aerating too much, which helps prevent cracking during baking. Folding in the warm melted dark chocolate creates ribbons that become unified with gentle turns; overmixing here traps air, so fold slowly. A typical mistake is whipping the batter too vigorously, which results in a cracked top after baking.
- Scrape the blended filling over the pre-baked crust in the springform pan. Smooth the top with the spatula.: As you transfer the filling, you will notice its thick, glossy body settling over the firm crust, and smoothing with a spatula reveals a mirror like surface. This visual cue tells you the batter is well combined and evenly distributed, which will encourage even baking. Smooth edges also help the cheesecake rise uniformly and avoid thin spots. Avoid scraping roughly or creating peaks, both of which might bake differently and change texture.
- Place the springform pan into a larger roasting pan. Pour hot water into the roasting pan until it reaches 1 inch up the sides of the cheesecake pan. Bake for about 70 minutes, or until the center is set but still slightly jiggly.: The steam from the water bath creates a humid oven environment, which yields a creamy, custardy interior rather than a dry, overcooked one. During baking you will detect a deep chocolate aroma and see the edges set while the center keeps a gentle wobble. The jiggle test is crucial: firm edges with a slightly wobbly center indicate perfect doneness. A common misstep is overbaking until fully firm, which creates a grainy, cracked texture.
- Carefully remove the cheesecake from the water bath and set the pan on a wire rack. Run a knife around the pan edges to help prevent cracking. Allow the cheesecake to cool to room temperature, then refrigerate for at least 6 hours until fully chilled.: As the cake cools, the glossy top will matte slightly and tension at the edges will relax, which is why running a knife between the cake and pan reduces cracking as it contracts. Cool slowly on a rack to avoid condensation forming on the surface, then chill undisturbed to let the custard set fully. Patience here is rewarded with clean slices and stable texture. Cutting too soon is a frequent error, resulting in a wobbly center and messy slices.
- If using, pour warm chocolate ganache over the chilled cheesecake and let it set for about 1 hour before slicing and serving. If desired, garnish with whipped cream when serving.: Pouring warm ganache creates a glossy, even coat that adds shine and extra chocolate richness, and letting it set yields a slight sheen and elegant edge. When you slice, the ganache will offer a pleasant contrast to the dense interior, and a dollop of whipped cream lifts each bite. Avoid pouring ganache that is too hot, which can soften the chilled filling and cause it to lose structure.
Notes
- Warm chocolate handling: Melt dark chocolate gently over simmering water and stir until glossy, removing from heat at the first sign of uniform melting to prevent graininess.
- Room temperature ingredients: Bring cream cheese, eggs, and heavy cream to room temperature so they blend smoothly and reduce the risk of lumps in the batter.
- Crust compression: Press the cookie crumb and melted butter mixture very firmly into the pan to create a stable base that slices cleanly without crumbling.
- Water bath seals: Double wrap the springform pan with heavy duty foil to keep the water bath from leaking into the crust, which prevents a soggy base.
- Doneness jiggle: Rely on a gentle jiggle in the center to determine doneness rather than baking for a fixed time, because ovens vary and texture is the true indicator.
- Slow cooling: Cool the cheesecake gradually at room temperature before refrigerating to reduce condensation and cracking on the surface.