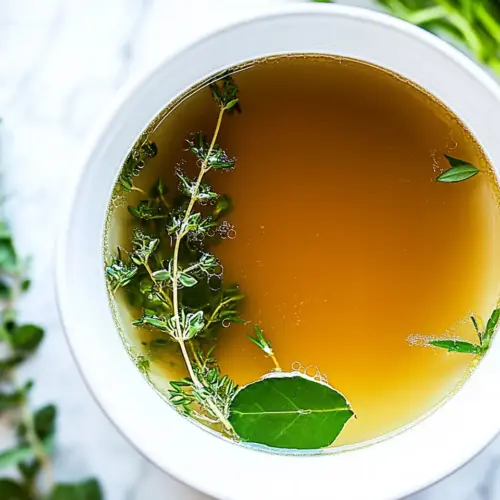
Chicken Stock
Chicken Stock delivers rich, savory depth and a silky mouthfeel that elevates soups, risottos, and sauces. This easy, aromatic homemade stock is both economical and versatile, using leftover bones and simple vegetables to create a comforting base for weeknight dinners. Make a big batch, freeze in portions, and you will always have a flavorful secret weapon for quick meals.
Equipment
- Large Stockpot
- Fine-mesh strainer
- Colander
- Slow Cooker
- Instant Pot
Ingredients
- Carcass from a 5-6 pound roasted chicken, or bones from 2 bone-in chicken breasts, 2 bone-in chicken thighs, and 2 chicken wings Provided roasted carcass or mixed bones supply rich gelatin and deep chicken flavor, forming the backbone of the stock; simmer slowly to extract marrow, collagen, and savory compounds that create body and mouthfeel. Use roasted carcass for a darker, more caramelized taste, or raw bones for a cleaner, lighter broth depending on desired outcome.
- 4 carrots, unpeeled and cut into halves Added unpeeled carrots contribute natural sweetness, subtle earthiness, and color to balance savory chicken flavors; leaving skins on enhances nutrients and depth while halved pieces release sugars during simmering. Carrots also help round out the stock’s aroma and provide background vegetal notes without overpowering the broth.
- 2 ribs celery, cut in half Included celery halves offer aromatic, slightly bitter-green notes and essential savory backbone often described as part of mirepoix, helping to balance sweetness from carrots and richness from bones. Celery stalks release aromatic compounds that brighten the stock and provide subtle complexity during long simmering.
- 1 yellow onion (or leek), cut into quarters Quartered yellow onion or leek builds savory depth, natural sweetness, and aromatic complexity through Maillard flavors if roasted or caramelized, or gentle allium notes when simmered raw. Using a peeled or halved bulb adds body, umami-enhancing sugars, and rounded aromatics that integrate with other vegetables.
- 1 head of garlic, unpeeled and cut in half crosswise Smashed, unpeeled garlic head supplies mellow, roasted garlic sweetness and subtle pungency when simmered, contributing savory complexity and aromatic warmth without overt sharpness. Keeping skins on tames intensity while allowing gentle garlic flavor to infuse the stock over extended cooking time.
- 1 parsnip, unpeeled and cut into 3-inch chunks Chunked unpeeled parsnip adds sweet, earthy, and slightly nutty undertones that complement carrots and deepen vegetable complexity; its starchy flesh helps contribute subtle body to the finished stock. Leaving the skin adds rustic flavor and additional nutrients while simmering down into the broth.
- 1 bunch of fresh Italian parsley Tied bunch of fresh Italian parsley delivers bright, herbaceous green notes and a clean finishing aroma that lightens the rich stock; stems contribute flavor during simmering while leaves refresh the final cup. Parsley also helps bind and harmonize other flavors, making the broth taste fresher and less one-dimensional.
- 6 -10 sprigs of fresh thyme Fresh thyme sprigs introduce woodsy, floral, and slightly minty aromatics that lend savory depth and herbal structure to the stock; simmer whole sprigs to extract volatile oils without creating harshness. Thyme pairs well with parsley and bay, rounding the herb profile and adding subtle savory lift.
- 6 -10 whole black peppercorns Whole black peppercorns provide warm, aromatic heat and subtle pungency that penetrates the broth during long simmering, enhancing overall savory balance without sharpness from ground pepper. Using whole peppercorns allows control over intensity while infusing clear, rounded spice notes into the stock.
- 2 -3 bay leaves Added bay leaves contribute subtle, slightly floral-bitter herbiness and a background aromatic complexity that elevates savory flavors when simmered slowly; remove before serving to avoid overly astringent bites. Bay complements thyme and parsley by adding a faintly resinous depth to the broth’s profile.
- 2 chicken bouillon cubes Crumbled chicken bouillon cubes boost concentrated savory, umami-rich chicken flavor and salt balance, helping achieve an immediate depth if bones alone need reinforcement; dissolve into the simmering liquid to integrate fully. Use cautiously to avoid over-concentration, especially if additional salt or salty ingredients are present.
- 1 -2 tablespoons kosher salt Measured kosher salt seasons and enhances all flavors while assisting extraction of proteins from bones; add gradually and taste as the stock reduces to avoid over-salting. Salt also helps outline aromatics and brings forward subtle sweetness from vegetables and herbs during the long simmer.
Instructions
- Add the chicken carcass or bones, carrots, celery, onion, garlic halves, and parsnip to a large stockpot. Add cold water, covering the chicken and veggies by at least 1-2 inches—about 12-16 cups of water. Add a handful of the parsley (with leaves and stems intact), thyme sprigs, peppercorns, bay leaves, chicken bouillon cubes, and kosher salt.: The moment the ingredients meet the pot you will notice an earthy, vegetal scent as the air warms, and that first step sets the scene for extraction. I always use a wide, heavy pot to allow heat to distribute evenly so nothing sticks or scorches, and arranging the bones and vegetables in a single layer helps flavors leach uniformly. As the water heats, proteins begin to dissolve and aromatics start to bloom, which builds a layered aroma that evolves as it simmers. Be careful not to overfill the pot, because excessive water will dilute those building flavors. A typical mistake is using a pot that is too small which can cause boiling over and uneven extraction.
- Bring to a boil, then reduce to a lightly rolling simmer and cook partly covered for 1 1/2 to 2 hours or until the stock is amber brown and tastes well flavored. Add more salt to taste if necessary.: Cold water is crucial because it draws proteins and collagen out of the bones gently as temperature rises, producing a clearer, more gelatinous stock. When you first pour the cold water, you can hear a low settling sound as it fills gaps around bones and vegetables, and the chill helps prevent premature emulsification of fats. I recommend filling to the listed depth; too little water will overconcentrate, and too much will make the stock weak. A common error is starting with boiling water which forces proteins to coagulate too quickly and often results in a cloudy stock.
- Turn off the heat and allow the stock to cool or if using immediately, place a large colander over a Pyrex 4-cup glass measuring cup and slowly drain the stock from the rest of the aromatics so the colander catches any veggies or bones that may fall from the pot. Then, use a fine-mesh strainer to strain the stock into your next recipe's soup stockpot. Or, if storing to use later, strain into 1-quart wide-mouth glass canning jars and cool before adding a tight-fitting lid. Refrigerate for up to 5 days or freeze in gallon bags for up to 6 months.: Adding herbs and spices early allows their flavors to infuse gradually, producing a balanced, well rounded profile rather than a one dimensional hit. You will notice fragrant herbal notes beginning to rise as the liquid warms, and whole peppercorns release an undertone of warmth without sharpness. I leave stems on parsley because they carry plenty of flavor and are easy to strain out later. One trap is adding too much salt or bouillon at the start, since evaporation concentrates seasoning, so I err on the side of caution and finish seasoning after reduction.
- Hot to Cook Chicken Stock in the Instant Pot or Electric Pressure Cooker: The transition from boil to gentle simmer is where the stock develops clarity and depth. At a simmer you will see soft, slow rolling bubbles and smell an intensified, layered aroma as collagen breaks down and vegetables release sugars. Cook time lets marrow and connective tissue impart body into the liquid, giving it a silky texture rather than thinness. Keep the lid slightly ajar to allow some evaporation and concentration, but avoid a full boil which agitates fats and sediments, clouding the broth. A frequent mistake is keeping the pot too hot which results in both cloudy stock and evaporative loss of delicate aromatics.
- Place all of the ingredients in the insert of a 6 or 8-quart Instant Pot and add enough water to cover the veggies and bones by 1-2 inches. Select High Pressure or Soup and set the timer for 30 minutes When the timer sounds, use a Natural Pressure release, allow the valve to drop, and carefully remove the lid. Continue with the directions for the stovetop method.: Tasting is essential because concentration changes salt intensity as the stock reduces, and your palate is the final judge. Begin with a small pinch, let it dissolve, then taste after the broth cools a touch to assess true seasoning. Adjust incrementally, remembering you can always add later in the soup or recipe that uses the stock. Oversalting is hard to reverse, so avoid large additions at once and resist the urge to correct with water which dilutes flavor.
- How to Cook Chicken Stock in the Slow Cooker: Allowing the stock to rest briefly helps sediments settle, making the straining process cleaner and clearer. The aroma will mellow during the cooldown and you can see tiny fat droplets rise to the surface, which you can skim for a cleaner finish. Draining into a heatproof container through a colander catches large solids first, preventing mess. Avoid pouring too quickly, as forceful strain can push small fragments through the sieve.
- Place all of the ingredients in a 6-quart slow cooker and fill with water until it is 2 inches below the top. Cover and cook on low for 10 hours. Continue with the directions for the stovetop method.: The fine mesh captures smaller particulates and produces a polished, translucent stock ready for immediate use. As you strain, notice the difference in clarity and smell between the unstrained and strained liquid, the latter being brighter and cleaner. Pressing solids can squeeze out bitter or vegetal off notes, so I avoid forcing them through the sieve. A common pitfall is skipping this step, which leaves sediments that cloud and muddy flavors in finished dishes.
- Or if storing to use later strain into 1 quart wide mouth glass canning jars and cool before adding a tight fitting lid: Cooling quickly in shallow containers prevents bacterial growth and preserves freshness. As the jars cool the surface will show a thin film of fat that you can remove easily before sealing, which also helps longevity in refrigeration. Label and date jars so you can track storage time, and avoid sealing while still hot which traps steam and can create unsafe conditions. One mistake I see is filling jars too full; leave headspace for expansion if freezing.
- Refrigerate for up to 5 days or freeze in gallon bags for up to 6 months: Proper storage ensures you have flavorful stock available for weeks or months, and freezing in flat layers in resealable bags saves space and makes thawing quick. When refrigerated the gelatinous texture will become apparent and indicates a well extracted stock, and when frozen you can portion by recipe size to avoid waste. A storage error is keeping stock too long without freezing, which risks off flavors and spoilage, so follow the timelines above.
- Place all of the ingredients in the insert of a 6 or 8 quart Instant Pot and add enough water to cover the veggies and bones by 1 to 2 inches: In the pressure cooker the environment extracts flavors rapidly, and when you add cold water the pressurized heat will pull gelatin and aromatics efficiently. You might notice a concentrated savory steam as the pot comes to pressure, and that intensity yields a deeply flavored stock in a fraction of stovetop time. Avoid filling past the max fill line, as boiling under pressure can be hazardous and dilute results if overfilled.
- Select High Pressure or Soup and set the timer for 30 minutes When the timer sounds use a Natural Pressure release allow the valve to drop and carefully remove the lid: Natural release lets the broth finish gently inside the sealed pot and preserves clarity, while quick release can agitate sediments. After venting the aroma is rich and immediate, and the stock will be darker and fuller than you might expect from a short cook time. Be cautious when opening, steam can be intense and scalding; step back and open the lid away from your face.
- Continue with the directions for the stovetop method: After depressurizing you follow the same straining and cooling routine used for stovetop stock to ensure clarity and proper storage. This combines the efficiency of pressure cooking with the finishing steps that maintain quality and safety. A common mistake is skipping the fine strain after pressure cooking, which can leave tiny particulates that affect finish and appearance.
- Place all of the ingredients in a 6 quart slow cooker and fill with water until it is 2 inches below the top: The slow cooker offers a set it and forget it approach where gentle, prolonged heat teases out flavors gradually without babysitting. You will wake to a kitchen that smells like comfort food, and the low, steady heat helps keep the broth clear and mellow. Avoid overfilling which can lead to spillage during long cooks and reduces concentration.
- Cover and cook on low for 10 hours Continue with the directions for the stovetop method: Long, low cooking time in the slow cooker yields a deep, rounded stock with a tender aroma and rich mouthfeel. After the cook finish with the usual straining and cooling to remove solids and excess fat. A common misstep is cooking on high which can promote boiling and cloudiness, so stick with low for best clarity and depth.
Notes
- Save and collect bones in a labeled freezer bag until you have enough to make a substantial pot, this improves flavor and reduces waste.
- Skim surface fat after chilling the stock to obtain a cleaner mouthfeel and a brighter flavor before using or freezing.
- Use whole spices like peppercorns and bay leaves instead of ground spices to avoid grit and cloudiness in the finished broth.
- Portion before freezing into flat freezer bags so you can break off exactly what you need and thaw quickly under cool running water.
- Label jars clearly with date and contents to keep track of freshness, and use within recommended storage times for best quality.