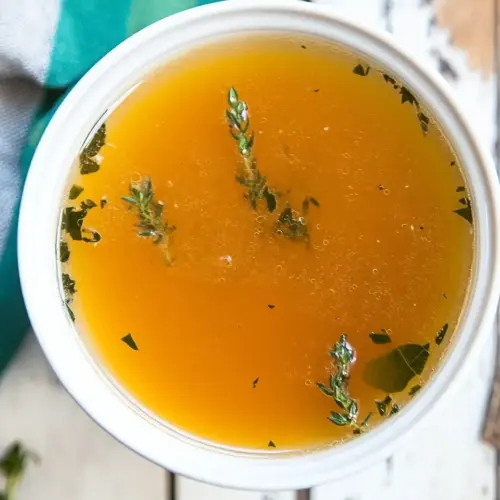
Chicken Broth
Chicken Broth is a rich, easy to make, and deeply comforting stock with savory depth and a silky mouthfeel. This homemade broth is perfect for easy weeknight dinners, nourishing soups, and flavorful grains, delivering clear golden flavor that enhances every dish. Make a big batch to freeze and save time while ensuring your meals taste homemade and noteworthy.
Equipment
- Mason jars
- Dutch Oven
- Cheesecloth
Ingredients
- to 5-pound whole chicken cut into pieces and giblets removed (see note 1 & 2) Provide hearty body and rich flavor by using a whole chicken cut into pieces; include giblets only if desired for deeper savory notes. Simmer gently to extract collagen and create a glossy, full-bodied broth. Adjust cooking time based on bird size for optimal extraction.
- Cold water about 12 cups (see note 3) Add cold water to fully cover the chicken and vegetables by about 1 to 2 inches, helping control initial temperature and gradual release of flavors. Use about 12 cups as a guideline and top up during simmering if necessary to maintain level. Start with cold water to yield clearer broth as proteins coagulate and rise to the surface.
- 1 medium onion peeled and halved Contribute aromatic sweetness and depth by adding a peeled, halved medium onion to the pot; the cut surfaces maximize flavor extraction. Simmer long enough for onion sugars to mellow and integrate into the broth. Remove solids before serving for a clean-tasting stock.
- 1 large carrot peeled and coarsely chopped, or 2 medium carrots (see note 4) Introduce natural sweetness and earthy complexity with a coarsely chopped large carrot or two medium carrots for balanced vegetable flavor. Chop coarsely to avoid cloudiness while allowing sufficient surface area for flavor release. Carrots also help round out the broth's mouthfeel and color.
- 1 celery rib coarsely chopped Provide subtle savory and vegetal notes through a coarsely chopped celery rib; celery's aromatic compounds enhance overall broth complexity. Keep pieces large to prevent disintegration and clouding during extended simmering. Celery balances sweetness from onion and carrot.
- 1 tablespoon salt Season the pot early with one tablespoon of salt to begin building the flavor base and allow gradual seasoning integration. Taste and adjust toward the end of cooking, since reduction concentrates saltiness. Use measured salt to avoid over-seasoning before final adjustments.
- 6 fresh parsley stems Impart fresh herbaceous brightness by adding six parsley stems, which release mild, clean aromatics into the simmering broth. Include stems rather than leaves for easier removal and gentle flavor contribution. Parsley complements other aromatics without overpowering the stock.
- 1 sprig fresh thyme Add a sprig of fresh thyme to introduce subtle earthy, slightly floral notes that pair well with chicken and vegetables. Keep the sprig whole for easy removal after simmering while allowing leaves to infuse the liquid. Thyme's persistent aroma enhances overall complexity.
- 2 cloves garlic Give gentle pungency and depth by crushing or lightly bruising two garlic cloves before adding; simmer briefly to avoid bitterness. Garlic contributes savory umami and warms the flavor profile of the broth. Remove cloves with other solids for a clean finish.
- 1 bay leaf Introduce a warm, herb-like background by adding one bay leaf which lends mild bitterness and aromatic depth when simmered. Keep the leaf whole for easy removal before serving. Bay balances richer flavors and adds complexity to the stock.
- 1 teaspoon whole black peppercorns Provide bright, spicy warmth by including one teaspoon of whole black peppercorns; they release delicate heat and aroma during simmering. Use whole peppercorns to avoid clouding and to control intensity. Strain them out with other solids before serving.
Instructions
- To a Dutch oven or large stock pot, add chicken and cold water to cover (see note 3).: The first sensory cue is the chill of the cold water meeting the room temperature chicken , which should look pale and slightly glossy. As the water settles around the pieces, you can press the skin gently to see juices bead at seams, indicating fresh meat. Starting cold pulls proteins slowly into the liquid, which helps clarity, and it prevents sudden coagulation that traps impurities. One mistake is tossing hot water over the chicken, which will hasten protein denaturing and can make the stock cloudy.
- Over medium-high heat, bring to a boil. Immediately reduce heat to low and skim the foam off the top.: Listen for the change as the pot climbs to a rolling boil, a louder bubbling and a steam plume rising. Once it reaches that point, reduce to a low setting where only a few gentle bubbles break the surface. You will see a pale foam form along the top, which smells mildly meaty; skimming it off with a ladle keeps the broth clear and prevents bitter tastes. A common slip-up is allowing a hard boil to persist, which agitates solids into suspension and clouds the broth.
- To the pot add onion, carrot, celery, and salt. If desired, tie parsley stems, thyme, garlic, bay leaf, and peppercorns to make a sachet or add loosely to the pot (see note 5).: When you drop the aromatic vegetables in, the pot fills with a fresh vegetal scent, brighter than the base chicken aroma. The salt begins to season and open the vegetables, coaxing sugars from the carrot and onion. Creating a sachet concentrates the herbs and makes removal simple, while adding them loose will require careful straining later. Avoid adding too much salt early if you plan to reduce the broth, as it will intensify.
- Simmer gently (bubbles should barely break the surface at irregular intervals) until the chicken is cooked through, at least 1 hour or up to 5 hours. The longer the broth simmers, the more flavor it will have. (NOTE: After 1 hour, you should remove the chicken breasts from the pot to prevent them from drying out).: After 1 hour, you should remove the chicken breasts from the pot to prevent them from drying out) : The simmer should whisper rather than shout, with occasional tiny bubbles and a soft, steady steam aroma. Over time the pot emits a deeper, roasted note even without high heat. This low and slow extraction releases collagen and flavor without emulsifying fat. If you keep it long, you may notice a richer mouthfeel and deeper color. Common mistakes include boiling too hard or neglecting to remove tender breasts after an hour, which can leave them dry and stringy.
- Remove chicken from pot to a rimmed baking sheet or large bowl. Separate chicken, discarding skin and bones (you should have about 4 cups chicken).: When you lift the pieces out, the skin will have softened and the meat should flake easily at the bone. The visual cue is opaque, firm meat that pulls away cleanly. Save any usable meat for bowls or salads, and discard bones and skin if you prefer a leaner stock. A pitfall here is not letting the meat cool slightly before shredding, which makes the process messy and less precise.
- Strain the broth through a fine-mesh strainer or cheesecloth. Place in a large bowl and chill covered overnight in the refrigerator.: As you pour, you will see a clear golden liquid separated from solids; the sound is a steady, reassuring stream. The strainer catches vegetables, bones, and herb fragments, leaving a smooth stock. Use cheesecloth for extra clarity and a finer finish. A common error is pouring too quickly and disturbing the solids at the bottom of the pot, which reintroduces clouding particles.
- The next day, scrape off the accumulated fat from the top of the stock and discard. Divide the broth into freezer-safe containers (leaving at least 1/2-inch for expansion), label, and freeze. Or, refrigerate and use within 4 days.: Cooling changes the texture and makes the fat rise to the top, where it solidifies into a pale cap that is easy to remove. The chilled broth smells concentrated and sweet, and the surface will appear glossy before you skim. Rapid cooling in an ice bath can speed this step if you are short on time, though gradual chilling preserves clarity. One mistake is trying to freeze hot stock, which can warp containers and trap steam, leading to off odors.
- The next day, scrape off the accumulated fat from the top of the stock and discard. Divide the broth into freezer safe containers (leaving at least 1 2 inch for expansion), label, and freeze. Or, refrigerate and use within 4 days: The scraped fat will be soft and pale, and removing it reveals a bright, golden liquid beneath. Portioning into containers, you'll hear the soft thud as each fills, and labeling helps identify dates later. Leaving headspace allows safe freezing and prevents bursting. A frequent oversight is not leaving enough headroom, which leads to cracked containers in the freezer.
Notes
- Use cold water: Starting with cold water extracts proteins slowly and helps the broth stay clear, which I always prefer for sipping and presentation.
- Control the simmer: Maintain a gentle simmer where bubbles barely break the surface to allow collagen extraction without clouding the stock.
- Sachet for ease: Tying parsley stems, thyme, garlic, bay leaf, and peppercorns into a sachet makes removal tidy and prevents small bits from passing through the strainer.
- Adjust salt at the end: Season lightly during cooking and finish seasoning when using the broth in a final dish, because reduction can concentrate saltiness.
- Label and portion: Cool completely, then freeze in measured portions so you can thaw only what you need for a recipe or a cup at a time.