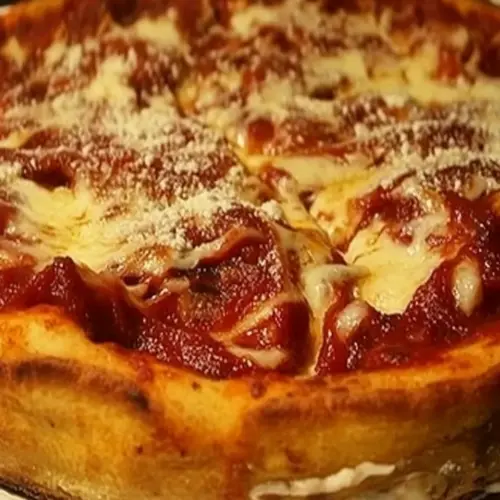
Chicago Deep Dish Pizza
Chicago Deep Dish Pizza is a rich, cheesy, and satisfying pie with a tender buttery crust and a slow simmered tomato sauce. This easy weeknight dinner or weekend project delivers melty mozzarella cheese, aromatic herbs, and deep layers that hold their own. Make it for gatherings when you want guaranteed crowd approval and comforting slices that taste like a pizzeria at home.
Equipment
- Mixer
- Medium pan
- 10 inch deep dish pizza pan or cast iron skillet
Ingredients
- For the Pizza Dough: Provide structure and organization for the recipe by dividing components into dough, sauce, and toppings, helping cooks follow steps clearly and prepare elements in proper sequence.
- 4 cups Flour Act as the main dry bulk for the dough, supplying gluten-forming proteins that give elasticity and chew; measure precisely to achieve desired dough texture and oven performance.
- 1 cup Milk Contribute richness and moisture to the dough, aiding in tenderness and flavor; warm milk can help activate yeast and create a softer crumb in the finished crust.
- 1 tbsp . Butter Add fat and flavor to the dough to improve tenderness and mouthfeel; softened butter also helps create a richer, flakier texture in the crust.
- 1 tbsp . Sugar Provide a touch of sweetness to feed yeast and balance savory flavors; sugar also promotes browning and improves dough rise during proofing.
- 1 tsp . Salt Enhance overall flavor balance by bringing out other tastes and controlling yeast activity; dissolve salt evenly into dough for consistent seasoning.
- 1 Package Instant Dry Yeast Leaven the dough rapidly by producing carbon dioxide, creating rise and airy texture; instant dry yeast can be mixed directly into dry ingredients for convenience.
- About 1 cup of water - add a little at a time until you get the right dough consistency Adjust dough hydration gradually to reach proper consistency, allowing control over stickiness and elasticity; adding water slowly prevents over-wet dough and ensures proper kneading.
- For the sauce: Label the sauce component to separate it from dough and toppings, indicating scope and ingredients for simmering a robust pizza sauce before assembly.
- 1 small yellow onion chopped Provide a sweet, aromatic base for the sauce when chopped and sautéed, mellowing harsh tomato acidity and adding savory complexity to the simmered mixture.
- 2 -3 cloves garlic minced Deliver sharp, pungent flavor when minced and cooked into the sauce, enhancing depth and complementing tomatoes while releasing aromatic oils during sautéing.
- Crushed red pepper to taste Introduce heat and a subtle kick to the sauce according to personal preference, enhancing overall flavor without overpowering the other herbs and tomatoes.
- 1 tsp . fennel Impart a mild anise-like sweetness that complements tomato and sausage flavors; fennel is commonly paired with Italian seasonings to deepen the sauce profile.
- 1 small can tomato sauce Form the tomato base of the sauce with concentrated flavor and smooth texture; small cans are convenient for single-recipe use and create a consistent sauce body.
- 1 can diced tomatoes drained Add chunky tomato pieces and bright acidity for texture contrast in the sauce; draining removes excess liquid so the sauce remains thick enough for deep dish application.
- 2 T tomato paste Provide concentrated umami and thickening power to round out sauce viscosity; tomato paste boosts tomato intensity without adding excess liquid.
- Pinch of sugar Balance acidity and enhance sweetness in the sauce with a small amount of sugar, smoothing sharp tomato edges and harmonizing flavors during simmering.
- Salt and pepper to taste Season the sauce to personal taste by adjusting salt and pepper for depth and balance; proper seasoning is essential to bring out tomato and herb nuances.
- 1 tsp . dried oregano Contribute classic Mediterranean herb flavor and aroma when dried oregano is added, reinforcing Italian character and pairing well with tomatoes and cheese.
- Fresh basil chopped - to taste Add fresh, bright herbal notes when chopped and stirred into the sauce or added after cooking, elevating aroma and providing a finishing freshness to the pizza.
- Toppings and Cheese: Organize optional ingredients and set expectations for variety by indicating this section is for assorted toppings, guiding cooks to personalize the pizza.
- Use whatever toppings you like: sausage, pepperoni, veggies, etc. Offer savory, textural, and flavor variations through chosen toppings like sausage, pepperoni, and vegetables, allowing customization of taste and mouthfeel.
- Shred a lot of mozzarella cheese! We use a lot! Provide abundant creamy, melty covering for the pizza; shredding a large amount of mozzarella ensures gooey texture and proper coverage in a deep dish pie.
Instructions
- For the Dough:: The warm milk smell is the first comforting signal, with a gentle steam rising as the butter melts into it. You want the mixture just warm to the touch, not hot, so the yeast wakes up rather than gets stunned by heat. If the milk is too hot you will kill the yeast, which leads to a dense crust. Stirring gives you a glossy, slightly sweet liquid that foreshadows a tender dough. If your kitchen feels cool, allow the mixture to rest a bit longer until it is pleasantly warm. A common mistake is rushing this and adding the yeast to hot liquid, so always test by placing a finger briefly in the milk mixture.
- Scald milk. Add butter, sugar, and salt. Allow milk mixture to cool to 'warm.' Add yeast and mix thoroughly.: As you add the flour , the texture shifts from wet to elastic; you will hear a subtle change as the motor works and the dough clears the bowl. The smell of warmed milk and yeast becomes faintly bready, a sign fermentation is beginning. Kneading develops gluten so the dough has strength to hold the deep dish shape. The first rise is airy and soft, and when you punch it down you feel the springs of life within the dough. A pitfall here is under kneading, which yields a fragile crust that may slump in the pan. If the dough feels excessively sticky, add water very sparingly at first, because over hydrated dough is hard to shape.
- In a heavy-duty mixer (e. g., KitchenAid), add milk mixture. Slowly add flour until the dough pulls away from the side of the bowl and forms a ball. Add water, a little at a time, until the dough combines. Knead dough for 5-10 minutes. Cover and allow dough to rise for 2 hours. Punch down the dough, knead briefly, and allow to rise an additional 2 hours until approximately doubled in bulk.: The kitchen fills with an inviting savory perfume as the onion softens and the garlic releases oils, a gentle sizzle that signals flavor extraction. The fennel and crushed red pepper add aromatic layers, with a faint sweetness from the onion caramelizing at the edges. Keep the heat moderate so the garlic does not brown too quickly, which would add bitterness. Stir frequently and watch for translucency in the onion , this is your visual cue that the base is ready. Avoid crowding the pan which can steam rather than sauté the aromatics.
- For the sauce:: When the liquids join the pan the aroma deepens into rich tomato notes, and you can hear a low simmering as flavors knit together. The tomato paste adds a concentrated tang that thickens the sauce, while a pinch of sugar tames sharp acidity. As it simmers, watch for the sauce to reduce and become glossy, that is when the flavor concentrates. Taste and adjust salt and pepper so the sauce tastes balanced but bright. A mistake is boiling too hard, which can toughen the tomatoes and lose delicate herb notes, so maintain a gentle simmer.
- In a medium pan add the olive oil. Over medium heat, sauté the onion and garlic until tender. Add in the crushed red pepper and fennel. Sauté for one minute.: Greasing the pan creates a barrier that encourages a golden exterior, and pressing the dough up the sides forms the iconic walls that hold filling. The dough should feel pliable and slightly tacky, not dry. As you press it in, the sound is a soft stretching, and the surface will look smooth. If your dough resists stretching, give it a short rest to relax the gluten rather than pulling forcefully which can tear it. Uneven edges can brown at different rates, so aim for consistent thickness.
- Stir in the tomato sauce, diced tomatoes, and tomato paste. Stir well. Season with pinch of sugar, salt, pepper, oregano, and fresh basil. Simmer for 30 minutes.: Layering sauce first and then cheese might feel counterintuitive, but placing a thin cushion of sauce followed by mozzarella cheese prevents the bottom crust from becoming soggy and creates a molten center that holds toppings in place. You will see the cheese melt into a glossy, elastic layer when the pie bakes. A common error is adding too much sauce to the base which can make the bottom undercooked and soupy, so use a modest amount here.
- Assembly & Baking the Pizza:: Spreading sauce over the cheese creates pockets of saucy goodness throughout the pie, while the toppings add texture and savory notes. Arrange toppings evenly so the pizza bakes uniformly, and avoid piling too many wet ingredients which can release moisture. The visual you want is an even field of toppings peeking through the sauce, with colors that promise flavor. One trap is overloading heavy toppings which can weigh down the crust and prevent full cooking.
- Grease a 10" deep-dish pizza pan or cast iron skillet. Roll the crust to fit the pan. The edges should come to the top of the pan. Take a little bit of sauce and put it on the bottom. Put some cheese on the bottom. Take some of the sauce and spread it on the cheese. Add whatever toppings you like. Take more of the cheese and spread a layer. Add a lot of sauce to the top. Sprinkle with extra cheese if you wish.: The top layers will bubble and brown into a molten crown, and the aroma is intensely cheesy and tomato forward as it nears doneness. The sound of gentle bubbling around the pan edges is a reliable indicator the interior is hot. Leaving some exposed edges of dough helps develop a toasted rim. Be careful not to overtop with cheese so the center becomes a wet mass; balance is the key for both texture and appearance.
- Bake 45 minutes at 425 degrees F or until bubbly!: When the pie bakes, the oven fills with a warm, toasty scent and you will see the top bubble vigorously, edges bronzing to golden brown. The internal temperature should feel hot and the cheese should be visibly melted and slightly browned. If the crust browns too quickly, tent with foil to allow the interior to finish without burning the rim. A common oversight is pulling the pie too early; the center needs time to set so slices hold together when plated.
Notes
- Swap cheeses: Try blending different melting cheeses with the mozzarella cheese to add complexity while maintaining stretch and creaminess.
- Vary toppings sparingly: Choose one or two bold toppings rather than crowding the pie, this helps it bake evenly and keeps flavors distinct.
- Use a cast iron for crust crisp: Baking in a preheated cast iron skillet helps the bottom achieve a deeper, crunchy texture while the interior stays tender.
- Infuse the sauce: Sauté aromatics longer to draw out sweetness from the onion and garlic, or finish with fresh basil for brightness just before assembly.
- Adjust sugar and salt: Small tweaks to seasoning can balance acidity from canned tomatoes and bring forward the herb notes without overwhelming the pie.
- Make ahead elements: Prepare the sauce a day early to let flavors meld, then assemble and bake when ready to serve for less last minute fuss.