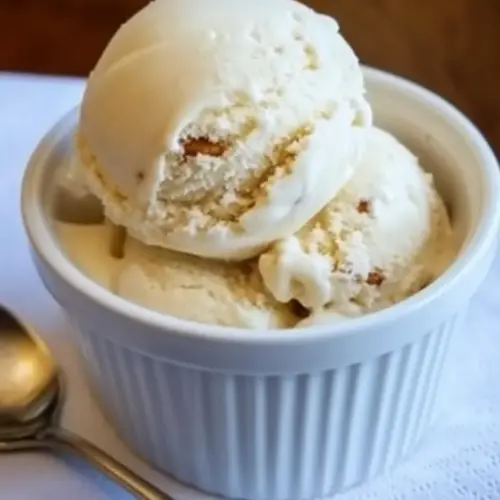
Cashew Ice Cream
Cashew Ice Cream is a creamy, dairy free frozen treat made from soaked raw cashews blended with milk, sweetener, salt, and vanilla extract. Velvety and scoopable, it works as soft serve or firm frozen scoops and is perfect for a quick summer dessert or easy weeknight indulgence. Make it for its silky texture and customizable sweetness.
Equipment
- High Speed Blender
- Ice cube trays
- Ice Cream Maker
- Popsicle Molds
Ingredients
- 1 cup raw cashews or macadamia nuts Soak and blend to create a creamy, rich base that provides body and healthy fats for the ice cream; when soaked, cashews or macadamia nuts become silky and emulsify smoothly with liquids to mimic dairy custard texture. Use raw nuts for the purest flavor and adjust soaking time depending on blender strength to ensure a lump-free mixture.
- 1 1/3 cup milk of choice Add for thinning and integrating flavors while contributing to overall mouthfeel; milk of choice determines creaminess and richness (dairy, oat, almond, or coconut will each alter texture and taste). Choose full-fat options for a denser, creamier outcome, or lighter milks for a lower-fat, icier texture.
- 5 tbsp sweetener of choice Sweeten to balance and enhance flavor while improving scoopability by lowering freezing point slightly; sweetener of choice can be sugar, maple syrup, honey, or a granular alternative depending on desired sweetness and texture. Adjust amount to taste and consider liquid versus granulated forms when blending to maintain consistent consistency.
- 1/8 tsp salt (heaping) Salt to heighten and round out the sweet and nutty flavors; a heaping 1/8 teaspoon deepens complexity and balances sweetness without making the ice cream overtly salty. Use sparingly and taste the base before churning to ensure proper seasoning.
- 1 1/2 tsp pure vanilla extract Flavor with pure vanilla extract for aromatic depth and classic ice cream notes; vanilla complements the nutty base and sweetener, lifting the overall profile with warm, familiar perfume. Add at blending stage to ensure even distribution throughout the mixture.
Instructions
- Cover the nuts with water, and let soak for around six hours. Drain and pat dry with paper towels. Blend all ingredients until completely smooth in a high speed blender. Pour the mixture into ice cube trays and freeze until solid. Once frozen, blend the frozen cubes on high, using the machine's tamper, until it achieves a soft serve texture. For authentic presentation, I like to scoop the cashew ice cream into bowls with an ice cream scoop. Eat right away, or freeze each bowl for up to an hour for a firmer ice cream consistency. You can also make the recipe in an ice cream maker (see ice cream machine how-to instructions above). Or you can freeze the mixture in popsicle molds for delicious cashew ice cream popsicles!: The soaking stage transforms the tough, dry texture of raw cashews or macadamia nuts into pliant, hydrated pieces that blend into a silky emulsion rather than a grainy paste. You will notice the nuts swell and soften, and the water will look clearer as soluble compounds leach out. This step matters because insufficient soaking leaves tiny gritty bits that ruin the mouthfeel; if you rush it the texture will betray the dessert. A common mistake is using hot water to speed things up, which can make the nuts gummy rather than tender. When done, the nuts will feel soft when pressed between fingers and will glide under a spoon without resistance.
- Drain and pat dry with paper towels: After soaking, draining removes excess water that would otherwise thin the base too much and cause icy crystals when frozen. Patting the nuts dry with paper towels helps control the water content so the blended mixture remains rich and smooth. You will see less pooling in the bowl and feel that the nuts are damp but not dripping. This technique keeps the finished texture creamy rather than icy. Avoid leaving them soggy or aggressively drying them into powder; either extreme can hurt the blend. If there is visible dripping, blot again until the towels barely darken.
- Blend all ingredients until completely smooth in a high speed blender: When you blend the soaked, drained nuts with the measured milk , sweetener , salt , and vanilla extract , expect a steady, bright hum from the blender as the mixture homogenizes. Visually the mix should become glossy and uniform with no visible specks. The smell will shift to a faintly toasted nut perfume and a sweet, aromatic vanilla veil. This step is crucial because incomplete blending results in a gritty or chunky mouthfeel. One pitfall is blending on too low a speed or for too short a time, leaving the mixture uneven. Scrape the sides and pulse a few extra times until the surface looks silky and you can run a spoon through it with no drag.
- Pour the mixture into ice cube trays and freeze until solid: Freezing the mixture in small portions like ice cube trays speeds the transformation to a solid that will later be reblended into soft serve. You will hear the quiet click as the tray settles into the freezer and later when you touch a cube it will be fully rigid with a slightly frosty surface. This approach shortens the time needed to process frozen cubes to a scoopable texture and prevents large ice crystals from forming. Avoid using a very deep container, because thick blocks freeze unevenly and take longer to work with. Check that each cube is firm through and through before moving to the next step.
- Once frozen, blend the frozen cubes on high, using the machine's tamper, until it achieves a soft serve texture: The blending of frozen cubes is a loud, energetic stage where the machine laboriously breaks down the ice into ribbons of creamy soft serve. Expect a change from muffled crunches to a smoother, more continuous sound as the frozen bits emulsify. The mixture will transform from icy shards to a billowy, creamy mass that folds upon itself. This technique matters because rapid processing at high speed creates heat and shear that recreate the smoothness of churned ice cream. A common mistake is overblending, which can warm the mixture and make it loose; stop when you see a soft serve appearance and the texture is airy yet dense. Use the tamper gently to keep things moving without forcing the motor.
- For authentic presentation, I like to scoop the cashew ice cream into bowls with an ice cream scoop: Serving immediately yields a luscious, soft texture that feels newly made. The surface should glisten slightly, and each scoop will hold a soft peak before settling. This immediate serving highlights the fresh, airy character and the nuanced nutty flavor. If you prefer a firmer scoop, place portions in the freezer briefly before serving. Avoid leaving it out too long, as it will melt quickly and lose body; conversely, freezing too long will harden it to an overly icy state. The ideal moment to serve is when it still yields gracefully to the scoop yet keeps its shape.
- Eat right away, or freeze each bowl for up to an hour for a firmer ice cream consistency: Eating right away celebrates the soft serve sensation that contrasts creamy interior with slightly chilled edges. If you desire a texture closer to store bought ice cream, pop individual bowls into the freezer for up to an hour until they firm up. You will notice a shift from pliant folds to a more compact, sliceable texture with diminished air. This holding time matters because it allows the mixture to stabilize and the fats to re bond, improving scoopability. A common slip is freezing much longer which can make it rock hard; to recover, let it sit at room temperature for a few minutes before scooping.
- You can also make the recipe in an ice cream maker: Using an ice cream maker will churn air into the base while it freezes, producing a very smooth, aerated texture similar to traditional churned ice cream. You will hear the gentle churn and smell the nutty aroma intensify as it cools. This method matters because controlled freezing and agitation limit large ice crystal formation, yielding a superior mouthfeel. Avoid using a machine that is not properly chilled or prepped, since inadequate freezing capacity will produce a loose end product. Keep an eye on the consistency, and stop churning when it forms soft peaks.
- Or you can freeze the mixture in popsicle molds for delicious cashew ice cream popsicles: Pouring the blended base into molds and freezing yields a portable, fun format with a creamy interior that still reflects the nut base. Expect the pops to develop a firmer outer shell with a slightly softer core depending on mold size. This presentation matters for casual entertaining or kid friendly portions. A frequent error is filling molds too full without leaving room for expansion which can cause spillage; also, unmold carefully to avoid breakage. Let them rest a few minutes at room temperature before unmolding for a clean release.
Notes
- Swap the milk For a richer mouthfeel, choose a creamier plant milk such as full fat coconut milk or macadamia milk; if you want a lighter result, use almond or oat milk.
- Adjust sweetness Taste before freezing, and increase or decrease the sweetener to suit your palate, remembering that sweetness mutes slightly when cold.
- Boost the flavor Stir in a pinch more salt or an extra 1/4 teaspoon of vanilla extract to amplify depth without adding sweetness.
- Make single serve pops Pour the base into molds for popsicles, which freeze solid and make portable, portioned treats ideal for warm days.
- Use an ice cream maker If you have one, churn the base for an even silkier texture and finer ice crystals, stopping when the mixture forms soft peaks.