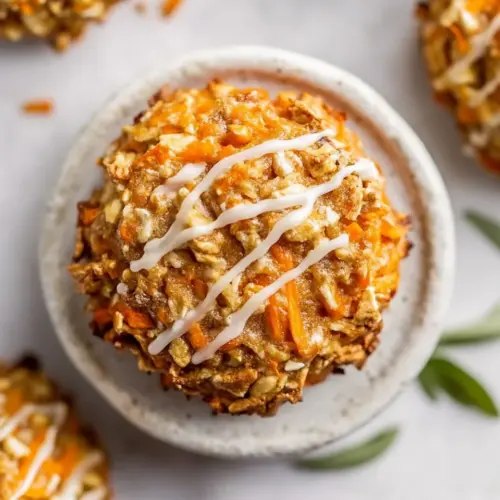
Carrot Cookies
Carrot Cookies deliver a chewy, spiced bite studded with nuts and raisins, finished with a bright orange glaze. These easy, wholesome cookies are perfect for snack time or a casual dessert, offering cozy cinnamon notes and a tender oat based texture that feels both nourishing and indulgent. Make a batch for weekend baking or an easy weeknight treat that travels well.
Equipment
- Oven
- Baking Sheet
- Parchment Paper
- Large Bowl
- Medium Bowl
- Rubber spatula
- Cookie Scoop
- Wire Rack
Ingredients
- 1 1/4 cups quick-cooking oats Provide texture and body with quick-cooking oats that absorb moisture and help bind the cookie while contributing a tender chew and whole-grain flavor.
- 1 cup oat flour Contribute structure and a subtle nutty taste as oat flour creates a soft crumb and keeps the cookies gluten-free when combined with other dry ingredients.
- 2 tablespoons ground flaxseed meal Act as an egg replacer and binder by mixing with water to form a gel that adds moisture and helps hold the cookies together during baking.
- 1 teaspoon baking powder Leaven gently to create lightness and lift so the cookies rise slightly and maintain a tender interior without becoming dense.
- 1 1/2 teaspoons ground cinnamon Impart warm aromatic depth and sweetness that complements the carrots and spices, enhancing the cookie’s overall cozy flavor profile.
- 1/4 teaspoon ground ginger Deliver a bright, slightly pungent warmth to balance sweetness and complement the cinnamon and nutmeg in the spice blend.
- 1/4 teaspoon ground nutmeg Add a warm, sweet-earthy note that rounds out the spice mix and enhances the baked aroma of the cookies.
- 1/4 teaspoon kosher salt Enhance all flavors subtly and help balance sweetness, while also supporting gluten-free dough chemistry and overall seasoning.
- 1 1/2 cups peeled grated carrots (about 8 ounces or 2 large carrots) Provide moisture, natural sweetness, and texture with grated carrots that contribute tender bits, color, and a mild vegetal flavor to the cookies.
- 3/4 cup chopped raw walnuts or pecans Introduce crunch and a toasty, buttery flavor; chopped walnuts or pecans also add richness and contrast to the soft cookie crumb.
- 1/4 cup raisins or additional walnuts or pecans Offer bursts of chewiness and concentrated sweetness when using raisins, or add extra crunch and nutty richness if choosing additional nuts.
- 1/3 cup honey or pure maple syrup Sweeten and help bind the dough while adding a touch of floral maple or clean honey flavor and contributing to chewiness when baked.
- 1/3 cup unsweetened applesauce at room temperature Add moisture and natural sweetness while keeping fat content lower; unsweetened applesauce helps maintain tenderness and reduces added fats.
- 1/4 cup melted cooled coconut oil or unsalted butter (I used coconut oil) Provide fat for richness and tenderness; melted coconut oil or butter contributes mouthfeel, helps distribute flavors, and aids browning.
- 1 teaspoon pure vanilla extract Brighten flavors and add aromatic complexity with pure vanilla extract, enhancing sweetness perception and tying the other ingredients together.
- 1/2 cup powdered sugar sifted if lumpy Sweeten the glaze or finishing touch with powdered sugar that dissolves smoothly, creating a silky coating or drizzle for presentation.
- 1 tablespoon freshly squeezed orange juice plus additional as needed Boost brightness and help thin the powdered sugar into a pourable glaze; orange juice also adds a fresh citrus note to balance sweetness.
- 1/4 teaspoon pure vanilla extract Reinforce vanilla aroma in the glaze or finishing elements; a small amount intensifies the overall vanilla presence and rounds the flavor.
Instructions
- Place a rack in the center of your oven and preheat the oven to 350 degrees F. Line a large rimmed baking sheet with parchment paper or a silicone baking mat.: The moment the oven begins to warm you will sense a comforting heat settling in the kitchen, and the sheet lining will prevent sticking and promote even browning. Preheating ensures the cookies start baking immediately on contact, which helps set their shape and develop golden edges. One common mistake is not giving the oven enough time to reach temperature, resulting in underbaked centers, so always wait until the preheat cycle completes. Use a rack in the center to keep the cookies equidistant from heat above and below, helping them brown evenly.
- In a large bowl, whisk together the oats, oat flour, flaxseed, baking powder, cinnamon, ginger, nutmeg, and salt. Add the carrots, walnuts, and raisins. With a rubber spatula, stir to combine.: As you mix the dry ingredients, inhale the warm, earthy scent of cinnamon and nutmeg , which frames the whole cookie. Adding the grated carrots and chopped nuts last preserves their texture, so you will see flecks of orange and bits of nut throughout the batter. Gentle folding keeps the oats from becoming gummy and ensures even distribution. If you stir too vigorously, the batter can get overly compacted, so fold until just combined to retain air and tenderness.
- In a separate medium bowl, briskly whisk together the honey, applesauce, coconut oil, and vanilla extract. If your coconut oil resolidifies, pop the mixture in the microwave for a few seconds, then stir until smooth. Pour the liquid mixture into the oat mixture and fold in by hand, just until combined. The dough will be thick, wet, and sticky.: The whisked wet ingredients should glisten and smell faintly of honey and vanilla, a sweet, inviting aroma. When combined with the dry mix, the batter changes from powdery to a cohesive, slightly sticky mass that holds together when scooped. Folding by hand helps you feel the right consistency, so you know when to stop mixing. Overmixing can make the cookies tough, and under mixing results in dry pockets, so aim for uniform moisture throughout.
- With a large cookie scoop or 1/4 cup measure, portion the dough by 1/4 cupfuls onto the prepared baking sheet, leaving 2 inches of space between each. Carefully flatten each cookie to be about 3/4 inch thick. If the dough is sticking to your hands, wet your palms slightly to make the process easier.: As you portion the dough, the surface will appear glossy and dotted with nuts and carrot strands, and flattening creates an even profile so the cookies bake evenly. The indicated spacing prevents them from merging as they spread slightly. Slightly wetting your palms keeps the dough from clinging and helps you form neat rounds with textured tops. A typical error is making scoops too large, which can lead to underbaked centers, so stick to the 1/4 cup measure for consistent results.
- Bake until the cookies are lightly golden and firm at the edges and on the top, 12 to 14 minutes. Place the baking sheet on a cooling rack (do not keep it on top of your hot oven) and let the cookies cool on the pan for 10 minutes. Transfer cookies from the sheet to the wire rack to finish cooling completely.: During baking you will notice the kitchen fill with a warm spice note, and the cookie edges will deepen to a pale gold while the centers remain slightly springy. The sound is subtle, but a finished cookie will feel set to the touch at the top and edges. Letting them rest on the pan for 10 minutes allows internal steam to redistribute, preventing them from falling apart when moved. Removing them too soon is a frequent mistake, as undercooled cookies can crumble when transferred, so be patient during this cooling window.
- For the orange icing: Whisk the powdered sugar, orange juice, and vanilla together in a small bowl. Drizzle over the cooled cookies. Wait a few minutes to allow the icing to set. Enjoy!: Whisk the powdered sugar, orange juice, and vanilla together in a small bowl. Drizzle over the cooled cookies. Wait a few minutes to allow the icing to set. Enjoy! : The icing will come together into a glossy, pourable glaze that smells bright and citrusy, and the act of drizzling creates thin ribbons that set into a delicate sheen. Use a spoon or piping bag to control the drizzle, and watch how the glaze clings to the ridges and pools slightly in crevices, adding visual contrast. Allow a few minutes for the icing to firm so it does not smear when stacking or packaging. A common oversight is glazing warm cookies, which will cause the icing to melt and run off, so be sure the cookies are fully cooled.
Notes
- Swap the nuts: Substitute chopped pecans for walnuts to bring a slightly sweeter, buttery crunch that complements the spices.
- Sweetener choice: Use pure maple syrup instead of honey for a deeper, woodsy sweetness that pairs well with the nutty elements.
- Make oat flour at home: Pulse rolled or quick oats in a food processor to create fresh oat flour if you do not have it on hand.
- Adjust glazing: Thin the icing with extra orange juice for a lighter drizzle, or use less for a thicker, decorative finish.
- Raisin alternative: Replace the raisins with additional chopped nuts if you prefer a less chewy, more crunchy bite.