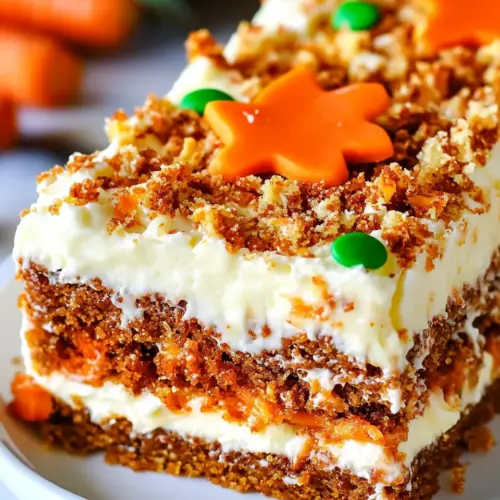
Carrot Cake Poke Cake
Carrot Cake Poke Cake is a creamy, moist dessert that combines tender cake with pockets of sweet white chocolate and a luxurious cream cheese mascarpone frosting, perfect for Easter or fall gatherings. The texture contrast is irresistible, and this easy to assemble recipe brings show stopping results with minimal effort, making it a must make for celebrations and casual get togethers.
Equipment
- 9×13-inch Cake Pan
- Electric Mixer
- Microwave-safe Bowl
- Spatula
Ingredients
- 1 Duncan Hines Carrot Cake Mix or any other Carrot Cake Mix Provide structure and foundational carrot cake flavor when using a boxed mix, simplifying preparation while ensuring consistent texture and rise; follow package instructions for best results and pair with complementary add-ins if desired.
- 3 eggs Bind and enrich the cake batter with added protein and lift; whisk eggs until combined to contribute moisture, structure, and a tender crumb during baking.
- 1 1/4 cups hot water Hydrate dry mix and activate leavening agents while contributing necessary batter consistency; use hot water to help dissolve mix ingredients and achieve a smooth pourable batter.
- 1/4 cup vegetable oil Add fat for moisture and tenderness, improving mouthfeel and crumb; gently combine with wet ingredients so oil disperses evenly throughout the batter.
- 14 oz sweetened condensed milk Introduce intense sweetness and creamy richness that soaks into the baked cake for a gooey poke filling; pour over warm cake to allow condensed milk to absorb and flavor each slice.
- 1 1/2 cups white chocolate chips Contribute sweet, creamy pockets of melted white chocolate that add a silkier, richer taste when melted into the poke or frosting; fold or sprinkle as desired to incorporate bursts of sweetness.
- 2 bricks (8 oz each) cream cheese room temperature Provide rich, tangy creaminess and structure to frostings or fillings; soften to room temperature for smooth blending and to prevent lumps in the cream cheese layer.
- 1 cup unsalted butter room temperature Impart a silky, buttery richness and stability to frosting when creamed with cheese, aiding spreadability and flavor depth; use at room temperature to ensure emulsification.
- 1 lb . mascarpone room temperature Enhance creaminess and lend a light, slightly tangy richness to fillings or frosting; beat at room temperature for smooth integration without curdling.
- 1 tablespoon vanilla extract Add warm aromatic notes and round out dairy flavors in fillings or frostings; measure precisely to avoid overpowering delicate components.
- 1/2 teaspoons salt Balance sweetness and enhance overall flavor profile by sharpening dairy-based frostings and fillings; dissolve salt thoroughly to avoid pockets of saltiness.
- 4 cups powdered sugar more if needed to thicken Sweeten and thicken frostings or fillings to desired consistency; gradually incorporate powdered sugar while monitoring texture to achieve pipeable icing.
- 1 cup ground walnuts Provide a crunchy, nutty texture and toasty flavor that complements carrot cake, suitable for folding into batter or sprinkling on top for contrast; pulse to desired coarseness before adding.
Instructions
- Preheat oven to 350°F. Place the oven rack in the middle of the oven.: When you set the oven to 350°F , you will notice a gentle warm up that fills the kitchen with dry heat, preparing the environment for an even rise. Preheating is crucial because it ensures the leavening agents react at the same time when the batter goes in, preventing uneven pockets or dense centers. A common mistake is placing the cake in a cold oven which causes poor rise and dense crumb, so always wait until the oven reaches temperature and use an oven thermometer if yours is inconsistent.
- Coat a 9×13-inch cake pan with non-stick baking spray and set it aside.: Greasing the pan gives the cake an easy release and keeps the edges intact, which is especially important for a delicate poke cake. The light, even sheen of oil reduces sticking without adding flavor, which helps the cake maintain its appearance. Avoid over greasing because excess oil can cause the cake to fry slightly at the edges, altering texture; instead, wipe away any pooling spray.
- To prepare the carrot cake, follow the instructions on the package. If you are using a Duncan Hines Carrot Cake mix, you will need to soak the carrots and raisins in hot water. Then, whisk together all the ingredients listed in the cake mix.: Working with the boxed mix keeps things consistent, and following the pack directions yields the expected crumb and sweetness. When mixing, you'll feel the batter loosen and smell the spices, and small air bubbles should appear indicating proper aeration. Over mixing is a frequent error that creates a tough crumb, so stir only until ingredients are combined and scrape the bowl for complete incorporation.
- Pour batter into the prepared pan and bake for 30-32 minutes, or until a toothpick comes out with just a few moist crumbs. I baked mine for exactly 30 minutes.: As the cake bakes you will see the surface set and edges pull slightly from the pan, and the aroma of baked spices will intensify. The toothpick test is a reliable visual and tactile cue; a few moist crumbs mean the cake is tender but cooked through. Baking too long will dry the cake, so start checking at the lower end of the time window.
- Remove the cake from the oven. While the cake is still warm, poke holes all over it using the end of a spatula or a large straw.: Taking the cake out at the right moment leaves a warm, springy surface that is perfect for poking, and you will hear the faint settling noises as steam escapes. Let the cake rest briefly so it is warm, not hot; if it is too hot, the filling may run rather than sink. Cutting corners here by poking a very hot cake can produce uneven soak and tempers the texture.
- In a medium, microwave-safe bowl, combine white chocolate chips with sweetened condensed milk. Heat in the microwave until hot, about 1 minute. Stir and heat for an additional 30 seconds or more if needed. Whisk until fully combined, smooth, and shiny.: When you poke the cake, you will feel a slight give and see small channels created across the surface, which guide the filling deep into the crumb. These pockets become concentrated flavor reservoirs, and their size determines how much filling each bite gets. Too shallow pokes limit penetration, while overly large holes can collapse the structure, so aim for consistent medium sized pockets across the cake.
- Pour the chocolate mixture all over the cake and, using a spatula, spread it evenly into the holes.: Heating the white chocolate chips and sweetened condensed milk together creates a glossy emulsion that smells rich and milky. Warmth dissolves the chips and helps them blend into a velvety sauce; whisking stimulates shine and ensures smoothness. Overheating can scorch the chocolate, causing graininess, so heat in short bursts and stir frequently to maintain a glossy texture.
- You can sprinkle a few ground walnuts onto the cake now so they get into the poked holes.: At this stage the mixture will steam gently and you will see the chips soften; stirring will transform them into a silky sauce. The residual heat continues to smooth the mixture, and when fully combined it should be shiny and pourable. A common oversight is leaving cold chunks of chocolate, so keep stirring until completely uniform and hot to the touch but not boiling.
- Using an electric mixer or a stand mixer with the whisk attachment, beat together the cream cheese, mascarpone, and butter on medium speed until smooth and free of lumps. This should take about 1 minute. Remember to stop once during mixing to scrape down the sides and bottom of the bowl with a spatula.: As you pour the warm, fragrant mixture it will sink with a soft sigh into the poked channels, and the surface will gleam with a sweet, creamy sheen. Use a spatula to nudge the sauce into pockets so each spot is saturated, which yields consistent flavor across slices. Pouring too slowly or unevenly can leave dry sections, so work methodically from one side to the other for uniform distribution.
- Add in vanilla extract and salt, and continue mixing until combined.: The ground walnuts add a toasty aroma and gentle crunch that contrasts with the soft, sweet filling. As they settle into the holes they will toast slightly from the warm sauce, producing a pleasant nuttiness. Skip this step or add too many nuts and the texture balance will tilt, so use them to complement, not overpower, the creamy pockets.
- With the mixer speed on medium-low, gradually add in the powdered sugar. Increase mixer speed to medium-high and beat until combined. Stop once to scrape the sides and bottom of the bowl with a spatula.: Whipping these chilled but soft dairy components yields a plush frosting base, and you will notice the mixture lighten and sound shift as air incorporates. Smoothness is the goal because any lumps will mar the frosting texture; stop once and scrape the bowl to keep everything uniform. Be careful not to over whip, which can cause the mixture to become overly soft and harder to pipe or spread.
- If your frosting is too thick, you can add one or two teaspoons of milk to achieve the desired consistency. If it's too thin, you can add more powdered sugar, starting with 1/3 cup at a time. Be sure to taste the frosting as you go, so you don't accidentally make it too sweet. Keep in mind that the frosting may appear thin initially, but it will harden and settle once chilled.: The vanilla extract and salt brighten flavors, turning the frosting from flat to nuanced; you will smell the vanilla blossom as the mixer runs. These small touches bring balance, and mixing until just combined ensures even flavor without losing texture. A frequent mistake is adding too much salt or vanilla, which can dominate the delicate dairy notes, so measure carefully.
- Sprinkle ground walnuts on top of the cake.: Adding powdered sugar slowly prevents a flour like cloud and allows you to control stiffness; you'll hear the mixer change tone as the frosting thickens. Once the sugar is incorporated, raising the speed creates a smooth, slightly aerated frosting that spreads beautifully. Adding all sugar at once or on high speed can make a dusty mess and over sweeten, so be patient and add in stages.
- Refrigerate the cake for at least 6-8 hours before serving. Enjoy!: When adjusting the frosting texture, a touch of liquid adjusts spreadability and mouthfeel, making the frosting feel silky instead of clumpy. Start with one teaspoon and mix, because small amounts make a big difference. A common trap is adding too much liquid at once, leaving the frosting runny, so proceed cautiously and test between additions.
- If it's too thin, you can add more powdered sugar, starting with 1/3 cup at a time: Thickening the frosting with measured powdered sugar restores body and helps it hold shape on the cake; after each addition taste to keep sweetness balanced. The frosting will firm when chilled, so avoid over thickening in the bowl which can produce a pasty finish. Overly thick frosting can be dry and hard to spread, so aim for a creamy but stable consistency.
- Sprinkle ground walnuts on top of the cake: Finishing with ground walnuts provides visual contrast and an appealing textural counterpoint to the silky frosting, and the nutty aroma ties the flavors together. Even distribution ensures that each slice has a touch of crunch. Applying too many nuts can overwhelm the cake, so use them as a garnish to enhance, not mask, the other components.
- Refrigerate the cake for at least 6 to 8 hours before serving: Chilling allows the filling and frosting to set, melding flavors into a cohesive whole; the cake firms slightly and becomes easier to slice neatly. Overnight refrigeration deepens the flavors and improves texture, creating that perfect fork friendly bite. A common mistake is serving too soon, when the filling is still loose and the frosting too soft, so plan ahead for adequate chill time.
Notes
- Choose a reliable cake mix, because the mix forms the structural basis of the cake; selecting a brand you trust reduces guesswork and delivers a consistent crumb.
- Bring dairy to room temperature, which helps the cream cheese, mascarpone, and butter combine into a smooth frosting without lumps, giving a silky texture that spreads well.
- Microwave in short bursts, stirring often when melting the white chocolate chips with sweetened condensed milk, to preserve a shiny, smooth emulsion and prevent scorching.
- Poke uniformly, making holes of similar size across the cake so the filling distributes evenly, preventing dry spots and ensuring consistent flavor in each slice.
- Use an offset spatula for spreading frosting, as it allows precise smoothing and fewer air pockets, which yields a professional looking finish without extra effort.
- Chill overnight if possible, since extended refrigeration deepens flavors and firms the cake for clean slicing and optimal texture.