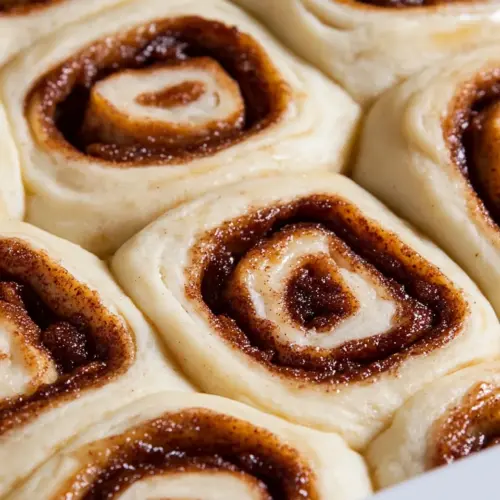
Carrot Cake Cinnamon Rolls
Carrot Cake Cinnamon Rolls are soft, warmly spiced rolls filled with shredded carrots and brown sugar, finished with a tangy cream cheese frosting. These rolls are tender, slightly sticky, and bakery worthy, perfect for brunch or holiday mornings. They offer an easy make ahead option and comforting aromas that fill the kitchen, making them irresistible to bake again and again.
Equipment
- Stand mixer with dough hook
- Measuring Cup
- 9 by 13 inch pan
- Mixing Bowls
Ingredients
- 3/4 cup (178 ml) warm water Hydrate and activate yeast by providing a warm medium; warm water helps dissolve yeast and sugar for proper proofing and dough formation. Maintain temperature between 105–115°F to avoid killing yeast and to encourage a good rise. Use specified volume to achieve correct dough hydration and texture.
- 1 tablespoon (9 g) active dry yeast Bloom and leaven the dough by producing carbon dioxide through fermentation; active dry yeast enables the rolls to rise and develop lightness. Sprinkle into warm water with sugar and allow it to foam for 5–10 minutes to confirm activity. Measure precisely to ensure predictable rising times and structure.
- 1/4 cup (50 g) granulated sugar Feed the yeast and add mild sweetness to the dough; granulated sugar accelerates fermentation and contributes to browning. Dissolve into the warm water and yeast mixture to create an even environment for proofing. Adjusting amount would change rise speed and caramelization of the crust.
- 1/2 teaspoon salt Enhance overall flavor balance and strengthen gluten structure by controlling yeast activity and taste; salt also suppresses excessive fermentation. Mix into flour or dough to ensure even distribution and to avoid direct contact with yeast during proofing. Precisely measured salt keeps the roll flavors balanced.
- 1 large egg Add richness, structure, and moisture to the dough by contributing fat and protein; the egg helps bind and create tender crumb. Beat into the dough mixture to improve elasticity and enrich flavor and color of finished rolls. Use at room temperature to incorporate smoothly.
- 1/3 cup (79 ml) vegetable oil Provide neutral fat to tenderize the dough and improve moisture retention; vegetable oil keeps rolls soft and prevents dryness. Mix with other wet ingredients to distribute fat evenly without affecting flavor. Measure accurately to maintain dough consistency and crumb.
- 3 cups (372 g) all purpose flour Create the dough's structure and bulk; all purpose flour supplies gluten-forming proteins and starch essential for rise and chew. Sift or measure correctly by spooning and leveling to avoid dense dough from excess flour. Combine with liquids to form a tacky, workable dough that traps gas.
- 3 tablespoons (42 g) unsalted butter, melted Add richness and help form the cinnamon-sugar filling by melting unsalted butter; its fat carries flavor and aids spreading. Brush over rolled-out dough before sprinkling sugar and spices to ensure even adhesion. Use melted to penetrate layers for tender, flavorful swirls.
- 1/2 cup (100 g) packed brown sugar Offer deep molasses-like sweetness and moisture to the filling; packed brown sugar creates a soft, caramelized interior. Sprinkle over buttered dough for sticky, flavorful swirls that complement spices and carrots. Pack firmly to measure accurately for consistent sweetness and texture.
- 1 tablespoon ground cinnamon Provide warm aromatic spice and primary flavor for the filling; ground cinnamon defines the classic cinnamon-roll profile. Combine with brown sugar to create a fragrant mixture that browns and melts during baking. Use measured amount to balance with other spices and sweetness.
- 1/2 teaspoon ground ginger Contribute bright, slightly spicy warmth that complements cinnamon and carrots; ground ginger adds depth to the spice blend. Mix into the filling for a subtle kick without overwhelming the cinnamon. Measure carefully to maintain balanced flavor in each roll.
- 1/2 cup (75 g) grated carrots (about 2 medium) Add moisture, texture, and a mild natural sweetness to both dough and filling; grated carrots introduce tender vegetable flecks and color. Fold into the filling or dough as specified to provide carrot cake character without excess moisture. Grate fine to distribute evenly and avoid large wet pockets.
- 4 ounces (114 g) cream cheese, room temperature Create a creamy, tangy base for the glaze; room-temperature cream cheese adds richness and slight acidity for contrast. Beat until smooth with butter, powdered sugar, and vanilla to form a glossy frosting that spreads easily over warm rolls. Use specified temperature for lump-free frosting.
- 2 tablespoons (28 g) unsalted butter, room temperature Soften and add buttery richness to the frosting; room-temperature unsalted butter provides spreadability and smooth texture. Cream with cream cheese to achieve a stable emulsion that holds up on warm rolls without separating. Measure to balance sweetness and tang in the glaze.
- 1 1/2 cups (170 g) powdered sugar Sweeten and thicken the frosting to a pipeable consistency; powdered sugar dissolves into the cream cheese-butter mixture for a smooth, sweet glaze. Sift or add gradually while beating to prevent lumps and reach desired thickness. Use the amount specified to balance sweetness with cream cheese tang.
- 1 teaspoon vanilla extract Enhance the frosting with warm, floral aroma and rounded flavor; vanilla extract brightens the glaze and ties other flavors together. Add a measured amount to the frosting and beat until evenly incorporated for consistent taste. Use pure vanilla for best flavor clarity.
Instructions
- Place warm water (about 100-110°F) into a measuring cup. (The easiest way to test the water is using an instant read thermometer, but if you don’t have one, think hot bathwater.) Add yeast, sugar and salt. Stir with a wooden spoon. Let rest until it bubbles, about 5 minutes.: The moment you pour the warm water and see it glint like a little bath signals readiness, and when you stir in the yeast and sugar you should start to notice tiny bubbles forming within five minutes, which smells faintly sweet and yeasty. This bubbling is your assurance the yeast is alive and will produce lift, and if you do not see it the common mistake is using water that was too hot or dead yeast . If it fails to bubble, start over with fresh yeast and check your water temperature, because proceeding without a proof can lead to flat, dense rolls.
- Place proofed yeast in the bowl of a stand mixer fitted with the dough hook. Add egg and oil along with 1 cup of flour.: Once the bubbly mixture is ready, adding it to a bowl with the dough hook is tactilely satisfying because you can see the dough come together as dough ingredients meet. I add the egg and oil first, then one cup of all purpose flour , which creates a shaggy paste that will gradually firm. The motor hums, and as it begins to pull the mixture away from the bowl you know the process is working. A frequent misstep is adding all the flour at once, which prevents proper hydration and results in a dry, tough dough rather than a soft, slightly tacky one.
- Start the mixer and then slowly another 1 1/2 cups of flour, stirring in gradually. Run the mixture for about 5-10 minutes or until the dough is elastic. The dough will be slightly sticky and very soft. You may need up to 3 total cups of flour.: As the mixer rolls, the dough transitions from messy to a cohesive mass, and the sound changes to a steady, low thrum, indicating gluten development. You may need up to the full three cups of all purpose flour , but stop when the dough is elastic and slightly sticky to the touch, with a springy feel when pressed. This elasticity is what gives rolls their structure and chew, and if you over flour the dough you will lose that softness. If the dough feels too firm, add a teaspoon of warm water at a time to adjust.
- Turn the dough out onto a floured cutting and knead until smooth. Place the dough into a bowl that’s been sprayed with nonstick cooking spray. Let rest until doubled. Time will vary depending on room temperature. To rise faster, place the dough in a warm place.: The action of kneading warms the dough and creates a satiny surface, which you will see as it becomes smoother and more uniform. Kneading by hand for a few minutes or letting the mixer run helps align the gluten strands, producing good chew and a tender crumb. Place the dough in a bowl sprayed with nonstick cooking spray and cover it, because a slightly humid environment helps a steady rise. A common error is letting the dough dry on top, which forms a skin and restricts rising, so keep it covered or use plastic wrap.
- Spray a 9×13-inch pan with nonstick cooking spray.: When the dough is resting, you should notice a subtle sweet, fermented aroma emerge, and the dough should visibly expand to about twice its size. Timing varies with room temperature, and a warmer spot will speed things up while a cooler spot slows it. Rushing the rise will weaken flavor and texture, while letting it overproof can cause collapse and less oven spring. I watch for that gentle doming, not a strict clock, as the best visual cue.
- Make filling: Stir together brown sugar, cinnamon, ginger, and grated carrots in a small bowl.: Preparing the pan ensures the rolls will glide out easily after baking and allows the edges to caramelize without sticking. When the pan is ready, the sprayed surface catches melted butter and sugar to form those irresistible edges. If you skip this, the rolls can cling and tear, so take the extra moment to prepare the pan properly.
- Roll dough into a rectangle that is about 12×15”. To fill, spread with melted butter and sprinkle with filling. Roll up lengthwise. Make roll as tight as possible. Cut into one-inch pieces. Place in greased pan so that rolls just touch each other. (You can slice it into 9-12 slices depending on how big you want your rolls.): When you combine the packed brown sugar , ground cinnamon , ground ginger , and fresh shredded carrots , the mixture has a moist, slightly coarse texture that spreads easily over the dough. The aroma is warmly spiced with sweet molasses notes, and the carrots introduce a fresh sweetness and bite. A common mistake is using dry pre shredded carrots, which lack moisture and won't meld as well, so freshly grate for best results.
- At this point you have two options: 1. Let rise until doubled (about 20-30 minutes), then bake as directed below or 2. Cover tightly with plastic wrap and chill overnight. Let the rolls come to room temperature before baking.: Rolling the dough to the right dimensions creates even layers, and when you brush on the melted butter the dough becomes glossy and easier to roll. As you roll lengthwise, you should feel gentle resistance and hear the dough whisper as it wraps, creating tight spirals with visible filling ribbons. Cut into one inch pieces so the rolls bake evenly, and arranging them so they just touch encourages soft sides and a pillowy center. A pitfall here is rolling too loosely, which creates looser spirals and a doughier center, so aim for a snug roll.
- Preheat oven to 350°F. Bake approximately 20-25 minutes.: You can let the cut rolls proof until doubled for a quick bake, or chill them tightly covered for an overnight option, which deepens flavor and makes morning baking effortless. If chilled, allow them to come to room temperature before baking so the rise resumes and the rolls bake through. A common issue is not allowing chilled rolls to warm enough, which results in dense interiors, so factor in extra time if using the fridge method.
- Make the frosting: beat cream cheese and butter until smooth, then mix in powdered sugar slowly. Mix until crumbly, then add vanilla and beat until smooth. Spread over warm or cooled rolls.: As the oven warms to 350°F , the kitchen fills with a caramelizing sweetness, and during baking you will see the tops turn golden and the centers puff up. The aroma of cinnamon and toasted carrots becomes pronounced, and a gentle jiggle in the center signals they are done. Overbaking dries the rolls, while underbaking leaves gummy interiors, so aim for a light golden color and a toothpick that comes out mostly clean.
- Store loosely covered in refrigerator for up to 2 days. Rolls can be frozen before baking or after, or even after frosting.: When you beat the room temperature cream cheese and soft butter , the mixture becomes silky and slightly tangy, which balances the sweetness of the powdered sugar . Add the vanilla extract and beat until glossy, then spread over warm or cooled rolls for different effects; warm rolls encourage the frosting to melt into nooks, while cooled rolls keep a thicker topping. Watch for overbeating, which can make the frosting too loose, and if it seems too thin chill briefly to firm up.
- Store loosely covered in refrigerator for up to 2 days and freeze if desired: Proper storage keeps these rolls fresh, and storing them loosely covered in the refrigerator preserves texture while preventing a too soft frosting. You can freeze rolls before or after baking, which is great for make ahead planning, but thaw fully and reheat gently to refresh texture. A misstep is sealing them too tightly while warm, which traps condensation and sogginess, so cool before covering.
Notes
- Adjust rise time: If your kitchen is cool, give the dough extra time to double, and consider creating a warm proofing spot by using a slightly warm oven with the light on, because a slow rise enhances flavor development.
- Control sweetness: If you prefer less sweetness, reduce the powdered sugar in the frosting by a couple of tablespoons, tasting as you go so the tartness of the cream cheese still balances the filling.
- Make ahead options: For easy morning baking, assemble and chill the rolls tightly covered overnight; bring to room temperature before baking so they finish with good oven spring.
- Texture tweaks: If your dough feels too sticky, flour your hands lightly and give it an additional minute of kneading rather than adding large amounts of flour which can make rolls dense.
- Frosting thickness: If the frosting is too thin, chill it for 10 to 15 minutes to firm up; if too thick, add a teaspoon of milk or cream at a time until spreadable.
- Carrot prep: Grate carrots finely by hand for the best texture; a food processor can be used but avoid over processing which makes them watery.