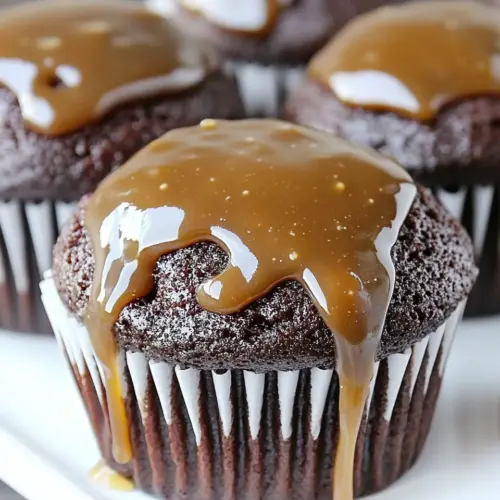
Caramel Filled Chocolate Cupcakes
Caramel Filled Chocolate Cupcakes are rich, gooey, and utterly satisfying, combining tender chocolate cake with a molten caramel center and silky frosting. This easy treat delivers creamy textures and deep cocoa notes, perfect for celebrations or casual gatherings. Make a batch for an easy weeknight dessert or to impress guests with minimal fuss.
Equipment
- Mixer
- Spoon
- Spatula
- Small knife or corer
Ingredients
- One batch of Chocolate Cupcakes Provides the baked base for the recipe, supplying structure, chocolate flavor, and moisture that hold the caramel filling and frosting together. Ensures the final cupcakes have proper crumb and portion size when prepared according to its own recipe. Allows for customization of texture and flavor depending on mixing and baking techniques used.
- One batch of Caramel Sauce Serves as the sweet, gooey center that contrasts with the chocolate cupcake, contributing richness, chewiness, and a glossy finish. Balances the overall sweetness and adds a luxurious mouthfeel when piped or spooned into cupcake centers. Can be warmed slightly for easier filling and to enhance integration with the cake.
- 1/2 cup butter Adds creamy fat and tenderness to frostings or fillings, contributing smoothness, richness, and stability. Helps emulsify other ingredients like cocoa and powdered sugar to create a spreadable texture. Can be softened to room temperature for easier incorporation and to avoid graininess.
- 2/3 cup unsweetened cocoa powder Delivers concentrated chocolate flavor and deep color while providing some dryness that helps balance wet ingredients in frostings or batters. Intensifies cocoa notes and can be sifted to prevent lumps for a smooth final texture. Works with butter and powdered sugar to create a stable, chocolate-forward frosting.
- 3 cups powdered sugar Provides bulk and sweetness while helping to create a smooth, pipeable frosting when combined with fats and liquids. Dissolves into butter and cocoa to form a glossy, stable finish that holds shape on cupcakes. Can be sifted to ensure an even, lump-free consistency.
- 1/3 cup evaporated milk Contributes liquid and slight creaminess to adjust frosting or filling consistency, helping to thin mixtures to a spreadable texture without watering them down. Adds a subtle caramelized milk flavor that pairs well with both chocolate and caramel components. Should be added gradually to reach desired thickness.
- 1 teaspoon vanilla extract Imparts aromatic sweetness and rounds out flavors in frostings or fillings, enhancing both chocolate and caramel notes. Acts as a flavor bridge that brightens and balances the overall taste profile when used sparingly. Can be adjusted to taste to avoid overpowering delicate flavors.
Instructions
- Cut a small piece out of the center of each cupcake.: The hollowing creates space for the warm caramel to nestle in, and you should feel a slight resistance as you push into the crumb then a clean release when the plug comes out. Smell the faint cocoa aroma as you work, and notice the fine crumbs that collect—they are a sign of a tender cake. Why this matters, the hollow ensures the filling sits inside rather than sitting on top, which keeps the bite neat and enjoyable. Common mistake, cut too deeply and you will create a hole too close to the bottom that weakens the cupcake and can leak. Use a small knife or a playful corer, and twist gently to lift the plug so the surrounding cake remains intact.
- Spoon caramel sauce into the hole. Frost with chocolate frosting. Top with a Sea Salt Butterscotch Caramel if desired.: As you spoon, observe the caramel flowing, shiny and smooth, settling into the cavity with a glossy sheen; that visual cue tells you it is the right thickness. The frost adds a creamy seal and visual contrast, and a sprinkle of sea salt can lift the sweetness with a delicate pop on the tongue. Why this matters, filling before frosting locks the sauce in place and prevents leaks during transport. Common mistake, overfilling can cause the filling to spill when the cupcakes are handled; stop when the sauce reaches the rim but does not overflow. Use a small spoon for control and give each cupcake a gentle tap to level the filling.
- Melt butter. Stir in cocoa.: When melting, watch for it to become a liquid gold that glitters in the pan; the aroma shifts to a warm, toasty note. Remove from heat as soon as it is fully melted to avoid browning unless you are intentionally browning for added nuttiness. Why this matters, temperature control prevents scorching which would introduce bitter notes. Common mistake, overheating will change the flavor profile and can ruin the smoothness; always melt slowly over low heat or in short bursts in the microwave, stirring between intervals.
- Alternately add powdered sugar and milk, beating to spreading consistency. Add small amount additional milk, if needed.: As you whisk the cocoa into the warm butter, you will see it bloom into a fragrant paste, releasing deep chocolate aromatics. Mix until the texture is uniform and glossy, which signals the cocoa has hydrated properly. Why this matters, evenly incorporated cocoa ensures no dry pockets and a consistent chocolate intensity throughout the frosting. Common mistake, adding dry cocoa too quickly can create lumps; sift if needed and stir vigorously to achieve a smooth emulsion.
- Stir in vanilla. Makes about 2 cups frosting.: When you alternate, the sugar absorbs the liquid more predictably, resulting in a silky, stable frosting. Listen for the change in sound from grainy to smooth as the mixer hums, and watch the texture thicken as you incorporate each addition. Why this matters, alternating prevents a gritty or runny finish and helps you dial in the perfect spreadability. Common mistake, dumping all the liquid at once can yield a thin frosting; add gradually and check texture between additions.
- Add small amount additional milk, if needed: A teaspoon at a time can transform a stiff frosting into a silky spread; notice how a tiny splash loosens the texture and adds sheen. The goal is a frosting that holds shape but still spreads with minimal tugging. Why this matters, hydration is the difference between a pleasant finish and a clunky one. Common mistake, adding too much will make the frosting weep; pause frequently to test and err on the side of less.
- Stir in vanilla: Stirring in the vanilla releases a warm, aromatic lift that brightens the sweetness and rounds the edge of the frosting. Incorporate it at the end so the aroma stays pronounced and not baked off. Why this matters, vanilla acts like an amplifier for other flavors, making the chocolate and caramel sing together. Common mistake, adding too much will make the flavor cloying; stick to the recipe amount and taste carefully.
- Makes about 2 cups frosting: This indicates the volume you should expect, and when you reach that amount the texture should be smooth, glossy, and hold soft peaks when pulled with a spatula. Visual cues such as thickness and sheen tell you it is ready to spread evenly over the cupcakes. Why this matters, knowing the expected yield helps you plan how liberally to frost each piece. Common mistake, underestimating yield may leave you short; measure as you go to ensure even coverage.
Notes
- Switch frosting texture by adjusting the amount of evaporated milk a teaspoon at a time to create either a thicker or silkier spread.
- Adjust sweetness by using slightly less powdered sugar in the frosting and tasting as you go, which helps fine tune for different palates.
- Temperature control matters, so cool the cupcakes completely before filling to prevent the caramel from seeping through the crumb.
- Presentation can be changed by piping the frosting with a star tip for a classic look or spreading it for a rustic finish.
- Salt finish is optional, a light sprinkle of sea salt on top of the frosted cupcake amplifies the caramel notes without overwhelming sweetness.