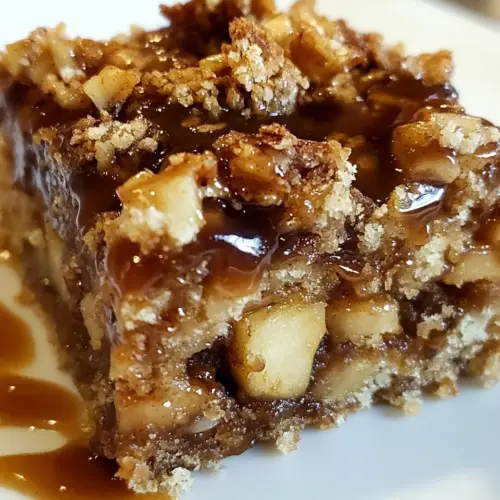
Caramel Apple Bars
Caramel Apple Bars combine tender, spiced apples with a crispy oat pecan crust and silky, homemade caramel. These bars are gooey, comforting, and easy to slice for gatherings, making them an ideal dessert for fall potlucks and cozy dinners. Make them ahead for simpler hosting and enjoy a perfect balance of sweet and tart in every square.
Equipment
- 9 x 13-inch pan
- Foil
- 2 quart saucepan
- Mixing Bowls
- Measuring Cups
- Oven
Ingredients
- 1 cup heavy whipping cream Whip to soft peaks and add richness to fillings or sauces; provides a smooth, creamy mouthfeel and helps carry flavors throughout the bar layers. Chill before whipping for best volume and stability when folding into mixtures or using as a topping.
- 2 cups brown sugar, firmly packed Sweeten and caramelize when heated; contributes deep molasses notes and moisture to the caramel layer while helping create a chewy, densely textured filling. Pack firmly to measure consistently and dissolve evenly during cooking for an even caramel color and flavor.
- 1/4 cup light corn syrup Prevent crystallization and promote smooth caramel texture by adding body and gloss; balances sugar concentration and helps maintain chewiness in the caramel layer. Stir in during heating to ensure uniform incorporation and stable caramelization.
- 1/4 cup (1/2 stick) butter Enrich the caramel with a silky fat that enhances mouthfeel and softens the final texture; melts into the cooked sugar to create a creamy, cohesive layer. Use at room temperature or melted as directed so it blends smoothly without seizing the caramel.
- 1 teaspoon vanilla extract Enhance and round out sweet and cooked flavors with a warm, aromatic note; brightens the caramel and complements the apple and cinnamon components. Add toward the end of cooking to preserve the delicate volatile aromatics.
- 1/4 teaspoons salt Balance sweetness and enhance overall flavor; draws out other flavors while providing a subtle savory contrast in the caramel or filling. Dissolve fully to avoid graininess and taste-adjust if using coarse salts.
- 1 cup firmly packed brown sugar Provide additional sweetness and depth with a molasses-forward profile that deepens caramel and filling flavors; packs densely to contribute moistness and chew to the bar structure. Combine with dry ingredients for even distribution and consistent texture.
- 3/4 cup (1 1/2 sticks) butter Bind dry oat and flour components while adding buttery richness and tenderness; contributes to the crumbly, shortbread-like base and oat topping. Soften or warm slightly if creaming is required to achieve a uniform dough consistency.
- 1 teaspoon ground cinnamon Impart warm, aromatic spice that complements apples and caramel; adds depth and a gentle heat to the filling and crumb. Use measured amounts to avoid overpowering the delicate sweetness of the bars.
- 3/4 teaspoons salt Enhance flavor balance by adding savory contrast; helps highlight sweetness and spices without being salty. Distribute evenly in mixtures to prevent localized salty pockets in the finished bars.
- 1/2 teaspoon baking soda React with acidic components to produce lift and a lighter texture in the oat and crumb layers; helps prevent dense, overly compact bars. Dissolve into wet ingredients prior to baking for consistent leavening action.
- 1 cup all purpose flour Provide structure and gluten for the base and topping while contributing body and tenderness when combined with fats; creates the foundation that holds the bar layers together. Measure and mix gently to avoid overworking and toughening the crumb.
- 1 cup ground pecans Add nutty richness and a crunchy, textural component to the bars; complements oats and provides a toasty flavor when toasted briefly. Pulse or chop to desired consistency to ensure even distribution without overwhelming the bite.
- 2 cups rolled oats Contribute hearty chew and wholesome texture; binds with the butter and brown sugar to form a sturdy, oat-based crust or topping. Use old-fashioned rolled oats for best texture and avoid quick oats if a firmer bite is desired.
- 3 1/2 cups (about 24 ounces) sliced apples Provide fresh, tart apple flavor and tender bite that contrasts sweetness; releases juices during baking that meld with caramel to create a saucy, fruity layer. Slice uniformly to ensure even baking and prevent some pieces becoming too soft while others remain firm.
- 1/2 teaspoons salt Accentuate sweetness and balance with a hint of savoriness; aids in flavor layering across the fruit and caramel components. Sprinkle or mix thoroughly so that the salt is evenly distributed throughout the filling.
- 1/2 teaspoon ground cinnamon Offer a secondary, subtle cinnamon boost that harmonizes with the primary spice; enhances apple aromatics and ties the flavor profile together. Add sparingly to maintain a balanced spice level that supports but doesn’t dominate the dessert.
- 1 cup homemade (or jarred) caramel Provide a sticky, sweet finishing layer that binds toppings and fruit together; contributes concentrated caramel flavor and chew to the bars. Warm gently for spreadability and use high-quality homemade or jarred caramel for best results.
Instructions
- Preheat the oven to 400 degrees. Line a 9 x 13-inch pan with foil and lightly spray with cooking spray.: When the oven warms, you will notice a steady hum and a slight warmth in the kitchen that signals readiness. Preheating ensures the crust sets quickly once it hits the oven, which helps keep a crisp bottom while the apples soften. A common mistake is not preheating long enough, which can lead to a soggy base, so wait until the oven fully reaches temperature. I like to give the foil lined pan a quick spray so the crumb presses smoothly; it also helps edges release cleanly after baking.
- Mix the caramel ingredients in a 2 quart saucepan. Heat over medium, stirring constantly, until it reaches the soft-ball stage (230 to 234 degrees). Remove from heat.: As the mixture heats, the smell of simmering brown sugar will deepen, and you should stir continuously to prevent scorching. The mixture moves from syrupy to thick, and when it hits the soft ball stage between 230 to 234 degrees, it will form a pliable droplet in cold water. This stage is crucial because it yields a caramel that sets but stays slightly chewy, rather than one that becomes hard. Watch closely, as high heat can quickly jump you past the target, causing grainy caramel. If the caramel seems to crystallize, lower the heat and stir more gently until it smooths out.
- In a medium bowl, beat the brown sugar and the next 4 ingredients (through baking soda) until thoroughly combined. Mix in the flour, ground pecans and oats until crumbly. Scoop out 1 cup and set aside. Place the remaining crumbs into your prepared pan and press down firmly to coat the bottom.: You will notice the mixture lighten and become more cohesive as the butter and sugars come together, releasing a rich aroma. This step is where the base gains its tender structure. Mixing thoroughly prevents dense pockets in the crumb, which would otherwise make texture uneven. Overbeating can incorporate too much air, while under mixing leaves dry streaks, so aim for a uniform, slightly glossy mixture. When you fold in the flour, ground pecans and oats, the blend should feel crumbly and hold together when pressed.
- Toss the apples in a large bowl with the salt and the cinnamon. Arrange them over the crust. Drizzle 1 cup of warm caramel over the top and then sprinkle with the remaining crumbs you set aside.: The scent of toasted nuts emerges as you work, and the crumb should form coarse, sandy clusters that will bake into a golden, slightly crunchy crust. Scoop out 1 cup and set aside for the topping; reserving this ensures a nice contrast between a compact base and a loose crumble on top. A mistake here is packing too much for the base which results in an overly thick bottom. Press the remaining crumbs firmly into the pan so they bind and create a stable layer that will support the apples and caramel .
- Bake 35 to 40 minutes until bubbly and the apples are just tender. Remove and let cool until they are just warm to the touch. Cut into squares. Try and let the bars rest until the caramel has set before serving. Drizzle individual servings with more caramel, if desired!: Pressing creates a compact layer that will crisp in the oven, giving a clear textural difference from the crumbly topping. Use the back of a measuring cup to even out the surface and ensure edges are sealed. If you press too lightly, the base can crumble when sliced; press too hard and the crust can become overly dense. Aim for firm, even pressure to get a golden, cohesive crust after baking.
- Toss the apples in a large bowl with the salt and the cinnamon: As you toss, the spicy perfume of cinnamon will bloom and coat the sliced apples in a thin, flavorful veil. The salt sharpens the fruit, preventing the overall sweetness from becoming flat. Ensure each slice is evenly coated so the flavor is consistent through the bars. A common oversight is overdressing the fruit, which can make the filling too wet; use just enough to season and enhance the natural apple flavors.
- Arrange them over the crust: Lay the spiced apples in an even layer to promote uniform baking. You want the pieces to nestle but not pile so high that steam cannot escape, which can cause uneven tenderness. The visual cue you are aiming for is a mostly level fruit layer with some natural overlap. If pieces are too large, they may remain firmer; slice consistently for even doneness.
- Drizzle 1 cup of warm caramel over the top and then sprinkle with the remaining crumbs you set aside: Warm caramel will spread and sink slightly into the apples , creating pockets of sticky goodness and glossy sheen. The contrast between molten caramel and crumb topping is irresistible, and the caramel also helps the bars hold together after baking. Avoid pouring caramel while it is too hot or too cold; overly hot caramel can make the fruit collapse, while cold caramel will not spread. Aim for warm and pourable consistency for best results.
- Bake 35 to 40 minutes until bubbly and the apples are just tender: You will hear a gentle bubbling sound as the juices and caramel mingle, and the edges will turn a warm golden brown. The apples should yield to a fork but still hold shape. Baking at this pace allows the crumb to toast without drying out the fruit. A common error is underbaking which leaves the center too soft, or overbaking which dries the apples. Check visually for bubbling and test a small piece for tenderness.
- Remove and let cool until they are just warm to the touch: Cooling allows the caramel to set slightly, making the bars easier to slice. The surface should feel warm but not hot, and the caramel should be tacky rather than runny. Cutting too soon will cause the caramel to run and bars to lose shape, while waiting too long cools the caramel too much and makes the bars less gooey. Aim for a gentle, warm consistency for perfect slices.
- Cut into squares: Use a sharp knife for clean edges, wiping it between cuts if the caramel starts to stick. Letting the bars rest until the caramel has set yields neat squares, but you can drizzle additional caramel over individual servings if you want extra gloss and sweetness. Rushing this step can lead to messy slices, so be patient and steady when cutting.
- Drizzle individual servings with more caramel, if desired: The final drizzle adds show stopping shine and an extra hit of sweetness. Warm the reserved caramel slightly if it has stiffened, and use a spoon to create graceful lines. Too much caramel can overpower the apple notes, so apply sparingly if you prefer balance. A light glossy finish makes each square inviting and keeps the texture harmonious.
Notes
- Swap apple varieties with caution Use apples that hold up in the oven like Granny Smith or Honeycrisp to retain structure and a pleasant tartness that balances the caramel.
- Control caramel thickness If your caramel is too runny, let it cool slightly before pouring so it stays in place between layers and does not make the crust soggy.
- Toast the pecans first Briefly toasting the pecans deepens their flavor and adds a more pronounced nutty note to the crumb, which enhances contrast with the sweet caramel.
- Adjust sugar for sweetness If you prefer less sweetness, reduce the additional brown sugar in the crumb by a small fraction, keeping the caramel amount to preserve that glossy coating.
- Make the caramel ahead The recipe makes extra, and chilling leftover caramel produces ready to slice squares for a second dessert, which is excellent for gifting or a future treat.