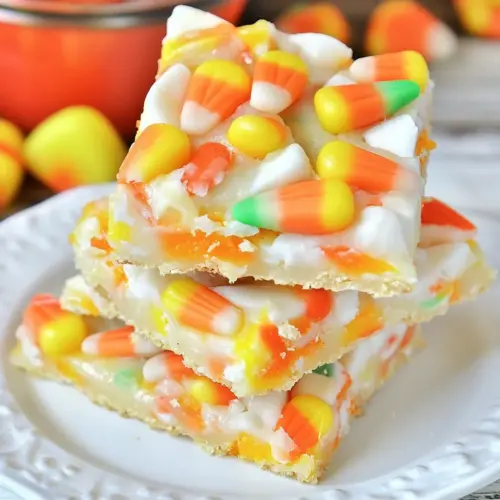
Candy Corn Sugar Cookie Bark
Candy Corn Sugar Cookie Bark is a vibrant, easy to make fall treat that combines a tender sugar cookie base, glossy vanilla flavored candy coating, and bright candy corn for a crispy chewy texture. This simple, crowd pleasing dessert is perfect for parties or last minute gatherings, offering sweet nostalgia with an eye catching presentation. Make it for seasonal fun and effortless entertaining.
Equipment
- Baking Sheet
- Parchment Paper
- Rolling Pin
- Spatula
- Mixing Bowl
Ingredients
- 16.5 oz refrigerated sugar cookie dough 1 roll - I used Pillsbury Provides a buttery, pre-made cookie base that simplifies preparation; press or roll into a thin layer to form the bark foundation and ensure even baking. Adds familiar sugar cookie flavor and tender crumb that pairs well with sweet coatings. Conveniently refrigerated for ease of use and consistent texture when spread into the pan.
- 16 oz vanilla flavored candy coating I used CandiQuik Creates a smooth, meltable vanilla coating that sets into a firm, glossy layer; melt and pour over the baked cookie base to create the candy-like surface. Contributes sweet vanilla flavor and bright color that helps the candy corn adhere and stand out. Designed for easy temper-free melting and quick setting on no-bake or baked confections.
- 1 1/2 cups candy corn and/or mellow-creme pumpkins Adds bright, chewy candy pieces for classic candy-corn appearance and sweet, chewy bursts; sprinkle over the warm coating and gently press to secure. Provides seasonal color contrast and textural variety with a mix of crunchy sugar shell and softer interior. Optional mellow-creme pumpkins can be mixed in for variety while maintaining festive presentation.
Instructions
- Roll out the sugar cookie dough to 1/4 inch thickness on a parchment-lined cookie sheet. Flour your rolling pin and dough as necessary to keep from sticking.: The dough should feel cool and slightly pliable under your hands, not sticky. As you roll, you will hear a faint brushing sound from the rolling pin and see a smooth, even sheet of dough spreading across the parchment. Aim for uniform thickness so the cookie base bakes evenly, which prevents thin edges from over browning. A common mistake is rolling too thin, which makes the final bark fragile, so check with a ruler or use light, even pressure. If the dough becomes sticky, chill it briefly to regain firmness before continuing.
- Bake according to directions and remove just before the cookie turns brown.: When you lightly dust with flour , the rolling pin moves with a soft whisper across the dough, preventing tears and ragged edges. The visual cue is a smooth surface with no tearing or clinging bits on the pin. Too much flour will dry the dough, so tap off excess and work in small bursts. A common oversight is over flouring which can make edges crumbly after baking, so use just enough to prevent sticking and reapply sparingly.
- Let cool for several minutes.: As it bakes, you will smell the warm, buttery aroma of the sugar cookie dough and see edges firm up and lighten in color. Remove the tray when the surface looks set and pale golden at the edges, not deeply brown. This ensures the base remains tender and avoids a hard, over baked texture. A frequent error is waiting until full golden brown, which leads to a brittle base that snaps instead of giving a pleasant chew.
- Divide candy coating in half and melt first batch.: The kitchen will fill with a sweet, baked fragrance as the cookie relaxes and firms slightly. Cooling a few minutes prevents melted coating from seeping into a hot surface and keeps the topping glossy. Touch the surface lightly when it is warm but not hot, it should be set to the touch. If you try to top while piping hot, the coating can melt into the cookie, so patience here keeps a clean layer. A common pitfall is tilting the sheet while it is too warm, which can cause sagging or cracking.
- Spread with a knife or spoon on top of sugar cookie and sprinkle on candy.: As you gently heat the first half of the vanilla flavored candy coating , it should transform from a solid matte block to a smooth, glossy liquid. Stirring continuously creates a ribbon like texture and avoids hot spots. Use low, indirect heat to prevent burning and keep a bowl of warm water nearby for a controlled double boiler if needed. Overheating will make the coating grainy or scorched, so stop heating when it is fully smooth and pourable.
- Melt second half of candy coating and repeat. Let candy coating set up before breaking apart.: When you spread the warm coating across the cookie, you will see a shiny, even surface form. Use a spatula or knife held at an angle for a thin, uniform layer that captures the light. Immediately scatter the candy corn so each piece anchors into the soft coating, pressing gently so they do not sink in. The sound will be a soft tap as pieces land and set into the coating. If you wait too long to add candy the coating will set and pieces will not adhere, so work with speed but care.
- Melt second half of candy coating and repeat: Melting the remaining coating gives you control to create layered color or extra shine. Pour and spread the second coat with a steady hand, noticing how the glossy surface smooths over any gaps and solidifies the decoration. The second layer can lock in candy pieces and create attractive patterns, so consider slight swirls for visual interest. A common mistake is overheating the second batch, which can change texture and dull the sheen, so heat gently and stop when smooth.
- Let candy coating set up before breaking apart: As the bark cools, the coating will firm into a crisp snap and the piece will shift from pliable to solid. You will hear a faint settling sound and feel the surface give a firm touch when ready. Allow it to set fully at room temperature or speed things up in the fridge for a short time, but avoid condensation by not chilling too long. Breaking too early can create sticky edges and messy pieces, so wait until the coating is fully set for clean, crisp shards.
Notes
- Keep the dough cool, chilling briefly if needed makes rolling simpler and prevents tearing, leading to a more uniform base for the bark.
- Work on parchment, it makes transferring, spreading, and later breaking the bark far easier and reduces sticking to the sheet pan.
- Stir the coating constantly while melting to ensure a smooth, glossy finish and to avoid graininess from overheating.
- Press candies gently into the coating immediately after spreading so they adhere without sinking or sliding off.
- Let it set fully before breaking to achieve clean shards and prevent sticky, misshapen pieces.
- Store in a single layer or use parchment between layers in a container to protect the coating and maintain crispness.