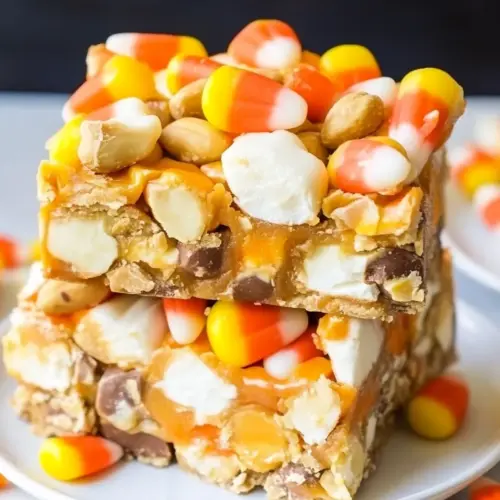
Candy Corn Peanut Butter Bars
Candy Corn Peanut Butter Bars are a creamy and crispy no bake treat that combines smooth peanut butter, melty chips, and crunchy peanuts with festive candy corn. This easy, nostalgic bar recipe is perfect for Halloween gatherings and quick bake sale contributions, delivering familiar flavors with minimal effort. Make a tray in under an hour for an irresistible seasonal snack.
Equipment
- 9x13 pan
- Saucepan
- Spatula
Ingredients
- 1 1/2 cups peanuts salted Roasted and salted to add a crunchy texture and savory balance; provides a nutty backbone that complements sweet components. Break or chop as needed to distribute crunchy bites throughout the bars and enhance mouthfeel.
- 10 ounces peanut butter chips Sweet and creamy baking chips formulated to melt smoothly and bind ingredients; contribute concentrated peanut flavor and a rich, cohesive texture. Gently melt with low heat to avoid scorching and achieve a glossy finish for the bar base.
- 11 ounces butterscotch chips Sweet and buttery baking chips that provide a deep caramel-like flavor; help create a golden, sweet layer that complements the peanut notes. Melt alongside other chips to ensure an even, velvety coating and to add structural stability to the bars.
- 1 cup peanut butter I used smooth peanut butter Smooth and spreadable to introduce cohesive creaminess and amplify peanut flavor; acts as both a flavoring and a binder. Stir into melted chips to achieve a pliable mixture that sets firm yet tender when cooled.
- 10 ounces mini marshmallows Soft, pillowy pieces used for chewiness and to help bind ingredients when melted; contribute little pockets of sweetness and a gooey texture. Add towards the end of melting to incorporate without losing all structure, creating tender bites.
- 1 cup candy corn Colorful, chewy candy used for decorative sweetness and a seasonal visual pop; adds small bursts of sugary flavor and playful contrast. Stir in or sprinkle on top after mixing to preserve shape and brighten the finished bars.
Instructions
- Line a 9×13 pan with foil or parchment paper. Lightly greasing with butter or oil will make it easier to remove the bars.: The moment you press the warm mixture into the pan you will appreciate a nonstick surface, because it makes lifting the whole slab out effortless once chilled. As you line the pan, smooth the foil or parchment so there are no large creases, which helps the bars set flat. If you lightly grease the liner with butter or oil you will notice the edges come away cleaner when slicing. A common mistake is skipping the liner, which leads to sticky clean up and ragged slices, so take the extra minute to prepare the pan properly.
- In a large saucepan with medium heat, add peanut butter chips, butterscotch chips and peanut butter. Stir the peanut butter and butterscotch frequently until smooth.: As the peanut butter chips , butterscotch chips , and peanut butter begin to warm, you will hear a gentle simmer and see the chips soften at the edges. Stir frequently to encourage even melting and to prevent hot spots that can scorch the chips. The aroma will shift from sweet to deeply caramelized as the butterscotch becomes fluid, and the mixture should become smooth and glossy. If the heat is too high you risk seizing the chips, which creates a grainy texture, so keep the flame moderate and patient stirring is your ally.
- Remove the pan from the heat. Add 1 cup of the peanuts and the marshmallows to the pan. Stir until the marshmallows are fully coated with the peanut butter mixture.: When the mixture reaches a velvety consistency, you will notice it flows like thick sauce and the color evens out. Continuously stirring helps incorporate the peanut butter into the melted chips fully, which yields a homogeneous binder for the bars. If you stop stirring the mixture can cling to the pan bottom and overcook, creating a burned taste that is hard to mask. Use a rubber spatula to scrape the sides and keep the texture even.
- Spread the mixture in the pan evenly. Sprinkle the top with candy corn and 1/2 cup of peanuts.: As soon as the mixture is smooth, take the saucepan off the burner to prevent carryover heat from breaking the emulsion. The residual warmth will still allow easy stirring while you add other ingredients. A frequent error is leaving it on heat too long which can over soften the marshmallows or make the mixture too thin, so step away quickly once smoothness is achieved.
- Chill the bars for 2 hours in the refrigerator, then slice and enjoy!: When you fold in the peanuts and mini marshmallows the texture shifts immediately, becoming studded and slightly springy. Stir until the marshmallows are fully coated, which prevents large clumps and ensures even distribution throughout the slab. The mixture will be sticky and spreadable, and you should pause if the marshmallows start melting into strings, which indicates the mixture is too hot. A tip is to let the pan cool for 30 to 60 seconds before adding them to maintain structure.
- Stir until the marshmallows are fully coated with the peanut butter mixture: Fully coated marshmallows look glossy and translucent at the edges rather than powdery or dry. This coating step is crucial because uncoated marshmallows can clump when pressed, creating uneven bites. Use a folding motion to keep air pockets and avoid overworking the mixture, which can deflate the marshmallows and change the final texture.
- Spread the mixture in the pan evenly: As you press the warm mixture into the lined pan, work steadily to create a uniform thickness so every square yields the same balance of goo and crunch. Press with a greased spatula or back of a spoon to smooth the top, aiming for compactness without flattening the marshmallow chew completely. If you press too firmly the bars will be overly dense and lose their tender chew, so apply steady, moderate pressure instead.
- Sprinkle the top with candy corn and 1/2 cup of peanuts: Scatter the candy corn and the remaining peanuts immediately after spreading while the mixture is still warm enough to anchor the pieces. The candy corn will sink slightly and adhere, creating a festive top layer. If you wait too long the candy will sit loosely on the surface and fall off when slicing, so this is a timing detail that matters for presentation.
- Chill the bars for 2 hours in the refrigerator: Cooling firms the mixture and allows clean cuts, and during chilling the fats solidify which gives structure to each bar. After about 2 hours the slab should feel set to the touch and cool throughout. A common pitfall is slicing too early which yields smudged squares and sticky fingers, so be patient and let the refrigerator do the work.
- Slice and enjoy: Use a sharp knife, warmed briefly under hot water and dried, to make clean slices through the set slab. Wiping the blade between cuts prevents ragged edges and clumping on the knife. Serve the bars chilled or at cool room temperature for the best texture; leaving them out too long can soften them and make them less portable.
Notes
- Microwave melting option: If you want a faster melting route, combine the peanut butter chips, butterscotch chips, and peanut butter in a microwave safe bowl and heat in 30 second intervals, stirring between each burst until fully smooth. This method reduces stovetop watching but requires short bursts to avoid overheating and seizing the chips.
- Lightly toast the peanuts: Toasting the peanuts for a few minutes in a dry skillet will deepen their flavor and add aromatic notes, but do not walk away because they can go from golden to burnt quickly. Let them cool before folding in to preserve crunch.
- Use smooth or crunchy peanut butter: Smooth peanut butter yields a creamier bar, while crunchy adds extra texture. Choose based on your preference, remembering that chunky will make the bars more rustic and textured.
- Chill for easier slicing: For clean slices, chill the slab until firm then warm the knife slightly under hot water and dry before cutting. This prevents tearing and helps you produce neat squares for sharing or packaging.
- Pressing technique: Use a piece of parchment between your hands or a spatula and press gently to compact the bars evenly, rather than pounding which flattens the marshmallow chew. Even pressure creates consistent bite across the tray.