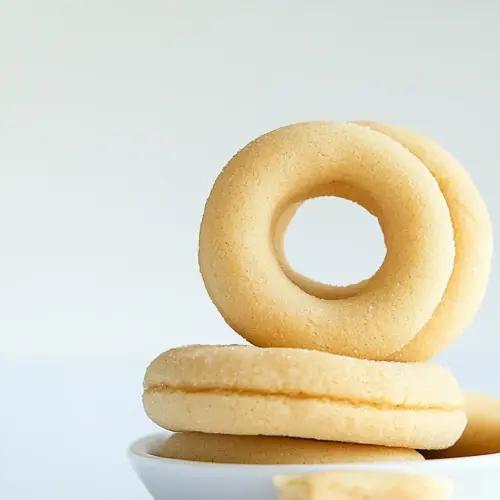
Butter Ring Cookies
Butter Ring Cookies are tender, buttery cookies with a delicate ring shape and a crisp edge. This easy, classic cookie recipe yields a melt in your mouth texture with simple pantry ingredients, perfect for afternoon tea or gifting. Quick to mix and reliable to bake, they are an ideal easy weekend bake that tastes like home.
Equipment
- Stand mixer
- Paddle attachment
- Mixing Bowl
- Plastic Wrap
- Baking Sheets
- Parchment Paper
- Rolling Pin
- Flower-shaped cutter
- 1-inch round cutter
- Wire Rack
Ingredients
- 1/2 cup (113 grams) unsalted butter, softened Creamed to incorporate air and create a tender, rich base for the dough; softened butter helps bind ingredients and yields a soft crumb when baked.
- 1/2 cup (100 grams) granulated sugar Whisked in to provide sweetness and help with creaming; granulated sugar also contributes to browning and structure through caramelization during baking.
- 1/2 teaspoon (1.5 grams) kosher salt Sprinkled to balance sweetness and enhance overall flavor; kosher salt strengthens gluten slightly and brings out the butter and vanilla notes.
- 1 large egg (50 grams), room temperature Beaten to add moisture and richness while aiding in emulsification; a room-temperature large egg helps create structure and contributes to tenderness.
- 1/2 teaspoon (2 grams) vanilla extract Stirred in to add aromatic sweetness and depth; vanilla extract rounds flavors and enhances the perception of sweetness in the cookies.
- 2 cups (250 grams) all-purpose flour, plus more for dusting Folded in as the main dry structure to form the dough; all-purpose flour provides necessary gluten and texture, with extra used for dusting to prevent sticking.
Instructions
- In the bowl of a stand mixer fitted with the paddle attachment, beat butter, sugar, and salt at medium speed until smooth and creamy, 1 to 2 minutes, stopping to scrape sides of bowl. Beat in egg and vanilla until combined, stopping to scrape sides of bowl. With mixer on low speed, gradually add flour, beating just until combined.: When you begin, you will hear a gentle whir and see the butter and granulated sugar transform into a pale, slightly fluffy mixture, releasing a soft, sweet butter aroma that signals proper creaming. The texture should appear smooth and hold slight peaks when lifted, not greasy or separated. I scrape the bowl once or twice so no pockets of unmixed butter remain, which keeps the dough uniform. This creaming step adds air that lightens the final crumb, so skimping on it can yield a denser cookie. A common mistake is using butter that is either too warm or too cold; aim for a cool room temperature for the best result.
- Turn out dough onto a sheet of plastic wrap, and shape dough into a disk. Wrap in plastic wrap, and refrigerate until firm, at least 1 hour.: As the egg and vanilla extract incorporate, the mixture will become smoother and the aroma will deepen with that familiar warm, fragrant note. The mixture should look glossy and cohesive, not curdled. If separation occurs, pause and scrape the bowl thoroughly, then beat at low speed until combined. This binding step ensures the dough will hold together; rushing it may leave streaks of egg or uneven texture. A frequent oversight is adding the egg straight from the fridge, which can cause the butter to seize; bring the egg to room temperature first.
- Preheat oven to 350°F (180°C). Line baking sheets with parchment paper.: When you add the all purpose flour slowly, you will notice the mixture shift from glossy to a soft, workable dough with faint seams where the paddle moves. The sound will quiet as the dough thickens, and the bowl will show a clean path where the paddle has passed. Stop mixing as soon as you no longer see streaks of flour, because overmixing develops the gluten and can make the cookies tough. One common problem is rushing and adding all the flour at once, which can create lumps and uneven hydration; take your time, and mix gently.
- On a lightly floured surface, roll dough to 3/16-inch thickness. Using a 2 1/4-inch flower-shaped cutter, cut dough. Using a 1-inch round cutter, cut out center from flower shapes. Place cookies 1 inch apart on prepared pans. Reroll scraps, and cut to use all dough.: When you turn the dough out, you'll notice its pliable, slightly tacky surface. I press it lightly into a uniform disk so it chills evenly, smoothing the top to eliminate cracks that could dry out during refrigeration. The dough should feel cool to the touch; if it seems overly warm, wrap and chill a bit longer. Proper shaping helps rolling go smoothly later, preventing sections that are crumbly or sticky. A typical misstep is wrapping the dough loosely which allows drying; make sure the wrap is snug.
- Bake until edges are lightly browned, 18 to 22 minutes. Let cool on pans for 10 minutes. Remove from pans, and let cool completely on wire racks. Store in an airtight container for up to 1 week.: As the dough cools, the butter solidifies, and the texture firms up, making it much easier to roll to a consistent thickness. You will notice a subtle calming of the dough's aroma as it chills. This resting period also lets the flour hydrate slightly for a more tender bake. If you skip chilling, the dough may spread and lose shape in the oven, so patience pays off. Avoid refrigerating much longer than needed without checking, because overly cold dough can be hard to roll; let it sit a few minutes at room temperature if it becomes too stiff.
- Preheat oven to 350°F (180°C): When the oven reaches 350°F , you'll feel confident that the first pan will bake evenly. I place racks in the middle of the oven for the most consistent heat and allow the oven to fully reach temperature before baking. A properly preheated oven produces the right rise and edge coloring; without it, cookies can spread irregularly or bake too slowly. A common error is placing pans in while the oven is still warming, which affects texture and timing.
- Line baking sheets with parchment paper: Lining pans with parchment prevents sticking and promotes even browning, giving a clean underside to each cookie. The paper muffles direct contact and reduces the chance of overbrowned bottoms, and it makes cleanup simple. When the cookies are done, they lift easily without breaking. Using unlined pans or greasing too heavily can change how the heat transfers, so I stick with parchment for reliability.
- On a lightly floured surface, roll dough to 3/16-inch thickness: Rolling to about 3/16-inch yields cookies that balance tenderness and structure. As you roll, you will feel the dough become smooth and uniform, and the surface will have a soft matte finish with a dusting of flour. Aim for consistent pressure so each cookie bakes the same, and rotate the dough occasionally to avoid sticking. A common pitfall is pressing too hard, which compresses the dough and leads to denser cookies, so keep the motion even and confident.
- Using a 2 1/4-inch flower-shaped cutter, cut dough: When you press the cutter, you should hear a subtle give and see a clean edge form. The floral shape gives a pretty silhouette, and a steady lift prevents drag marks. After cutting, gently transfer the shapes to the prepared sheet, keeping margins between cookies to allow for slight expansion. If edges are ragged, re roll scraps to avoid wasted dough. Avoid twisting the cutter when you press, as this can seal the base and distort the shape.
- Using a 1-inch round cutter, cut out center from flower shapes: Removing the center creates the charming ring appearance and lets the edges bake crisp while the interior remains tender. The small circles should pop out cleanly, leaving a neat hole. If the cutter sticks, dust it lightly with flour and press straight down and up. A frequent mistake is using a dull or sticky cutter that pulls the dough, so keep the cutter clean and dry.
- Place cookies 1 inch apart on prepared pans: Spacing the cookies about 1 inch apart lets them expand without merging, and it ensures even air circulation so edges brown uniformly. When arranged, the pan will still look airy, not crowded. Overcrowding causes uneven baking and soft centers, so use multiple pans if needed. Also rotate pans halfway through the bake if your oven has hot spots.
- Reroll scraps, and cut to use all dough: Gathering and rerolling scraps yields more cookies, but you will notice the dough becomes slightly less tender with each handling. I try to minimize reworking to preserve texture, but this step is useful for efficiency. Chill briefly if the scraps become too warm, since warm dough can be sticky and hard to cut. Avoid overworking the dough, or the cookies may become tougher.
- Bake until edges are lightly browned, 18 to 22 minutes: As the cookies bake, the kitchen fills with a warm, buttery scent and the edges will take on a pale golden tone. The centers should set while remaining tender, and you may see a faint crackle on top. Oven times vary, so watch for light browning rather than relying solely on the clock. A common mistake is overbaking; pull them when edges show color because carryover heat on the pan continues to finish the bake.
- Let cool on pans for 10 minutes: Letting cookies rest on the warm pan for about 10 minutes firms them slightly and prevents breakage when you transfer them. During this time, the aroma settles and the structure stabilizes. If you try to move them too soon, they can deform; if you leave them too long, they may become too soft on the pan and stick, so aim for that balanced window.
- Remove from pans, and let cool completely on wire racks: When the cookies are cool on a wire rack , air circulates underneath and they retain a crisp edge with a tender interior. Cooling completely avoids condensation in storage, which would soften them. Arrange them in a single layer until they reach room temperature to keep edges crisp. Storing while warm is a common reason cookies turn soggy, so be patient here.
- Store in an airtight container for up to 1 week: Proper storage preserves texture and flavor, and an airtight container prevents staleness. I layer parchment between cookies if stacking to avoid sticking. For the best experience, bring them to room temperature before serving, as chilled butter can mute the flavor. A frequent oversight is leaving cookies exposed to air, which accelerates drying and flavor loss.
Notes
- Brush with glaze Add a thin vanilla glaze after cooling for a touch of sweetness and shine that makes cookies look gift ready.
- Chill longer Refrigerate the dough overnight for cleaner cuts and a slightly deeper flavor as the flour fully hydrates.
- Use different cutters Swap the flower and circle for stars or hearts to match a season or celebration while keeping the same method.
- Dust with powdered sugar Lightly dust cooled cookies with powdered sugar for an elegant, snowy finish without changing texture.
- Double the recipe Make a double batch and freeze half of the dough disk for later, so you can bake fresh cookies on demand.