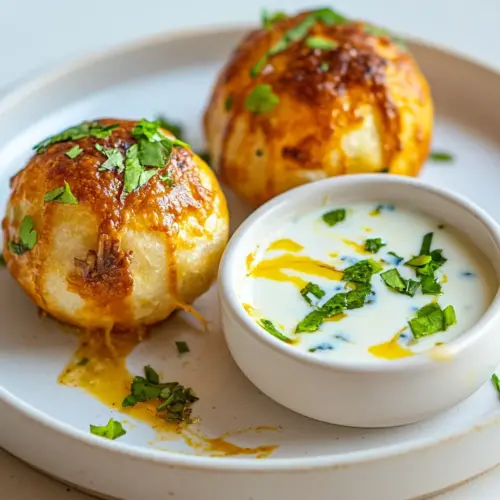
Buffalo Chicken Pizza Bites
Buffalo Chicken Pizza Bites are crispy golden pockets filled with spicy, creamy chicken and melty mozzarella cheese served with a tangy blue cheese dip. These easy, crowd pleasing bites deliver savory, spicy, and creamy textures, perfect for an easy weeknight dinner or game day snack. Make them for parties when you want simple prep and big flavor.
Equipment
- Oven
- Mixing Bowl
- Baking Tray
- Microwave
Ingredients
- 1 cup chopped cooked chicken Provide chopped cooked chicken to supply lean protein and hearty texture, forming the savory base for each pizza bite. Ensure pieces are small and moist so they incorporate well with sauces and toppings without drying out.
- 1/3 cup melted butter Add melted butter to enrich the buffalo sauce with a silky mouthfeel and to help carry flavors. Melt gently to avoid burning and whisk with hot sauce for a balanced, glossy coating.
- 1/3 cup hot sauce Combine hot sauce to deliver the signature tangy heat of buffalo flavor and to energize the chicken filling. Choose a straightforward cayenne-based sauce for authentic spice and consistent heat level.
- 2 teaspoons worcestershire sauce Include Worcestershire sauce to contribute umami depth and a subtle savory complexity that complements the hot sauce. Measure carefully since its concentrated flavor elevates the overall sauce profile.
- 1/4 teaspoon granular garlic Sprinkle granular garlic to introduce a sharp, aromatic garlic note and enhance savory layers without adding moisture. Use a light hand to prevent overpowering other delicate flavors.
- 1/4 cup spring onion/green onion, chopped Fold in chopped spring onion/green onion to add bright, vegetal crunch and a mild oniony bite for contrast against creamy and spicy components. Scatter evenly so each bite gains a fresh pop of flavor and color.
- 1/2 cup shredded mozzarella cheese Mix shredded mozzarella cheese to provide gooey meltiness and mild creamy flavor that binds the filling together when baked. Distribute so cheese melts uniformly, creating pleasant stretch in every bite.
- 1 1/2 lb pizza dough Stretch pizza dough to form the handheld vessel that holds filling and crisps to golden brown when baked. Handle gently to maintain lightness while sealing edges securely to prevent leaks.
- 2 tablespoons olive oil Brush with olive oil to encourage an even browning and add a subtle fruity richness to the dough exterior. Apply thinly for a crisp crust without making the dough greasy.
- 1 cup light sour cream Spoon light sour cream to contribute cool creaminess and a slight tang that tempers spicy heat when served or used as a finishing dollop. Keep chilled until serving to maximize contrast with hot bites.
- 1 cup crumbled blue cheese Crumble blue cheese to impart pungent, salty tang and rich flavor contrast that pairs traditionally with buffalo sauce. Sprinkle sparingly on top or inside to ensure each bite has a balanced hit of sharpness.
Instructions
- Pre-heat the oven to 220ºC/425ºF.: A warm, properly heated oven gives you immediate browning and an evenly baked crust; you should feel a dry heat when you open the oven and see the racks glowing faintly. This high temperature encourages the outside of the dough to crisp while the inside cooks through, producing that desirable contrast between a golden shell and a tender filling. A common mistake is not letting the oven fully reach temperature, which can lead to pale crusts and underbaked centers. If your oven runs cool, allow a few extra minutes for preheating so the first tray benefits from steady heat.
- Add the chicken, melted butter, hot sauce, Worcestershire sauce, granular garlic, green onion, and mozzarella together in a bowl. Mix together.: The bowl will smell bright and tangy as the hot sauce and butter combine with the meat, releasing a zesty steam. Mixing by hand or with a spatula helps you feel if the texture is cohesive enough to hold in the dough, and you'll see glossy strands of mozzarella cheese throughout the chicken . This step matters because an evenly blended filling ensures each bite is balanced. Avoid overmixing to prevent the filling from becoming too dense; if it seems dry, a teaspoon of melted butter can restore moisture.
- Pull off a golf ball sized piece of dough and flatten it gently.: When you flatten the piece, the dough should feel springy and slightly tacky, not sticky. Light pressure with your fingers creates a pocket that will cradle the filling without tearing. The tactile cue here is important, because overly thin dough will leak during baking, while dough that is too thick leads to a heavy chew. A common error is squeezing the dough too hard, which removes needed air pockets; keep your touch gentle so the dough retains some loft.
- Add a heaped teaspoon of the chicken mixture to the dough and pinch it together to create a ball.: As you enclose the filling, you should notice the warmth from the filling and the slight resistance as the dough seals. Pinch firmly so the seams are sealed and the filling is contained, otherwise juices can escape in the oven. The goal is a smooth, even surface with no gaps. If the filling is too loose to hold together, let it chill briefly so it firms up, preventing leaks and ensuring an intact bite.
- Place on a lined baking tray.: Lining the tray makes cleanup simple and helps the bottoms brown evenly without sticking, and you will hear a faint thud as each ball sets in place. Leave a little space so air circulates and the bites don't fuse together. The visual cue to watch for is uniform spacing and even sizing; mismatched sizes bake at different rates. Avoid crowding the tray because that can produce uneven browning and a softer exterior on the crowded pieces.
- Brush the top of each bite with a little olive oil and bake for 20 minutes until golden brown.: The surface will take on a glossy sheen when brushed with olive oil , and soon after going in the oven you will smell toasty, nutty notes. As they bake, check for a golden brown hue and a faint crisp at the edges, which signals readiness. This step locks in moisture and promotes caramelization for deeper flavor. A frequent slip is removing them too early; underbaked dough will feel doughy and pale, so wait for that warm color and a slight firmness when tapped.
- Gently heat the sour cream in the microwave. You want it warm but not hot.: Warm sour cream becomes silkier and blends easily with crumbled cheese, but overheating can cause separation. Heat in short 10 second bursts, stirring between each burst, until the sour cream is pleasantly warm to the touch and emits a faint dairy aroma. The reason for gentle warming is to preserve the creamy texture so it emulsifies with the blue cheese . A common mistake is microwaving too long, resulting in a split dip; if this happens, whisk in a teaspoon of cool sour cream to bring it back together.
- Add the blue cheese and stir well until melted and combined.: As the blue cheese meets the warm sour cream , it softens and releases its tangy aroma, creating a velvety, slightly chunky dip. Stir until ribbons of cheese are fully incorporated and you notice a consistent pale color with flecks of blue. This combination tempers the heat from the bites and adds a sharp, savory counterpoint. If the mixture seems too thick, a teaspoon of warm water can smooth it, but take care not to water it down excessively.
- Serve with a garnish of chopped green onion/parsley.: The finishing scatter of chopped green onion or parsley adds a fresh aroma and a pop of color against the golden bites. You will hear the soft clink of serving dishes as you arrange the tray, and the contrast between warm bites and cool dip makes a pleasing sensory pairing. Garnish just before serving so the herbs stay bright. Avoid adding the garnish too early, because prolonged heat dulls the vibrant green and softens the texture.
Notes
- Make ahead: Assemble the bites and refrigerate on the tray for up to 24 hours, then bake straight from the fridge so you can serve hot bites with minimal last minute work.
- Size consistency: Keep each dough piece roughly the size of a golf ball so they bake evenly, small variations can lead to uneven doneness.
- Dip texture: Warm the sour cream gradually and stir in the blue cheese slowly to maintain a smooth, slightly chunky dip rather than a separated sauce.
- Storage: Store cooled bites in an airtight container in the refrigerator for up to three days, and reheat in a moderate oven to regain crispness.
- Serving tip: Arrange bites on a warmed platter with the dip in a shallow bowl so guests can easily grab and dunk without making a mess.