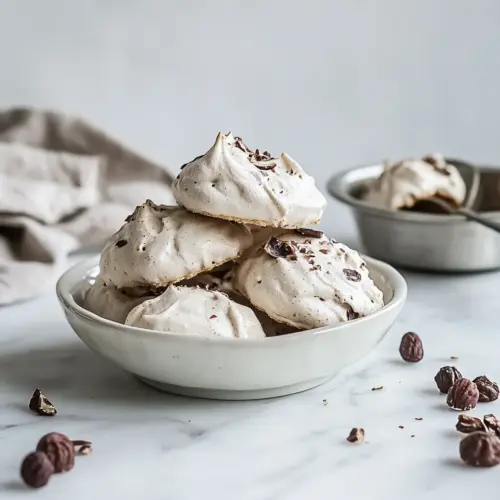
Brutti ma buoni
Brutti ma buoni are rustic Italian hazelnut meringue cookies with a crisp exterior and chewy nutty interior. Light, airy egg whites meet toasted hazelnuts and a whisper of cocoa powder for deep flavor. These easy, charming cookies are perfect for gifting or a cozy tea, and their minimal ingredients mean quick, satisfying baking every time.
Equipment
- Electric beater
- Baking Sheet
- Baking paper
- Wire Rack
Ingredients
- 2 egg whites Whip to soft peaks to provide structure and lightness to the meringue base; egg whites trap air when beaten and set during baking, creating the chewy interior and crisp exterior characteristic of brutti ma buoni. Handle gently to preserve volume and fold in other components without deflating the foam, ensuring an even texture throughout the cookies.
- 150 g castor sugar Sweeten and stabilize the beaten egg whites while contributing to a glossy meringue; castor sugar dissolves readily for a fine, smooth texture and helps create the caramelized exterior during baking. Adjust quantity carefully to maintain proper balance between sweetness and chewiness in the finished cookies.
- 125 g toasted hazelnuts chopped - or 80 g hazelnut flour and 45 g hazelnuts Provide nutty flavor and crunchy texture; chopped toasted hazelnuts (or a combination of hazelnut flour and chopped hazelnuts) deliver aromatic depth and body to the cookies. Toasting enhances natural oils and intensifies flavor, while chopping or milling controls the distribution of nut particles for desired chew and mouthfeel.
- 2 tbsp cocoa powder Darken flavor and add subtle cocoa bitterness to balance sweetness; cocoa powder contributes chocolatey notes and color without adding fat, complementing the hazelnut profile. Use sifted powder to prevent lumps and ensure even incorporation into the meringue-nut mixture.
Instructions
- Preheat oven to 150 C.: Warm oven air at 150 C creates an even, gentle bake that dries the cookies slowly, producing a crisp exterior and tender interior. You'll notice a faint warm, nutty aroma as the oven reaches temperature, which helps set expectations. If your oven runs hot, rotate a tray halfway through the bake to avoid uneven browning. A common pitfall is starting with an oven that is too hot, which can brown the outside before the insides set.
- Line a large baking sheet with baking paper.: Lining the sheet with baking paper prevents sticking and encourages even bottoms, so the cookies don't flatten into the tray. The paper also makes cleanup simple and allows you to slide the entire sheet onto a cooling rack. Press the paper into the corners so it lies flat, otherwise cookies can spread unevenly where the paper creases. Avoid greasing the paper, which can cause excessive spreading.
- Beat the egg whites with an electric beater until stiff peaks. Slowly add the castor sugar and carry on beating until the mix is glossy. Sift the cocoa powder over the meringue and gently fold the hazelnuts through.: As you whip the egg whites , watch them go from foamy to glossy peaks that stand upright, and listen for the subtle change in sound as the beater struggles less through the froth. Reaching stiff peaks ensures the structure to support the nut mixture. If there is any yolk or oil in the bowl, the whites will fail to whip, so separate carefully. Overbeating can make the whites dry and prone to collapsing, so stop when peaks hold their shape.
- Drop spoonfuls on a baking tray allowing some space between them and bake for spreading. You can go with smaller or slightly bigger cookies but make a tablespoon I would say.: Adding castor sugar gradually dissolves it into the foam, producing a shiny, stable meringue; you should see the mixture reflect light like satin. This glossy stage signals that sugar has integrated and the mixture is ready to carry the nuts. If the sugar is added too fast, the foam can deflate or remain grainy, so pour slowly while the mixer runs on medium. A grainy texture usually means the sugar did not fully dissolve, which can affect chewiness.
- Bake for 25 - 30 minutes until firm and slightly golden.: Sifting the cocoa powder ensures it blends smoothly, and gentle folding of the hazelnuts preserves the air bubbles you worked for. You should move the spatula with sweeping motions, turning the bowl while lifting the mixture so you keep volume. The fold should be deliberate but light, keeping many air pockets intact for a tender center. Overworking at this point deflates the meringue and yields denser cookies, so stop folding once streaks disappear.
- Cool on a wire rack before eating (they will crisp up as they cool). Store in an airtight container.: As you drop the batter, the dollops should hold shape but have a slightly rippled surface, hinting at the rustic look of Brutti ma buoni . Leave room because they will spread slightly; spacing also promotes even airflow and uniform edges. If you make them too close, cookies may merge and bake unevenly. Use a consistent spoon size so they finish at the same time, and dust the tray lightly if you see sticking.
- You can go with smaller or slightly bigger cookies but make a tablespoon I would say.: Choosing a size affects texture, smaller cookies tend to crisp through, larger ones keep a chewier center. When I aim for a balance, a tablespoon creates that charming contrast. Keep in mind that larger cookies will need a touch more baking time, and uniformity ensures even baking. Beware of wildly different sizes on one tray, as smaller pieces can overbake while larger ones remain underdone.
- Bake for 25 to 30 minutes until firm and slightly golden.: During baking you will notice a sweet, nutty scent and the tops developing small cracks and a hint of gold; that is the right time to pull them. The edges should feel set and the tops slightly springy. If you bake too briefly they remain too soft and may collapse when cooled, whereas overbaking turns them overly dry and hard. Check at the earlier end if your oven runs hot, and trust the color and firmness rather than the clock alone.
- Cool on a wire rack before eating (they will crisp up as they cool).: Cooling on a rack lets air circulate around each cookie so the exterior crisps while the center sets; you will hear a faint hardening as they cool. This stage finishes the texture transformation, and it is tempting to nibble right away, but patience yields the ideal bite. If cooled on a solid surface, bottoms can trap steam and go soft, so avoid that. Do not store them until fully cool or they will sweat in the container.
- Store in an airtight container.: Once completely cool, an airtight container preserves the crispness and prevents the hazelnuts from going stale, keeping cookies fresh for days. Layer parchment between layers to protect their shape and texture. Moist environments will soften them, so keep the container in a cool, dry spot. Avoid refrigerating, which can introduce moisture and change the texture.
Notes
- Separate eggs carefully, ensuring no yolk or grease contacts the egg whites which prevents proper whipping and volume loss.
- Add sugar slowly, pouring the castor sugar in increments so it dissolves fully and the meringue becomes glossy rather than grainy.
- Toast hazelnuts evenly, tossing them halfway through to ensure uniform color and flavor without burning, which can introduce bitterness.
- Fold gently, using a spatula to turn the bowl and preserve as much air as possible, since overmixing will deflate the meringue.
- Watch your oven, since temperatures vary, and rely on visual cues like slight golden edges and firm tops rather than just the timer.
- Cool on a rack, never on a flat tray, so air circulates and the cookies crisp properly as they reach room temperature.