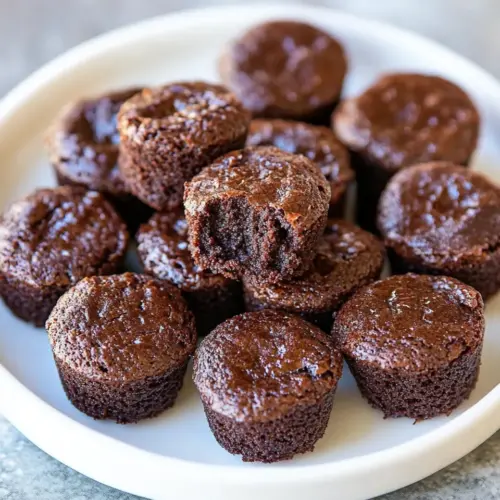
Brownie Bites
Brownie Bites deliver fudgy, bite sized chocolate bliss with a rich, glossy interior and melty mini chips. This easy, small batch dessert is ideal for gatherings, lunchboxes, or a quick sweet fix. With minimal ingredients and simple technique, it is an approachable, crowd pleasing treat that invites repeat baking and sharing.
Equipment
- Mini Muffin Pan
- Microwave safe mixing bowl
- Wire whisk
- Spatula
- Wire Rack
- Cookie Scoop
Ingredients
- 9 tbsp unsalted butter, cut into 1 Tbsp pieces Melted and rich, supplies the fat that creates fudgy texture while carrying flavor; cut into pieces to melt evenly and ensure consistent incorporation into the batter.
- 1 cup (200 g) granulated sugar Sweet and crystalline, provides structure by dissolving into the batter and balancing bitterness from cocoa while encouraging a glossy top when baked.
- 1/4 tsp (heaping) salt Briny and sharp in small measure, enhances overall flavor depth and balances sweetness; the heaping 1/4 teaspoon ensures the chocolate notes are more pronounced.
- 2 large eggs Beaten for binding and lift, eggs add moisture, structure, and some leavening, helping the brownie bites set with a tender crumb.
- 1 1/2 tsp vanilla extract Fragrant and warm, contributes aromatic sweetness that brightens chocolate flavors and rounds out the overall taste profile of the batter.
- 2/3 cup (86 g) all-purpose flour (spoon and level to measure) Starchy and structural, adds body and firmness to the brownies while absorbing moisture; spoon-and-level measurement ensures accurate texture and prevents dryness.
- 6 tbsp (36 g) Dutch process cocoa powder, plus 2 tsp for dusting pan Deep and chocolatey, Dutch-process cocoa imparts intense flavor and darker color while contributing to brownie richness; the extra two teaspoons are reserved to dust the pan for a nonstick, flavored coating.
- 1/2 cup (85 g) mini semi sweet chocolate chips Small and melty, mini semi-sweet chips provide pockets of concentrated chocolate throughout the bites, adding texture contrast and bursts of sweetness when baked.
Instructions
- Preheat oven to 325 degrees.: The oven should be fully heated so the batter begins setting right away, creating defined edges and fudgy centers. You will notice the oven light flicker off when it reaches temperature, and a stable oven often produces more even rise across the tray. A common mistake is placing the pan in before the oven reaches temperature, which can cause uneven baking and a gummy center. If your oven runs hot or cold, consider using an oven thermometer to confirm exact temperature, because a few degrees can change the bake time.
- Spray a 24 cup mini muffin pan with non-stick cooking spray and dust with 2 tsp cocoa powder. Shake to coat evenly and set aside.: Dusting with cocoa powder after spraying prevents sticking while keeping the exterior purely chocolate. The fine cocoa clings to the spray and creates a light coating that releases easily when cooled. If you skip the cocoa and use flour, you may get white residue and altered flavor. Shake out excess cocoa so you do not overpower the surface, and tap the pan to distribute the powder evenly.
- Place butter in a large microwave safe mixing bowl. Heat until just melted in microwave. Let cool slightly.: Melting the unsalted butter gently in the microwave allows for quick butter preparation with minimal tools. I use short bursts of 10 seconds, stirring between pulses, to prevent scorching. Letting the butter cool slightly avoids cooking the eggs when they are added. Overheating the butter can fry the eggs when combined, so patience here keeps the batter smooth.
- Whisk in sugar and salt, then whisk in eggs and vanilla extract. Blend well.: The butter should be liquefied but not boiling, with no hot spots. You can stir to finish melting residual pieces so the temperature evens out. If the butter is too hot, wait until it cools to a warm state before adding other ingredients, because hot butter can scramble the eggs and make the batter grainy. Touch the bowl carefully to gauge warmth, and give it a stir to homogenize the temperature.
- Add flour and cocoa powder and stir mixture until combined, while scraping sides and bottom of bowl.: Cooling the melted butter a little protects the integrity of the eggs when they are whisked in. You want it warm enough to incorporate smoothly, but not so hot it cooks the eggs. A roughly two minute pause on the counter usually suffices. Rushing this step often results in tiny cooked egg flecks in the batter, so take the few minutes to be safe.
- Stir in chocolate chips.: Incorporating the granulated sugar and salt into warm butter helps dissolve some of the sugar and create a glossy base. Whisk briskly until slightly grainy smoothness disappears, then the mixture takes on a more cohesive sheen. If the sugar stays undissolved, you may notice a slightly gritty texture in the finished bites. Use a wire whisk to speed dissolution and ensure even mixing.
- Scoop batter out about 1.5 Tbsp at a time (I use a #40 scoop) and drop into prepared muffin pan filling nearly full.: Adding the eggs and vanilla extract next emulsifies the batter, building structure while retaining moisture. Whisk until completely combined, and pay attention to the texture changing from glossy to more cohesive and slightly thickened. A common issue is under mixing, leaving streaks of egg, or over mixing, which can incorporate too much air and change the dense fudgy texture. Aim for a smooth, uniform batter.
- Bake in preheated oven until just set, about 15 to 17 minutes (you can test with a toothpick in center, it should be free of batter).: Blending here ensures the eggs are evenly distributed and the batter has a consistent texture, which translates to uniform baking across all cups. I scrape the sides and bottom while blending to capture any unmixed bits of butter or sugar. If you skip scraping, you may get pockets of uncombined ingredients that bake oddly, so be thorough but gentle.
- Let cool in pan 15 minutes before removing and transferring brownie bites to a wire rack to finish cooling.: Folding in the all purpose flour and cocoa powder gently prevents overdeveloping gluten, which keeps the bites fudgy rather than cakey. You should see a homogeneous deep brown batter with no streaks of dry powder. Over stirring can make the texture lighter and drier, so stop once the ingredients disappear into the batter. Use a spatula to scrape the bowl so nothing is left clinging to the sides.
- If desired top with frosting, my favorite is to top it with a small swirl of cream cheese frosting (recipe listed in notes below).: Folding the mini semi sweet chocolate chips into the batter distributes melty pockets of chocolate throughout each bite. The chips will soften during baking and create little glossy pockets. If you use larger chips they may not distribute as evenly and you will get larger blobs of chocolate rather than integrated fudginess. Ensure even distribution so every bite has chocolate in it.
- Scoop batter out about 1.5 Tbsp at a time (I use a #40 scoop) and drop into prepared muffin pan filling nearly full: Using a consistent scoop size produces uniformly baked bites that all finish at the same time, and filling nearly full yields slightly domed tops with fudgy centers. You will hear a quiet thud as the batter drops into the cups, and the surface will look glossy and dense. Avoid overfilling as overflow can cause sticking and uneven browning. Clean the edges of the pan before baking to make removal cleaner.
- Bake in preheated oven until just set, about 15 to 17 minutes (you can test with a toothpick in center, it should be free of batter): As they bake you will smell rich chocolate wafting through the kitchen and see edges firm up while centers remain glossy and slightly jiggly. A toothpick should come out clean of wet batter, though a little moist crumb is fine for fudginess. Baking too long will dry them out, so watch closely in the final minutes and rotate the pan if your oven heats unevenly. If the tops crack a bit, that is normal and indicates a chewy edge and tender center.
- Let cool in pan 15 minutes before removing and transferring brownie bites to a wire rack to finish cooling: Cooling in the pan allows the bites to set so they hold shape when removed, and transferring to a wire rack ensures air circulates and prevents condensation. You will feel the residual warmth and smell intensified chocolate as they cool. Trying to remove them too soon can cause them to break apart, so be patient for the fifteen minute rest.
- If desired top with frosting, my favorite is to top it with a small swirl of cream cheese frosting (recipe listed in notes below): A small swirl of cream cheese frosting adds tang and creaminess that contrasts the deep chocolate, elevating the bites for special occasions. I like piping a modest rosette so the frosting complements rather than overwhelms the fudgy base. Avoid adding frosting while the bites are warm or it will melt and spread, losing shape. Keep the topping light to preserve the bite sized balance.
Notes
- Use different chocolate sizes if you want more obvious pockets of chocolate, experiment with smaller or larger chips, but note that minis melt more uniformly for a fudgier texture.
- Swap cocoa types try natural cocoa for brighter acidity or Dutch process for mellow depth, adjusting a touch of salt if you change the cocoa to maintain balance.
- Add a sprinkle topping finish warm bites with flaky sea salt or a dusting of extra cocoa powder to enhance contrast and appearance before serving.
- Try an alternative frosting if you want a different flavor profile, use a small pipe of cream cheese frosting for tang or a chocolate ganache dollop for extra richness, applied only once bites are fully cooled.
- Freeze for later cool completely, then freeze in a single layer and transfer to a sealed container; thaw at room temperature for about 20 minutes or warm briefly to regain that freshly baked feel.