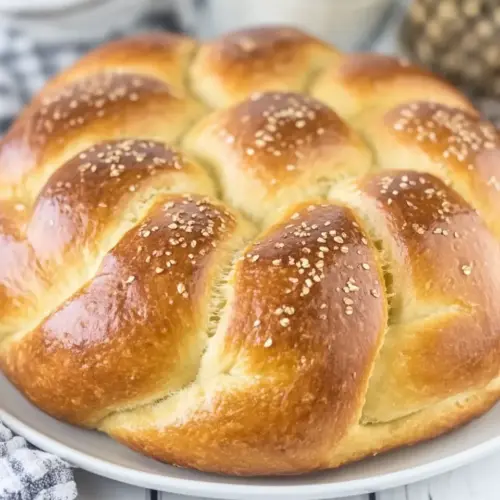
Braided Easter Bread
Braided Easter Bread is a soft, enriched loaf with a glossy crust and subtle vanilla aroma. This easy to follow recipe produces a tender crumb, lightly sweet flavor, and a beautiful braided ring perfect for holiday brunch or weekend baking. Make it for family gatherings because its warm, buttery scent and golden finish invite everyone to the table.
Equipment
- Stand mixer
- Whisk attachment
- Dough Hook
- Mixing Bowl
- Baking Sheet
- Parchment Paper
- Oven
Ingredients
- 1/2 cup sugar Sweeten the dough and feed the yeast; sugar promotes browning and tender crumb while balancing flavor in enriched breads.
- 2 packages instant yeast (I use Red Star Platinum yeast) Activate and leaven the dough quickly; instant yeast reliably creates rise and light texture without prior proofing.
- 1 tablespoon vanilla Provide aromatic sweetness and depth; vanilla enhances the bread's flavor profile and complements the enriched egg dough.
- 1 teaspoon salt Season the dough and regulate yeast activity; salt strengthens gluten structure and balances sweetness for proper taste.
- 6 to 6 1/2 cups all-purpose flour Build the structure and bulk of the dough; all-purpose flour supplies starch and gluten necessary for an elastic, braidable loaf.
- 1 1/2 cup milk Hydrate the dry ingredients and enrich the dough; milk adds fat, proteins, and tenderness while contributing browning.
- 6 tablespoons butter, cubed (plus extra to grease your bowl) Enrich the dough with fat and flavor; butter adds richness, improves softness, and enhances shelf life when cubed for melting.
- 4 eggs, divided (3 for the bread, one for the egg wash) Bind and enrich the dough while aiding structure; eggs contribute moisture, emulsification, and a tender, golden crumb.
- 2 tablespoons water Thin the egg wash and help it spread evenly; water dilutes the beaten egg to achieve a glossy, subtle finish on crust.
- Sanding sugar, optional Add sparkle and crunch to the finished loaf; sanding sugar provides decorative, coarse sweetness that resists melting during baking.
Instructions
- In the bowl of your stand mixer fit with the whisk attachment, mix sugar, yeast, salt, and 2 cups of flour.: Warm, yeasty fragrance will begin to form as these dry elements meet; you will notice the granulated sugar catching the light and the fine dust of flour settling. This step creates a uniform base so the wet ingredients incorporate smoothly; it prevents clumps of yeast that could lead to uneven rises. Avoid adding warm liquids now, because that would cause the yeast to activate prematurely and can lead to inconsistent results.
- In the microwave, heat milk and butter to about 120 degrees (if it gets too hot, just let cool before adding). Add to the dry ingredients and mix until they are incorporated. Add 3 of the eggs and vanilla then beat on high for 2 minutes.: When you pour warm milk and melting butter into the bowl, a comforting steam and rich dairy aroma will rise. This temperature is gentle enough to wake the yeast without killing it, which encourages a steady, even rise. Stir until no dry streaks remain, then stop; overmixing here can make the dough tough. A common mistake is overheating the liquid, which will stop yeast activity, so always test with a thermometer when possible.
- Switch the whisk for the dough hook. Mix in enough remaining flour to form a soft, sticky dough. Knead with the dough hook for about 4-5 minutes or knead by hand for up to 8 minutes.: As the eggs and vanilla blend in, you will see the mixture lighten and become slightly frothy, releasing a warm scent of vanilla . This creates emulsion and helps distribute air pockets that encourage a soft crumb. Be mindful not to beat too long, or the dough can become overly aerated and collapse later during shaping.
- Place dough in a greased bowl, turning once to grease the top. Cover the bowl with plastic wrap and let rise in a warm place (85° is ideal) until doubled, about 45 minutes.: The transition to a dough hook is when the batter gains body; you will hear a low, steady whirr as the hook gathers the mass. Add the remaining flour gradually until the dough clings to the hook but remains slightly tacky to the touch. This stickiness signals the right hydration level for a tender bread. Resist the urge to add all the flour at once, since that can dry the dough and yield a dense loaf.
- Punch down dough. Turn onto a lightly floured surface; divide into thirds (I weighed my pieces on a kitchen scale to divide evenly).: During kneading, you will notice the dough smooth out and become elastic; a windowpane test shows the gluten developing. Proper kneading builds the network that traps gas and creates lift, resulting in an open, tender crumb. If the dough feels too slack, knead a bit longer; if it becomes firm and resistant, you may have overfloured. A typical error is under-kneading, which leads to a heavy texture.
- Roll each portion into a 24-inch long rope. Place ropes side by side on a parchment-lined baking sheet and braid. Bring ends together to form a ring. Pinch ends together to seal.: The first rise begins here; you will feel a warm, doughy scent fill the kitchen as the yeast works. Turning the dough ensures the surface is oiled, preventing a dry skin from forming and allowing an even rise. Cover tightly so the dough does not lose moisture. Leaving the dough uncovered is a frequent misstep that causes a crust to form.
- Cover with a tea towel and let rise in a warm place until doubled, about 20 minutes.: As the dough proofs, it will swell and puff, sounding airy when you press lightly with a fingertip. The rise window is about 45 minutes at a warm temperature; cooler rooms will lengthen this time. You want the dough to spring back slowly when poked, not collapse. Overproofing is a risk, which makes the bread flat once baked, so check visually rather than relying strictly on time.
- Preheat oven to 375°.: Deflating the dough releases large gas pockets and creates a uniform texture. On the floured surface you will feel the dough relax, becoming easier to shape into ropes. Even portions ensure a balanced braid and consistent bake. A common slip is uneven portions, which yields a lop-sided ring.
- In a bowl, whisk the remaining egg and water and carefully brush over the dough.: While rolling, notice the dough stretch and smooth under your palms; the surface should be taut and even. Aim for similar thickness across all ropes so the braid bakes uniformly. If one rope is thinner, it will brown and crisp before the rest finish baking. Work gently to avoid degassing the dough completely.
- Bake 25-30 minutes or until golden brown. (If you'd like, at the halfway point, brush with more glaze to get any areas that have risen up from the heat).: As you braid, the ropes will spring back slightly, creating defined ridges that brown beautifully. Forming a ring concentrates heat evenly during baking. Seal the ends well so the loaf holds together during the final rise. A loose seal is the usual culprit when rings open in the oven.
- Cover with a tea towel and let rise in a warm place until doubled, about 20 minutes: During the second rise the dough will puff and become pillowy, giving you visible proof that the interior structure is set. The final proof should be lively, with the braid retaining definition. Avoid rushing this step, since underproofed dough will not have the right crumb, while overproofing may collapse in the oven.
- Preheat oven to 375°: Preheating develops a steady oven spring and ensures even browning. You will see the room fill with a toasty scent once the oven is ready. Baking at this moderate temperature allows the interior to set while the crust colors. Putting the bread into a cool oven can result in a pale crust and longer bake time.
- In a bowl, whisk the remaining egg and water and carefully brush over the dough: The egg wash adds sheen and promotes a golden crust, giving that bakery finish. Brush gently to avoid deflating the loaf; the surface should glisten but not be saturated. Too thick a wash can mask the braid details, while too light will reduce the shine.
- Bake 25-30 minutes or until golden brown: As it bakes, the kitchen will fill with the warm aroma of browned butter and caramelized sugars. The crust should be evenly golden and sound hollow when tapped on the underside, indicating the interior is cooked. If the top browns too fast, tent lightly with foil. The most common error here is underbaking at the center, so check for even color and a firm crust.
- (If you'd like, at the halfway point, brush with more glaze to get any areas that have risen up from the heat): A mid-bake touchup enhances gloss on exposed ridges and evens the color, making the loaf look professionally finished. Apply quickly and lightly so you do not cool the oven each time you open it. Over-brushing can cause sogginess, so do this sparingly if desired.
Notes
- Enrich the dough further by replacing a couple of tablespoons of the milk with cream for a silkier crumb, keeping an eye on hydration so the dough does not become too soft.
- Make rolls instead of a ring by dividing the dough into smaller pieces and shaping individual braids, which is great for portion control at gatherings.
- Glaze options include a simple powdered sugar drizzle after baking, applied once the loaf has cooled slightly, for a sweet finish without extra brushing during the bake.
- Overnight fridge rise works well if you want to prepare the dough the day before; refrigerate after initial mixing and allow a slow cold proof for deeper flavor, then shape and bake the next day.
- Add sparkling sugar just before baking to catch the heat and produce a festive, textured crust that shimmers under lights on a holiday table.