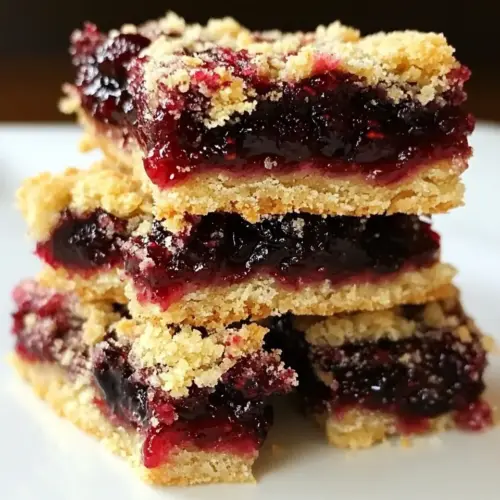
Blackberry Jam Shortbread Bars
Blackberry Jam Shortbread Bars combine a buttery, tender shortbread base with glossy, fruity seedless blackberry jam and a crisp, crumbly topping. This easy, crowd pleasing treat balances sweet and nutty notes with a bright jam center, making it ideal for potlucks, picnics, or an afternoon tea. Make it once and you will keep coming back for another slice.
Equipment
- 9 x 13-inch pan
- Electric Mixer
- Wire Rack
- Spatula
- Mixing Bowls
Ingredients
- 1 1/2 cups (3 sticks) butter, at room temperature Creamy and soft, provides the rich, tender base and fat needed to create a flaky shortbread texture while helping the dough bind together evenly when creamed with sugars.
- 3/4 cup light brown sugar, firmly packed Moist and flavorful, adds deep caramel-like sweetness and a slight chew that enhances the shortbread’s complexity while contributing to browning and moisture retention.
- 3/4 cup granulated white sugar Granulated for clean sweetness and structure, helps aerate when creamed with butter to produce a lighter crumb and balances the richer sugars for proper texture.
- 2 teaspoons vanilla extract Fragrant and sweet, imparts aromatic complexity and enhances other flavors in the bars while rounding out the overall sweetness profile without adding moisture.
- 3/4 teaspoons salt Salty and balancing, elevates the flavors by cutting sweetness, strengthening the butter and jam flavors, and improving overall taste perception in the shortbread.
- 3/4 cup almond flour (or very finely ground almonds) Nutty and tenderizing, contributes subtle almond flavor and a delicate crumb, while adding fat and slight texture that lightens the dough without overpowering it.
- 2 3/4 cups all purpose flour Powdery and structural, provides the bulk and gluten needed for proper shortbread formation, creating a firm but tender base that holds the jam filling.
- 1 1/2 cups seedless blackberry jam Fruity and sweet, supplies the concentrated blackberry flavor and moisture that creates the jam layer, adding bright acidity and a sticky contrast to the buttery crust.
- powdered sugar, for dusting Light and decorative, dusts the finished bars with a delicate sweetness and visual appeal while slightly softening the surface and masking any imperfections.
Instructions
- Preheat oven to 325 degrees F. Spray 9 x 13-inch pan with nonstick spray.: As the oven warms, you will notice a steady hum and eventually a consistent heat that bakes evenly, which is essential for an even shortbread crust. The initial preheat ensures the crust begins setting right away when it hits the oven, preventing soggy centers. A common mistake is not allowing the oven to reach temperature, which can lead to underbaked centers or overly pale edges; use an oven thermometer if your oven runs cool.
- In a large bowl, use an electric mixer to combine butter and sugars; beat until creamy. Add vanilla and salt and beat until well combined. Beat the almond flour and the all-purpose flour into the butter mixture on low speed, just until a smooth dough forms. Divide the dough in half. Wrap one half in plastic wrap and refrigerate for 30 minutes or so. Press the other half of the dough into the bottom of the prepared pan to form the bottom crust. Bake the crust until it is just beginning to turn light brown around the edges, about 20 minutes. Remove the pan from the oven.: Coating the pan helps the bars release cleanly once cooled, and you might hear a faint squeak as the spray makes contact. I prefer spraying lightly and evenly across corners to avoid sticking. One pitfall is overusing spray, which can pool and alter browning; a thin, even layer is all you need.
- Place jam into a bowl and stir very well until it is nice and smooth. Spread the jam evenly over the partially baked crust. Crumble the refrigerated shortbread dough over the jam to form a crumbled topping. Return the pan to the oven and continue baking until the topping is firm and crisp and golden in color, about 30 minutes. Transfer to a wire rack and let cool completely. Sprinkle lightly with powdered sugar before cutting into bars.: As you mix butter with both light brown sugar and granulated white sugar , the texture turns from grainy to smooth and slightly whipped, and you may smell caramel notes emerging from the light brown sugar . Creaming traps tiny air pockets that help the dough bake with a tender crumb. Avoid overbeating, which can make the dough too soft and cause spreading; stop once it appears smooth and slightly fluffy.
- Add vanilla and salt and beat until well combined: After adding vanilla and salt , the aroma becomes rounder and more aromatic, a subtle lift that blends with the buttery scent. This step seasons the dough and distributes flavor evenly, so be sure the vanilla is fully incorporated. Don’t skip mixing thoroughly, or you’ll get pockets of uneven flavor.
- Beat the almond flour and the all purpose flour into the butter mixture on low speed, just until a smooth dough forms: As you incorporate the almond flour and all purpose flour , the bowl will transition from glossy to a thicker dough that holds together. Using low speed prevents overdeveloping the gluten, which keeps the bars tender rather than tough. A common issue is mixing too long; stop as soon as the dough comes together into a cohesive mass.
- Divide the dough in half: When you split the dough, you’ll feel its silky, pliable texture. Dividing allows for a bottom crust and a chilled topping, which produces that desirable crumbled contrast. If you divide unevenly, the crumble may be too thin or the crust too thick, so try to keep the halves similar in size for balanced results.
- Wrap one half in plastic wrap and refrigerate for 30 minutes or so: Chilling the reserved dough firms up the butter , making it easier to crumble later and helping the topping hold its shape while baking. You may notice the dough harden and become less sticky, which is good. Avoid freezing solid, because it will be difficult to crumble evenly when too cold.
- Press the other half of the dough into the bottom of the prepared pan to form the bottom crust: Pressing the dough evenly creates a uniform base that bakes consistently; you can feel the resistance change as the crust becomes compacted. Use light, steady pressure to avoid overworking the dough, which can make it dense. Watch for thin spots, and gently patch them to ensure the jam will not pool through holes.
- Bake the crust until it is just beginning to turn light brown around the edges, about 20 minutes: In the oven you will see the edges take on a delicate golden hue and smell a gentle butter aroma as the crust sets. This partial bake firms the base so it does not become soggy when the jam is added. A frequent mistake is baking until too brown; remove when the edges only begin to color to avoid a hard crust.
- Remove the pan from the oven: Once out of the oven, you’ll notice the crust has set and the oven heat will no longer influence it immediately. This pause is important to let the surface cool slightly before adding the jam, which helps prevent the jam from thinning out and sinking into the dough. Don’t spread jam on a piping hot crust, or the filling may become runny.
- Place jam into a bowl and stir very well until it is nice and smooth: Stirring the seedless blackberry jam smooths out any lumps and ensures a glossy, even layer. The jam will become more fluid and shiny, making it easier to spread without tearing the crust. A common oversight is using jam straight from the jar without stirring, which can leave clumps or uneven texture on the bars.
- Spread the jam evenly over the partially baked crust: As you spread, the jam should glide and create a vibrant band of color; aim for a uniform thickness so every bite has the same fruit intensity. Use a spatula to smooth it gently without digging into the crust. If the jam is too thick to spread, warm it briefly, but not too much, or it will soak into the crust.
- Crumble the refrigerated shortbread dough over the jam to form a crumbled topping: The chilled dough breaks into rustic bits that create texture contrast when baked. The crumbles should be varied in size so some bits crisp while others remain tender. Pressing them down slightly is optional, but avoid packing them too tightly or you will lose the airy, crisp quality of the topping.
- Return the pan to the oven and continue baking until the topping is firm and crisp and golden in color, about 30 minutes: During this stage you will see the crumbles turn golden and hear a faint crackle as moisture leaves the topping. This bake ensures the jam is heated through and the crumbs set to a pleasing crisp. A common error is underbaking, which leaves a soft topping that can collapse when cooled; bake until you see consistent golden color.
- Transfer to a wire rack and let cool completely: Cooling on a wire rack allows air to circulate around the pan, preventing the bottom from becoming soggy and helping the jam to set so slices hold together. The aroma will mellow as it cools, and the texture firms up for clean cuts. Cutting too soon is a typical mistake, resulting in sticky, messy bars.
- Sprinkle lightly with powdered sugar before cutting into bars: A dusting of powdered sugar adds a pretty finish and a subtle extra sweetness that enhances presentation. The powder settles into the crevices and highlights the crumbled top. Avoid heavy dusting which can overwhelm the fruit flavors and melt into the jam if the bars are not fully cooled.
Notes
- Almond Flour Swap Use finely ground almonds if you do not have packaged almond flour, sifting them to remove any larger pieces so the crumb stays delicate.
- Jam Alternatives Substitute with seedless raspberry or apricot jam to change the flavor profile while maintaining texture and ease of spreading.
- Brown Sugar Adjustment For a deeper caramel note, increase the light brown sugar by a tablespoon, which will enrich the flavor without compromising texture.
- Make Ahead Bake fully, cool, and store in a covered container at room temperature for up to one week, making these bars an excellent make ahead treat.
- Freezer Friendly Freeze cut bars in an airtight container for up to one month; thaw at room temperature and dust with powdered sugar before serving.