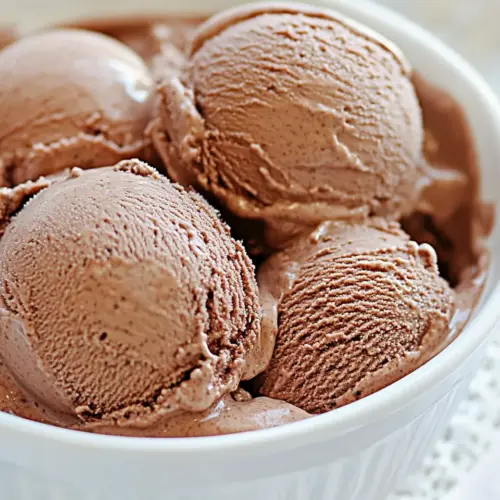
Ben and Jerry’s Chocolate Ice Cream Recipe
Ben and Jerry’s Chocolate Ice Cream Recipe delivers a creamy, custard style ice cream with deep chocolate flavor and a silky texture. This easy copycat feels indulgent yet approachable, perfect for an easy weeknight dessert or special treat. Rich, smooth, and intensely chocolatey, it’s a recipe worth making for anyone who loves classic ice cream.
Equipment
- Small Saucepan
- Whisk
- Mixing Bowl
- Ice Cream Maker
Ingredients
- 4 ounces unsweetened chocolate Melted and bitter, provides deep chocolate flavor and structure when combined with dairy; finely chop or grate before melting to ensure smooth incorporation. Balances sweetness and gives the base its signature cocoa intensity while contributing to the custard’s texture.
- 1 cup milk Creamy and fluid, helps thin the custard base so eggs and chocolate combine smoothly; warm slightly when tempering eggs to avoid curdling. Contributes to mouthfeel and helps dissolve sugar for an even texture in the finished ice cream.
- 2 large eggs Rich and emulsifying, adds body and helps create a smooth custard by thickening when cooked with sugar and chocolate; whisk thoroughly to incorporate air and stabilize the base. Coagulates partially during cooking to produce a custardy texture that yields a creamier frozen dessert.
- 1 cup sugar Sweet and texturizing, dissolves into the milk and cream to provide balanced sweetness and contribute to the ice cream’s scoopable texture. Helps lower freezing point slightly, improving spreadability and preventing the final product from becoming too hard.
- 1 cup heavy cream Luscious and fatty, increases creaminess and richness while improving the ice cream’s ability to hold air and resist iciness. Chill the mixture after cooking to allow fats to firm slightly and produce a smoother churned result.
- 1 teaspoon vanilla Fragrant and rounding, enhances and lifts the chocolate flavors while adding aromatic complexity to the frozen custard; stir in near the end to preserve volatile aromas. Acts as a subtle flavor enhancer that completes the overall profile without overwhelming the chocolate.
- 1 pinch salt Savory and balancing, sharpens flavors and counteracts sweetness to make the chocolate taste more pronounced; a tiny pinch is enough to adjust the overall flavor harmony. Also helps highlight the depth of the chocolate and other ingredients without altering texture.
Instructions
- Place the chocolate in a small saucepan over medium heat.: You will notice the chocolate softening and then beginning to melt, releasing an earthy cocoa scent that deepens as it turns glossy. Watch the surface carefully, stirring gently, because chocolate can seize if exposed to too-high heat. The ideal visual cue is a smooth, shiny pool with no dry chunks. A common mistake here is turning the heat too high, which scorches the chocolate and creates bitter burned notes, so keep the flame moderate and stir consistently.
- As the chocolate melts, gradually add the milk, whisking constantly, until smooth.: The milk will thin the melted chocolate and produce a warm, homogenous sauce that smells rich and comforting. Whisking prevents lumps and encourages even heat distribution, which is essential for a silken base. If you add the milk too quickly, the temperature contrast can cause clumps, so add it in a slow stream while whisking. Listen for a soft bubbling along the edges, not an aggressive boil, which indicates overheating.
- Remove the chocolate mixture from the heat and let it cool to room temperature.: As it cools, the aroma settles into a rounded chocolate perfume and the surface will become slightly thicker. Cooling prevents the eggs from curdling when they are combined later. One error to avoid is rushing this step by adding cold dairy or ice directly, which can shock the mixture; instead, be patient and allow it to reach room temperature naturally.
- Whisk the eggs in a mixing bowl until light and fluffy, 1 to 2 minutes.: The eggs should transform into a pale, slightly voluminous texture that feels airy when you lift the whisk. This aeration contributes a delicate lift to the custard, and the visual change is subtle but important. Overbeating will make them too frothy and harder to integrate, so aim just for light and pale, not stiff.
- Whisk in the sugar into the eggs, a little at a time, then continue whisking until completely blended, about 1 minute more.: As the sugar dissolves, the mixture will feel smooth and become glossy, with the grains vanishing. This controlled incorporation prevents grainy custard and helps stabilize the eggs. If you add all the sugar at once, you risk incomplete dissolution and a gritty texture, so introduce it gradually and test by rubbing a small amount between fingers to ensure it is smooth.
- Add the cream, vanilla and salt to the egg mixture and whisk to blend.: When you whisk in the heavy cream , vanilla , and salt , the bowl will take on a richer, creamier sheen and a warm, inviting aroma. The cream increases fat content, giving a round mouthfeel, while the salt and vanilla lift the chocolate notes. A common slip is to add these cold ingredients and then immediately heat aggressively, which can cause uneven texture; gentle, steady mixing is the right approach.
- Pour the chocolate mixture into the cream mixture and blend.: Pour slowly while stirring so the two components marry into an even custard, and you will see a smooth, uniform color and a luxurious viscosity. The combined aroma will be fuller, and the body should coat a spoon. If you pour too fast without stirring, you can create streaks or temperature shocks that leave bits unevenly cooked; maintain a steady stream and constant stirring.
- Cover and refrigerate until cold, from 1 to 3 hours, depending on your refrigerator.: Chilling firms the custard and lets flavors meld, giving a colder base that the ice cream maker can aerate effectively. You want the mixture to be fully chilled, not tepid, because a warm base will take longer to churn and can form ice crystals. A typical mistake is under chilling, which produces dense texture due to poor overrun, so allow sufficient time until the custard feels cold to the touch.
- Transfer the mixture to an ice cream maker and freeze according to the manufacturer’s instructions.: As the machine works, you will hear a gentle rhythmic churn and notice the mixture thickening into a soft serve like texture. The smell intensifies, and the surface appears glossy with small air pockets. This process traps air and sets the structure, giving scoopable results. Avoid leaving it running far beyond recommended time, which can over-churn and make the ice cream grainy, or stopping too soon, which yields a loose, unset texture.
Notes
- Chocolate Almond: Chop and roast whole almonds, salted or unsalted, then fold them in after churning for a crunchy contrast that enhances the chocolate flavor.
- Chocolate Chip: Use mini chocolate chips for even distribution; add them at the end of churning so they stay intact and give small bursts of texture.
- Edible Cookie Dough Pieces: Make safe, heat free cookie dough pieces and fold in gently to keep them tender in the frozen ice cream.
- Chocolate Brownie Pieces: Chop leftover brownie into small chunks and swirl in after churning to create fudgy pockets within the creamy base.
- Peanut Butter Chips: Add peanut butter chips after churning for salty sweet notes that pair beautifully with the deep chocolate custard.