Beef Stock
Beef Stock is a rich, savory foundation with deep roasted notes and silky body. Slow simmered and concentrated, it adds savory depth to soups, sauces, and grains, making it perfect for easy weeknight dinners and special occasion braises. Make a big batch and freeze in portions for fast flavor boosts later, it's an economical, pantry enhancing staple you will reach for again and again.
Equipment
- Large stock pot
- Cookie Sheet
- Colander
- Fine strainer or cheesecloth
- Fat separator
- Slotted Spoon
Ingredients
- 3 -4 pounds beef scraps (with bones if you have some) Roast or simmer to extract deep, savory flavors and collagen; provides the primary body and beefy backbone for the stock. Break larger pieces so heat penetrates evenly and remove excess fat during skimming for a clearer liquid.
- 2 onions Char or quarter to release natural sugars and aromatics; contributes sweetness, depth, and subtle caramelized notes that balance beef richness. Place skin-side up to brown evenly and add to the pot early for full flavor extraction.
- 4 stalks celery Roughly chop and bruise to release vegetal aromatics and gentle bitterness; adds bright, savory undertones that round out the stock. Include leafy tops if available and add with the carrots and onions for balanced extraction.
- 3 large carrots Chop into large pieces to lend sweetness, earthy aroma, and body; helps round the flavor profile and supports gelatin extraction from the meat and bones. Add early in the simmer to fully impart color and subtle complexity.
- enough water to completely cover the beef and vegetables in a large pot Pour enough to completely submerge solids and allow slow, even simmering; acts as the medium for heat transfer and extraction of flavors, collagen, and nutrients from solids. Maintain gentle simmer and top up if evaporation concentrates the liquid too much.
- Better than Bouillon Beef Base (see notes) Dissolve a measured amount to intensify savory, umami character and salt control; serves as a concentrated seasoning to enhance beef depth without needing many added spices. Add gradually near the end and adjust to taste to avoid over-salting.
Instructions
- I keep a large container in the freezer, and whenever I get beef scraps I freeze them until I have enough to make stock.: The cool, metallic scent of raw beef fades into the background as you gather scraps over time, and this habit is the backbone of efficient stock making. Freezing prevents spoilage and allows you to accumulate the recommended 3 to 4 pounds without rushing. When you collect pieces, label the container so you know that they are for stock, not for immediate cooking. A common mistake is forgetting older scraps, so rotate and use them within a few months. This practice reduces waste and guarantees you enough material for a rich simmer later.
- When you're ready to make stock, put the beef scraps on a cookie sheet and roast the meat for about 30-60 minutes at fairly high heat. This produces browning which produces flavor. For beef stock, roasting also releases fat.: As the oven work begins, the air fills with a deep, roasted aroma, and the surfaces of the beef develop dark, caramelized crusts. That browning is pure flavor chemistry, Maillard reaction notes that become the backbone of your stock. Roast until you see a good color, but avoid burning, which would introduce bitterness. Roasting also melts and renders some fat, making it easier to skim later. If your scraps are crowded, they will steam instead of roast, so spread them into a single layer. A common pitfall is skipping this step, which yields a flatter, less complex stock.
- Add the roasted beef scraps to a large stock pot.: You will hear a gentle hiss as warm meat meets the pot, and that pot becomes the central stage for flavor transformation. Use a heavy bottom pot for even heat distribution. Placing roasted scraps straight into the pot means those browned bits will slowly surrender their concentrated taste into the liquid. Avoid transferring charred residue from the sheet into the pot that is overly burnt, as it could taint the stock. If you have excessive fat on the roasting pan, you can decant some away first to keep the stock cleaner.
- Peel onions and cut into quarters.: The sharp scent of freshly cut onion mellows quickly when roasted or simmered. Quartering exposes more flesh to the liquid, which encourages the release of natural sugars and savory compounds. Leave the root end intact enough to keep layers from falling apart during handling. A mistake people make is chopping too finely, which causes the onion to disintegrate and cloud the stock; large pieces are easier to strain out later and still release plenty of flavor.
- Cut each stalk of celery into a few pieces. Include the celery leaves if you have some.: Celery offers herbaceous, vegetal notes that balance the richness of beef. By cutting into larger sections, the celery retains structure through long simmering, and the leaves provide a gentle lift in aroma. If you omit the leaves, the stock will still be fine, but including them adds an extra savory brightness. Over chopping leads to scattered bits that complicate straining, so keep cuts chunky.
- No need to peel carrots, just cut each one into about three pieces.: The sweet perfume of carrot appears as the pot simmers, and leaving the skin on keeps things rustic and flavorful. Cutting into thirds gives generous surface area without turning the carrots into mush. As they simmer, carrots lend color and subtle sweetness that balances beefy umami. If carrots break down completely, the stock can become cloudy and require more filtration, so resist cutting them smaller than recommended.
- Put vegetables into the stock pot with the beef scraps. Fill the pot with enough water to completely cover the meat and vegetables.: Pouring cold water over the roasted bits and vegetables produces a soft hiss and a rising steam that smells unexpectedly fragrant. Starting with cold water helps draw flavors out gradually, extracting gelatin from bones and soluble compounds from veg. Leave some headspace to allow gentle simmering without boil over. If you add too much water, the stock will be diluted; too little and extraction is incomplete. Aim for a level that covers ingredients comfortably while allowing room for simmering.
- Add two or three tablespoons of beef flavor base if using.: This concentrated paste dissolves into the warm water, deepening the savory profile quickly, and you will notice the aroma intensify almost immediately. Use sparingly, tasting as you go, because it adds salt and umami power. If you prefer a cleaner product, skip it and rely purely on roasted bones and vegetables. A frequent error is adding the paste at full strength at the start, which can make the final stock too salty when it reduces, so add modestly and adjust later.
- Simmer the mixture on low for 4-6 hours, adding more water as needed.: As the pot settles into a gentle simmer, tiny bubbles will periodically rise and break, and the kitchen fills with a layered, comforting aroma. Slow, gentle heat extracts gelatin and flavor without emulsifying fat into the liquid, which keeps the stock clearer. Check occasionally and add hot water to maintain the level, not cold water which can shock the pot and stop extraction temporarily. Overly vigorous boiling agitates sediments and clouds the stock, so keep the heat low. If you stop too early, the body will be thinner; if you go much longer you will concentrate flavor and salt more than intended.
- I like to use a tool called a Fat Skimmer (affiliate link) for removing meat and vegetables while letting the flavorful stock run back into the pan. It also catches sediments and coagulated proteins. If you don't have that just scoop out meat and vegetables with a large slotted spoon.: When you remove solids, you will notice both clearer liquid and less surface fat. Skimming and lifting out the bulk materials at this stage reduces stray bits that can cloud the final product. Use a slotted spoon to lift solids gently so the liquid drains back into the pot. A trap is to push everything through a fine mesh early, which can make straining harder later; remove large solids first and save fine straining until after cooling.
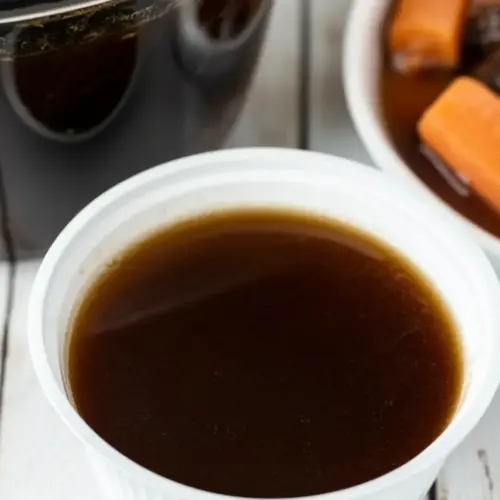
- I strain my stock through a colander, then strain it through a Yogurt Strainer (affiliate link) into a Fat Separator (affiliate link). As you can see, there’s not a lot of fat because most of it was removed by the roasting. (Use whatever tools you have to strain the stock and remove bits and pieces of meat and fat.): The first strain removes large solids, and the second filters finer particles. Pouring through successive filters results in a clearer, cleaner stock with a smooth mouthfeel. Let gravity do the work and avoid pressing solids through the strainers, which can push sediment into the liquid. If you do not have specialized tools, line a fine mesh with cheesecloth and strain carefully. A common mistake is skipping a second strain, which leaves suspended bits that show up as cloudiness in sauces.
- After I strain the stock, I put it back into a clean pan and cook down until it’s a deep brown color and has a lot of flavor. I just keep tasting it until it’s as strong as I want.: Reducing concentrates flavor and thickens the mouthfeel, and you will notice an intensified aroma and a richer coating on the back of a spoon. Taste frequently as it reduces, because it can go from perfect to too intense quickly. This step is where you control final strength, so reduce patiently over medium low heat, and stir occasionally to prevent sticking. Avoid overheating which can scorch and ruin the nuance you built with roasting.
- I freeze the stock in one cup and two cup containers so it is easy to use in recipes.: As the stock cools, it hums with promise, and portioning before freezing makes future cooking effortless. The aroma when thawing will remind you why you made the extra effort. Use airtight containers or freezer bags, leaving space for expansion. A common error is filling containers to the brim, which leads to broken lids or messy thawing, so leave a little headspace for safety.
Notes
- Save and freeze scraps: Keep a dedicated container in your freezer for beef trimmings and bones, and add to it whenever you have leftovers. When the container reaches 3 to 4 pounds, you have the right quantity for a full stock pot. This habit reduces waste and builds flavor reserves without extra shopping.
- Roast for flavor: Roast scraps on a cookie sheet until nicely browned, which adds caramelized, savory notes. Spread pieces into a single layer to avoid steaming. Browning is essential for a deep, rounded flavor profile, and it renders fat so you can remove excess before simmering.
- Use cold water to cover: Start with cold water so extraction happens gradually, coaxing gelatin and flavor from bones. Hot water can lock flavors prematurely, and too much or too little liquid alters concentration. Maintain water level by topping up with hot water during the long simmer.
- Skim often: Remove foam and coagulated proteins periodically with a skimming tool or slotted spoon. Skimming improves clarity and reduces off flavors. If you skip skimming, the stock can taste dull and appear cloudy.
- Strain in stages: First pour through a colander to catch large solids, then use a finer strainer or cloth to catch smaller particles. This two stage approach yields a cleaner finish that looks and functions better in sauces and soups.
- Reduce for intensity: After straining, gently simmer the liquid to concentrate flavor to your desired strength. Taste as you reduce, because salt and intensity concentrate quickly. Stop when the stock tastes full bodied without being overly salty.