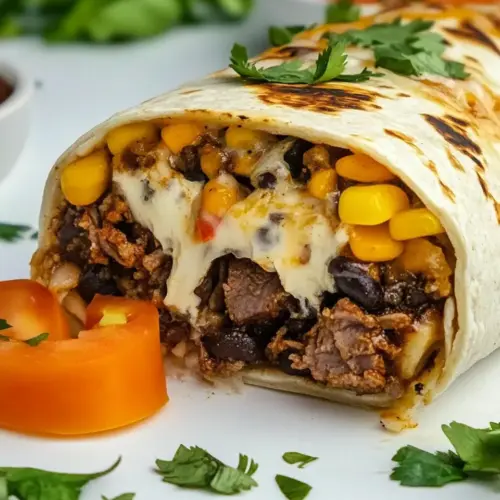
Beef Burrito
Beef Burrito is a hearty, crispy, and flavorful classic that blends seasoned ground beef, black beans, and melty cheddar into a satisfying easy weeknight dinner. The warm tortillas, bright salsa, and creamy avocado create a balanced mouthfeel, perfect for meal prep or family dinners. Try it for a quick crowd pleaser that reheats well and always hits the spot.
Equipment
- COSORI Air Fryer 5.8 Quart
- COOKLOVER Nonstick Saute Pan Induction Skillet with lid 9.5 inch
Ingredients
- 1 pound ground beef Brown thoroughly to develop savory flavor and a slightly caramelized exterior; provides the primary protein and hearty texture for the burrito. Drain excess fat if desired and season while cooking to deepen overall taste.
- 1 small onion (finely chopped) Sauté gently until translucent to add a sweet, aromatic base that balances the beef and spices. Finely chopping ensures even distribution and a tender mouthfeel throughout the filling.
- 2 cloves garlic (minced) Mince and cook briefly with the onion to release pungent, savory notes that complement the beef and taco seasoning. Adds depth and aromatic complexity without overpowering other flavors.
- 1 ounce taco seasoning (1 packet or homemade seasoning) Measure and stir into the cooked beef to deliver concentrated Mexican-inspired spices and a consistent flavor profile. Use the packet or homemade blend to control heat and sodium levels.
- 1/2 cup water Simmer with the seasoned beef to loosen pan drippings and create a cohesive, saucy filling that clings to the meat. Adjust amount to achieve the desired moisture for wrapping.
- 15 ounces black beans (drained and rinsed) Rinse and drain before adding to the filling to contribute creamy texture, protein, and fiber while reducing sodium. Warm through to meld flavors with the seasoned beef and rice.
- 1 cup cooked rice Pre-cook and fold into the filling to add bulk, subtle nuttiness, and a comforting, chewy texture that stretches the dish. Use evenly distributed rice to help bind other ingredients inside the tortilla.
- 1 cup cheddar (shredded, or Monterey Jack cheese) Shred and melt over the hot filling to introduce rich, gooey creaminess and a mild sharpness that enhances overall flavor. Choose cheddar or Monterey Jack for reliable melting properties.
- 4 large flour tortillas Warm briefly to increase pliability and prevent tearing while wrapping; serves as the vessel that holds all components together. Large flour tortillas provide a soft, neutral backdrop for the robust filling.
- 1 cup salsa (or pico de gallo) Spoon as a bright, acidic topping to cut through richness and introduce fresh, tomato-forward flavor and mild heat. Pico de gallo can be used interchangeably for chunkier texture and fresher herbs.
- 1 cup sour cream Dollop to add cool, tangy richness that softens spice and adds silky mouthfeel to each bite. Use as a finishing element so it remains creamy and not fully incorporated into the hot filling.
- 1 avocado (sliced) Slice and add for creamy, buttery texture with mild flavor and healthy fats that complement spicy and acidic components. Place slices inside or on top for visual appeal and a fresh contrast.
- fresh cilantro (chopped (for garnish)) Chop and sprinkle for herbaceous brightness and a lively cilantro aroma that lifts the other flavors. Use as a garnish to add green color and a crisp, slightly citrusy finish.
- lime wedges (for serving) Serve alongside as wedges to squeeze over assembled burritos, adding fresh acidity and a zesty brightness. Provide toasting or extra lime for guests who prefer more tang.
Instructions
- In a large skillet, cook 1 pound of ground beef over medium-high heat until browned, breaking it up with a spoon as it cooks. Drain any excess fat.: The aroma of browning ground beef is rich and meaty, with a toasty note as the Maillard reaction develops. Listen for a steady sizzle that softens as moisture evaporates, and watch as the meat shifts from pink to a deep brown which signals flavor development. Browning properly creates those savory juices that form the base of the filling, so avoid crowding the pan which can steam the meat instead of browning it. A common mistake is not breaking the meat apart enough, leaving large clumps that cook unevenly. If excess liquid accumulates, tilt the pan and spoon off the fat to keep the filling from becoming greasy.
- Add the finely chopped onion and minced garlic to the skillet with the beef. Cook for about 3-4 minutes, or until the onion is soft and translucent.: As the onion hits the pan, it will begin to soften and release sweet, savory aromas that mellow the raw edge of the garlic . You should see the onions go translucent and slightly glossy, and the garlic become fragrant without browning too quickly. These softened aromatics blend into the meat and round out its flavor. Watch closely because garlic burns fast and becomes bitter; if it begins to darken, lower the heat. A frequent misstep is adding garlic too early, which can leave an acrid taste.
- Stir in the taco seasoning and 1/2 cup of water. Cook for about 2-3 minutes, allowing the seasoning to coat the beef and the sauce to thicken.: When the seasoning meets the hot mixture, its oils will bloom and release a warm, spiced bouquet. The water helps dissolve the seasoning so it forms a glossy, slightly thick sauce that clings to each grain of rice and spoonful of black beans later. You should notice the mixture becoming saucier and the pan deglazing as the browned bits lift. If the sauce seems too thin, simmer a bit longer; if too dry, add a splash more water. Overthickening can make the filling pasty, so aim for a coating that is moist but not soupy.
- Stir in the black beans and cooked rice, cooking until heated through. Remove the skillet from the heat and set aside.: As you fold in the black beans and rice , their textures will absorb the seasoned juices and round out the filling. You should hear a gentle simmer as the mixture heats, and steam will rise, carrying the scent of spice and cooked grains. The beans add creaminess, while the rice contributes body and a tender chew. Overcooking can make the rice mushy, so aim to heat through until warm. A common error is stirring too vigorously which can break beans and make the mixture too pasty; fold gently to keep some bean integrity.
- Warm the flour tortillas in a dry skillet or microwave until pliable.: Warming the tortillas releases steam and makes them flexible, which prevents them from cracking when you roll. In a dry skillet you will see faint toasty spots appear and smell a toasty, wheaty fragrance; in the microwave they will steam a bit and soften quickly. Warm just until pliable, not hot, so you can handle them comfortably while assembling. Overheating makes them fragile and more likely to tear, while underwarming can cause splitting when filled. If a tortilla tears, use a fresh one or tuck any torn edge back into the roll when folding.
- Place a generous portion of the beef mixture in the center of each tortilla. Sprinkle with shredded cheese, then add a spoonful of salsa or pico de gallo. Fold in the sides of the tortilla, then roll it up tightly from the bottom to encase the filling.: As you build the burrito, the warm filling will soften the shredded cheddar and the salsa will glisten with bright acidity. A tight roll ensures the filling stays contained, while folding the sides first prevents spillage. You should feel a satisfying weight when the filling is balanced, and see cheese begin to melt into the hot mixture. Avoid overfilling which makes rolling difficult and leads to bursting during cooking. If the seam does not stay closed, tuck it seam-side down when you crisp it to help seal the burrito.
- Preheat your air fryer to 400°F (200°C). Place the rolled burritos in the air fryer basket seam-side down and cook for 3-5 minutes, or until the tortillas are golden and crispy. If you don't have an air fryer, you can use a skillet. Heat a skillet over medium heat and lightly grease it with a small amount of oil or butter. Place the rolled burritos seam-side down in the skillet and cook for 2-3 minutes on each side, or until golden and crispy.: As the burritos crisp, the tortilla will turn golden and develop a light crunch, while the interior stays warm and melty. You will hear the exterior go from a gentle sizzle to a crisp crackle when you bite in. The high heat sets the seam and transforms the texture, turning soft tortillas into a pleasantly crunchy shell. Watch closely because crisping can progress quickly and burn if left unattended. A common issue is overcrowding the air fryer basket or skillet, which prevents even browning; cook in batches if needed.
- Serve the burritos with a dollop of sour cream, sliced avocado, and a sprinkle of chopped fresh cilantro. Lime wedges on the side add a bright, tangy flavor.: The cool tang of sour cream and the creamy avocado balance the warm, spiced filling, and chopped cilantro brings a fresh herbal pop. Squeezing a bit of lime over the top brightens the whole dish and cuts through richness, giving each bite lively contrast. Arrange the burritos so the golden side faces up for visual appeal and offer lime wedges for added acidity. A frequent mistake is adding toppings too early, which can make the tortillas soggy; add them right before serving for best texture.
Notes
- Customize Your Fillings, you can add extra fillings like corn or diced bell peppers for sweetness and crunch, keeping in mind the core filling proportions so you do not overstuff.
- Warm Tortillas, heat them briefly in a dry skillet or microwave so they become pliable and resistant to tearing while rolling, making assembly smoother.
- Don’t Overfill, leaving a little room when you roll prevents seams from bursting during crisping and makes a neater final burrito.
- Crispy Texture, using an air fryer or skillet gives the tortilla a satisfying crunch while keeping the inside warm and melty, which enhances the overall eating experience.
- Fresh Toppings, add chopped cilantro and a squeeze of lime before serving to lift the flavors and provide contrast to the rich filling.
- Meal Prep Friendly, store filling and tortillas separately for best texture, then assemble and crisp when ready to eat for near fresh results.