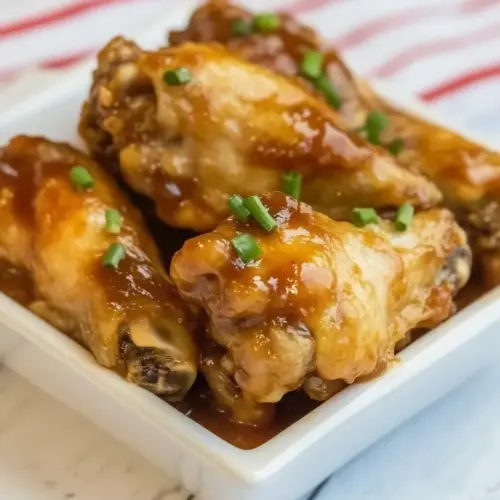
BBQ Chicken Wings
BBQ Chicken Wings are sticky, tender, and deeply flavored with a sweet and savory sauce that becomes glossy after broiling. This easy weeknight dinner or party favorite yields fall off the bone chicken thanks to a slow cook, and finishes with a crisp, caramelized exterior for irresistible texture, making it a must make whenever you need crowd pleasing comfort.
Equipment
- 6 Quart Crockpot
- Large spoon
Ingredients
- 1 1/2 cups BBQ sauce can use your favorite brand, I like Sweet Baby Rays Adds a tangy, smoky-sweet base that defines the glaze; contributes body and moisture while carrying other flavors. Use your favorite brand to control sweetness and smoke intensity, and adjust quantity for desired sauciness.
- 1 cup honey Provides concentrated sweetness and helps create a glossy, sticky texture for the wings; balances the acidity of the BBQ sauce. Drizzle in gradually and taste to avoid overpowering with sweetness.
- 1 teaspoon red pepper flakes Imparts assertive heat and a subtle texture contrast; disperses warmth throughout the sauce to cut through richness. Sprinkle evenly and adjust to heat preference to maintain balance with sweet components.
- 1 tablespoon Worcestershire sauce Contributes savory, umami depth and subtle complexity that elevates the overall flavor profile; helps round out sweetness and acidity. Add in small increments and stir well to integrate into the sauce.
- 1 teaspoon mustard powder Delivers a gentle sharpness and mild earthy bitterness that brightens the glaze; enhances overall savory balance without adding liquid. Whisk in until fully dissolved to distribute its pungent notes evenly.
- 3/4 cup brown sugar Adds deep molasses sweetness and a caramel-like richness that darkens and thickens the sauce; enhances complexity and helps with caramelization. Pack into the measuring cup and mix thoroughly so it blends smoothly with liquids.
- 3 pounds chicken wings can use drumettes, flats or wings. 3 Pounds is about 18-22 wings depending on the size. Provides the primary protein and canvas for the sauce; offers skin-on fat that crisps and renders for flavorful wings. Choose drumettes, flats, or whole wings of similar size to ensure even cooking and consistent portions.
Instructions
- Spray the crock pot generously with cooking spray. Add the BBQ sauce, honey, red pepper flakes, Worcestershire, mustard powder, and brown sugar together to the bottom of a crock pot. Mix the sauce well.: When you smell the faint oil warmth as the crock pot preheats, you know the surface is ready. Greasing prevents the sauce from bonding too tightly to the ceramic insert, making cleanup easier and ensuring the wings glide when removed. You should hear no sizzling at this point, just a soft, warming hum from the appliance. If the insert is not well greased, the sauce can stick and scorch in spots during long cooking, so be thorough with the spray.
- Add the chicken to the crock pot. Stir well to coat all of the chicken pieces in sauce. Cover the crock pot and cook covered on low for 4 hours, or until 165 degrees when checked with a meat thermometer. Serve and enjoy!: You will notice a heady scent as the sweet and savory components mingle, with honey lifting the aroma and Worcestershire lending a roast like backbone. Mixing these at the bottom lets flavors marry as they gently heat and prevents uneven pockets of sweetness. Stir until the sugar dissolves for a uniform texture. A common error is failing to dissolve the brown sugar, leaving grittiness in the sauce.
- Turn on the broil setting on the oven. Cover a sheetpan with aluminum foil and spray lightly with cooking oil. Remove the chicken wings and place on the sheetpan with a little space in between each one. Use a silicone brush and brush extra sauce from the crock pot generously over the chicken wings.: As you mix, you should see the sauce become glossy and homogeneous, with red pepper flakes suspended throughout. This step ensures each wing will pick up the same flavor intensity during the long cook. The sauce should cling, not separate; if it feels too thin, give it a few extra stirs so the brown sugar integrates fully. If the mixture splits or looks watery, it may be because the brown sugar was not incorporated or the sauce was too cold.
- Place the chicken wings under the broiler to crisp up the outside a little, usually 1-3 minutes. Be careful to watch closely as we want them to crisp but not burn. Serve and enjoy!: As you nestle the pieces into the sauce, you’ll hear a soft settling sound and see the wings start to accept the glaze. The chicken should be arranged so pieces touch the sauce and not stacked too tightly, allowing heat to circulate. Overcrowding can cause uneven cooking where inner pieces remain underdone. If you pile them too high, some wings may not reach the safe internal temperature.
- Stir well to coat all of the chicken pieces in sauce: When you stir, the sauce should cling and paint the skin with a thick sheen. This coating is crucial because it infuses flavor through the long cook and creates a sticky surface that caramelizes during the broil. Be gentle when stirring to keep the skin intact, and ensure every nook has sauce coverage. A frequent mishap is stirring too roughly and tearing the skin, which can lead to dryer meat.
- Cover the crock pot and cook covered on low for 4 hours, or until 165 degrees when checked with a meat thermometer: Over the course of the cook, you will witness the sauce thicken and the chicken relax into tenderness, emitting a warm, savory aroma that fills the kitchen. Use a thermometer to check the thickest part of the meat, away from bone, aiming for 165 degrees for safety and juiciness. Cooking too long on high can cause the meat to dry, so stick to the low setting for that melt in the mouth texture. A common problem is trusting time alone; always verify with a thermometer.
- Serve and enjoy!: The moment you lift the lid you will be greeted by a rich, sweet tang and steam that smells like backyard gatherings. At this stage the wings are tender and flavorful but not crisp, which is why we move to broiling for texture. Serving them straight from the crock pot is tempting, but you will lose the contrast that makes the recipe sing. Don’t skip the next steps if you crave that glossy, slightly charred finish.
- Turn on the broil setting on the oven: Preheating the broiler creates an intense radiant heat that crisps the sauce and creates caramelized edges. You will hear a faint, energetic hum from the oven as it reaches temperature and feel a quick rise in kitchen heat. This short, high heat step transforms the surface without altering the tender interior. Be mindful of distance to the heating element; too close can burn the glaze rapidly.
- Cover a sheetpan with aluminum foil and spray lightly with cooking oil: The foil protects the pan and the spray keeps the wings from sticking after broiling, while making cleanup trivial. A very light spray yields a dry surface that crisps efficiently; heavier oil can cause flare ups or oily spots. Smoothly lay the foil without folds in the central area to keep wings stable. If the foil is badly crumpled, wings may sit unevenly and cook inconsistently.
- Remove the chicken wings and place on the sheetpan with a little space in between each one: Laying wings with breathing room helps hot air circulate and encourages even browning, so you will see small bubbling points appear on the sauce as it begins to caramelize. The visual cue is a glossy, deepening color that signals readiness for the broiler. Packing them too tightly leads to steaming rather than crisping and a soggy skin texture.
- Use a silicone brush and brush extra sauce from the crock pot generously over the chicken wings: Brushing on fresh sauce layers up sticky sweetness and enhances gloss, giving each wing an even, lacquered finish. You should hear a gentle brush sound and see the sauce gleam as light catches it. Applying the sauce here allows it to caramelize quickly under high heat. A common mistake is using too much sauce and causing flare ups or pooling that prevents even browning.
- Place the chicken wings under the broiler to crisp up the outside a little, usually 1 to 3 minutes: Under the broiler you will notice the surface go from glossy to speckled and slightly charred, producing a toasty aroma that contrasts beautifully with the sweet glaze. Watch for bubbling and browned edges, and keep the oven door ajar if your broiler suggests it. Don’t walk away, as this step is fast and can turn from perfect to burnt in seconds. Over broiling is the most common error here.
- Be careful to watch closely as we want them to crisp but not burn: As the final seconds tick by, the sensory signals are crucial the deepened color, a faint smoky perfume, and a firm but yielding texture at the skin. Once you reach a balance of browned edges and tender interior, remove them and let them rest briefly so the glaze sets. If you leave them too long, the char will become bitter and overpower the other flavors.
- Serve and enjoy!: The finished wings should glisten with a sticky glaze and present both tender interiors and a slightly crisped exterior. Arrange them on a platter and let guests dive in, noting the contrast of textures and the layered sweetness and savory notes. If you detect any bitterness from overcooking, a quick squeeze of neutral acid can brighten the profile, but ideally you will time the broil to avoid that need.
Notes
- Scale with care, when increasing quantities make sure your crock pot can fit the wings in a single layer or at least in a loose stack so heat circulates. Overfilling will extend cooking time and may yield uneven doneness.
- Pick the right sauce, a thicker BBQ sauce will cling better and reduce to a glossy finish. If your sauce is thin, reduce it briefly on the stove before adding to intensify flavor and improve texture.
- Monitor sugar levels, honey and brown sugar help caramelize but can burn under intense heat. Brush on extra sauce for broiling rather than piling on a heavy coat to prevent bitterness.
- Use a thermometer, checking away from the bone ensures accurate readings. If you hit bone, the number may be misleadingly high and lead to overcooking.
- Rest briefly before serving, a two minute rest lets the glaze set and makes handling easier while preserving that glossy appearance that makes the wings irresistible.
- Mix wing types, combining drumettes and flats creates textural variety that guests appreciate, with drumettes offering meatier bites and flats providing a greater skin to meat ratio.