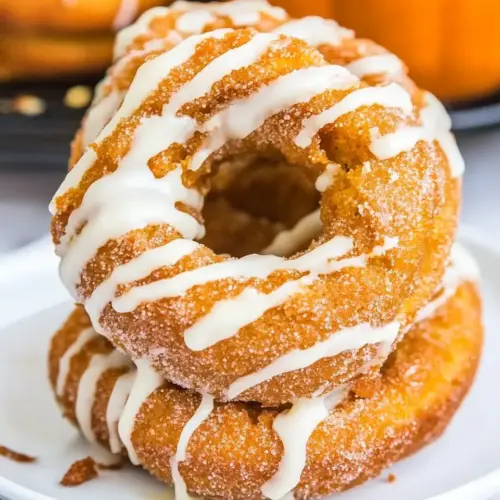
Baked Pumpkin Donuts
Baked Pumpkin Donuts are tender, spiced treats with moist pumpkin crumb and a warm cinnamon finish. This easy, bakery style recipe yields soft, cozy donuts perfect for autumn mornings or a festive brunch, and they come together quickly with simple pantry staples. Make a batch to enjoy fresh or to share with friends and family for a seasonal crowd pleaser.
Equipment
- Donut Pan
- Muffin Pan
- Mixing Bowls
- Whisk
- Wire Rack
Ingredients
- 2 cups all-purpose flour Provide structure and bulk to the donut batter while creating a tender crumb when properly mixed and sifted to avoid lumps.
- 2 teaspoons homemade pumpkin pie spice (recommended for best flavor; or 1 1/2 teaspoons cinnamon, 1/4 teaspoon nutmeg, and 1/4 teaspoon ginger) Enhance warm autumnal flavors and aromatics; combine spices to build depth and complement the pumpkin without overpowering sweetness.
- 1 1/2 teaspoons baking powder Lighten the batter and help the donuts rise by releasing carbon dioxide when reacting with liquids and heat for a tender texture.
- 1/2 teaspoon baking soda React with acidic components to produce lift and a slightly open crumb, balancing the leavening for even rise.
- 1/2 teaspoon salt Balance sweetness and strengthen gluten slightly while enhancing overall flavor; distribute evenly to avoid concentrated salty pockets.
- 3/4 cup packed brown sugar Sweeten and add moisture with deep, caramel-like notes that contribute chewiness and richer flavor than white sugar alone.
- or alternative brown sugar (sugar free option) Offer a sugar-free alternative with similar bulk and sweetness profile for those avoiding sugar, maintaining texture where possible.
- 1/2 cup granulated sugar Provide bulk sweetening and contribute to browning; helps balance flavors and supports tender crumb formation.
- or alternative granulated sugar (sugar free option) Serve as a sugar-free option that mimics the sweetness and texture of granulated sugar for dietary preferences.
- 1/4 cup oil Add fat for moisture and tenderness while keeping donuts soft; neutral oils contribute to shelf life and pliability.
- 1/4 cup unsalted butter, melted and slightly cooled Introduce richness and buttery flavor while adding moisture; melted form blends smoothly into the batter for uniform texture.
- 1 1/2 cups pumpkin puree Contribute moistness, body, and pumpkin flavor while adding beta-carotene and subtle earthiness to the donuts.
- 3 large eggs Bind ingredients together, contribute richness and structure, and help create a soft, cake-like crumb.
- 1/4 cup buttermilk (or 1/4 cup milk with 1/4 teaspoon white vinegar stirred in) Provide slight acidity and extra moisture, reacting with baking soda to aid leavening while contributing tenderness.
- 1 teaspoon quality pure vanilla extract Boost overall flavor with sweet, floral notes; enhances other ingredients and rounds out the palette of the batter.
- For the Cinnamon Sugar Topping: Specify a finishing component for coating or garnish, indicating a separate element to prepare after baking for extra flavor.
- 1 cup granulated sugar Create a classic cinnamon-sugar coating that adds crunch and warm spice contrast to the soft donut surface.
- 2 teaspoons ground cinnamon Provide concentrated spice to mix with sugar for the topping, delivering aromatic warmth and pairing especially well with pumpkin.
- For the Glaze (optional): Indicate an optional finishing sauce to add sweetness and sheen, allowing customization of sweetness and texture.
- 1 cup powdered sugar Deliver smooth sweetness and structure to a glaze, dissolving easily to create a glossy finish that sets on the donut.
- or alternative powdered sugar (sugar free option) Offer a sugar-free powdered option to create a low-sugar glaze alternative while preserving texture and sweetness balance.
- 2 teaspoons milk Adds creaminess and helps loosen batter while contributing to a tender crumb; when warmed slightly it blends smoothly with wet ingredients and aids in achieving the desired dough consistency for baked donuts.
- 1 teaspoon quality pure vanilla extract Provides aromatic depth and enhances sweet flavors; a small amount delivers concentrated vanilla notes that round out the pumpkin spice profile and elevates overall taste without overpowering.
Instructions
- Preheat the oven to 350 F. Lightly grease a donut pan. (Alternatively can use a muffin pan and increase baking time by another 5-8 minutes or until toothpick inserted into center of muffin comes out clean.) In a bowl combine the flour, baking powder, baking soda, pumpkin pie spice, and salt. Set aside. In a large bowl, beat together the sugars, oil and butter. Add the pumpkin puree, eggs, and vanilla extract and beat until smooth. Add the flour mixture and buttermilk and stir just until combined. Do not over-stir or the donuts will be dense.: The oven should be properly heated so the donuts rise evenly and develop a light crust. You will notice a steady warmth and a faint dry smell as the oven reaches temperature, and this initial heat helps set the batter structure quickly, preventing soggy centers. If the oven is not fully preheated, the donuts may cook unevenly, leading to dense interiors, so use an oven thermometer if yours is unreliable. A common mistake is opening the oven too often; that cools the cavity and affects rise, so avoid peeking until the early color change appears.
- Spoon the batter into the prepared donut pan, filling to 3/4 full. Bake on the center rack for 15-20 minutes or until the donuts are lightly browned and spring back slightly when you gently press them. You can also test with a toothpick: inserted into the donut, if it comes out clean the donuts are done. Let the donuts cool for about 2 minutes and then transfer them to a wire rack.: Greasing the pan ensures the donuts release cleanly and keeps the edges intact. When you brush or spray your pan, you should see a thin, even sheen across each cavity, which will result in gently browned rims. Over greasing can cause excess oil to pool and create greasy bottoms, so wipe away any visible pools before filling. If you do not have a donut pan and use a muffin pan, you will need to increase baking time and check for doneness carefully, as the larger volume changes how heat moves through the batter.
- Preferably while the donuts are still a little warm, lightly spray them with oil or lightly brush them with some extra butter, and roll them in the cinnamon sugar. Serve immediately or let cool completely and then drizzle with the optional glaze. To make the glaze: Combine the ingredients until smooth. Add a little more milk if needed. Drizzle over the cooled donuts in a stripy pattern and let sit until firm. Store in an airtight container at room temperature for up to 2 days or in the fridge for up to 5 days. Warm for a few seconds in the microwave before eating.: Muffin pan donuts will puff differently and develop a slightly different crust, but they are a practical swap. Expect more dome and a longer bake because of the greater mass, and test by inserting a toothpick into the center, looking for a largely clean probe. Watch for overbaking as that dries the crumb; if the edges darken quickly while the center is not set, reduce oven temperature slightly and extend time in short increments.
- In a bowl combine the flour, baking powder, baking soda, pumpkin pie spice, and salt: The dry mixture should look uniform and fragrant, with flecks of spice dispersed through the flour . Sifting is optional, but whisking these elements together helps distribute the leaveners so each donut rises evenly. If leaveners are not well mixed, you can end up with uneven pockets of rise, so take the extra moment to whisk. A common error is adding wet ingredients directly to unsifted flour, which can create lumps and uneven texture.
- Set aside: Let the dry ingredients rest while you prepare the wet components, keeping the process organized and preventing over mixing later. This small pause keeps you from scrambling to combine everything at once, and keeps the leaveners from being activated prematurely by residual moisture in the workspace. Avoid leaving mixes out too long if your kitchen is warm, as some leaveners can react slightly over extended time.
- In a large bowl beat together the sugars oil and butter: As you beat, the batter will become glossy and slightly aerated, with the brown sugar lending a deeper, molasses like note. This step helps dissolve the sugars and coats the fats for a more even texture. If the butter is too hot it can melt more than desired and affect batter temperature, so ensure it is only slightly warm. Over beating at this stage may lead to an overly tender crumb that collapses, so mix just until combined and smooth.
- Add the pumpkin puree eggs and vanilla extract and beat until smooth: The mixture will transform into a silky, orange batter with an aromatic pull of spice when stirred. Pumpkin adds moisture and body, while the eggs help emulsify the fats for a cohesive batter. If the batter looks curdled, a brief, gentle beat usually brings it back together; however, extremely cold eggs can cause temporary separation so consider room temperature ingredients. A common misstep is rushing this step, leaving lumps of pumpkin or streaks of egg white, so take a moment to ensure homogeneity.
- Add the flour mixture and buttermilk and stir just until combined: Once the dry mix meets the wet, you will see the batter thicken and take on a paler hue as the flour hydrates. Use folding motions to preserve air and avoid a gummy texture. The buttermilk reacts with the baking soda to assist lift and adds a subtle tang, enhancing the overall flavor. Over stirring here is the most common cause of dense donuts, so stop as soon as streaks of flour disappear.
- Do not over stir or the donuts will be dense: After combining, the batter should be cohesive but slightly lumpy, which is ideal for tender cake donuts. You want a batter that holds its shape but still flows a little when spooned, indicating proper hydration without gluten overdevelopment. If your batter becomes smooth and glue like, that means over mixing has activated gluten, and the final crumb will be tougher. To avoid this, use a spatula and fold with intention, stopping early.
- Spoon the batter into the prepared donut pan filling to 3 4 full: Fill each cavity to the recommended level so the donuts rise to the correct height and maintain the central hole. You should see the batter settle slightly after filling, and the surface should be roughly even across cavities for uniform baking. Overfilling creates oversized donuts that can overflow and bake irregularly, while under filling yields flat donuts; practice helps you judge the right amount.
- Bake on the center rack for 15 to 20 minutes or until the donuts are lightly browned and spring back slightly when you gently press them: As they bake, the kitchen will fill with a warm, spiced aroma and the tops will tighten and take on a light golden color. The spring back test is tactile confirmation that the crumb is set, and a toothpick check ensures the center is cooked through. Opening the oven early can cause a sudden drop in temperature, so rely on visual cues first and test toward the end of the range. If the edges brown too quickly, move the pan away from direct heat by shifting racks down one notch.
- You can also test with a toothpick inserted into the donut if it comes out clean the donuts are done: The toothpick should show a few moist crumbs but not wet batter, signaling ideal doneness. If the toothpick returns with batter, bake in short additional intervals and check again. Be careful not to overbake, which dries the crumb; it is better to pull slightly early because residual heat will finish the cooking outside the oven.
- Let the donuts cool for about 2 minutes and then transfer them to a wire rack: Brief cooling allows the structure to set so the donuts release without tearing, and transferring to a wire rack prevents condensation that makes bottoms soggy. You will feel the warmth and detect a gentle steam escape as they move, and the surface will be less pliable. Leaving them in the pan too long can trap steam and create a softer exterior than intended, so move them promptly yet carefully to avoid burns.
- Preferably while the donuts are still a little warm lightly spray them with oil or lightly brush them with some extra butter and roll them in the cinnamon sugar: The warmth helps the topping adhere and creates a slight crunch where sugar crystals meet the soft donut surface. Brushing with butter gives a richer finish and helps the cinnamon sugar form an even coating. If you wait until they are completely cool, the sugar will not stick as well, and the topping may fall off during eating. One mistake is applying too much butter which can make the surface soggy; a thin layer is sufficient.
- Serve immediately or let cool completely and then drizzle with the optional glaze: Serving warm offers the best texture contrast between the crisp exterior and tender center, while glazing cooled donuts yields a neat, shiny presentation. The glaze sets into a delicate shell that accentuates the spice flavors. If you glaze while the donuts are hot, the glaze may melt and run off, producing a thinner coating than intended.
- To make the glaze Combine the ingredients until smooth: A small bowl and a whisk will yield a glossy glaze where the powdered sugar dissolves into the milk and vanilla . Adjust thickness with tiny additions of milk to achieve a ribbon like pour that holds briefly before settling. If the glaze is lumpy, sift the sugar or whisk vigorously to smooth it out. Avoid making the glaze too thin or it will not set properly on the donuts.
- Add a little more milk if needed: Tiny amounts of extra milk will loosen the glaze if it is too thick, but add sparingly to avoid a runny finish. You want a consistency that drizzles in ribbons and briefly holds shape on the donut surface. If you add too much milk, the glaze may never set fully and will remain sticky rather than forming a delicate crust.
- Drizzle over the cooled donuts in a stripy pattern and let sit until firm: Use a spoon or piping bag to create decorative stripes that harden slightly as the glaze sets, giving a pleasing appearance and a slight snap to the bite. The visual contrast between the orange crumb and white glaze is appealing, and the glaze firms enough to allow stacking for transport. If you store donuts before the glaze sets, the pattern can smear, so let them rest undisturbed.
- Store in an airtight container at room temperature for up to 2 days or in the fridge for up to 5 days: Room temperature keeps the donuts tender, while refrigeration extends their life at the cost of slight drying, which a quick warm up can remedy. Return chilled donuts to room temperature or zap for a few seconds in the microwave to revive softness. A common error is stacking without paper between layers which can cause glaze to stick; use parchment to separate layers.
- Warm for a few seconds in the microwave before eating: A short burst of heat refreshes the texture, revives aromas, and melts any glaze slightly for a just baked experience. Be careful with timing, as overheating will make the crumb gummy or too hot to eat. Microwaves vary, so test with one or two seconds at a time until you find the sweet spot.
Notes
- Spice it up, increase the pumpkin pie spice by a small amount for a bolder autumn flavor, but add gradually so the mix does not overpower the pumpkin.
- Swap sugars, use the sugar free alternatives listed for a lower sugar profile, remembering that browning and texture may change slightly.
- Butter finish, brush the warm donuts with melted butter before rolling to add richness and help the cinnamon sugar adhere uniformly.
- Muffin pan option, bake in a muffin pan if you do not have a donut pan, extending the bake time and testing doneness with a toothpick.
- Glaze thickness, adjust the milk in the glaze to make a thicker coat for a substantial bite or a thinner drizzle for light sweetness.