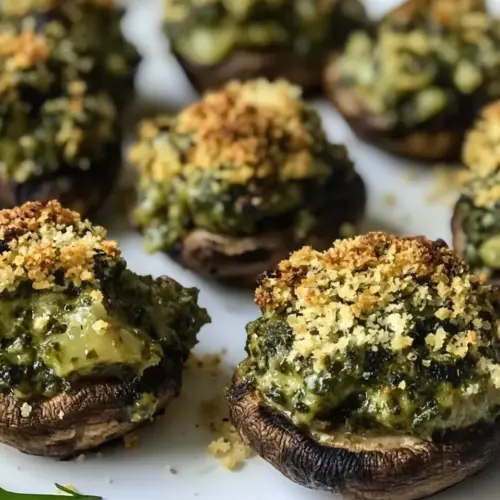
Baked Pesto Mushies with Crunchy Cashew Cheese
Baked Pesto Mushies with Crunchy Cashew Cheese are creamy, crispy, and herb forward little bites perfect for easy weeknight dinners or casual entertaining. Bright basil pesto meets silky cashew cheese that browns to a crunchy finish, creating a vibrant, dairy free option that guests adore. Make ahead friendly and endlessly adaptable, these mushrooms are worth trying for a crowd pleasing starter.
Equipment
- Food Processor
- Oven
- Baking Tray
Ingredients
- 20 button mushrooms Clean and hollow to prepare a cup for stuffing; provides a meaty, earthy base and soaks up surrounding flavors during baking. Browning its surface concentrates umami and adds pleasant texture contrast when roasted.
- 4 garlic cloves Crush and mince to release pungent, aromatic oils that deepen savory notes; adds sharpness to both pesto and cashew cheese components. Sauté briefly if desired to mellow heat and bring sweetness while preserving garlic character.
- 2 spring onions Slice thinly and sprinkle raw or lightly sauté to contribute a mild oniony crunch; brightens the filling with fresh, green bite. Use both whites and greens to vary texture and enhance visual appeal.
- 2 cups basil leaves Pack and blend to form the herbaceous backbone of the pesto, delivering bright, aromatic basil fragrance and flavor. Fresh leaves emulsify with oil to create a glossy sauce that clings to mushrooms.
- 1/2 cup chives Chop finely to add delicate oniony, garlic-like hints and verdant color; balances the pesto with a subtler, grassy note. Scatter some on top after baking for a fresh finish and mild texture contrast.
- 4 small red chilies Deseed and finely chop to inject spicy, fruity heat and a pop of color; adjusts the pesto's warmth to taste and complements savory elements. Roasting briefly softens sharpness while concentrating chili flavor for complexity.
- 1/4 cup pine nuts Toast lightly and blend into the pesto to provide a buttery, resinous nuttiness and help emulsify the sauce for body and rich mouthfeel. Grinding them releases oils that add depth and traditional pesto character.
- 5 tablespoons olive oil Drizzle and emulsify with basil to bind pesto ingredients, impart fruity richness and help coat fillings evenly. Use extra to brush mushrooms before baking for a glossy finish and added moisture.
- 1/2 lemon juiced Squeeze fresh to introduce bright acidity that lifts the pesto and balances richness from oil and nuts. Use judiciously to enhance overall flavor without overpowering delicate herb notes.
- salt to taste Season sparingly to enhance and balance all flavors; brings out natural umami and reduces perceived bitterness in herbs and nuts. Add incrementally, tasting to achieve harmonious seasoning throughout the dish.
- 3/4 cup cashews Soak and blend to create the creamy base for crunchy cashew cheese, contributing richness and a subtle sweet nuttiness. When processed, provides body and acts as a dairy-free, protein-rich binder for texture.
- 2 to 4 tablespoons water Add gradually to adjust consistency, creating a smooth yet scoopable cashew cheese; controls thickness for spreading or dolloping. Use chilled water for a creamier emulsion and stop when desired texture is reached.
- 1 garlic clove Mince and incorporate for an extra layer of aromatic pungency in the cashew cheese; enhances savory depth and complements the cashew nuttiness. Roast or use raw depending on preferred intensity to meld with other flavors.
- 3 teaspoons nutritional yeast Sprinkle and blend with cashews to add a cheesy, umami-rich flavor while keeping the cheese vegan; enriches mouthfeel and gives a slightly nutty, savory profile. Stir well to evenly distribute and mimic aged-cheese notes.
- 1/2 lemon juiced Squeeze freshly to brighten the cashew cheese with citrus acidity and cut through richness; balances the savory and fatty elements for a lively finish. Adjust to taste for a harmonious tang without overwhelming other flavors.
- salt to taste Season to taste to complete the cashew cheese, enhancing overall balance and highlighting subtle flavors; final adjustment ensures the spread complements the pesto-stuffed mushrooms. Add small amounts and taste between adjustments for best results.
Instructions
- Soak the cashews in water for at least three hours but overnight is better.: The cashews soften during soaking, allowing them to blend into a completely smooth, creamy texture that mimics soft cheese. You should notice the cashews swell slightly and feel soft when pressed between fingers, which makes a huge difference in the final mouthfeel. If they are not fully hydrated, your cashew cheese can be gritty and lumpy, so avoid rushing this step. A common mistake is using boiling water to force a quick soak, which can change the flavor and texture; stick to room temperature water and a longer soak for the best results.
- Crush the garlic and loosely chop the herbs, chili and spring onions.: Crushing the garlic releases pungent aromatics that give the pesto backbone, while loosely chopped herbs and spring onions retain bright flecks of green and little bursts of flavor. You should perfume the prep area with a fresh, herbal scent that hints at the final dish. If the herbs are chopped too finely, the pesto can turn into a paste that loses texture, so keep it slightly coarse for character. Avoid overworking the herbs to prevent bruising and bitterness.
- Place these and the remaining ingredients into a food processor and pulse until chopped finely. Place to one side.: As the herbs and nuts chop together, you will see a peppering of green with tiny nut fragments, and smell a heady mix of basil and garlic. The pine nuts and olive oil will begin to bind the mixture into a glossy pesto. Stop and scrape the sides periodically to ensure even blending. A frequent error is running the processor continuously, which can heat the mixture and dull fresh flavors, so pulse in short bursts.
- Place your soaked cashews and the water into a food processor. Pulse until the mixture becomes smooth and free of lumps. This can take a while.: While blending, the cashew mixture will transform from chunky to velvety smooth; watch the texture through the lid and add water sparingly to achieve a thick, spoonable cream. The sound changes from intermittent grinding to a steady, high pitched whir, and the aroma turns subtly sweet and nutty. If the mixture remains grainy, it usually means the cashews were under soaked or the processor needs more time; scrape and continue blending rather than adding more liquid prematurely.
- Crush the garlic and then add all the remaining ingredients to the cashew mixture. Again, pulse until everything is smooth and mixed through.: Once combined, the cashew cheese should be glossy, slightly loose, and aromatic from garlic and lemon . Taste and adjust salt and lemon to make sure the tang and savor are balanced. The finished texture should hold its shape on a spoon but spread easily. Overblending can warm the mixture and thin it too much, so check texture often. A common pitfall is underseasoning, so be bold with a little salt and acid at this stage.
- If you have the time, it’s worthwhile popping both the pesto and the cashew cheese into the fridge for a few hours to allow the flavors to blend and settle.: Chilling calms the sharper edges of raw garlic and allows the fats to firm slightly, which improves spreadability and deepens flavor. You will notice the aroma mellow and the individual elements knit together into a cohesive profile. I find that overnight chilling yields the best result, though a couple of hours still helps. Avoid leaving them uncovered in the fridge where they can dry out, and do not skip chilling if you prefer a more integrated, rounded taste.
- Preheat the oven to 180°C.: Preheating ensures even roasting of the mushrooms so they cook through while the cashew cheese crisps on top. You should feel a warm, steady heat when opening the oven, and the environment should be hot enough to brown the topping within the time window. Skipping preheat leads to uneven cooking, with mushrooms that sweat rather than roast, so always allow the oven to reach temperature before baking.
- Wash the mushrooms and pull out the stems.: Cleaning the mushrooms removes grit while removing stems creates space for the filling. The caps will appear glossy and slightly moist after washing, and the open cavity should be large enough to hold a spoonful of pesto and a dollop of cashew cheese. Pat them dry to avoid diluting your fillings, and reserve any usable stem for another use if desired. A common mistake is rinsing too vigorously and leaving them saturated; blot gently with a towel.
- Scoop the pesto into the mushroom heads, then add a dollop of the cashew cheese on top. Sprinkle with freshly cracked pepper.: As you fill the caps, the pesto will cling to the interior, and the cashew cheese will sit on top like little crowns that brown attractively. You should see a neat contrast between the deep green pesto and the pale cashew topping, and the aroma of herbs and toasted nuts will be pronounced. If you overfill, the cheese can overflow and burn at the edges, so fill conservatively and press gently to level the topping.
- Place in the oven and bake for 10-20 minutes until the cashew cheese is golden and the mushrooms are cooked through.: During baking you will hear faint sizzling as moisture releases, and the tops will turn a pale golden to deeper amber color depending on time. The mushrooms should be tender and juicy without collapsing, while the cashew cheese gains toasty notes and a slightly firm edge. If you underbake, the cashew topping will stay pale and soft, missing that nutty crunch, so watch closely in the last minutes. Avoid opening the oven repeatedly which can extend cooking time and prevent browning.
- Pop them out on a serving platter and watch the little guys disappear before your eyes.: The final platter should steam gently when presented, releasing basil and roasted nut aromas that draw people in. Serve warm so the texture of the cashew cheese is at its best, slightly firm on the exterior and creamy inside. One common oversight is leaving them to sit too long where the cashew topping can soften and lose its crisp edge, so plan to serve shortly after they come out of the oven.
Notes
- Soaking time matters — Plan ahead and soak the cashews for several hours or overnight so the cashew cheese is silky, not gritty. Properly hydrated nuts blend more easily, producing a cream that browns beautifully in the oven.
- Keep pesto texture lively — Pulse the herbs, pine nuts, and garlic instead of running the processor nonstop. Pulsing preserves tiny flecks of herb that look attractive and provide textural contrast.
- Adjust chili to taste — The four small red chilies offer a pleasant heat for many, but you can reduce or increase them to suit your guests. Try one or two first if you are unsure about spice tolerance.
- Dry mushrooms for better roasting — After washing, blot the mushrooms dry with paper towel so they roast instead of steam, concentrating flavor and improving texture.
- Make ahead and chill — Both the pesto and cashew cheese can be made a day in advance. Chilling them lets flavors meld and saves time when assembling before baking.
- Check oven temperature early — An accurately preheated oven at 180°C ensures even cooking. Use an oven thermometer if your oven runs hot or cool to avoid overbrowning the cashew topping.