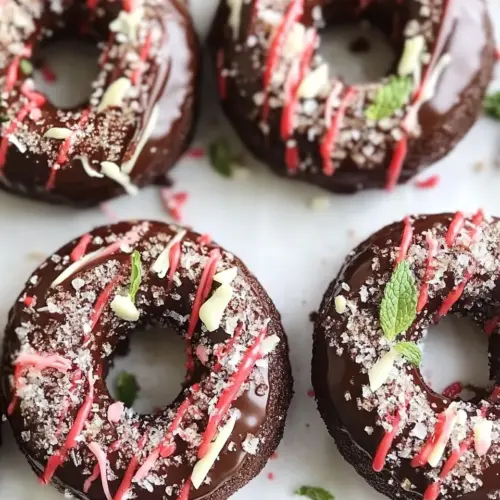
Baked Mint Chocolate Donuts
Baked Mint Chocolate Donuts are tender, chocolaty donuts finished with a minty candy cane crunch. These easy baked treats blend cocoa, chocolate chips, and a silky cocoa glaze for a festive, not fussy, holiday dessert. Perfect for winter gatherings or a sweet weeknight treat, they offer bright peppermint contrast and a soft cake like crumb that begs to be shared.
Equipment
- Donut Pan
- Medium Bowl
- Wire Rack
- Paring knife
Ingredients
- 1/2 cup unsweetened creamy peanut butter (or almond or sunflower seed butter) Adds creamy texture and rich nutty flavor while providing healthy fats and binding the batter; helps create moist donuts and can be swapped for almond or sunflower seed butter without altering overall structure.
- 1/2 cup unsweetened applesauce Contributes moisture and natural sweetness while reducing the need for added fats; keeps donuts tender and light and helps balance the peanut butter’s density.
- 3 large eggs Provides structure, lift, and leavening through protein and coagulation when heated; helps set the crumb and ensures the donuts hold their shape after baking.
- 1/4 cup maple syrup Imparts natural sweetness and a touch of caramel-like flavor while helping to thin the batter for easier mixing and consistent texture.
- 1/4 cup cocoa powder Adds deep chocolate flavor and color while contributing a slight bitterness that balances sweetness; helps intensify the overall cocoa profile of the donuts.
- 1/4 cup chocolate chips Melts into pockets of chocolate within the batter, adding bursts of concentrated chocolate flavor and a pleasant melt-in-mouth texture when baked.
- 2 tablespoons ground flaxseed (or whole wheat flour) Absorbs moisture and adds body to the batter while supplying fiber and a slight nuttiness; can act as a binder or thickener if whole wheat flour is substituted.
- 1 teaspoon baking powder Provides chemical leavening to help the donuts rise and become light and tender; works with eggs to create lift and an even crumb structure.
- 1/8 teaspoon salt Enhances and balances flavors by brightening sweetness and reducing any bitterness; also strengthens gluten slightly and supports overall taste.
- 1/4 cup powdered sugar Creates a sweet, decorative coating or glaze when combined with liquid, adding a smooth surface and additional sweetness to the finished donuts.
- 2 tablespoons milk Thins the powdered sugar to form a pourable glaze, contributing to a smooth consistency and slight creaminess that adheres well to the donuts.
- 1 tablespoon cocoa powder Intensifies chocolate flavor in the glaze and adds color depth; helps produce a glossy, chocolatey topping when blended with powdered sugar and milk.
- 3 candy canes (crushed) Provides crunchy peppermint flavor and festive visual contrast when sprinkled on top; crushed pieces add texture and a refreshing minty finish to each donut.
Instructions
- Preheat oven to 350 F and grease a standard donut pan very well, including the centers of the donut pan.: The oven warming gives an immediate environment for rise, and greasing thoroughly prevents sticking in those small donut centers. You should notice the oven cycling and a steady heat, and greased pans will show a thin sheen that helps release the donuts. If the pan is under greased the donuts may tear when removed, so take a moment to coat every cavity. A common mistake is skipping the center tube of each donut cavity, which can cause the donut hole to cling and break.
- Add all donut ingredients to a medium bowl and stir until well combined.: As you mix, the batter should look glossy and uniform, with no streaks of cocoa powder or clumps of nut butter. The sound is a quiet stirring, and the scent will be a blend of maple and chocolate. Good mixing ensures even rise and texture, which is why I make sure the eggs are fully incorporated. Overmixing can lead to a tougher crumb, so stop once the ingredients are homogenous.
- Divide batter evenly between 10 donut cups, filling each about three-quarters full, using a scant 1/4 cup batter per donut. (Bake in two batches if you have one 6 donut donut pan.): Filling evenly yields consistent bake times and uniform size. The batter should be thick but pourable, and you can hear it settle into the pan as you spoon it. I use a small measuring cup to keep portions steady. If you overfill, donuts can overflow and form misshapen tops, so keep to about three quarters full.
- Bake for 18-20 minutes, or until a cake tester inserted into the center of each donut comes out clean.: During baking you will notice the aroma intensify and edges beginning to pull away slightly from the pan. A clean tester indicates the interior is set while keeping the crumb tender. The tops should spring back to gentle pressure and be matte, not wet. Opening the oven too soon can cause collapse, so rely on the tester to be sure.
- Remove from oven and let donuts cool in the pan for 5 minutes. Use a paring knife to loosen the edges of the donuts as needed and transfer to a wire rack to cool completely.: The initial cooling lets the donuts set so they hold shape when removed. If you touch one, it will feel warm and slightly soft, but not jiggly. A paring knife helps release stubborn edges without tearing. Donuts that are transferred too early can crumble, so patience here preserves texture.
- Stir together powdered sugar, cocoa powder, and milk in a small bowl until icing is smooth.: The icing should be glossy and pourable, with the cocoa fully incorporated so there are no gritty bits. Whisking by hand creates a silky surface and a sweet chocolate aroma. If the glaze is too thick, add a few drops of milk ; if too thin, sprinkle a bit more powdered sugar . A common error is adding too much liquid at once, making the glaze runny rather than coating the donut.
- Dip each cooled donut into the icing and top with crushed candy canes. Let sit for a few minutes (at least) before serving so the icing sets.: Dipping should coat the top cleanly, leaving a smooth layer that sets in minutes. You will hear a faint drizzle as excess icing returns to the bowl, and the crushed candy canes will stick to the surface, adding crunch and a peppermint scent. Allow the icing to set for at least a few minutes before serving for a tidy finish. If you apply topping while the glaze is too wet the candy may sink or slide off, so let the glaze thicken slightly before sprinkling.
Notes
- Room Temperature Ingredients: Bring eggs and milk to room temperature so they blend smoothly, creating a uniform batter and better rise.
- Pan Preparation: Grease the donut pan thoroughly, including the center posts, to ensure clean release; if you have trouble, use a pastry brush to reach tight spots.
- Storage Timings: Store unfrosted donuts in an airtight container in the fridge for 3 to 5 days, and keep frosted donuts for up to 2 days to preserve the topping texture.
- Butter Substitute Note: If using sunflower seed butter expect a more pronounced flavor, and consider almond butter for a more neutral profile, as noted in the recipe guidance.
- Mini Muffin Option: To make mini versions, use a mini muffin pan and bake for roughly the same time while keeping an eye on color and a clean tester for doneness.
- Kid Friendly Step: Crushing candy canes is a safe, simple task for children; place canes in a sealed bag and let them tap with a measuring cup.