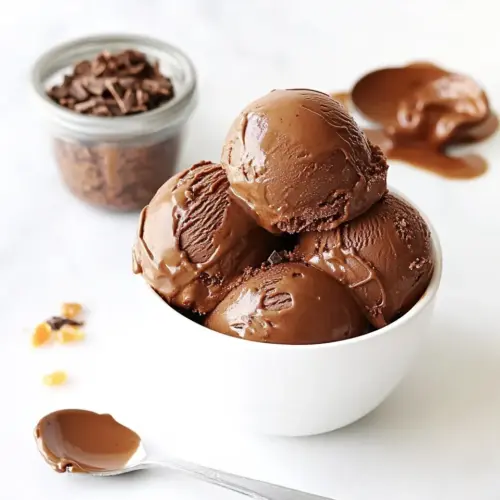
Aztec Chocolate Caramel Ice Cream
Aztec Chocolate Caramel Ice Cream is a creamy, spiced frozen custard that layers deep bittersweet chocolate with toasted caramel and a whisper of cinnamon and cayenne. Velvety texture from a rich custard base makes it an easy decadent dessert for special evenings or casual celebrations, offering an unforgettable balance of sweet, smoky, and warm spice. Make it to impress and savor the bold finish.
Equipment
- Saucepan
- Heat proof rubber spatula
- Whisk
- Fine mesh sieve
- Mixing Bowls
- Ice Cream Maker
Ingredients
- 1 cup heavy cream Whip into peaks and add luscious richness and smooth mouthfeel to the custard base, balancing flavors and providing a creamy finish for the ice cream.
- 1 cup granulated sugar Dissolve into caramelized sweetness during cooking to provide structure, sweetness balance, and contribute to the overall mouthfeel of the frozen dessert.
- 2 tablespoons unsalted butter, cut into cubes Melt gently to create a silky, rounded fat component that enhances texture and adds a subtle savory richness when incorporated into the chocolate-caramel mixture.
- 5 ounces bittersweet chocolate, finely chopped Melt into a glossy chocolate base to deliver intense cocoa flavor, depth, and luxurious bittersweet notes that define the ice cream’s chocolate character.
- 1 1/2 teaspoons ground cinnamon Season the custard with warm, aromatic spice to introduce an earthy, slightly sweet complexity that complements chocolate and enhances aroma.
- 1/2 teaspoon fine sea salt Season the mixture to heighten and balance sweetness and chocolate bitterness, while helping accentuate other flavors and preserve savory depth.
- 1/4 teaspoon cayenne pepper, or to taste Spice the custard with heat to provide a subtle warming contrast that lifts the chocolate and cinnamon, adjustable to desired spiciness.
- 2 cups whole milk Combine with cream to form the liquid foundation of the custard, supplying body, lactose for browning, and a creamy mouthfeel when frozen.
- 4 egg yolks Enrich and thicken the custard by emulsifying fats and stabilizing texture; cook with milk to form a silky, custard-based ice cream foundation.
- 1 teaspoon vanilla extract Add at finish to brighten and round flavors, providing aromatic lift and enhancing the perception of sweetness and chocolate nuances.
Instructions
- Prepare an ice bath by nesting a smaller bowl inside a larger bowl filled with ice water. You can also use a zip-top freezer bag set inside a bowl of ice water.: The sound of clinking ice and the immediate cooling sensation when you set a hot bowl into the bath are satisfying cues that the tempering and rapid cool down will work effectively. Using an ice bath stops carryover cooking and helps the custard reach a safe, cool temperature quickly, preserving texture and food safety. A common mistake is using too little ice or too warm water, which slows cooling and can allow residual heat to continue cooking the custard. Make sure the inner bowl sits snugly and that the ice surrounds it well for even chill.
- Warm cream in a small saucepan until warm to the touch (do not boil). Reduce heat to keep warm while you prepare the caramel.: You will feel a gentle steam and slight wisping as the heavy cream heats, but you must avoid boiling which can separate the fat and change the mouthfeel. Warming the cream softens it so that when it meets the caramel, it melds smoothly, preventing large temperature shocks that could seize the caramel. A frequent error is overheating to a simmer or boil, which can scald the dairy, introducing off flavors; remove from heat at the first sign of steam and small bubbles forming at the edge.
- Place sugar in an even layer in the bottom of a large heavy saucepan set over medium heat. Keep an eye on it, but once the sugar starts to liquefy around the edges, use a heat-proof rubber spatula to carefully drag the liquid toward the center. Continue to drag the liquid edges toward the center, doing so slowly, until all the sugar is melted and golden brown. If at any point the color begins to get too dark and you still have granulated sugar, lower the heat and gently stir to dissolve the remaining sugar. The final caramel should have a faintly burnt smell and deep amber color. Watch this carefully as caramel can go from not quite done to burnt in a matter of seconds.: As the sugar warms, listen for the faint tinkling when crystals begin melting and watch for the edges to liquefy first, forming a clear amber ring. Slowly coax the molten edges toward the center with a heat proof rubber spatula to encourage even caramelization. Rushing this phase or stirring too aggressively can cause crystals to form and lead to a grainy caramel. If parts darken too quickly, reduce the heat; even color is the sign of properly developed flavor.
- Remove caramel from heat and slowly pour in warm cream, whisking vigorously the entire time (caramel will bubble up so be careful as it is VERY hot). Continue to whisk, scraping the sides and corners of the pan, until no hard chunks remain. If necessary, return to medium-low heat and whisk until any remaining chunks are dissolved. Add butter and chocolate and whisk until smooth and chocolate is melted. Whisk in cinnamon, salt, and cayenne, followed by milk.: Expect an intense hiss and bubbling as the hot caramel meets the warm cream , that is normal; whisking keeps the mixture smooth as any hardened shards dissolve. Continue whisking until the mixture is glossy and free of lumps; if needed, briefly return to medium low heat to dissolve remaining pieces. One common mistake is adding cold cream which causes more violent bubbling and risks hardening the caramel; always warm the cream first to tame the reaction and protect yourself from splatter.
- Return mixture to medium heat until it just begins to steam.: The butter will melt into the caramel, creating a silken mouthfeel, while the finely chopped bittersweet chocolate will melt into a deep, cohesive sauce. You should see the surface become glossy and uniform, and the aroma will shift from toasted sugar to rich chocolate with a buttery note. If the chocolate is not chopped finely enough, longer heating will be needed, risking overheating; keep the pieces small for even melting and stir patiently.
- In a small bowl, whisk egg yolks. Slowly ladle in some of the warm chocolate mixture, about 1/4 cup at a time, until about half of the chocolate mixture has been incorporated and yolks are warm to the touch. You want to do this gradually; doing so will temper the egg yolks rather than cook them.: As you add the spices, inhale the fragrant lift they provide, which brightens the heavier flavors. The whole milk eases the intensity, creating a balanced liquid base. Stir thoroughly to distribute the spices evenly, because pockets of spice can create unexpected bursts of flavor. A typical misstep is adding too much cayenne up front; start conservatively and adjust after chilling if needed.
- Pour entire yolk mixture back into the saucepan and return to medium heat, stirring constantly and scraping the bottom of the pan as you do, until the mixture thickens slightly and coats the back of a spoon, about 5 to 7 minutes (it will measure approximately 170ºF on a thermometer). Do not let it to boil.: You will see tiny wisps of steam along the surface, a visual cue that the mixture is warm enough to temper the egg yolks without scalding them. This gentle heat ensures the custard will thicken properly when combined with the yolks. Avoid bringing it to a boil, because boiling can break down the emulsion and alter the final texture; maintain a patient, moderate heat instead.
- Stir in vanilla extract. Pour through a fine mesh sieve into prepared ice bath, and let sit for 15 to 20 minutes or until cooled to room temperature. Cover tightly with plastic wrap and refrigerate for at least 3 hours or preferably overnight.: The yolks should be smooth and glossy when whisked, and slightly pale, which signals they are ready to accept warmer liquid. Slowly ladle warm chocolate mixture in about 1 4 cup increments while whisking the yolks; you will notice the yolks loosen and warm without cooking into ribbons. This gradual tempering prevents curdling, a common problem when too hot a liquid is added too quickly. If you rush, the yolks can scramble, leaving you with bits and an undesirable texture.
- When custard base is completely chilled, churn ice cream according to manufacturer’s instructions until the ice cream is the consistency of soft serve. Spoon into a freezer safe container and freeze overnight until firm.: As the custard thickens, listen for a change in the sound of simmering and watch for it to coat the back of a spoon, which is your cue to stop heating. The texture should become noticeably silkier and slightly thicker after about 5 to 7 minutes, and it will measure roughly 170ºF on a thermometer. Overcooking to a boil will curdle the custard and ruin the emulsion, so maintain constant motion and gentle heat to avoid this pitfall.
- Stir in vanilla extract: The vanilla will add a floral, rounded lift that pulls the layers together, and you should sense the aroma blooming as soon as it hits the warm custard. Pour the mixture through a fine mesh sieve into the prepared ice bath to remove any tiny solids and stop the cooking, the cooled custard will be smooth and glossy. A frequent error is skipping the sieve, which can leave unwanted bits from cooked egg or undissolved spice, altering the final texture.
- Let sit for 15 to 20 minutes or until cooled to room temperature, then refrigerate for at least 3 hours or preferably overnight: Cooling slowly in the ice bath and then chilling in the refrigerator improves flavor melding and texture, allowing the custard to develop depth as the spices harmonize. Overnight rest also helps the base to fully hydrate and makes a silkier final churn. A common misstep is rushing this step and churning a warm base, which traps large ice crystals and yields a coarse texture instead of smooth creaminess.
- When custard base is completely chilled, churn ice cream according to manufacturer’s instructions until the ice cream is the consistency of soft serve: As the machine works, you will notice the volume increase and the texture becoming thick and creamy, with a velvety sheen. Proper churning incorporates air in a controlled way, which keeps the ice cream scoopable and light while retaining richness. Overchurning can make the texture grainy or cause it to melt quickly when served, so stop at soft serve and transfer promptly to freeze.
- Spoon into a freezer safe container and freeze overnight until firm: Press a piece of plastic wrap directly onto the surface to prevent ice crystals, and allow it to firm up in the freezer for several hours to reach the ideal scoopable texture. Overnight freezing lets the flavors settle and gives the ice cream a dense, satisfying body. Leaving it uncovered is a common mistake that leads to freezer burn and icy texture; always cover it tightly and allow sufficient freezing time before serving.
Notes
- Control your heat during caramelization: Keep the stove at medium and decrease immediately if edges darken too fast. Even color is the best indicator of proper caramel development. If you rush and the sugar scorches, the bitter notes will overpower the rest of the dessert. Use a heavy bottom pan for even heat distribution.
- Warm dairy before combining: Heating the heavy cream and whole milk slightly reduces the temperature shock when they meet hot caramel and makes incorporation smoother. Cold dairy will cause violent bubbling and can harden the caramel into pieces that are difficult to dissolve. Warm to just under simmering to keep control.
- Chop chocolate finely: Smaller pieces of bittersweet chocolate melt faster and more evenly, preventing pockets of unmelted chocolate in the base. This also reduces the time you need to reheat the mixture, preserving texture. Use a sharp knife to achieve a consistent chop.
- Measure spices carefully: The cinnamon and cayenne pepper are powerful, so start with the listed amounts and adjust in future batches to your taste. Too much cayenne can shift the dessert from nuanced to plainly spicy. If you want to experiment, split the batch and adjust one to compare.
- Temper yolks gradually: Add warm custard to the yolks in small increments to prevent scrambling. This technique preserves the smoothness of the custard and ensures a stable emulsion when you finish cooking. If curdling begins, remove from heat and whisk vigorously while cooling to salvage the mixture.
- Use a fine mesh sieve: Straining the finished custard removes any tiny solids and ensures an ultra smooth base before chilling. This small step noticeably improves mouthfeel, giving a luxurious texture. Skip the sieve and you risk tiny cooked egg pieces or spice fragments in the final ice cream.
- Chill thoroughly before churning: Warm mixture traps large ice crystals when churned, creating a coarse texture. Refrigerate for at least 3 hours, preferably overnight, so the base is very cold before you churn. Plan ahead, as rushing this step undermines the final product.
- Do not overchurn: Stop when the machine reaches a soft serve consistency to maintain the ideal balance of air and creaminess. Overchurning can cause the ice cream to become too dense or to separate. Follow your machine’s guidance and check frequently as it approaches readiness.
- Prevent freezer burn: Press plastic wrap onto the surface of the ice cream prior to sealing the container and place in the coldest part of your freezer. This keeps crystals from forming and preserves the fresh churned texture. Leaving gaps will let air in and dry out the ice cream.
- Allow slight tempering before serving: Remove the ice cream from the freezer 10 to 15 minutes before scooping so it softens slightly for clean, rounded scoops. Serving too cold makes scooping difficult and mutes flavors. A brief rest helps the chocolate and caramel express themselves fully.