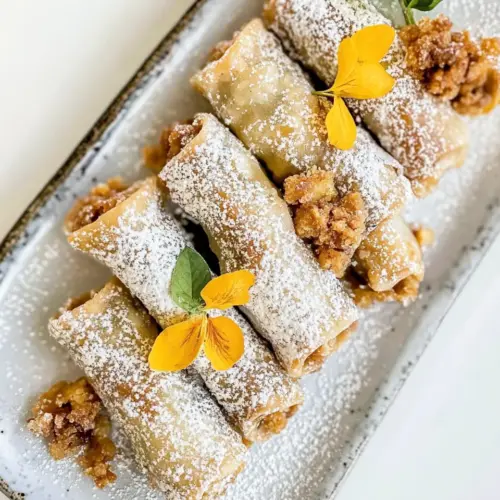
Apple Pie Spring Rolls
Apple Pie Spring Rolls blend crispy rice paper sheets with a warm, spiced apple filling for a crispy, cozy treat. These easy, shareable rolls make an ideal easy weeknight dessert or snack with bright fruit flavor and a hint of pumpkin spice, perfect for fall gatherings and last minute entertaining.
Equipment
- Non-stick frying pan (10.5 inch / 26 cm)
- Non-stick baking sheet
Ingredients
- 8 Rice paper sheets (I used a 6-inch diameter small one this time) Soak and soften to create pliable wrappers for holding the apple filling; hydrate briefly in warm water until translucent, then pat dry to avoid sogginess and ensure even frying or baking.
- 3 Apple 1 apple is approx. 3.5 oz (100 g) Provide sweet, fruity body and texture; peel, core, and thinly slice or dice before cooking down slightly to concentrate flavor and meld with sugar and spice for a tender filling.
- 1/4 cup Cane sugar Add concentrated sweetness and help caramelize the apples when cooked; sprinkle and stir into the apple mixture to balance tartness and aid in achieving a golden, syrupy interior.
- 1 tbsp Pumpkin spice or cinnamon Season and aromatize to complement the apples; sprinkle pumpkin spice or cinnamon into the filling to impart warm, spicy notes and deepen the overall flavor profile.
Instructions
- Wash and peel apples.: The first sensory cue is the fresh scent when you peel the apple , a bright, slightly tart aroma that tells you the fruit is ripe enough. Use a sharp peeler so the skin comes away in smooth ribbons, and rinse the apples under cool water to remove any residues. I like how the peeled fruit feels firm in my hand, and that firmness helps when grating. A common mistake is using overly soft apples, which will mush during grating and produce a watery filling, so choose ones that yield slight resistance to the blade.
- Use a large hole cheese grater and grate the apples.: Grating transforms the texture, creating fine strands that cook down evenly, releasing sweet juices that mingle with the sugar. You will hear a faint rasping as the apple meets the grater, and the bowl will fill with moist, pale ribbons. This size is ideal because it shortens cooking time and avoids large chunks that could puncture the wrapper. Avoid pressing too hard while grating, which can lead to uneven pieces and extra liquid.
- Take a small saucepan and add grated apples, sugar, and pumpkin spice.: When you add the grated apple , sprinkle the Cane sugar and dust the pumpkin spice across the top to distribute flavor evenly. The dry sugar will initially glisten on the fruit, and once heat is applied it dissolves and pulls juices out of the apple , creating a cohesive filling. Use a small saucepan so the mixture concentrates rather than spreads out. A common error is using too large a pan, which can prevent even heating and prolong cooking.
- Heat it over low-medium heat until the sugar dissolves and the apple pieces soften. Leave it to cool.: As you warm the pan you will notice steam rising and the aroma of baked fruit and spice intensifying. Stir occasionally, listening for a gentle simmer and watching the mixture thicken. The pieces should become translucent and tender, and the sugar should melt into a glossy syrup coating the apple . Remove from heat and let it cool to avoid making the wrappers soggy when assembled. A frequent mistake is rushing the cooling, which leads to wrappers becoming limp because of excess steam.
- Gently submerge the rice paper. (See NOTES on how to know the duration.): Softening the rice paper sheets is a tactile step. Submerge briefly in water or use a damp towel depending on the wrapper type, and you will feel the paper go from stiff to pliable in a few seconds. The wrapper should be slightly tacky but not falling apart. Over soaking makes it tear easily, while under soaking results in cracks when you try to fold, so test one wrapper first to find the perfect timing.
- Once submerged, transfer it to a dry and smooth surface.: Place the softened wrapper on a clean surface where it can sit without folding on itself. I use a smooth cutting board so the wrapper does not catch, and I let any excess water drip off for a moment. The surface should feel cool under the wrapper, which prevents it from continuing to soften too rapidly. If the surface is uneven you risk small rips when wrapping, so pick a flat area.
- I place the filling in the middle around the lower third of the rice paper. Approx. 1-2 Tablespoons.: The placement is about balance, not volume. Put a small mound near the lower third so you can fold the bottom up and roll without the filling spilling. You will sense the slight warmth of the filling against the wrapper if it has not fully cooled, and that warmth helps the wrapper stick. Avoid overfilling, which makes sealing difficult and can lead to splitting while frying or baking.
- First, fold the sides gently but tight towards the middle.: This step sets the structure. Folding the sides inward creates neat edges and keeps the filling contained. The wrapper should feel taut but not strained; you want a snug envelope. If you fold too loosely the roll will open during cooking, and if you fold too tight you risk tearing the paper, so aim for gentle, firm pressure.
- Take the bottom seam and fold it upwards gently, but tight.: Folding the bottom up locks in the filling and forms the start of the classic spring roll shape. Press the seam with your fingers to create a clean edge, and keep the filling compact. You should hear a faint creak as the wrapper settles into place, and the roll should feel stable in your hand. A common pitfall is leaving a gap at the bottom, which will let filling escape while cooking.
- Use your fingers to tuck the filling tight within the rice paper before rolling it up.: Tucking ensures the filling is compact and centered. Use your fingertips to coax stray pieces inward, and smooth the wrapper so there are no air pockets. This step keeps the texture consistent throughout the roll and prevents weak spots that could burst. Avoid pushing too hard which might squeeze juices out, making the wrapper soggy.
- Roll it all the way up, but use your fingers to keep the filling tucked tightly.: The final roll should be smooth and uniform, feeling firm yet pliable. Roll slowly and evenly, keeping the tension constant so the shell adheres and seals. The finished cylinder should sit flat on the surface without unwrapping. If the roll is loose at the end, the filling can escape while cooking, so rewrap if needed to secure it.
- Preheat a frying pan over medium heat. Spray a bit of oil. Fry the spring rolls on all sides. Gently roll them around using tongs. They should be crispy and slightly bubbly on the surface.: When the rolls hit the pan you should hear a soft sizzle, and within moments small bubbly blisters will appear on the wrapper. This is the cue that crispness is forming, and the aroma of caramelizing sugar will fill the air. Turn them gently with tongs so each side gets even contact with the pan. Avoid overcrowding the pan which lowers the temperature and results in soggy rolls.
- Preheat the oven to 395 Fahrenheit (ca. 202 °C). Place the rolls on a baking sheet with parchment paper or a non-stick baking mat. Spray it with a bit of oil. Don’t brush them, as you might end up adding too much. Bake them for 10-15 minutes. The rice paper will not change color, so don’t wait for them to be golden brown. I usually flip them after 10 minutes to ensure they are crispy all around.: Baking produces even crisping without excess oil. You will notice the surface becoming dryer and the rolls emitting a toasted aroma. Because rice paper does not always brown, rely on texture and a light, crackly feel to know they are done. Flip midway so both sides crisp uniformly. A mistake is waiting for color alone, which can lead to overbaking or missing the ideal crunch.
Notes
- Dry hands first Use dry hands when handling the rice paper sheets to avoid sticking, it keeps the wrappers manageable and speeds assembly.
- Adjust submersion time Because different wrappers vary, test one to determine whether a damp towel or quick dip works best for your brand.
- Cool filling fully Let the cooked apple mixture cool before wrapping so steam does not make the paper soggy and the rolls stay crisp after cooking.
- Use a small amount of filling Keep to about 1 to 2 tablespoons per wrapper to make rolling easier and to prevent splitting while cooking.
- Pan first, oven finish For maximum crisp with minimal oil, sear the rolls briefly in a non stick pan to create bubbles, then finish in the oven for even texture.