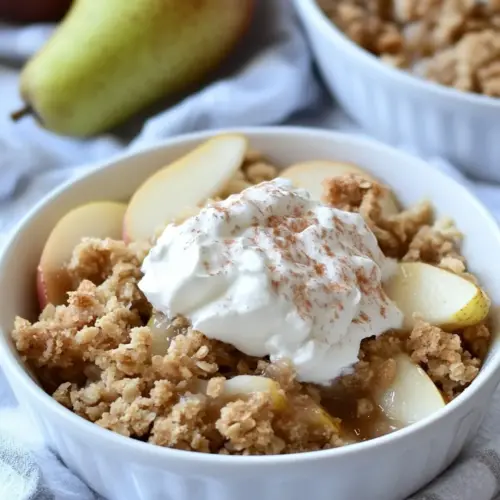
Apple Pear Crisp
Apple Pear Crisp combines tender, syrupy apples and pears with a crunchy, buttery oat topping for a warm, comforting dessert. This easy, crowd pleasing fall dessert offers a balance of sweet and bright citrus notes, making it perfect for family gatherings or a cozy weeknight finish. Try it warm with Vanilla ice cream for serving for a classic pairing that never fails.
Equipment
- 9 1/2-inch deep dish pie plate or similar baking dish
- Large Bowl
- Separate bowl for topping
- Oven
Ingredients
- 3 ripe firm pears peeled, cored and sliced Peel, core, and slice to provide a tender, juicy base for the filling that softens during baking and releases natural sweetness; pairs well with apples for balanced flavor and texture. Maintain firm ripeness to prevent mushiness and ensure even cooking throughout the crisp. Toss slices with juices and sugar to help macerate and create a syrupy filling as it bakes.
- 3 apples peeled, cored and sliced Peel, core, and slice to contribute a slightly tart, crisp texture that contrasts with pears and holds shape when baked. Choose varieties that bake well to provide structure and a bright apple flavor that complements the warm spices. Combine with pears to balance sweetness and enhance overall fruit complexity.
- 3 tablespoons orange juice Add bright acidity and citrus aroma to the fruit mixture, helping to prevent browning and enhancing overall flavor complexity. Use orange juice to deglaze fruit juices and boost natural sweetness without added granulated sugar. Stir into sliced fruit to promote maceration and a glossy, flavorful filling.
- 1/3 cup granulated sugar Sweeten the fruit mixture and help draw out juices for a syrupy filling when combined with fruit and orange juice. Dissolve into the fruit to balance tartness from apples and provide a caramelizing effect during baking. Adjust amount slightly for preferred sweetness while ensuring the filling thickens properly.
- 2 tablespoons flour Thicken the fruit juices as they cook to create a cohesive filling and prevent an overly runny texture. Sprinkle into the fruit mixture to absorb excess liquid and bind the slices together, promoting a jammy consistency. Combine evenly for consistent thickening throughout the crisp.
- 3/4 teaspoon ground cinnamon Season the filling with warm, aromatic flavor that complements the fruit without overpowering it, adding classic spice notes associated with apple desserts. Blend into the fruit mixture to infuse evenly and enhance overall aroma. Adjust quantity modestly to maintain balanced spice intensity.
- 1 teaspoon pure vanilla extract Enhance the fruit mixture with a concentrated sweet-floral note that deepens flavor and rounds out acidity, adding complexity to the filling. Stir into the fruit after mixing to distribute flavor evenly and avoid evaporation during baking. Use pure extract for a clean, authentic vanilla profile.
- Topping: Label the layer that accommodates the oat-flour-sugar mixture, providing a clear separation between the fruit base and crunchy topping components. Prepare the topping ingredients following this marker to ensure proper assembly. Place topping over fruit before baking to create a crisp, golden crust.
- 2/3 cup old fashioned rolled oats Add rustic chew and nutty texture to the topping, contributing structure and absorbing some fruit juices for a cohesive bite. Choose old-fashioned rolled oats for hearty texture that crisps nicely in the oven. Mix evenly with dry topping ingredients before incorporating melted butter.
- 2/3 cup all purpose flour Provide bulk and structure to the topping, helping create a crumbly, flour-based crust that binds with oats and butter when baked. Use all-purpose flour to achieve a tender yet crisp topping that browns evenly. Combine thoroughly with oats and sugars for uniform texture.
- 2/3 cup light brown sugar Impart deep, molasses-like sweetness and moisture to the topping, enhancing caramelization and delivering rich flavor contrast to the fruit. Light brown sugar helps produce a slightly chewy texture and golden color when baked. Mix into dry topping ingredients before adding melted butter.
- 1/2 teaspoon salt Balance flavors and enhance the overall taste profile of the topping by moderating sweetness and highlighting other ingredients. Use measured salt to draw out flavors and deepen the perception of sweetness without making it salty. Distribute evenly to avoid concentrated pockets of salt.
- 1/2 teaspoon ground cinnamon Season the topping with a secondary touch of warm spice that echoes the filling and unifies the dessert’s flavor. Combine with the other topping ingredients to ensure cinnamon is present in every bite. Use ground cinnamon for familiar, cozy aroma and taste.
- 1/2 cup 1 stick unsalted butter, melted Bind the dry topping ingredients and provide richness and browning through melted butter, resulting in a crisp, golden crust with tender pockets. Pour and mix melted butter until the oat-flour-sugar mixture clumps slightly to form cohesive crumble. Use unsalted butter to control overall seasoning and achieve optimal texture.
- Vanilla ice cream for serving Serve warm with a cold scoop to provide creamy contrast and enhance the dessert’s richness, creating a classic pairing that complements warm fruit and crunchy topping. Offer vanilla ice cream to add luscious mouthfeel and mellow any intense spices. Allow the crisp to rest briefly before adding ice cream to prevent complete melting.
Instructions
- Preheat oven to 350°F. Grease a 9 1/2 inch deep dish pie plate (or similar sized baking dish). Set aside.: As the oven warms to 350°F , you should notice a dry, warming air filling the kitchen, which helps the topping brown evenly rather than steaming. This temperature encourages the fruit to soften while allowing the crumble to turn golden without burning. A common mistake is skipping a full preheat, which can lead to uneven baking, so wait until the oven indicator shows it has reached the set temperature before placing the dish inside.
- In a large bowl combine pears, apples, orange juice, granulated sugar, flour, cinnamon and vanilla. Stir gently until completely combined. Dump the mixture (and any accumulated juices) into the prepared baking dish.: Rubbing the dish with a thin layer of butter or using a quick spray prevents the syrupy fruit from sticking and makes serving easier. You should see a faint sheen on the surface, and the butter will sizzle slightly when the hot fruit hits the dish. If you skip greasing, the fruit can cling to the edges, making it hard to transfer portions neatly, so take the extra minute to prepare the pan.
- For the topping: In a separate bowl, combine oats, flour, brown sugar, salt and cinnamon. Add melted butter and stir until combined. Using your fingers, crumble the mixture over the fruit occasionally pressing some of it together to form clumps. Bake for 45-60 minutes, until the fruit is tender (check it with a sharp knife), the top is golden brown and it is bubbling around the edges. Serve warm with vanilla ice cream.: When you toss the sliced pears and apples with the orange juice , granulated sugar , flour , ground cinnamon , and pure vanilla extract , the fruit should glisten and a light syrup may begin to form. Use a gentle folding motion to coat every slice without bruising, and you may pick up a sweet, spiced aroma that signals the flavors are marrying. Avoid overmixing which can crush the fruit and release too much juice, leading to a soggy bottom.
- Stir gently until completely combined: As you stir gently, note the change in texture as the sugar begins to dissolve and the flour starts to thicken the juices. The mixture should look cohesive, with each slice evenly dusted in spice and a slight gloss from the orange juice . A problem to watch for is uneven coating, which can produce pockets of underflavored fruit, so take your time to ensure a uniform mixture.
- Dump the mixture (and any accumulated juices) into the prepared baking dish: Pour the fruit and its juices into the greased dish, and spread it into an even layer so that it cooks uniformly. You should hear a soft plop as the fruit settles, and the juices will reflect light across the surface. Resist packing the fruit too tightly, as leaving small gaps allows steam to escape and keeps the filling from becoming mushy.
- For the topping: In a separate bowl, combine oats, flour, brown sugar, salt and cinnamon : When you whisk together the old fashioned rolled oats , all purpose flour , light brown sugar , salt , and ground cinnamon , the dry mix will smell toasty and sweet, and you can visually confirm even distribution of the brown sugar and spices. This step builds the flavor base for the crunchy topping, and an uneven mix can lead to pockets that either over sweeten or remain bland.
- Add melted butter and stir until combined: Pouring in the melted unsalted butter should transform the dry mixture into clumping crumbs that hold together when pressed. You will see glossy streaks as the butter coats the oats and flour, and the aroma of browned butter may emerge slightly. If the mixture is too dry, add a touch more melted butter; if too wet, a few extra tablespoons of oats will rescue the texture. Overly wet topping will not crisp properly, so adjust carefully.
- Using your fingers, crumble the mixture over the fruit occasionally pressing some of it together to form clumps: As you scatter the topping, press a few portions so they form clusters that will brown into satisfying chunks. You should hear soft crumbling, and visually the topping should show a mix of fine crumbs and larger clumps. Avoid pressing the entire surface flat, because the air pockets between clumps create texture; pressing only occasional areas yields the best contrast.
- Bake for 45-60 minutes, until the fruit is tender (check it with a sharp knife): During baking, the kitchen will fill with the scent of caramelizing sugars and warm spice, and you should see the topping turn a rich golden brown while juices bubble around the edges. Carefully insert a sharp knife into the fruit to test tenderness; it should glide through without resistance. A common misstep is removing the crisp too early, which leaves the fruit undercooked, or too late, which risks overbrowning the topping, so watch the color and bubbling carefully.
- The top is golden brown and it is bubbling around the edges: These visual cues indicate the right balance between set filling and toasted topping. Look for deep golden tones on the largest clumps and audible gentle bubbling along the dish sides. If bubbling is absent but the top is brown, the interior may still be undercooked, so return it to the oven briefly and tent with foil if the top approaches too much color.
- Serve warm with vanilla ice cream: Serving warm, you will notice steam rising and a contrast when you add a scoop of Vanilla ice cream for serving , which softens into silky ribbons across the fruit and soak into the crunchy topping. The cold and hot contrast is part of the pleasure here. Avoid serving straight from the oven if people will eat immediately without plates, as the dish can be very hot, so let it rest for a few minutes to avoid scalding.
Notes
- Adjust sugar to fruit sweetness If your pears and apples are very sweet, cut back on the granulated sugar in the filling by one to two tablespoons to keep the balance from tipping overly sweet.
- Create chunkier topping Press small handfuls of the topping into clumps before scattering them over the fruit so you get those satisfyingly large clusters when baked.
- Prevent a soggy bottom Toss the fruit with the flour evenly, and avoid overmixing which can release excess juice, ensuring the filling thickens rather than pools.
- Control browning If the topping browns too fast, tent the dish loosely with foil while the fruit continues to bake until tender.
- Use room temperature butter Melt then cool the unsalted butter slightly before combining so it binds the topping without making it greasy.
- Serve for contrast Offer a scoop of cold Vanilla ice cream for serving to create hot and cold contrast that enhances both texture and flavor.