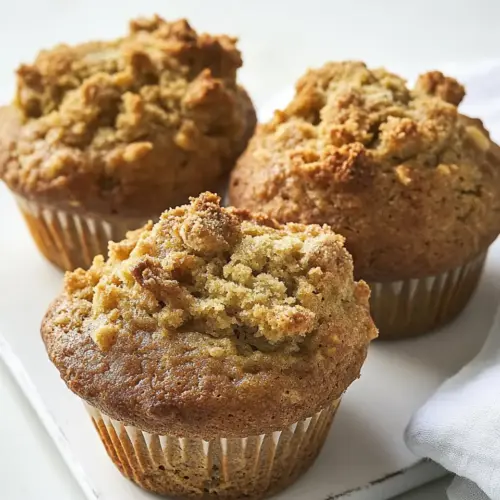
Apple Muffins
Apple Muffins are tender, warmly spiced muffins studded with juicy chopped apples and finished with a caramelized brown sugar top. The blend of whole wheat and all purpose flours creates a hearty crumb while yogurt keeps them moist. Perfect for easy weekend breakfasts or make ahead snacks, these muffins are comforting, aromatic, and sure to please a crowd.
Equipment
- Muffin Pan
- Electric Mixer
- Rubber spatula
- Ice Cream Scoop
- Wire Rack
Ingredients
- 1/2 cup (8 tablespoons) unsalted butter, at room temperature Soften and cream to incorporate air and fat into the batter, providing tenderness and a rich mouthfeel; ensure butter is at room temperature for even blending with sugars and egg for a smooth batter.
- 1/2 cup granulated sugar Sweeten the batter and help with structure by dissolving into the butter to create tiny air pockets when creamed, contributing to a fine crumb and mild sweetness throughout the muffins.
- 1/4 cup (packed) dark brown sugar Add deep, molasses-like sweetness and moisture while enhancing flavor complexity; pack firmly to measure accurately and cream with butter early in the mixing process for even distribution.
- 1 large egg Bind ingredients together, add structure and moisture, and contribute to leavening as proteins coagulate during baking; beat lightly before adding to ensure consistent incorporation into the batter.
- 1 cup plain low-fat yogurt or Greek yogurt Provide moisture, slight tang, and tenderness while contributing to leavening reactions with baking soda; choose plain low-fat or Greek yogurt depending on desired tanginess and texture.
- 1 cup whole wheat flour, spooned into measuring cup and leveled off Add whole-grain flavor, nutty texture, and additional fiber while absorbing moisture to contribute to structure; spoon into the measuring cup and level off for accurate measurement to avoid dense muffins.
- 1 cup all-purpose flour, spooned into measuring cup and leveled off Offer neutral flavor and primary structure through gluten development while balancing whole wheat for tenderness; spoon and level to ensure correct proportions for proper texture and rise.
- 1 teaspoon baking powder Provide chemical leavening to produce lift and create a light, tender crumb; measure accurately and combine with dry ingredients for even distribution before baking.
- 1 teaspoon baking soda React with acidic components like yogurt to create carbon dioxide, aiding rise and tender crumb structure; ensure even mixing with dry ingredients to prevent uneven pockets of leavening.
- 1/2 teaspoon salt Enhance overall flavor by balancing sweetness and strengthening gluten structure slightly; measure precisely to avoid over-salting, which can suppress leavening and flavor.
- 1 tablespoon ground cinnamon Impart warm, aromatic flavor and a cozy spice profile that complements apples; measure by spoon and level or use a small spoon for accuracy to avoid overpowering the batter.
- 1/2 teaspoon ground nutmeg Add warm, earthy spice notes and depth to the spice blend; use sparingly to support cinnamon without making the muffins taste medicinal.
- 1/4 teaspoon ground cloves Contribute a sharp, aromatic spice that boosts complexity in small amounts; use precisely measured quantity to prevent clove from dominating the spice mix.
- 2 cups peeled, cored, and finely chopped baking apples (you'll need 2 large apples) Provide fresh apple flavor, moisture, and tender chunks throughout the muffins; peel, core, and finely chop baking apples so the pieces cook evenly and distribute flavor in every bite.
- 6 tablespoons (packed) dark brown sugar Create a caramelized, sweet topping or swirling pockets inside the muffins to intensify apple sweetness and add moistness; pack firmly to measure and sprinkle or fold in as directed for bursts of brown-sugar richness.
Instructions
- Preheat the oven to 375°F (190°C). Grease a 12-cup muffin pan with butter or spray with non-stick cooking spray.: When you start, the warm rush of oven heat becomes part of the ritual, and that preheated environment ensures the batter begins rising immediately. You should smell a faint toasty scent the moment the oven reaches temperature, which signals a steady, even bake. Greasing the pan helps release the muffins cleanly, preserving their tops. A common mistake is skipping greasing, which can make those beautiful domes stick to the pan, tearing when removed.
- In the bowl of an electric mixer, beat together the butter, granulated sugar and brown sugar until fluffy, 1 to 2 minutes. Scrape down the sides of the bowl with a rubber spatula.: As you cream butter and sugars, watch the mixture lighten in color and increase in volume, creating tiny air pockets that will help the muffins rise. The sound of the mixer will change from a heavy whir to a lighter, aerated tone, and the texture should look creamy. Scraping the bowl prevents unmixed pockets, so every bite has balanced sweetness. Overworking the mix is a trap, it can melt the butter and reduce lift, so stop once it looks light and uniform.
- Add the egg and mix well, stopping to scrape the bowl if necessary.: Adding the egg incorporates structure and moisture. You will notice the batter become smoother and slightly more cohesive. The glossy appearance of the batter indicates good integration. If you add the egg to cold butter, it may not emulsify properly, so ensure the butter is at room temperature to prevent a separated, curdled mix.
- Beat in the yogurt. The batter will look a little curdled—that's okay.: When you fold in yogurt , the batter might appear slightly curdled but this is normal, due to the dairy interacting with the beaten fats. The tang of the yogurt enhances flavor while keeping the crumb moist. The batter should still be cohesive enough to hold chopped apple . If it seems too thin, a short rest lets the flours hydrate and thicken without overmixing.
- Add the flours, baking powder, baking soda, salt, cinnamon, nutmeg and cloves. Beat on low speed until just combined. The batter will be very thick.: As you add dry ingredients, they will dull the sheen and thicken the batter noticeably. The smell of cinnamon will become prominent, releasing warm aromas. Low speed prevents gluten overdevelopment, which keeps the muffins tender. Overmixing here leads to tough muffins with tunnels, so stop as soon as you no longer see loose flour.
- Add the chopped apples and mix until just combined. Do not over-mix.: Folding in the chopped apples introduces pockets of moisture and little bursts of fruit in every bite. The batter will look chunky and uneven, which is what you want; these visual cues mean the fruit is distributed but not pulverized. Overmixing could break down the pieces and yield a gummy texture, so fold gently until you see even specks of apple throughout.
- Use an ice-cream scooper or large spoon to divide the batter evenly among the prepared muffin cups. The cups should be full. Sprinkle the 6 tablespoons of brown sugar evenly over top.: Filling the cups generously encourages a nice domed top and a moist interior. The scoop provides uniform portions so baking is even across the pan. When you sprinkle the extra dark brown sugar , it creates a sweet, caramelized crown that crackles a little in the oven, adding contrast. Avoid underfilling, which produces flat muffins, or overfilling, which can lead to spillover.
- Bake the muffins for 25 to 30 minutes, or until a toothpick inserted into the center of a muffin comes out clean.: During baking, your kitchen will fill with a warm, spiced perfume, and the tops will turn golden brown with slightly crisp edges. Listen for a faint set sound when you tap the top, and check the centers near the lower end of the time. A clean toothpick indicates set crumb without wet batter. A common mistake is removing muffins too early, leaving them gummy in the center; always test before pulling them from the oven.
- Remove the muffins from the oven, cool them for 5 minutes in the pan, then turn them out onto a rack to finish cooling completely.: Letting them rest in the pan allows steam to settle and the structure to firm up; you will see the tops slightly contract as they cool. Turning them onto a rack prevents condensation from making bottoms soggy. If you skip the short cool in the pan, the muffins may collapse or stick, so give them those precious minutes.
- Freezer-Friendly Instructions: The muffins can be frozen in an airtight container or sealable plastic bag for up to 3 months. Thaw for 3 to 4 hours on the countertop before serving. To reheat, wrap individual muffins in aluminum foil and place in a preheated 350°F (175°C) oven until warm.: The muffins can be frozen in an airtight container or sealable plastic bag for up to 3 months. Thaw for 3 to 4 hours on the countertop before serving. To reheat, wrap individual muffins in aluminum foil and place in a preheated 350°F (175°C) oven until warm. : Frozen muffins keep their texture well, and the reheating step brings back a just-baked warmth and renewed aroma of cinnamon and apple . Thawing on the counter preserves moisture, and a short oven warm-up restores a pleasant exterior chew. Avoid microwaving from frozen without a cover, it can dry them out and make the crumb rubbery.
Notes
- Swap apple type Add a sweeter apple if you prefer a milder tartness, or use a tangy baking apple for contrast.
- Make them mini Use a mini muffin pan and reduce bake time for bite sized treats that are perfect for parties and snacking.
- Boost spice Increase the cinnamon slightly or add a pinch more nutmeg for a stronger warm spice profile without overpowering the apple.
- Yogurt choice Use thicker Greek style yogurt for denser, richer muffins, or regular low fat yogurt for a lighter crumb.
- Brown sugar topping For extra crunch, mix the topping dark brown sugar with a touch of melted butter before sprinkling to create a sticky caramelized crust.