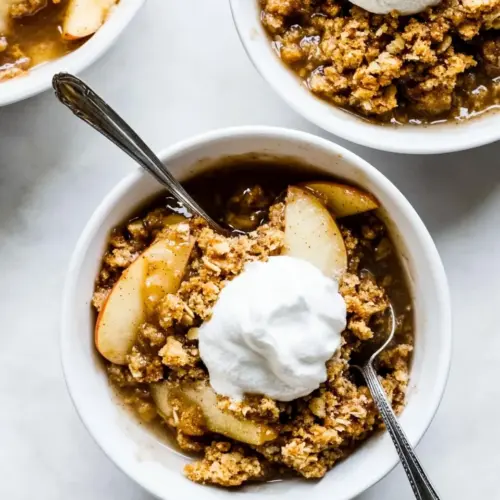
Apple Crisp
Apple Crisp is a warm, crispy dessert featuring tart Granny Smith apples, a buttery oat topping, and cozy spices like cinnamon and nutmeg. This easy, family friendly treat offers bubbling fruit and a golden crumb that is perfect for an easy weeknight dessert or a holiday table. Make it for its comforting texture and simple pantry ingredients that come together into a crowd pleasing finale.
Equipment
- 9 X 13 baking dish
- Large Mixing Bowl
- smaller mixing bowl
- Oven
Ingredients
- 6 cups Granny Smith apples (green apples), peeled, cored, and cut into 1/4" slices (about 9-10 green apples) Provide tartness and firm texture to balance sweetness; peeled, cored, and sliced into 1/4" pieces for even cooking and soft, tender apple layers. Use Granny Smith apples for bright flavor that holds shape well when baked, contributing freshness and a pleasant bite. Quantity yields about 9–10 medium apples to fill a standard baking dish and create enough fruit base under the crisp topping.
- 1 cup granulated sugar Add sweetness and help macerate the apples so juices develop during baking; granulated sugar also promotes caramelization at the fruit surface. Measure precisely to balance tartness of the apples without overpowering the filling, adjusting slightly to taste if apples are especially tart or sweet.
- 1 1/2 tablespoons all-purpose flour Absorb excess liquid released by the apples and help thicken the filling into a cohesive, slightly saucy texture; all-purpose flour prevents a runny crisp. Stir briefly into the apple-sugar mixture to distribute evenly so the fruit cooks into a pleasantly thickened filling without floury pockets.
- 1 teaspoon ground cinnamon Provide warm aromatic spice that complements the apple flavor and enhances overall aroma; ground cinnamon adds classic warmth and cozy depth. Sprinkle into the filling mixture to infuse each bite with balanced spiced notes that pair well with the sweet and tart components.
- 1 teaspoon ground nutmeg Contribute subtle warm, slightly sweet and nutty complexity that enhances the apple profile; ground nutmeg adds a more aromatic, slightly earthy counterpoint to cinnamon. Use sparingly to avoid overpowering the other spices while enriching the overall spice blend in the filling.
- 1/2 teaspoon kosher salt Enhance overall flavor balance by slightly moderating sweetness and elevating other ingredients; kosher salt rounds flavors and heightens aroma. Incorporate into both filling and topping mixtures as directed to ensure even seasoning across the dessert.
- 1 1/2 cups old-fashioned oats Add hearty texture and chewiness to the topping while providing whole-grain flavor and structure; old-fashioned oats crisp up during baking for a contrasting crunch. Combine with flour and sugars so the oats form a cohesive streusel that crowns the apples with rustic, toasty notes.
- 1 1/2 cups all-purpose flour Create structure and body in the crisp topping and help bind dry ingredients together for a tender crumb; all-purpose flour absorbs butter and forms the streusel matrix. Measure carefully to maintain the right balance between crumbly topping and crunchy bite without becoming doughy.
- 1 1/2 cups brown sugar Provide deep molasses-like sweetness and moisture that enrich the streusel with a caramelized flavor; brown sugar contributes chew and color. Use packed brown sugar to ensure consistent texture and to help the topping brown evenly while adding complexity to the sweetness.
- 1 teaspoon baking powder Introduce light leavening that contributes slight aeration and lift to the topping for a lighter, less dense crumb; baking powder helps create subtle fluffiness. Blend evenly into the dry topping ingredients so the streusel develops a pleasing, tender texture when baked.
- 1 cup melted butter Bind the streusel ingredients and provide rich buttery flavor while promoting browning and a crisp finish; melted butter coats the dry mix for cohesive clumping. Pour warm melted butter gradually into the topping mixture to achieve crumbly clusters that become golden and crisp in the oven.
Instructions
- Preheat the oven to 350°F.: When you slide a dish into the oven preheated to 350°F , you should notice a steady warming of the kitchen and a promise of even baking. The temperature sets the stage for the filling to simmer gently while the topping browns, creating contrast. A common mistake is putting the dish into an oven that is not fully up to temperature, which can lead to uneven cooking and a soggy topping. To avoid this, give the oven at least 10 to 15 minutes to stabilize and use an oven thermometer if you have one.
- Make the apple filling. In a large mixing bowl, toss the sliced apples with the sugar, 1 1/2 tablespoon flour, salt, cinnamon, and nutmeg, and set aside for the sugar to soften the apples and macerate, creating a light syrup.: The moment you toss the sliced Granny Smith apples with 1 cup granulated sugar , 1 1/2 tablespoons all-purpose flour , 1/2 teaspoon kosher salt , 1 teaspoon ground cinnamon , and 1 teaspoon ground nutmeg , you will notice the sugar starting to pull juices from the apple slices, creating a glossy coating. This maceration softens the fruit and forms a light syrup that will thicken as it bakes. Smell the warming spice notes right away, and watch for evenly coated slices rather than clumps of dry ingredients. A common slip up is overmixing and bruising the apples, which makes them break down too much in the oven. Toss gently, and let the mixture sit while you make the topping so the apples can release their juices and build flavor.
- Make the crisp topping. In a smaller mixing bowl, toss the oats, 1 1/2 cups flour, brown sugar, and baking powder together, then use your fingers to mix in the melted butter, gently making small clumps where you can.: Combine 1 1/2 cups old-fashioned oats , 1 1/2 cups all-purpose flour , 1 1/2 cups brown sugar , and 1 teaspoon baking powder in a bowl, then use your fingers to work in 1 cup melted butter until you have small clumps and coarse crumbs. The texture should be varied, with some pea size clusters and some looser crumbs, so you get pockets of crunch. The aroma of butter meeting sugar will be pronounced, and you should feel the mixture come together without becoming a paste. One trap is adding too much butter which creates a greasy topping that won't crisp; measure carefully and stop when clumps form.
- Assemble. Layer the sugared apples and their juice in a 9 X 13 baking dish and sprinkle evenly with the oatmeal mixture, but don't pack it tightly.: Layer the sugared apples and their accumulated juice in a 9 X 13 baking dish so there is even fruit coverage across the pan, then gently sprinkle the oatmeal mixture over the apples without packing it down. You want the topping to remain airy so heat can circulate and create crispness, and the contrast between visible fruit and crumb makes for a pleasing presentation. Listen for the soft rustle of oats settling into place, and avoid pressing the topping into a dense mass, as that will prevent it from rising and crisping properly.
- Bake. Bake uncovered for 50-60 minutes until the apples are soft and tender and the sauce has thickened and is bubbly. If the crisp seems to be browning too much, cover with foil for the remaining cooking time.: Place the baking dish uncovered into the oven and bake for 50 to 60 minutes until the apples are soft and tender and the sauce has thickened and is bubbling around the edges, a comforting sight and sound. The topping should turn a warm golden brown and smell rich and toasty; if it appears to be browning too quickly, tent the dish loosely with foil to protect it while the filling finishes. A frequent error is removing the crisp too early when the filling is still watery, so check that the center bubbles and the juices have reduced into a syrupy consistency before pulling it out.
- Cool slightly. Let the apple crisp cool for 20-30 minutes before serving for the caramel sauce to thicken. Divide in bowls and top with vanilla ice cream or whip cream, and serve.: Let the apple crisp cool for 20 to 30 minutes before serving so the caramel sauce from the cooked juices can thicken and set, giving cleaner spoonfuls and a better mouthfeel. As it cools you will notice the steam lessen and the aroma mellow into a warm, concentrated scent. Resist the urge to dig in immediately, because serving it piping hot can lead to a runny sauce and burned tongues. If you need a shortcut, a brief 10 minute rest will help, but longer cooling gives a more cohesive texture.
- Divide and serve.: When you scoop the crisp into bowls, top with vanilla ice cream or whip cream for a delightful temperature contrast and creamy complement to the textured topping. The cold cream will melt slowly into the warm fruit, creating ribbons of richness. A pitfall is adding the topping so early that it melts instantly into a pool, losing the contrast; add your garnish just before serving and encourage guests to dig in right away.
Notes
- Choose the right apple — Use firm, tart Granny Smith apples so the slices hold their shape and offer a bright counterpoint to the sweet topping. They keep a pleasant bite after baking.
- Even slicing matters — Slice apples about 1/4" thick so they cook uniformly. Uneven pieces lead to some slices overcooked while others stay too firm.
- Macerate for flavor — Let the sugared apples sit for a bit to pull out juices and start forming a light syrup; this step builds depth without extra work.
- Work butter in by hand — Using your fingers to combine the topping encourages varied clumps, which create contrasting textures when baked. Cold hands can help prevent the butter from over softening.
- Watch the oven — Keep an eye on the topping once it nears golden color, and tent with foil if it darkens too fast while the filling still needs time to bubble.
- Rest before serving — A 20 to 30 minute cool down allows the juices to thicken. Serve slightly warm for the best texture and flavor balance.