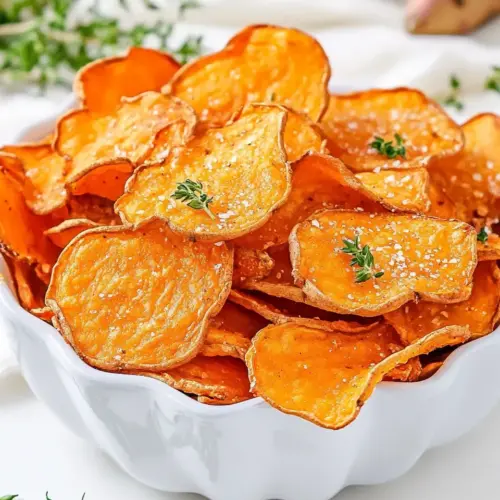
Air Fryer Sweet Potato Chips
Air Fryer Sweet Potato Chips are an easy, crispy snack that transforms simple sweet potatoes into golden rounds with minimal oil and fuss. This recipe is perfect for an easy weeknight snack or party nibble, delivering crunchy texture and bright flavor in about twenty minutes, making it a go to when you want something satisfying and quick to make.
Equipment
- Air Fryer
- Mandolin slicer
- Mixing Bowl
- Towel
Ingredients
- 2 medium sweet potatoes Peelable and hearty, provides the sweet, starchy base for thin, crisped chips; slice uniformly to ensure even cooking and browning in the air fryer. Contains natural sugars that caramelize slightly during cooking, enhancing flavor and creating a tender interior with a crispy exterior.
- 1 tablespoon olive oil Neutral and flavorful-medium, helps coat the sweet potato slices for even heat transfer and promotes browning; use just enough to lightly slick each slice without making them greasy. Also carries any applied seasonings, improving adherence and crisp texture in the air fryer.
- 1/2 teaspoon salt Essential and balancing, enhances the natural sweetness of the potatoes and brings out savory notes to prevent the chips from tasting flat; sprinkle evenly before air frying for consistent seasoning. Also helps draw out a bit of moisture from the surface, aiding in crisping.
- 1/4 teaspoon black pepper Warm and mildly pungent, adds a subtle peppery bite that contrasts the sweet potatoes and complements the salt; crush or grind freshly for best aroma. Use sparingly to avoid overpowering the delicate sweetness while still providing a gentle heat and complexity.
Instructions
- Wash and thinly slice the sweet potatoes using a mandolin slicer for uniform thickness.: The moment you begin slicing, you will notice the clean, earthy scent of the sweet potato . Uniform thickness is essential because it controls how heat moves through each piece, ensuring that every chip reaches the same level of crispness. As you slide the tuber across the mandolin, listen for a steady whisper as the blade meets flesh, and watch for perfectly round discs. A common error is inconsistent pressure while slicing, which produces varied thickness. To avoid that, hold the potato firmly and use a guard, or take slow, steady passes so each slice is identical in profile. If you smell anything faintly burnt while slicing nearby vegetables, you may have residual oil on your mandolin, so wipe it clean before continuing.
- Soak the slices in cold water for 10 minutes to remove excess starch, then pat dry with a towel.: When the slices hit the bowl of cold water, you will see the water cloud slightly as surface starch releases, and that tells you this step is working. The soak helps prevent the chips from sticking and promotes a dry, crispy finish because it removes loose starch that can create a gummy surface. After soaking, the visual cue is that the water becomes clearer with time, and the slices feel firmer when you squeeze them gently. Thorough drying is crucial; pat each slice with a towel and air dry them briefly on a rack if needed. A common mistake is skipping the drying, which leads to steaming rather than crisping in the air fryer. If slices feel cold and wet after patting, blot them again until no dampness remains.
- Toss the dried sweet potato slices with olive oil, salt, and black pepper until evenly coated.: As you drizzle the olive oil over the slices, the kitchen fills with a gentle, fruity aroma that signals the start of flavor development. Tossing should feel like a gentle massage, ensuring each slice has a whisper of oil rather than a pool. The salt and black pepper cling to the oil, distributing seasoning across the surface. Look for a faint sheen on each slice; that is the visual cue for proper coverage. Over-oiling will weigh the slices down, making them limp, so err on the side of lightness. If you notice oil pooling at the bottom of the bowl, drain the slices on a rack and blot excess to prevent sogginess.
- Arrange the slices in a single layer in the air fryer basket. Cook at 360°F for 15 minutes, flipping halfway through, until crispy.: Laying the slices in a single layer allows hot air to circulate freely and ensures every edge can get crisp. When arranging, you should hear a soft clink as chips touch the basket, and you will be able to see gaps between pieces that signal adequate airflow. Crowding is the most common issue here, because it traps steam and prevents browning. If your basket is small, work in batches and keep warmed chips on a tray in a low oven to maintain texture. For best results, place similar sized slices together so thinner pieces do not overcook while you wait for thicker ones.
- Cook at 360°F for 15 minutes, flipping halfway through, until crispy.: During the first few minutes of cooking the aroma will shift to a toasty, sweet scent as sugars begin to caramelize. Around the halfway point you should hear a faint crackle as moisture leaves the slices, and the color will move from pale to golden, then to deeper brown at the edges. Flipping halfway promotes even exposure to heat and prevents one-sided browning. The crisp is apparent to the eye and by touch, test a chip near the end to ensure it breaks cleanly with a crisp snap. Avoid overcooking, because once the sugars burn the flavor will turn bitter; watch the last few minutes closely and reduce time if you see rapid darkening. A common mistake is leaving the basket closed the whole time; flipping improves texture and gives you a better sense of how done the batch is.
Notes
- Spice it up: After tossing with olive oil, try adding a pinch of smoked paprika or a little garlic powder for a different flavor profile, applied sparingly so the natural sweetness of the sweet potatoes still shines.
- Extra crisp method: Double soak the slices briefly, pat completely dry, and use a convection setting if available to encourage faster moisture removal and a firmer crunch.
- Batch keeping: If making multiple batches, keep finished chips on a cooling rack in a single layer in a warm oven set to low to maintain texture until serving time.
- Dipping ideas: Pair with a yogurt or herb dip for contrast, and spoon a little dip into a small bowl so guests can enjoy both the crisp texture and a cooling complement.
- Storage tip: Once fully cooled, store chips in an airtight container with a paper towel to absorb residual moisture, which helps preserve crispness for up to two days.