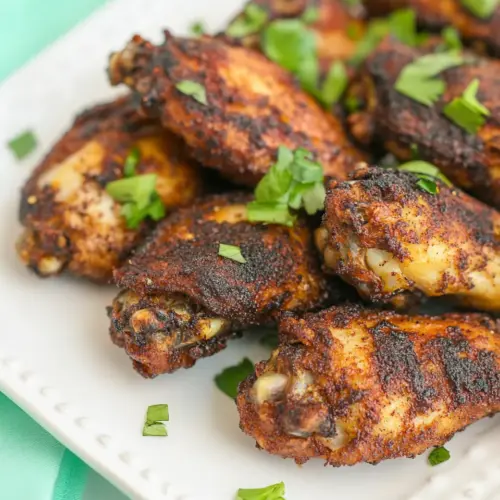
Air Fryer Chicken Wings
Air Fryer Chicken Wings are crispy, savory, and easy to make for an easy weeknight dinner or game day snack. The simple spice blend and quick air frying produce golden skin and juicy meat, perfect for dipping. This recipe is reliable, minimal fuss, and built to satisfy hungry crowds, making it a go to for busy cooks who want punchy flavor without long prep.
Equipment
- Air Fryer
Ingredients
- 2 1/2 lbs chicken wings and drummettes Provide moisture and protein to the dish while supplying the primary structure for the wings and drummettes; pat dry before seasoning to ensure a crispy exterior when air fried. Trim any excess skin or tips if desired and allow the poultry to come to room temperature briefly for more even cooking. Handle safely and cook to an internal temperature of 165°F (74°C) for food safety.
- 3 tbsp avocado oil Coat the wings evenly to promote browning and help seasonings adhere; avocado oil offers a high smoke point suitable for air frying. Add the oil gradually while tossing to avoid clumping and ensure all pieces are lightly glazed. Choose avocado oil for a neutral flavor and heart-healthy monounsaturated fats.
- 1 tbsp paprika Impart warm color and mildly sweet, smoky flavor to the seasoning blend; paprika contributes both taste and appetizing appearance. Use sweet or smoked paprika according to preference, adjusting quantity for more pronounced smokiness. Sift or mix well with other dry spices to prevent lumps and ensure even distribution.
- 2 tsp garlic powder Add a concentrated savory, aromatic garlic flavor that enhances overall taste without adding moisture; garlic powder disperses easily in dry rubs. Balance the amount to avoid overpowering the other spices and combine thoroughly for consistent flavor on every wing. Consider toasting briefly with other powders to deepen its flavor if desired.
- 1 tsp onion powder Deliver sweet, slightly pungent depth to the spice mix and complement garlic with onion powder's savory notes; its powdered form blends smoothly. Use measured amounts to maintain balance with paprika and salt, ensuring it doesn't dominate the profile. Store in a cool dry place to preserve its aroma.
- 1/2 tsp oregano Introduce a subtle earthy, herbaceous undertone to the seasoning blend; oregano adds Mediterranean complexity in small amounts. Crush lightly between fingers before mixing to release oils and improve aroma. Use sparingly so it complements rather than competes with bold spices like paprika and garlic.
- 1 tsp sea salt Season the wings to enhance all other flavors and help draw out surface moisture for crisper skin when cooked; sea salt provides a clean salinity. Distribute evenly and consider tasting a small cooked piece to adjust future batches. Use measured amounts to avoid over-salting and maintain balance with aromatic spices.
Instructions
- Add all of the ingredients for the wings to a zip lock bag and seal it up. Shake it well until all of the chicken pieces are covered with oil and seasonings.: As you close the bag, notice the scent of the paprika and the warm, savory notes of garlic powder and onion powder rising through the plastic, which signals the start of flavor building. Massaging the bag distributes the avocado oil so the spices cling to every crevice of the chicken , helping the skin brown evenly in the air fryer. This step matters because an even coating prevents dry spots and promotes consistent crispiness. A common mistake is undercoating the wings, which leads to uneven color and flavor. If some areas look dry, open the bag and gently rub those pieces until they glisten with seasoning, then reseal.
- Preheat the air fryer to 400 degrees F for 2 minutes.: When you shake the bag, listen for the gentle thud of wings colliding, and feel how the mixture shifts, indicating proper distribution. The oil creates a protective barrier that aids browning, while the spices adhere to the skin to form that tasty crust. Doing this thoroughly ensures each bite has seasoned edges, which improves the overall mouthfeel. Avoid damping the wings with too much oil, as that can cause excess smoking in the air fryer. If you find clumps of seasoning, redistribute them manually to maintain an even layer.
- Place the wings in the air fryer in a single layer such that they aren’t touching. Air fry for 10 minutes at 400 degrees.: You will notice a slight hum as the air fryer comes up to temperature, and the basket will feel warm to the touch briefly after preheating. Starting with a hot environment jumpstarts surface crisping and prevents the wings from slowly stewing. Preheating helps achieve a rapid Maillard reaction so the skin turns golden rather than pale. A frequent oversight is skipping preheat, which can extend cooking and yield soggier skin. If your machine does not indicate readiness, wait a little longer until it feels consistently hot.
- After the 10 minutes are up, flip the wings and air fry for another 8 minutes or until the wings reach an internal temperature of at least 180 degrees Fahrenheit. Repeat the process for all of the wings.: Arrange the chicken pieces so air can circulate freely, and you will see edges begin to color after a few minutes. Crowding the basket traps steam, which prevents crisping and causes uneven cooking. This spacing produces a crunchy exterior and tender interior, because hot air reaches each piece equally. A typical error is stacking wings to save time, but that results in limp skin on the inner pieces. If you have many wings, cook in batches rather than crowding the basket.
- Serve with choice of ranch dressing, hot buffalo sauce, blue cheese, etc.: During this interval, watch for a sizzling sound and an emerging golden tone on the skin, which are key indicators of progress. The high heat renders fat and tightens the skin, producing that satisfying crackle. This stage sets the foundation for texture, so resist opening the basket too often as it lets heat escape. A mistake to avoid is assuming a uniform color early on; check visually toward the end of the period so you can adjust the next step if needed. If wings start to brown too quickly, reduce the temperature slightly to prevent burning while still finishing the interior.
- After the 10 minutes are up, flip the wings and air fry for another 8 minutes or until the wings reach an internal temperature of at least 180 degrees Fahrenheit: When you flip them, breathe in the intensified roasted spice aroma and note the deepening color on the cooked side. Flipping ensures both sides get direct exposure to the hot air, promoting even crispness and a uniform crust. Internal temperature is the true measure of doneness, because visual cues can be misleading if pieces vary in size. A common pitfall is undercooking larger drummettes, so always check with a thermometer inserted into the thickest part. If the chicken is not yet at 180 degrees Fahrenheit, continue cooking in short increments to avoid over crisping the exterior.
- Repeat the process for all of the wings: As you work through batches, you'll notice small timing adjustments depending on load size and basket airflow, and that awareness helps refine future cooks. The repeated sensory feedback, like more pronounced sizzling or deeper color, teaches you how your specific air fryer behaves. Consistency comes from observing and tweaking, so keep notes on batch sizes and placement. One mistake people make is assuming each batch needs the exact same time; slight variations are normal, so use temperature checks. Allow rested wings to sit briefly so juices redistribute before serving.
- Serve with choice of ranch dressing, hot buffalo sauce, blue cheese, etc: The final presentation brings contrast, whether you choose creamy dips or tangy sauces, and those pairings enhance the savory chicken flavor. Offer a few options for variety, and let guests mix and match to their preference. Serving at the right moment, when the skin is still crisp, maximizes textural pleasure. A common error is letting wings sit too long uncovered, which softens the crust. If you need to hold wings, keep them briefly in a warm oven to preserve crispness until serving.
Notes
- Adjust batch sizes: If you are cooking a large quantity like the full 2 1/2 lbs, plan to do multiple batches so each wing crisps properly. Crowding the basket reduces airflow which prevents uniform browning, and frequent flipping will not fully compensate for trapped steam. By dividing into smaller batches you get more predictable results and can fine tune timing per load.
- Use a high smoke point oil: The recipe calls for avocado oil because it tolerates 400 degrees Fahrenheit without burning, which helps the exterior brown without off flavors. Lightly coat the wings so spices adhere and skin crisps, but avoid soaking them in oil. A thin film is sufficient to develop color and texture.
- Monitor your air fryer model: Different brands circulate air at different intensities, so track how many minutes your specific unit needs to reach golden color. Keep a log of minutes per batch, and if you notice rapid browning, reduce temperature slightly to protect the interior from drying out while maintaining crispness.
- Season evenly: Tossing wings in a sealed bag distributes spices consistently, avoiding patches that are under seasoned. If clumping occurs, separate pieces and redistribute by hand before cooking. Even coverage means every bite has balanced flavor and texture.
- Hold without losing crunch: If you need to hold cooked wings while finishing additional batches, keep them on a wire rack in a warm oven to preserve air circulation. Stacking on a plate softens the skin due to trapped steam, so keep them single layered until ready to serve.