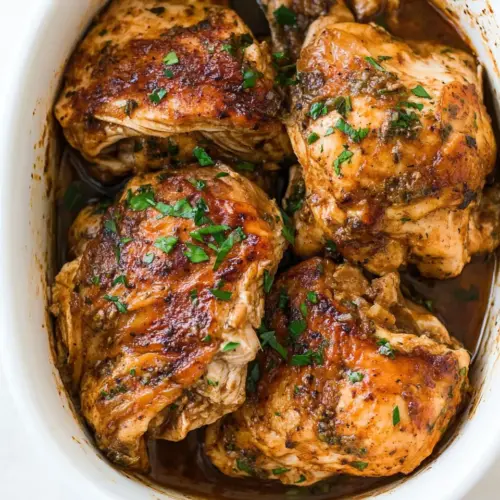
3 Packet Crockpot Chicken
3 Packet Crockpot Chicken delivers tender, savory shredded chicken seasoned with ranch, Italian, and gravy powders for a rich, comforting meal. This easy weeknight dinner is perfect for busy evenings, offering a creamy saucy finish that pairs beautifully with mashed potatoes or rice. Make it for family dinners or feed a crowd with minimal effort and big flavor.
Equipment
- Slow Cooker
- Medium Bowl
- Forks
Ingredients
- 3 pounds boneless skinless chicken breasts Provide tender, lean protein that serves as the main component of the dish; slow-cooking yields juicy, shreddable chicken perfect for sandwiches or casseroles. Absorbs seasonings and broths during long cook times, contributing body and substance to the finished meal.
- 1 (1-ounce) packet ranch seasoning powder Add bold, savory flavor with concentrated tang and herby notes that season the chicken throughout the slow-cook process. Works as a convenient flavor base that dissolves into the cooking liquid, helping create a cohesive sauce.
- 1 (0.6-ounce) packet Italian dressing powder Introduce zesty, herbal Italian-style seasoning to complement the ranch and gravy; contributes oregano, basil, garlic, and onion flavors that brighten the overall profile. Blends with other powders to round out the savory and aromatic dimensions of the dish.
- 1 (0.9-ounce) packet chicken gravy powder Thicken and enrich the cooking liquid while providing concentrated poultry-savory flavor; creates a gravy-like sauce around the chicken as the powdered mix hydrates and dissolves. Enhances mouthfeel and helps coat the shredded meat for serving.
- 1 cup low sodium chicken broth or water Moisten the slow cooker contents and act as the medium for dissolving seasoning packets; low sodium broth or water prevents oversalting while facilitating even heat transfer. Helps form a flavorful cooking liquid that keeps the chicken tender and prevents dryness.
Instructions
- Spray the inside of the slow cooker with non-stick cooking spray. Place 3 pounds boneless skinless chicken breasts in the bottom of the slow cooker.: The first sensory cue is a clean, oiled surface that prevents sticking and eases cleanup. Laying down the chicken in a relatively even layer helps each piece absorb heat uniformly, which produces consistent tenderness. You should notice the raw meat glistening and slightly chilled to the touch at this stage. Why it matters, the non stick barrier preserves the texture and prevents meat from tearing when you shred it later. Troubleshooting tip, if your cooker is crowded the center pieces may take longer to cook, so try to arrange the breasts with a little space between them for even cooking.
- In a medium-sized bowl combine 1 cup low sodium chicken broth, 1 (1-ounce) packet ranch seasoning powder, 1 (0.6-ounce) packet Italian dressing powder, and 1 (0.9-ounce) packet chicken gravy powder. Whisk together until dissolved.: You will see powders thicken the liquid initially, then slowly dissolve into a uniform sauce as you whisk. Smell the aromas rising from the bowl, a medley of herbs and savory gravy notes that foreshadow the finished dish. This step creates a cohesive sauce so seasonings disperse evenly across the chicken , which prevents pockets of overpowering flavor. Common mistake, failing to fully dissolve the powders can leave gritty bits in the finished meal, so whisk until the liquid is smooth and slightly viscous.
- Pour the broth mixture over the chicken in the slow cooker.: When you pour, listen for the gentle splash as the sauce spreads over the meat and sinks into crevices. The visual cue is the breasts becoming coated, the surface gleaming with seasoned liquid. The liquid helps conduct heat and infuse seasoning during long cooking, so ensuring full coverage matters for consistent flavor. If you notice dry spots, use a spoon to distribute the mixture, and avoid adding extra liquid unless necessary, as too much will dilute the seasoning.
- Cover and cook on LOW for 5 hours or HIGH for 4 hours.: As it cooks you will begin to notice a steady, savory aroma filling your kitchen and occasional gentle bubbling at the edges. Low heat yields the most tender results, as collagen breaks down slowly, resulting in silkier shredded chicken . Cooking on HIGH shortens the time but can slightly change texture, producing a firmer shred. A frequent error is lifting the lid frequently to check, which releases heat and prolongs cooking time, so resist peeking unless necessary. Visual cues for doneness include the meat pulling apart easily and the sauce looking noticeably reduced and more concentrated.
- Shred the chicken using two forks and serve with mashed potatoes or rice!: When you remove the lid the aroma intensifies, and the meat should be so tender it yields under gentle tines. Use two forks to pull the fibers apart, noticing the moist, saucy pieces that cling to the forks, and scrape the bottom to incorporate any concentrated sauce. This is the stage where texture and seasoning become most apparent, so taste and adjust if needed. A common pitfall is shredding while the meat is too hot to handle safely, so let it rest a few minutes, and use tongs or forks to avoid burns.
Notes
- Make it creamier: Stir a few tablespoons of plain yogurt or sour cream into the shredded chicken off heat for a silkier sauce that clings beautifully.
- Thicken the gravy: Mix 1 tablespoon cornstarch with 1 tablespoon water and whisk into the sauce, then heat briefly to activate for a glossy, ladle worthy gravy.
- Serve as sandwiches: Pile the shredded chicken on toasted rolls and add crisp greens for texture, the saucy meat makes excellent handhelds for picnics or lunches.
- Stretch with vegetables: Add cooked peas or diced carrots when reheating to increase volume and color while keeping the comforting base flavors intact.
- Double the batch: Increase ingredients proportionally for gatherings, just avoid overfilling the slow cooker to ensure even results.