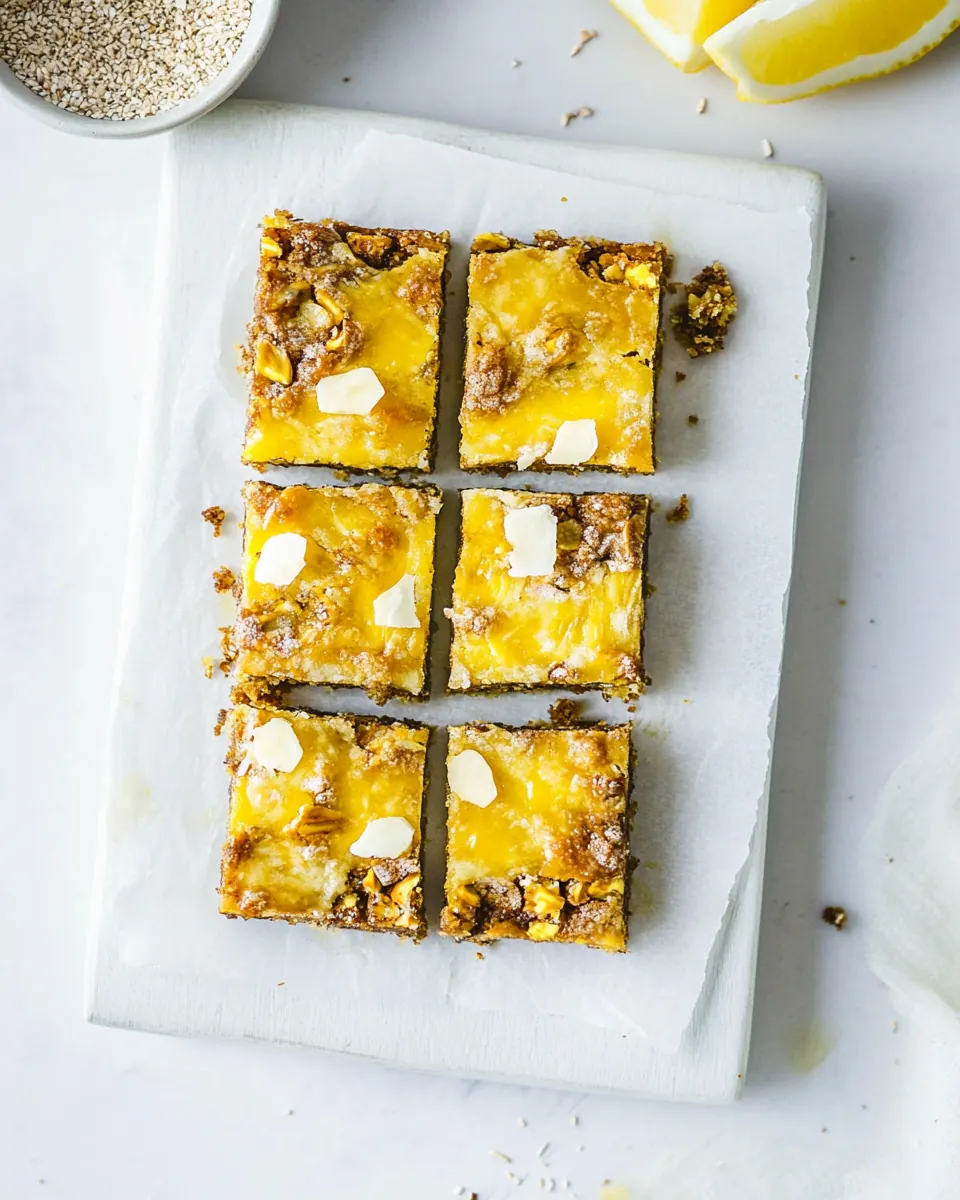
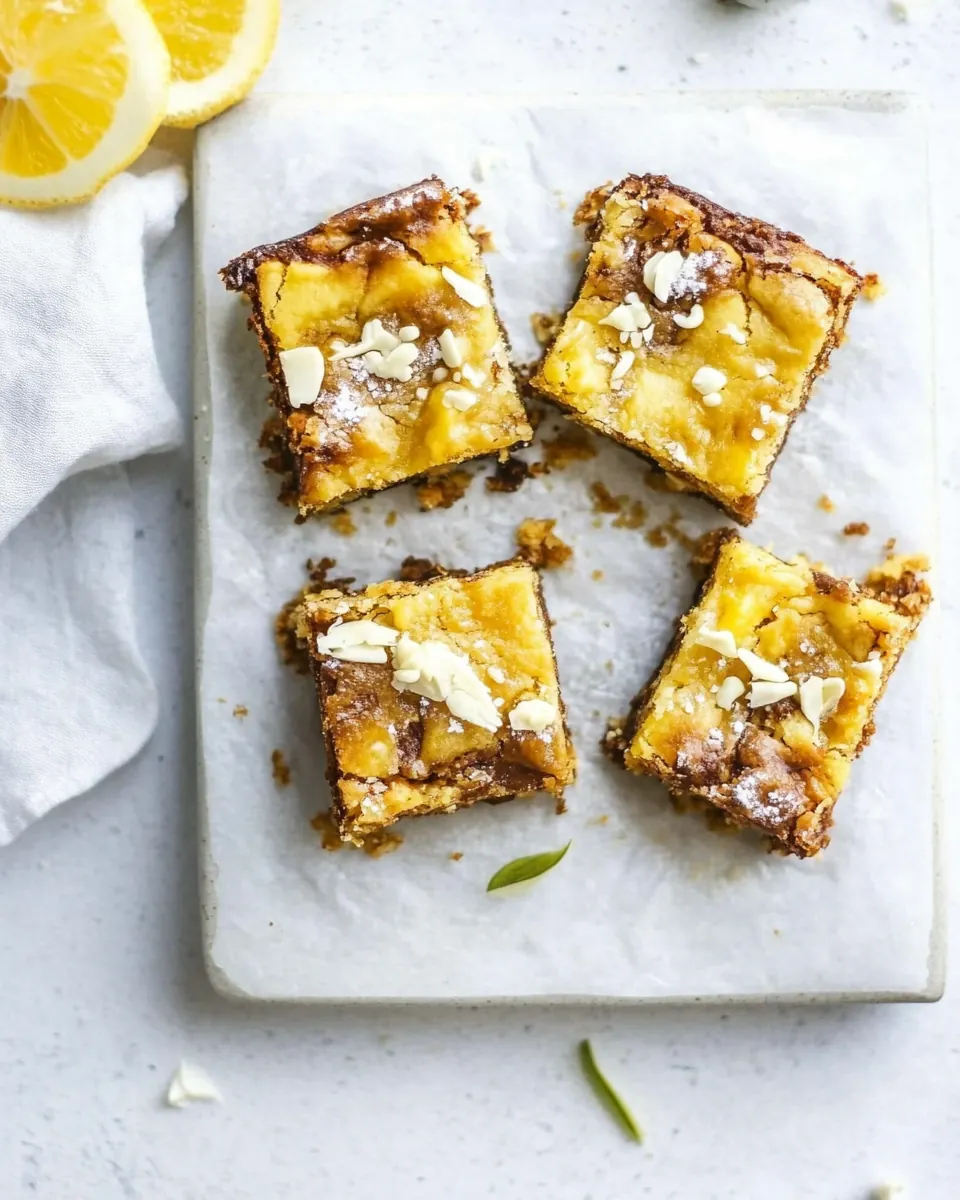
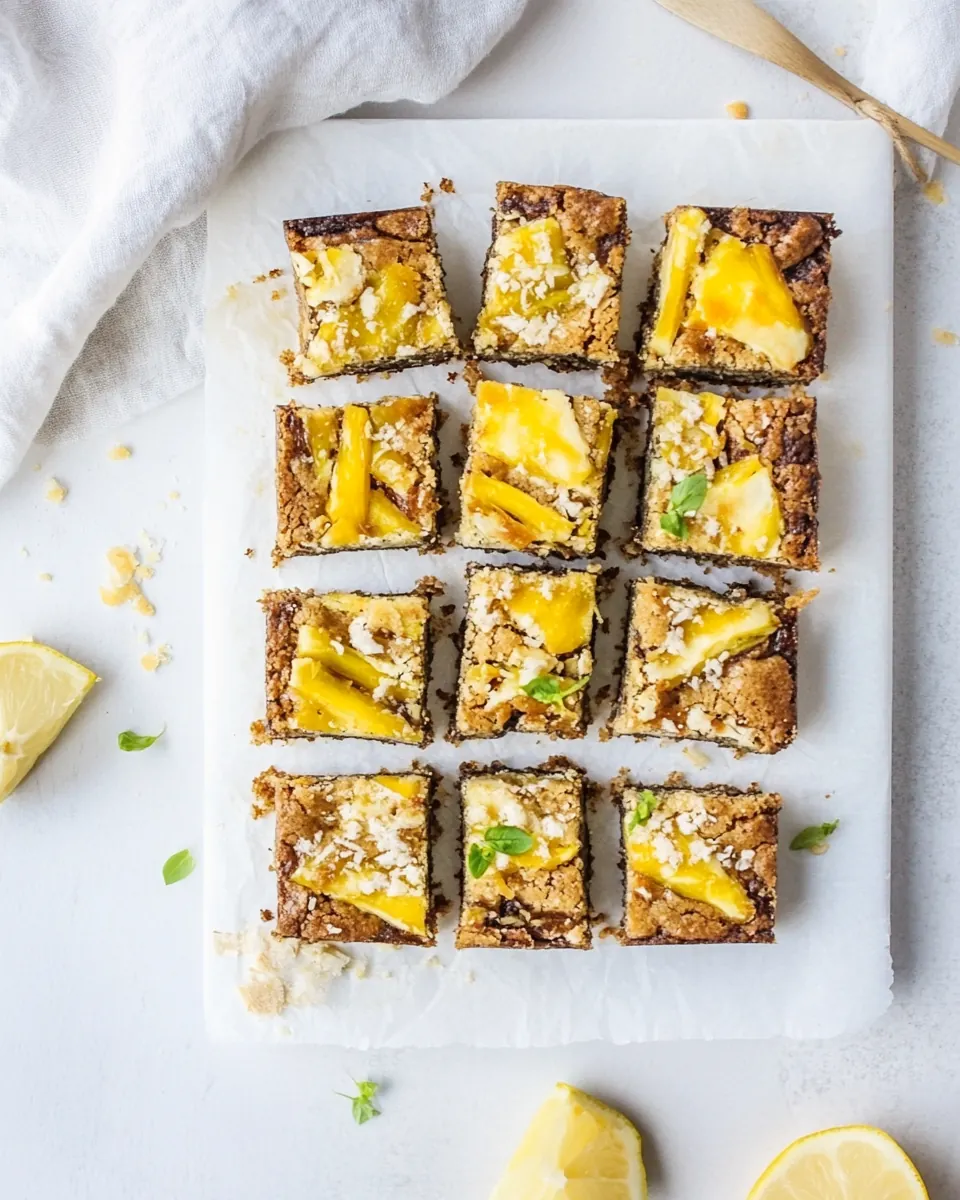
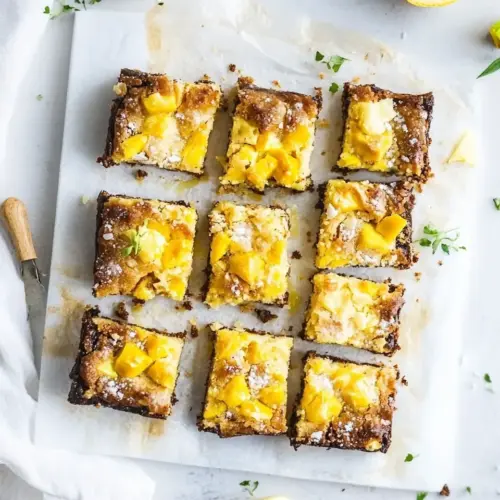
Tropical Paleo Magic Cookie Bars
Tropical Paleo Magic Cookie Bars are the kind of treat I reach for when I want summer in a bite, a nostalgic nod to childhood bars but rebuilt with paleo ingredients that actually satisfy.
I first made Tropical Paleo Magic Cookie Bars after a humid beach weekend when I had a jar of coconut milk and some macadamia nuts staring at me from the pantry. I wanted something that felt indulgent, but that would also travel well to a potluck where many folks avoid grains. I remember rubbing the pan with coconut oil, feeling the warm aroma of toasted coconut fill the kitchen as the bars baked, and thinking this version might be better than the original.
The texture is what hooked my friends and me most, the contrast between a slightly crisp, tender crust and a glossy, sticky, set coconut milk topping studded with pineapple and nuts. I also loved how forgiving the dough was when pressed into the pan, even though it seemed stubborn at first. Over successive batches I tuned the lime and honey balance, and now the recipe reliably delivers a bright, tropical bite that is sweet, nutty, and just the right amount of chewy.
Every time I slice these, the scent of toasted macadamia and warm coconut brings back that week by the water, and the bars disappear faster than I expect. If you love desserts that feel like a mini escape, Tropical Paleo Magic Cookie Bars will likely become your new standby.
Recipe Snapshot
1 hr 25 mins
25 mins
60 mins
Medium
200 kcal
American
Paleo, Gluten-Free
Desserts
Oven, 8×8-inch pan, Parchment paper, Large pot, Electric hand mixer, Measuring cup, Kitchen towel
The Appeal of This Tropical Paleo Magic Cookie Bars
Bright Tropical Flavor
I fell in love with how the combination of crushed pineapple, lime juice, and unsweetened coconut flakes sings together. The citrus lifts the sweetness, while the toasted coconut adds depth, so every bite feels lively and balanced.
Paleo Friendly, Yet Indulgent
Using coconut flour, coconut oil, and full fat coconut milk keeps the bars grain free, but the texture remains satisfyingly rich. I like that these bars can fit into a paleo plan without feeling like a compromise, the honey brings natural sweetness and the macadamia nuts offer a buttery crunch.
Make Ahead Convenience
One of the biggest wins for me is that these bars improve after an overnight chill. I’ve learned to make them the day before a picnic, which saves last minute stress and ensures clean, firm slices that travel well.
Toasty, Nutty Contrast
Toasting the macadamia nuts and coconut flakes transforms their flavors, adding a toasty complexity that plays against the sweet coconut milk sauce. That little bit of extra work gives the bars a professional edge.
Playful, Yet Simple Technique
The method is approachable, and once you get the sauce reduction timing down, the assembly is straightforward. I enjoy the hands on pressing of the crust, it feels like kneading a small hug into the pan, and the final bake brings everything together into a cohesive, sliceable bar.
Ingredients for Tropical Paleo Magic Cookie Bars
These ingredients are chosen to deliver a paleo friendly, tropical dessert that balances richness, structure, and bright acidity. The key players are the full fat coconut milk for the glossy sauce, the coconut flour and coconut oil for the sturdy, tender crust, and the combination of macadamia nuts and unsweetened coconut flakes for texture. Honey sweetens naturally while lime juice and lime zest brighten the overall profile.
- 2/3 cup macadamia nuts: Provide a rich, buttery flavor and crunchy texture while supplying healthy monounsaturated fats and a creamy mouthfeel when chopped or ground into the base.
- 1/2 cup unsweetened coconut flakes: Add a toasty, chewy element and tropical aroma while contributing fiber and structural contrast to balance richer components in the bars.
- 113.5 ounce can full-fat coconut milk: Contribute a silky, full-bodied coconut creaminess and natural fat content that enhances moisture and binds ingredients; shake well and measure the creamy portion for consistency.
- 1/2 cup raw honey: Impart natural sweetness and a mild floral note while helping to bind and caramelize edges during baking; adjust quantity for desired sweetness and chewiness.
- 3 tablespoons fresh lime juice: Deliver bright acidity and fresh citrus aromatics to cut through richness and enhance overall flavor complexity when combined with other tropical elements.
- 1 teaspoon lime zest: Provide concentrated citrus oils and intense aroma to amplify lime flavor throughout the recipe; zest finely to avoid bitter pith and distribute evenly.
- 3/4 cup crushed pineapple squeeze out as much juice as possible: Introduce juicy tropical fruit flavor and sweet acidity while adding soft texture; squeeze out excess juice to prevent overly wet batter and maintain proper consistency.
- 1/3 cup coconut oil at room temperature: Supply a smooth, stable fat that helps solidify and lend tenderness to the bars while contributing mild coconut flavor and moisture at room temperature.
- 3 tablespoons raw honey: Contribute additional sweetness and slight viscosity to help bind ingredients together and enhance caramel-like notes during baking or setting.
- 3/4 cup coconut flour sifted (66 grams): Act as a dense, absorbent base ingredient that soaks up moisture, adds mild coconut flavor, and provides structure; sift to remove lumps for even mixing.
- pinch salt: Enhance overall flavor balance by elevating sweetness perception and reducing flatness; a small pinch improves depth without making the bars taste salty.
Making This Tropical Paleo Magic Cookie Bars
These directions guide you through toasting, reducing, pressing, and baking, so patience matters. The rhythm of toasting, stirring the sauce, and gentle pressing is what creates a picture perfect bar. Below I expand each original direction into a detailed, sensory rich step so you know exactly what to expect at every turn.
- Preheat your oven to 350 degrees Fahrenheit and line an 8×8-inch pan with parchment paper, leaving a little overhang to use as a handle once the bars are baked. I like to rub the pan with coconut oil to help the parchment stick.: As the oven warms you will feel a gentle hum and the kitchen will start to feel cozy, the parchment overhang is your best friend for cleanup and removal later. The reason we use an 8×8 pan is to achieve the right thickness, and leaving a paper handle saves you from prying the bars out with a knife, which could crack the edges. A common mistake is using a too large pan, which yields bars that bake too quickly and dry out, so use the size specified and rub the pan with a little coconut oil to anchor the parchment so it stays put when you press the crust.
- Place the macadamia nuts on a small baking sheet and the coconut flakes on a separate baking sheet. Place into the oven and bake until golden brown and toasted, about 10-12 minutes for the macadamia nuts and 2-4 minutes for the coconut. Coconut burns quickly, so keep an eye on it!: The sound of nuts scattering on the sheet and the first aroma as they begin to color is memorable, the macadamias will take longer than the coconut flakes so separate trays let you pull each at the perfect moment. Toast until the macadamias are golden and fragrant, about 10 to 12 minutes, and the coconut until edges are lightly brown in 2 to 4 minutes, because coconut can burn quickly. The why here is simple, toasting intensifies oils and converts flavors from flat to toasted nutty and toasty coconut; a misstep is leaving both on one sheet, which often leads to burnt coconut or under toasted nuts.
- In a large pot, whisk together the coconut milk, honey, lime juice, and lime zest and bring to a boil over high heat. Once boiling, boil for 1 minute, stirring constantly.: You will hear a soft simmer build to a rolling boil, and the scent of lime will blossom through the coconut steam, which is an excellent sign the aromatics are marrying. Boiling for one minute while stirring constantly begins the thickening process by evaporating water and integrating the honey, which helps the sauce develop a glossy texture later. A common error is to step away during that first boil, which can cause scorching on the bottom; use a sturdy whisk and keep the mixture moving.
- Reduce the heat to medium and simmer, stirring frequently, until the sauce reduces to a total of 1 cup, about 18-19 minutes. I recommend checking it at about 16 minutes (you'll need to pour it into a measuring cup). If you still have over 1 cup, add it back to the pot and cook a few more minutes. It's important to reduce to 1 cup.: During the 18 to 19 minutes of simmering you will notice the mixture slowly darken and the sound soften as it thickens, and steam will carry rich coconut and honey notes. Checking with a measuring cup around 16 minutes keeps you from overshooting, because reducing to exactly 1 cup concentrates flavor and enables the sauce to set when chilled. If you stop too early the topping will be runny and the bars won’t firm up; if you go too far the sauce can become too sticky and crystallized, so aim for that sweet spot and stir frequently to prevent sticking.
- While the sauce reduces, place the crushed pineapple into a kitchen towel and wring out the excess moisture. This is important, or your bars will not set as the water will be released when cooking. Set aside.: Squeezing out juice is a tactile step, the fruit yielding under pressure and leaving behind a fragrant, drier pulp. This is crucial because excess pineapple liquid will release while baking, making the bars soggy and preventing proper setting. A common oversight is skipping this step to save time, which risks a soft, uncuttable bar, so be thorough and press until the towel only gives a little.
- While the sauce is still reducing, in a large bowl, using an electric hand mixer, beat the coconut oil with the 3 tablespoons of honey until smooth and creamy. Stir in the flour and pinch of salt until a wet dough forms.: The blades humming and the mixture turning glossy is satisfying, the texture should be silky and spreadable, which helps the coconut flour hydrate evenly when you stir it in. After adding the sifted flour and a pinch of salt , the dough will come together into a wet, pliable mass; this gives the crust body and a slightly tender crumb. One mistake is adding too much flour without weighing it, which makes a dry, crumbly crust, so trust the measured grams or sift the flour carefully.
- Press the dough evenly into the bottom of the pan. This will be a little tough, but just be patient with it. I found it easiest to use the palms of my hands and rinse them off every so often until the dough was pressed in. Do not bake the crust until the sauce finishes reducing, as this allows the sauce to thicken and cool while the crust bakes.: Pressing creates the base texture that supports all the toppings, and you will feel the dough firm under your palms as small air pockets are worked out. Use rinsed palms to stop sticking and take your time to create an even surface, because an uneven crust leads to uneven baking. Let the crust wait to bake until the sauce finishes reducing, this allows the crust to firm slightly while the sauce is ready, ensuring the final bake sets properly. The common pitfall is rushing and baking the crust too early, which changes the timing for the final bake and can affect texture.
- While you wait for the sauce to finish reducing, chop the toasted macadamia nuts and set aside.: Chopping releases a burst of nutty aroma and creates size contrast for texture, a mix of larger pieces and crumbs works nicely when sprinkled on top. Setting them aside means they are ready for immediate assembly, so you preserve the toasty warmth and crunch. Avoid over chopping into a powder, because then you lose the delightful nutty bite that the bars need.
- Once the sauce has reduced to 1 cup, set aside to cool while you bake the crust. Place the crust into the oven and cook for 8 minutes.: The sauce cooling will thicken slightly and become glossy, and the heat will mellow sharpness from the lime while rounding the honey notes. Bake the crust for 8 minutes; you will see the edges begin to deepen in color and the aroma shift to a gentle toasted note. A typical mistake is pouring hot sauce onto an unbaked crust, which can make the base soggy; letting the sauce cool and the crust start its bake prevents this.
- When the crust comes out of the oven, it may have risen in some spots. Take a small spoon and gently press it back down, being sure not to leave cracks in the crust.: Gently pressing with a small spoon smooths the surface without cracking it, and you will notice steam release and a faint toasty perfume. This step helps the layers adhere better and avoids uneven toppings when you add nuts and fruit. Don’t press too hard, or you could compact the crust and lose the pleasant tender crumb, so be gentle.
- Sprinkle the chopped nuts on top, and lightly press them into the crust. Then, sprinkle on the coconut flakes, followed by the crushed pineapple. Be sure to spread everything out evenly.: The nuts will sink slightly and release more fragrance, anchoring the textures; then add the toasted coconut flakes and the drained crushed pineapple, spreading them evenly so each bite has a balance of fruit, coconut, and nuts. The visual contrast of white coconut, golden nuts, and pineapple makes the bars inviting. An easy mistake is piling too much in one area, which leads to uneven baking and pockets of excess moisture, so distribute everything evenly.
- Finally, pour the coconut milk sauce evenly over top of everything, making sure you get it down the sides of the bars (but not between the parchment and the pan!). Use a knife to swirl around the layers in a few spots where the sauce pools to make sure it seeps down into all the layers (don't puncture the crust!). Then, gently shake the pan to ensure the sauce really sinks in everywhere.: The sauce should pool slightly and shine, and when you use a knife to swirl it into areas where it pools you help it seep into the layers for consistent setting, just do not puncture the crust. A gentle shake of the pan encourages the sauce to settle and find its way into nooks, creating an even glossy layer. If you pour while the sauce is too hot you risk melting the crust or shifting the toppings, so cool the sauce first to avoid that problem.
- Place back into the oven and cook until golden brown and bubbly, about 28-30 minutes. Let cool on the counter to room temperature.: During the 28 to 30 minutes of baking you will hear faint bubbling, and the top will turn golden, with edges caramelizing slightly, that visual cue tells you the sauce has set and the crust is done. Letting them cool to room temperature on the counter tempers the heat so the structure firms before refrigeration. A common error is removing the pan while too hot, which can cause the sauce to sink; patience here pays off.
- Once the bars are at room temperature, cover and chill the bars overnight to let everything set.: Overnight chilling is transformative, the texture becomes sliceable and the flavors meld together into a cohesive whole. The chill encourages the coconut milk sauce to firm up and the crust to compact properly, so cutting neat squares is possible the next day. Skipping this step usually results in soft, unstructured bars, so plan ahead and refrigerate them for the best outcome.
- The next day, lift the bars out of the pan, slice, and serve cold.: Lifting the parchment handles will give you clean edges, and slicing cold yields neat squares with defined layers, the cold temperature enhances the contrast between the creamy topping and tender crust. Serve straight from the fridge for the crispest bite and most satisfying texture. Cutting while warm will smear the topping and create messy slices, so wait until they are fully chilled.
Recipe Tips about Tropical Paleo Magic Cookie Bars
These tips are drawn from repeated testing and aim to help you get consistent, beautiful bars every time. I expand practical notes into clear, actionable steps that respect the recipe directions and ingredients.
- Weigh the coconut flour because brands vary greatly in density, using the gram measurement ensures the crust is neither dry nor wet, so it binds correctly when you press it into the pan.
- Don’t skip the overnight chill the coconut milk sauce needs time to set and the crust firms up, chilling overnight will change the difference between messy slices and clean bars.
- Use the parchment overhang to lift the bars cleanly from the pan, this prevents the need to pry or scrape which can crack the edges, preserving neat squares.
- Keep an eye on the coconut while toasting because coconut browns faster than nuts, remove it the moment the edges deepen to avoid bitterness and to keep a pleasant toasted flavor.
- Measure the sauce reduction by pouring into a measuring cup during the simmer, stopping at 1 cup prevents under or over reduction which impacts final texture.
- Cool the sauce slightly before pouring so the crust does not become too soft, pouring piping hot sauce can cause shifting in the layers and a soggy base.
Serving Suggestions
Serve these bars chilled for the best texture and the most refreshing taste. They are ideal for summer gatherings, dessert tables, and times when you want a tropical treat without grains. Use the list below for ideas on pairing, occasions, and storage.
- Serve cold straight from the refrigerator to keep the coconut topping firm and the crust crisp, this preserves the distinct layers when slicing.
- Perfect for summer picnics these bars travel well when packed in a cool bag, and they make a bright dessert option for outdoor gatherings.
- Potlucks and parties bring a full pan and slice into neat squares, they present beautifully on a platter with their toasted nut and coconut topping visible.
- Storage keep covered in the fridge for up to 5 days, or freeze individual squares wrapped tightly for up to a month, thaw in the fridge before serving.
- Occasions great for brunch, afternoon tea, or a light dessert after a heavy meal, their tropical notes pair well with fresh fruit plates.
- Seasonal pairing they shine in warm months when citrus and pineapple are in season, but the flavor is pleasant year round for a taste of sunshine.
FAQ
Conclusion
Tropical Paleo Magic Cookie Bars stand out because they deliver nostalgic magic with paleo friendly ingredients, balancing toasted nuts, coconut, and bright lime into a sliceable, make ahead dessert. Give them a try the day before your next gathering, and enjoy how the flavors develop overnight into a cohesive, tropical treat. These bars are forgiving, transportable, and delightfully different from ordinary cookies, making them a recipe I come back to whenever I want a sunny, impressive dessert.
Tropical Paleo Magic Cookie Bars
Equipment
- Oven
- 8×8-inch pan
- Parchment Paper
- Large Pot
- electric hand mixer
- Measuring Cup
- Kitchen Towel
Ingredients
- 2/3 cup macadamia nuts Provide a rich, buttery flavor and crunchy texture while supplying healthy monounsaturated fats and a creamy mouthfeel when chopped or ground into the base.
- 1/2 cup unsweetened coconut flakes Add a toasty, chewy element and tropical aroma while contributing fiber and structural contrast to balance richer components in the bars.
- 113.5 -ounce can full-fat coconut milk Contribute a silky, full-bodied coconut creaminess and natural fat content that enhances moisture and binds ingredients; shake well and measure the creamy portion for consistency.
- 1/2 cup raw honey Impart natural sweetness and a mild floral note while helping to bind and caramelize edges during baking; adjust quantity for desired sweetness and chewiness.
- 3 tablespoons fresh lime juice Deliver bright acidity and fresh citrus aromatics to cut through richness and enhance overall flavor complexity when combined with other tropical elements.
- 1 teaspoon lime zest Provide concentrated citrus oils and intense aroma to amplify lime flavor throughout the recipe; zest finely to avoid bitter pith and distribute evenly.
- 3/4 cup crushed pineapple squeeze out as much juice as possible Introduce juicy tropical fruit flavor and sweet acidity while adding soft texture; squeeze out excess juice to prevent overly wet batter and maintain proper consistency.
- 1/3 cup coconut oil at room temperature Supply a smooth, stable fat that helps solidify and lend tenderness to the bars while contributing mild coconut flavor and moisture at room temperature.
- 3 tablespoons raw honey Contribute additional sweetness and slight viscosity to help bind ingredients together and enhance caramel-like notes during baking or setting.
- 3/4 cup coconut flour sifted (66 grams) Act as a dense, absorbent base ingredient that soaks up moisture, adds mild coconut flavor, and provides structure; sift to remove lumps for even mixing.
- pinch salt Enhance overall flavor balance by elevating sweetness perception and reducing flatness; a small pinch improves depth without making the bars taste salty.
Instructions
- Preheat your oven to 350 degrees Fahrenheit and line an 8×8-inch pan with parchment paper, leaving a little overhang to use as a handle once the bars are baked. I like to rub the pan with coconut oil to help the parchment stick.: As the oven warms you will feel a gentle hum and the kitchen will start to feel cozy, the parchment overhang is your best friend for cleanup and removal later. The reason we use an 8×8 pan is to achieve the right thickness, and leaving a paper handle saves you from prying the bars out with a knife, which could crack the edges. A common mistake is using a too large pan, which yields bars that bake too quickly and dry out, so use the size specified and rub the pan with a little coconut oil to anchor the parchment so it stays put when you press the crust.
- Place the macadamia nuts on a small baking sheet and the coconut flakes on a separate baking sheet. Place into the oven and bake until golden brown and toasted, about 10-12 minutes for the macadamia nuts and 2-4 minutes for the coconut. Coconut burns quickly, so keep an eye on it!: The sound of nuts scattering on the sheet and the first aroma as they begin to color is memorable, the macadamias will take longer than the coconut flakes so separate trays let you pull each at the perfect moment. Toast until the macadamias are golden and fragrant, about 10 to 12 minutes, and the coconut until edges are lightly brown in 2 to 4 minutes, because coconut can burn quickly. The why here is simple, toasting intensifies oils and converts flavors from flat to toasted nutty and toasty coconut; a misstep is leaving both on one sheet, which often leads to burnt coconut or under toasted nuts.
- In a large pot, whisk together the coconut milk, honey, lime juice, and lime zest and bring to a boil over high heat. Once boiling, boil for 1 minute, stirring constantly.: You will hear a soft simmer build to a rolling boil, and the scent of lime will blossom through the coconut steam, which is an excellent sign the aromatics are marrying. Boiling for one minute while stirring constantly begins the thickening process by evaporating water and integrating the honey, which helps the sauce develop a glossy texture later. A common error is to step away during that first boil, which can cause scorching on the bottom; use a sturdy whisk and keep the mixture moving.
- Reduce the heat to medium and simmer, stirring frequently, until the sauce reduces to a total of 1 cup, about 18-19 minutes. I recommend checking it at about 16 minutes (you'll need to pour it into a measuring cup). If you still have over 1 cup, add it back to the pot and cook a few more minutes. It's important to reduce to 1 cup.: During the 18 to 19 minutes of simmering you will notice the mixture slowly darken and the sound soften as it thickens, and steam will carry rich coconut and honey notes. Checking with a measuring cup around 16 minutes keeps you from overshooting, because reducing to exactly 1 cup concentrates flavor and enables the sauce to set when chilled. If you stop too early the topping will be runny and the bars won’t firm up; if you go too far the sauce can become too sticky and crystallized, so aim for that sweet spot and stir frequently to prevent sticking.
- While the sauce reduces, place the crushed pineapple into a kitchen towel and wring out the excess moisture. This is important, or your bars will not set as the water will be released when cooking. Set aside.: Squeezing out juice is a tactile step, the fruit yielding under pressure and leaving behind a fragrant, drier pulp. This is crucial because excess pineapple liquid will release while baking, making the bars soggy and preventing proper setting. A common oversight is skipping this step to save time, which risks a soft, uncuttable bar, so be thorough and press until the towel only gives a little.
- While the sauce is still reducing, in a large bowl, using an electric hand mixer, beat the coconut oil with the 3 tablespoons of honey until smooth and creamy. Stir in the flour and pinch of salt until a wet dough forms.: The blades humming and the mixture turning glossy is satisfying, the texture should be silky and spreadable, which helps the coconut flour hydrate evenly when you stir it in. After adding the sifted flour and a pinch of salt , the dough will come together into a wet, pliable mass; this gives the crust body and a slightly tender crumb. One mistake is adding too much flour without weighing it, which makes a dry, crumbly crust, so trust the measured grams or sift the flour carefully.
- Press the dough evenly into the bottom of the pan. This will be a little tough, but just be patient with it. I found it easiest to use the palms of my hands and rinse them off every so often until the dough was pressed in. Do not bake the crust until the sauce finishes reducing, as this allows the sauce to thicken and cool while the crust bakes.: Pressing creates the base texture that supports all the toppings, and you will feel the dough firm under your palms as small air pockets are worked out. Use rinsed palms to stop sticking and take your time to create an even surface, because an uneven crust leads to uneven baking. Let the crust wait to bake until the sauce finishes reducing, this allows the crust to firm slightly while the sauce is ready, ensuring the final bake sets properly. The common pitfall is rushing and baking the crust too early, which changes the timing for the final bake and can affect texture.
- While you wait for the sauce to finish reducing, chop the toasted macadamia nuts and set aside.: Chopping releases a burst of nutty aroma and creates size contrast for texture, a mix of larger pieces and crumbs works nicely when sprinkled on top. Setting them aside means they are ready for immediate assembly, so you preserve the toasty warmth and crunch. Avoid over chopping into a powder, because then you lose the delightful nutty bite that the bars need.
- Once the sauce has reduced to 1 cup, set aside to cool while you bake the crust. Place the crust into the oven and cook for 8 minutes.: The sauce cooling will thicken slightly and become glossy, and the heat will mellow sharpness from the lime while rounding the honey notes. Bake the crust for 8 minutes; you will see the edges begin to deepen in color and the aroma shift to a gentle toasted note. A typical mistake is pouring hot sauce onto an unbaked crust, which can make the base soggy; letting the sauce cool and the crust start its bake prevents this.
- When the crust comes out of the oven, it may have risen in some spots. Take a small spoon and gently press it back down, being sure not to leave cracks in the crust.: Gently pressing with a small spoon smooths the surface without cracking it, and you will notice steam release and a faint toasty perfume. This step helps the layers adhere better and avoids uneven toppings when you add nuts and fruit. Don’t press too hard, or you could compact the crust and lose the pleasant tender crumb, so be gentle.
- Sprinkle the chopped nuts on top, and lightly press them into the crust. Then, sprinkle on the coconut flakes, followed by the crushed pineapple. Be sure to spread everything out evenly.: The nuts will sink slightly and release more fragrance, anchoring the textures; then add the toasted coconut flakes and the drained crushed pineapple, spreading them evenly so each bite has a balance of fruit, coconut, and nuts. The visual contrast of white coconut, golden nuts, and pineapple makes the bars inviting. An easy mistake is piling too much in one area, which leads to uneven baking and pockets of excess moisture, so distribute everything evenly.
- Finally, pour the coconut milk sauce evenly over top of everything, making sure you get it down the sides of the bars (but not between the parchment and the pan!). Use a knife to swirl around the layers in a few spots where the sauce pools to make sure it seeps down into all the layers (don't puncture the crust!). Then, gently shake the pan to ensure the sauce really sinks in everywhere.: The sauce should pool slightly and shine, and when you use a knife to swirl it into areas where it pools you help it seep into the layers for consistent setting, just do not puncture the crust. A gentle shake of the pan encourages the sauce to settle and find its way into nooks, creating an even glossy layer. If you pour while the sauce is too hot you risk melting the crust or shifting the toppings, so cool the sauce first to avoid that problem.
- Place back into the oven and cook until golden brown and bubbly, about 28-30 minutes. Let cool on the counter to room temperature.: During the 28 to 30 minutes of baking you will hear faint bubbling, and the top will turn golden, with edges caramelizing slightly, that visual cue tells you the sauce has set and the crust is done. Letting them cool to room temperature on the counter tempers the heat so the structure firms before refrigeration. A common error is removing the pan while too hot, which can cause the sauce to sink; patience here pays off.
- Once the bars are at room temperature, cover and chill the bars overnight to let everything set.: Overnight chilling is transformative, the texture becomes sliceable and the flavors meld together into a cohesive whole. The chill encourages the coconut milk sauce to firm up and the crust to compact properly, so cutting neat squares is possible the next day. Skipping this step usually results in soft, unstructured bars, so plan ahead and refrigerate them for the best outcome.
- The next day, lift the bars out of the pan, slice, and serve cold.: Lifting the parchment handles will give you clean edges, and slicing cold yields neat squares with defined layers, the cold temperature enhances the contrast between the creamy topping and tender crust. Serve straight from the fridge for the crispest bite and most satisfying texture. Cutting while warm will smear the topping and create messy slices, so wait until they are fully chilled.
Notes
- Weigh the coconut flour because brands vary greatly in density, using the gram measurement ensures the crust is neither dry nor wet, so it binds correctly when you press it into the pan.
- Don’t skip the overnight chill the coconut milk sauce needs time to set and the crust firms up, chilling overnight will change the difference between messy slices and clean bars.
- Use the parchment overhang to lift the bars cleanly from the pan, this prevents the need to pry or scrape which can crack the edges, preserving neat squares.
- Keep an eye on the coconut while toasting because coconut browns faster than nuts, remove it the moment the edges deepen to avoid bitterness and to keep a pleasant toasted flavor.
- Measure the sauce reduction by pouring into a measuring cup during the simmer, stopping at 1 cup prevents under or over reduction which impacts final texture.
- Cool the sauce slightly before pouring so the crust does not become too soft, pouring piping hot sauce can cause shifting in the layers and a soggy base.