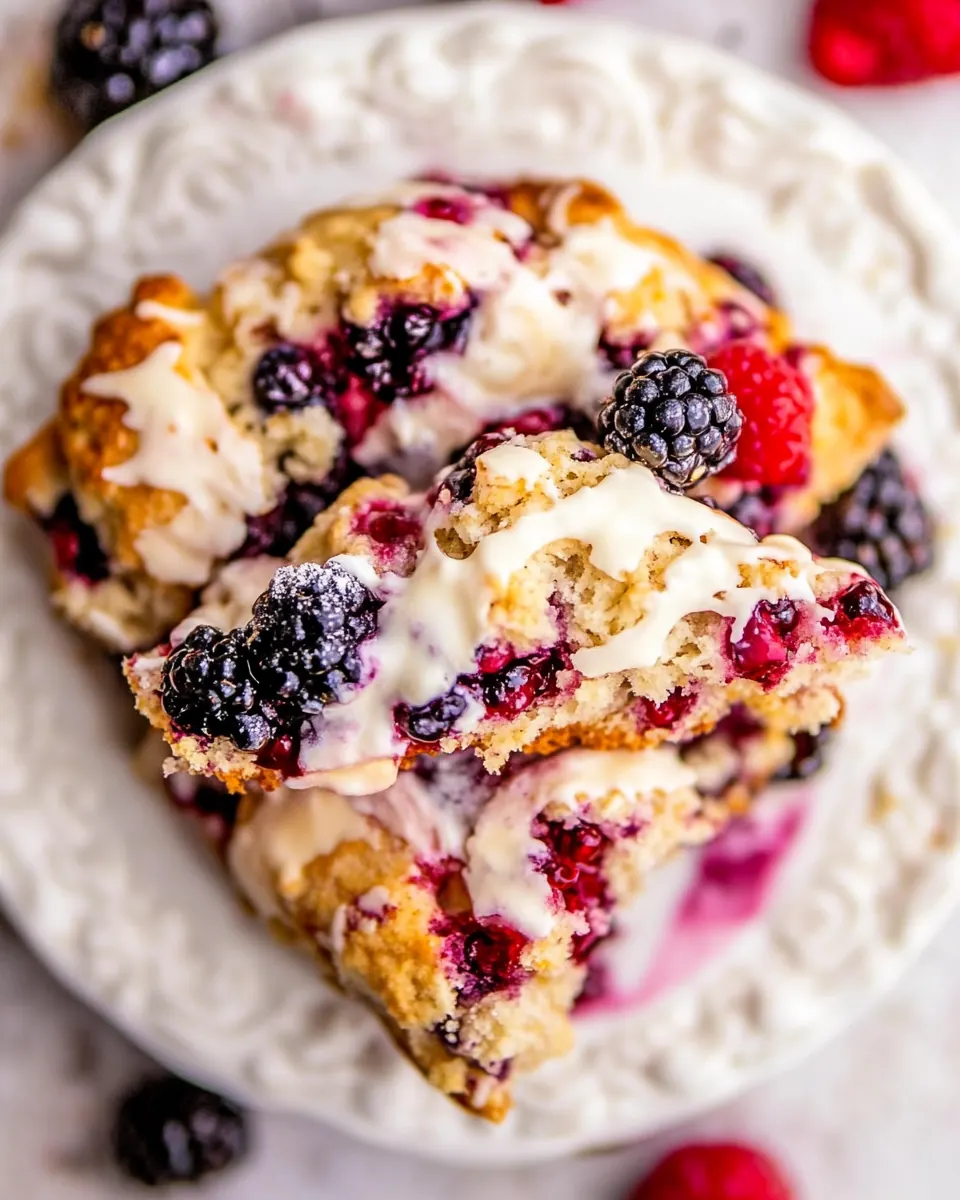
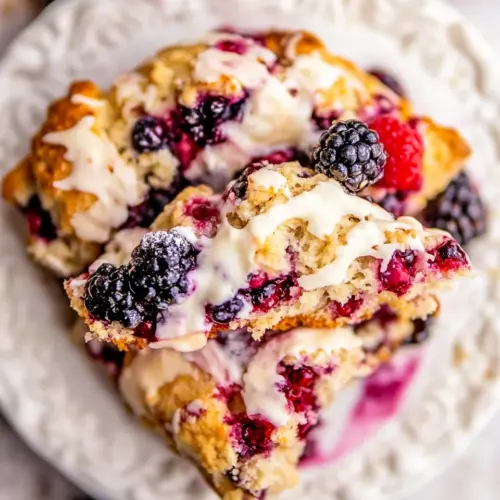
Triple Berry Buttermilk Scones
Triple Berry Buttermilk Scones are the kind of thing I reach for when an ordinary morning needs a little lift. I first made these on a rainy spring weekend when the house smelled like citrus and warm butter, and the smell alone convinced a neighbor to stay for tea. From that first batch I learned how playful and forgiving this dough can be, and how the tiny explosions of berry juice make each bite sing.
There is a calm joy to mixing the dry ingredients, cutting in the cold butter, and folding in soft, jewel like berries. Sometimes I make them painfully rustic and other times I coax them into neat wedges, but the essence is always the same: flaky layers, a tender crumb, and shards of sweet glaze on top. When I have company I tell stories while shaping the dough, and when I bake alone I treat the process like a short meditation that ends with something delicious to hold and share.
Recipe Snapshot
42 mins
20 mins
22 mins
Medium
210 kcal
American
Gluten-Free, Low FODMAP
Breakfast
Mixing bowl, Baking sheet, Parchment paper, Pastry blender or two forks, Bench scraper or sharp knife, Whisk, Rubber spatula, Small bowl
Why We Love This Triple Berry Buttermilk Scones
Perfect balance of tart and sweet
I love how the bright citrus and the tang of the buttermilk play against the natural sweetness of the blackberries, blueberries, and raspberries. The contrast keeps each bite lively, so you never get tired of the flavor. You can taste the lemon zest in the crumb and a gentle tang from the buttermilk, which makes the scones feel light even though they are satisfyingly rich.
Flaky texture that is foolproof
Keeping the butter very cold and working it into pea sized pieces creates pockets of steam as the scones bake, giving you that desirable flakiness. I find this method easy to follow and forgiving, especially if you are a home baker who worries about overworking dough. The end result is tender layers that flake apart without crumbling into a mess.
Quick and elegant for guests
From bowl to oven these scones come together quickly, which is why I reach for this recipe when guests pop in or when I host a casual brunch. The glaze adds a pretty finish that feels special, and a scatter of toasted almonds gives a hint of crunch that elevates the presentation. It looks like you spent more time than you did, and that always feels good.
Flexible and adaptable
I like that you can vary the berries depending on what is in season, and the dough welcomes small changes without losing structure. If you want more tartness, add a touch more lemon juice in the glaze. If your berries are very juicy, handle them gently while folding and the dough will still hold together. This makes the recipe a dependable kitchen companion, year after year.
Great warm or room temperature
These scones travel well from oven to table, and they remain enjoyable even after cooling. Warm from the oven they are irresistible, and later they keep their charm with the glaze still offering sweet highlights. That makes them a smart choice for gatherings where baking ahead helps you enjoy the company.
Ingredients to Make Triple Berry Buttermilk Scones
These ingredients are chosen to create a delicate, flaky scone with bright berry flavor. The dry staples provide structure, the butter creates lift and tenderness, and the buttermilk adds a subtle tang that balances the sweetness. The berries are the stars, bringing pockets of juiciness that burst during baking, while the lemon and glaze tie everything together for a finishing note of brightness.
- 1 large egg, beaten: Beaten to bind the dough and add richness, providing structure and a tender crumb when mixed with the wet ingredients.
- 1 teaspoon milk or water: Added sparingly to thin the egg wash and help it brush on smoothly for a glossy, lightly set finish after baking.
- 3 cups all-purpose flour: Sifted and measured to form the scone base, supplying gluten and bulk so the leavening can create a flaky texture.
- 1/2 teaspoons salt: Measured for seasoning to balance the sweetness and enhance the overall flavors without making the scones taste salty.
- 2 teaspoons baking powder: Combined with the flour to aerate the dough and produce rise, ensuring the scones are light rather than dense.
- 1/3 cup granulated sugar: Folded into the dry ingredients to contribute gentle sweetness and help brown the exterior during baking.
- 2 teaspoons lemon zest, finely grated: Grated finely to release essential oils and bright citrus aroma, lifting the fruit flavors and adding a fresh note.
- 1 stick (4 ounces) unsalted butter, VERY cold and cut into tiny pieces: Cut very cold into tiny pieces to create flaky layers as the butter melts during baking, contributing rich flavor and tender texture.
- 1 large egg: Beaten into the dough mixture to add richness and help bind ingredients, contributing to a golden color on the interior.
- 2/3 cup buttermilk: Measured into the batter to provide acidity for tenderizing, activate the leavening, and impart a slight tang to the scones.
- 1/2 cup blueberries: Gently folded in to offer bursts of juiciness and mild sweetness, adding texture and fruity contrast in each bite.
- 1/2 cup raspberries: Handled carefully and folded in to preserve shape, supplying delicate tartness and a bright, summery flavor.
- 1/2 cup blackberries: Tossed with the other berries to provide deep color, juicy bursts, and a balance of sweet-tart flavor throughout the scones.
- 2 tablespoons lemon juice: Squeezed and mixed with the glaze or berries to intensify citrus brightness and balance the sweetness with acidic lift.
- 3/4 cup confectioners' sugar: Whisked into a glaze to create a smooth, sweet coating that adds shine and extra sweetness to the finished scones.
- pinch of salt (1/8 teaspoon or less): Pinched in small amount to enhance the glaze sweetness and round out flavors without overpowering the delicate berries.
- 1/4 cup toasted almonds (for garnish and ) (optional): Toasted and sprinkled as an optional garnish to add crunch, warm nutty notes, and visual appeal when serving.
How to Assemble Triple Berry Buttermilk Scones
These directions walk you through each stage with attention to feel and timing so you get flaky, fruit studded scones every time. Read through the steps first, then follow along while you bake to keep the rhythm. I find moving deliberately and keeping tools ready makes this process relaxing and reliable.
- In a small bowl beat together the egg and water until well combined. Set aside until needed.: You should notice the egg mixture become glossy and slightly homogenous, with the yolk and white fully integrated, which gives the wash an even sheen. The reason to set it aside is to let any bubbles settle so the wash brushes on smoothly, avoiding streaks. A common mistake is using a vigorously frothy wash, which can puff and flake in spots; let it calm before applying. If the wash seems too thick, a tiny extra drop of water will make it brushable without diluting the appearance.
- Preheat oven to 400° (F). Line a large baking sheet with parchment paper; set aside.: The oven should feel hot and steady when you open it, which ensures the scones get an immediate lift. Lining the sheet with parchment prevents sticking and helps the bottoms brown evenly. A cold oven or skipping the parchment often leads to uneven rise or bottoms that stick, so avoid those shortcuts. You want a consistent intense heat to create steam from the butter pockets.
- In a large bowl combine flour, salt, baking powder, sugar, and lemon zest; mix well to combine.: At this stage you will smell the lemon and fresh flour mingling, and mixing ensures the leavening distributes evenly, which is essential for uniform rise. Stir until you can no longer see clumps of dry ingredients and the zest is evenly dispersed. A typical error here is under mixing the dry mix, which causes uneven pockets of baking powder and irregular texture in the bakes. A gentle whisk or fork works fine, avoid compacting the mixture.
- Cut the butter into small cubes then work it into the mixture (using two forks or a pastry blender) until it resembles a coarse meal. The chunks of butter should be no smaller than peas and no larger than hazelnuts.: As you work the butter in, you will feel the texture change from sandy to pebbly, with visible tiny flecks of butter. Those pieces are crucial because they melt in the oven to create flaky layers. If the butter melts while working, the mixture becomes pasty and the scones lose flakiness, so keep everything cold and use a light touch. The right texture looks uneven and coarse rather than uniform and dry.
- In a small bowl whisk together the egg and buttermilk until well combined. Add this liquid mixture to dry mixture and use a fork to stir everything together until just moistened.: You will see the dough begin to come together in clumps and feel slightly tacky. The combination of the egg and buttermilk activates the baking powder and gives the dough both lift and tenderness. Stir just until the dry bits disappear; overmixing develops gluten and yields tough scones. A common misstep is stirring until smooth rather than slightly shaggy, which changes the crumb from tender to dense.
- Add in the berries and, using a rubber spatula, gently fold them into the dough. Don’t worry if some of the berries break up a bit.: You should sense the difference between the dry dough and the delicate fruit, with flashes of color appearing as you fold. Folding gently preserves the shape of the berries while distributing them evenly; it also prevents the dough from turning purple and wet. If you aggressively stir, the juices will bleed and make the dough sticky, so resist the urge to overwork it. Light, deliberate strokes keep the texture right.
- Empty the loose dough out onto a clean, lightly floured work surface, then shape the dough into an 8-inch circle. You will need to knead the mixture a few times to get it to a workable texture.: The surface should feel cool and slightly tacky, and as you pat and fold the dough it will come together into a cohesive round. Kneading just a few turns builds gentle cohesion without overdeveloping gluten; you want a tender crumb not a chewy bread texture. A frequent mistake is excessive kneading which creates tight, dense scones; stop as soon as the dough holds together.
- Cut the dough into 8 wedges and carefully transfer them to the prepared sheet, placing them 2" apart.: Each wedge should look distinct with clean edges, and the space between them allows hot air to circulate so they brown on all sides. Use a sharp knife or bench scraper to make clean cuts, which helps maintain structure while transferring. If wedges are too close, they may bake together and steam rather than brown, losing crisp edges. Handle them gently to keep the berry pockets intact.
- Lightly brush each scone with the egg wash.: The wash should coat the tops without pooling, giving a warm golden color and slight shine once baked. Use a soft pastry brush and the reserved wash, applying a single even layer for best appearance. Over brushing can cause the wash to drip down and seal the sides, preventing a crisp edge. A subtle, even coat is what you are aiming for.
- Bake for 20 to 22 minutes, or until light golden brown.: You will hear a quiet hiss as the oven steam activates and smell warm butter and citrus as the tops color. The visual cue is a light golden brown crown and firm bottoms when nudged. An under baked scone will feel doughy inside, while an over baked scone will be too dry; check at 20 minutes and trust the color and slight spring back to know doneness. If your oven runs hot, rotate the sheet midway to avoid uneven browning.
- Allow scones to cool for 10 minutes on the baking sheet. In the meantime you can make your glaze.: The scones will settle and the interior crumb will finish setting as they cool, so patience here preserves tenderness. Use the cooling interval to whisk the glaze ingredients until smooth and taste to adjust. Cutting too soon risks a gummy interior, while waiting too long makes the glaze less likely to adhere. Ten minutes strikes a good balance.
- In a small bowl whisk together the lemon juice, confectioners' sugar, and salt. Drizzle over scones and sprinkle with almonds, if using. Serve at once.: The glaze should be glossy and pourable, with a bright lemon note that lifts the scones. Drizzle in a thin stream so the glaze sets into pretty streaks, then add the toasted almonds for contrast. If the glaze is too runny add more confectioners' sugar; if too thick add a drop of lemon. Serve while slightly warm so the contrast between crust, crumb, and glaze is most appealing.
Variations to Try
These variations let you customize the scones for texture, flavor, and presentation. Each note begins with a practical hook and continues with details so you can try the idea with confidence. I enjoy rotating through these options seasonally to keep this recipe fresh.
- Swap the berry ratios: If you prefer one berry more than another, increase that fruit to create a dominant flavor while keeping the total fruit volume the same so the dough consistency remains balanced.
- Make mini scones: Form smaller circles and cut into more wedges to yield bite sized scones that are ideal for parties, reducing baking time slightly and creating more crust to crumb ratio per bite.
- Use Greek yogurt instead of buttermilk: Stir Greek yogurt with a touch of milk until pourable to replicate the tang and moisture if you do not have buttermilk on hand, noting the texture will be slightly denser.
- Omit the almonds: Leave off the toasted almonds for a simpler finish or for nut free preferences, and sprinkle an extra pinch of lemon zest on the glaze for brightness instead.
- Add a citrus sugar topping: Mix a little granulated sugar with lemon zest and sprinkle over the egg washed tops before baking to add sparkle and a playful crunch on the crust.
How to Serve Triple Berry Buttermilk Scones
These scones are versatile and welcome at many tables, from casual mornings to festive brunches. Serve them warm to highlight the flaky crumb and glossy glaze, and pair thoughtfully to complete the experience. Below are serving ideas, occasions, and storage notes to help you present them beautifully.
- Brunch centerpiece: Arrange warm scones on a platter with small bowls of jam and softened butter so guests can customize each bite, creating a relaxed, communal feel for the table.
- Tea time treat: Serve one or two scones alongside a pot of strong black tea or herbal infusion, letting the fruit flavors complement the beverage for an afternoon pause.
- Casual breakfast: Pair a scone with a bowl of fresh fruit and a cup of coffee for a quick, satisfying morning that feels special without extra fuss.
- Party platter: For gatherings, slice scones into smaller portions and place them on a tiered stand with labels, offering a pretty display that invites nibbling throughout the event.
- Storage tip: Keep cooled scones in an airtight container at room temperature for one to two days, or freeze individually wrapped for up to one month, reheating gently to revive the texture.
- Seasonal pairings: Serve with a dollop of mascarpone or a smear of lemon curd in spring when berries are at their peak, enhancing the natural flavors without overpowering them.
FAQ
Conclusion
These scones shine because they combine flaky texture, bright berry flavor, and a tangy finish in a straightforward, approachable bake. Give them a go the next time you want a quick, impressive treat for breakfast or a casual gathering. I hope they become one of your dependable recipes that looks and tastes like you spent more time than you did, and that you enjoy sharing them as much as I do.
Triple Berry Buttermilk Scones
Equipment
- Mixing Bowl
- Baking Sheet
- Parchment Paper
- Pastry blender or two forks
- Bench scraper or sharp knife
- Whisk
- Rubber spatula
- Small Bowl
Ingredients
- 1 large egg, beaten Beaten to bind the dough and add richness, providing structure and a tender crumb when mixed with the wet ingredients.
- 1 teaspoon milk or water Added sparingly to thin the egg wash and help it brush on smoothly for a glossy, lightly set finish after baking.
- 3 cups all-purpose flour Sifted and measured to form the scone base, supplying gluten and bulk so the leavening can create a flaky texture.
- 1/2 teaspoons salt Measured for seasoning to balance the sweetness and enhance the overall flavors without making the scones taste salty.
- 2 teaspoons baking powder Combined with the flour to aerate the dough and produce rise, ensuring the scones are light rather than dense.
- 1/3 cup granulated sugar Folded into the dry ingredients to contribute gentle sweetness and help brown the exterior during baking.
- 2 teaspoons lemon zest, finely grated Grated finely to release essential oils and bright citrus aroma, lifting the fruit flavors and adding a fresh note.
- 1 stick (4 ounces) unsalted butter, VERY cold and cut into tiny pieces Cut very cold into tiny pieces to create flaky layers as the butter melts during baking, contributing rich flavor and tender texture.
- 1 large egg Beaten into the dough mixture to add richness and help bind ingredients, contributing to a golden color on the interior.
- 2/3 cup buttermilk Measured into the batter to provide acidity for tenderizing, activate the leavening, and impart a slight tang to the scones.
- 1/2 cup blueberries Gently folded in to offer bursts of juiciness and mild sweetness, adding texture and fruity contrast in each bite.
- 1/2 cup raspberries Handled carefully and folded in to preserve shape, supplying delicate tartness and a bright, summery flavor.
- 1/2 cup blackberries Tossed with the other berries to provide deep color, juicy bursts, and a balance of sweet-tart flavor throughout the scones.
- 2 tablespoons lemon juice Squeezed and mixed with the glaze or berries to intensify citrus brightness and balance the sweetness with acidic lift.
- 3/4 cup confectioners' sugar Whisked into a glaze to create a smooth, sweet coating that adds shine and extra sweetness to the finished scones.
- pinch of salt (1/8 teaspoon or less) Pinched in small amount to enhance the glaze sweetness and round out flavors without overpowering the delicate berries.
- 1/4 cup toasted almonds (for garnish and optional) Toasted and sprinkled as an optional garnish to add crunch, warm nutty notes, and visual appeal when serving.
Instructions
- In a small bowl beat together the egg and water until well combined. Set aside until needed.: You should notice the egg mixture become glossy and slightly homogenous, with the yolk and white fully integrated, which gives the wash an even sheen. The reason to set it aside is to let any bubbles settle so the wash brushes on smoothly, avoiding streaks. A common mistake is using a vigorously frothy wash, which can puff and flake in spots; let it calm before applying. If the wash seems too thick, a tiny extra drop of water will make it brushable without diluting the appearance.
- Preheat oven to 400° (F). Line a large baking sheet with parchment paper; set aside.: The oven should feel hot and steady when you open it, which ensures the scones get an immediate lift. Lining the sheet with parchment prevents sticking and helps the bottoms brown evenly. A cold oven or skipping the parchment often leads to uneven rise or bottoms that stick, so avoid those shortcuts. You want a consistent intense heat to create steam from the butter pockets.
- In a large bowl combine flour, salt, baking powder, sugar, and lemon zest; mix well to combine.: At this stage you will smell the lemon and fresh flour mingling, and mixing ensures the leavening distributes evenly, which is essential for uniform rise. Stir until you can no longer see clumps of dry ingredients and the zest is evenly dispersed. A typical error here is under mixing the dry mix, which causes uneven pockets of baking powder and irregular texture in the bakes. A gentle whisk or fork works fine, avoid compacting the mixture.
- Cut the butter into small cubes then work it into the mixture (using two forks or a pastry blender) until it resembles a coarse meal. The chunks of butter should be no smaller than peas and no larger than hazelnuts.: As you work the butter in, you will feel the texture change from sandy to pebbly, with visible tiny flecks of butter. Those pieces are crucial because they melt in the oven to create flaky layers. If the butter melts while working, the mixture becomes pasty and the scones lose flakiness, so keep everything cold and use a light touch. The right texture looks uneven and coarse rather than uniform and dry.
- In a small bowl whisk together the egg and buttermilk until well combined. Add this liquid mixture to dry mixture and use a fork to stir everything together until just moistened.: You will see the dough begin to come together in clumps and feel slightly tacky. The combination of the egg and buttermilk activates the baking powder and gives the dough both lift and tenderness. Stir just until the dry bits disappear; overmixing develops gluten and yields tough scones. A common misstep is stirring until smooth rather than slightly shaggy, which changes the crumb from tender to dense.
- Add in the berries and, using a rubber spatula, gently fold them into the dough. Don’t worry if some of the berries break up a bit.: You should sense the difference between the dry dough and the delicate fruit, with flashes of color appearing as you fold. Folding gently preserves the shape of the berries while distributing them evenly; it also prevents the dough from turning purple and wet. If you aggressively stir, the juices will bleed and make the dough sticky, so resist the urge to overwork it. Light, deliberate strokes keep the texture right.
- Empty the loose dough out onto a clean, lightly floured work surface, then shape the dough into an 8-inch circle. You will need to knead the mixture a few times to get it to a workable texture.: The surface should feel cool and slightly tacky, and as you pat and fold the dough it will come together into a cohesive round. Kneading just a few turns builds gentle cohesion without overdeveloping gluten; you want a tender crumb not a chewy bread texture. A frequent mistake is excessive kneading which creates tight, dense scones; stop as soon as the dough holds together.
- Cut the dough into 8 wedges and carefully transfer them to the prepared sheet, placing them 2" apart.: Each wedge should look distinct with clean edges, and the space between them allows hot air to circulate so they brown on all sides. Use a sharp knife or bench scraper to make clean cuts, which helps maintain structure while transferring. If wedges are too close, they may bake together and steam rather than brown, losing crisp edges. Handle them gently to keep the berry pockets intact.
- Lightly brush each scone with the egg wash.: The wash should coat the tops without pooling, giving a warm golden color and slight shine once baked. Use a soft pastry brush and the reserved wash, applying a single even layer for best appearance. Over brushing can cause the wash to drip down and seal the sides, preventing a crisp edge. A subtle, even coat is what you are aiming for.
- Bake for 20 to 22 minutes, or until light golden brown.: You will hear a quiet hiss as the oven steam activates and smell warm butter and citrus as the tops color. The visual cue is a light golden brown crown and firm bottoms when nudged. An under baked scone will feel doughy inside, while an over baked scone will be too dry; check at 20 minutes and trust the color and slight spring back to know doneness. If your oven runs hot, rotate the sheet midway to avoid uneven browning.
- Allow scones to cool for 10 minutes on the baking sheet. In the meantime you can make your glaze.: The scones will settle and the interior crumb will finish setting as they cool, so patience here preserves tenderness. Use the cooling interval to whisk the glaze ingredients until smooth and taste to adjust. Cutting too soon risks a gummy interior, while waiting too long makes the glaze less likely to adhere. Ten minutes strikes a good balance.
- In a small bowl whisk together the lemon juice, confectioners' sugar, and salt. Drizzle over scones and sprinkle with almonds, if using. Serve at once.: The glaze should be glossy and pourable, with a bright lemon note that lifts the scones. Drizzle in a thin stream so the glaze sets into pretty streaks, then add the toasted almonds for contrast. If the glaze is too runny add more confectioners' sugar; if too thick add a drop of lemon. Serve while slightly warm so the contrast between crust, crumb, and glaze is most appealing.
Notes
- Swap the berry ratios: If you prefer one berry more than another, increase that fruit to create a dominant flavor while keeping the total fruit volume the same so the dough consistency remains balanced.
- Make mini scones: Form smaller circles and cut into more wedges to yield bite sized scones that are ideal for parties, reducing baking time slightly and creating more crust to crumb ratio per bite.
- Use Greek yogurt instead of buttermilk: Stir Greek yogurt with a touch of milk until pourable to replicate the tang and moisture if you do not have buttermilk on hand, noting the texture will be slightly denser.
- Omit the almonds: Leave off the toasted almonds for a simpler finish or for nut free preferences, and sprinkle an extra pinch of lemon zest on the glaze for brightness instead.
- Add a citrus sugar topping: Mix a little granulated sugar with lemon zest and sprinkle over the egg washed tops before baking to add sparkle and a playful crunch on the crust.