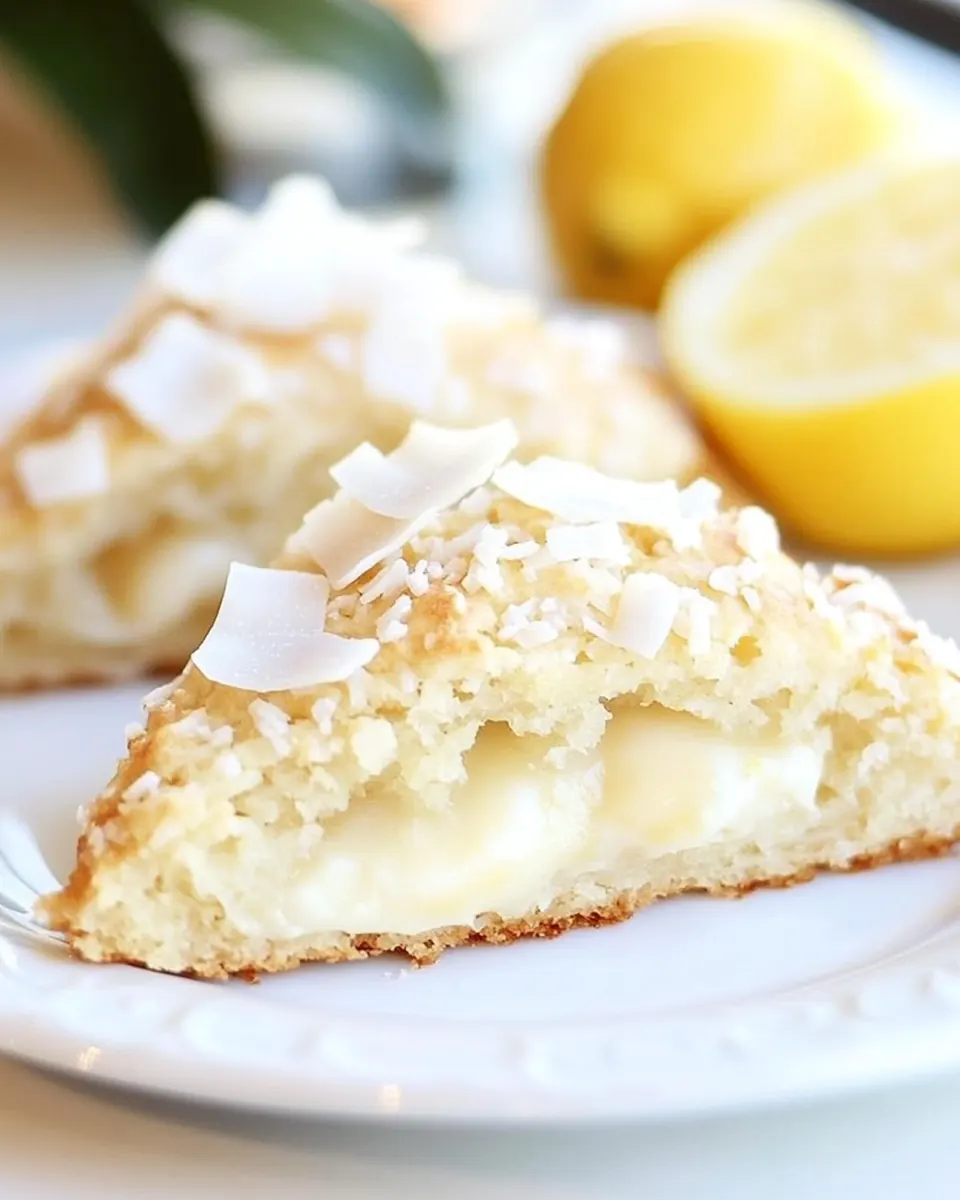
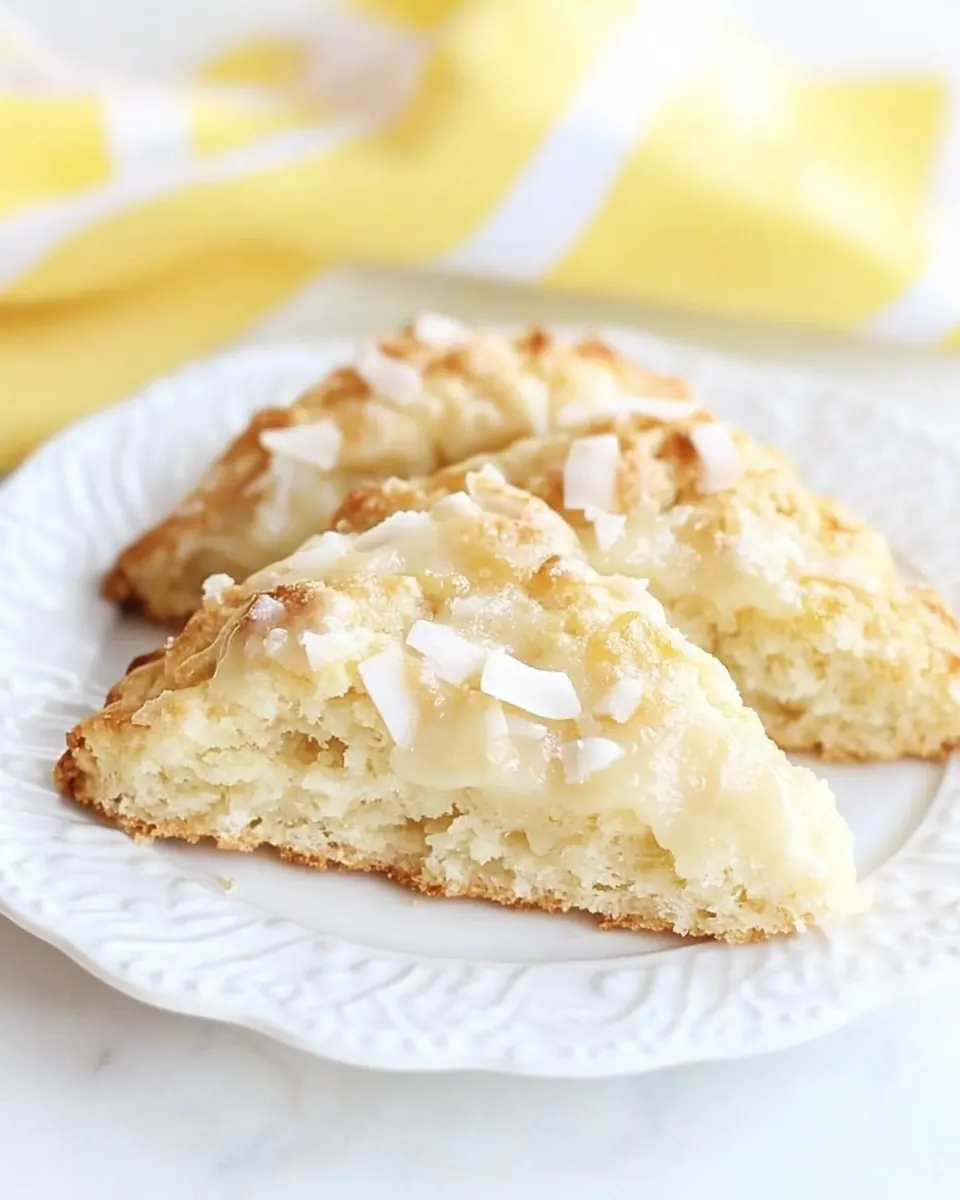
Toasted Coconut Lemon Scones
Toasted Coconut Lemon Scones have been my go to when I want something bright, flaky, and a little indulgent with my afternoon tea. The first time I baked them I remember the way the kitchen smelled, a warm mix of toasted coconut and sharp lemon zest, and how my neighbor popped in for a taste and left with a paper towel wrapped scone in hand. I still laugh about that impromptu trade, coffee for pastry, and how that simple exchange turned a regular afternoon into a small celebration.
Baking these Toasted Coconut Lemon Scones has become a ritual I look forward to on slow mornings. I enjoy the tactile work of cutting cold butter into the flour mixture, the tiny shards of fat hiding among the dry ingredients, which promise tender layers. There is something comforting about patting the dough into a circle, the soft resistance beneath my palms, and the neat, satisfying sound when I cut the wedges. Every step invites a pause, a chance to breathe and really notice how the ingredients are transforming.
What keeps me coming back to this recipe is its ability to feel both cozy and fresh. The combination of bright lemon and nutty coconut balances one another so well, and the glaze adds that perfect whisper of sweetness. I like to have a small stack ready when friends stop by, because they make a humble brunch feel special without fuss. Over time I have learned a few small adjustments that make the scones more consistent, and I enjoy sharing those little tricks when someone asks for the recipe.
Recipe Snapshot
30 mins
15 mins
15 mins
Medium
250 kcal
American
Gluten-Free, Low FODMAP
Breakfast
Mixing bowl, Pastry blender, Baking sheet, Parchment paper, Wire cooling rack
Why We Love This Toasted Coconut Lemon Scones
Vibrant flavor pairing
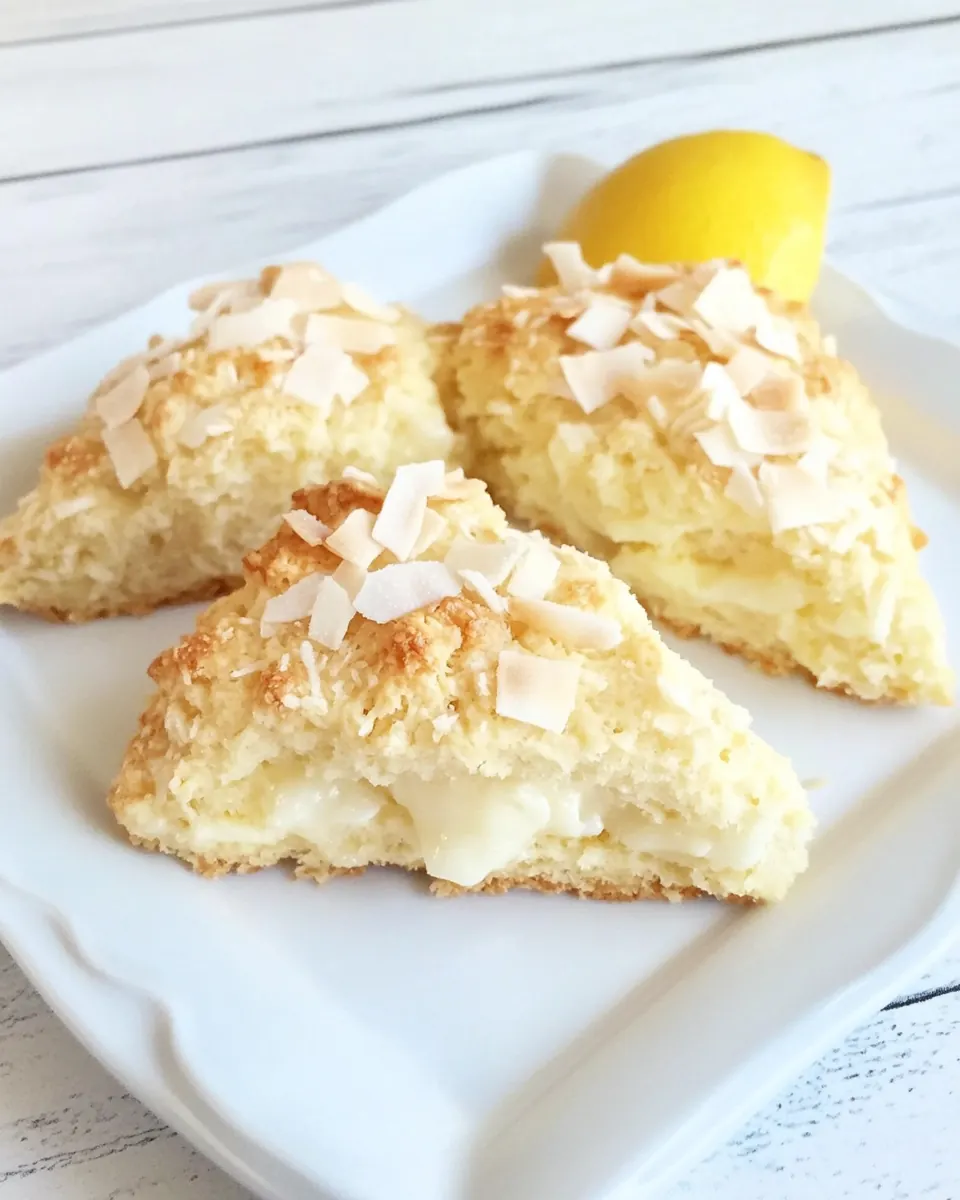
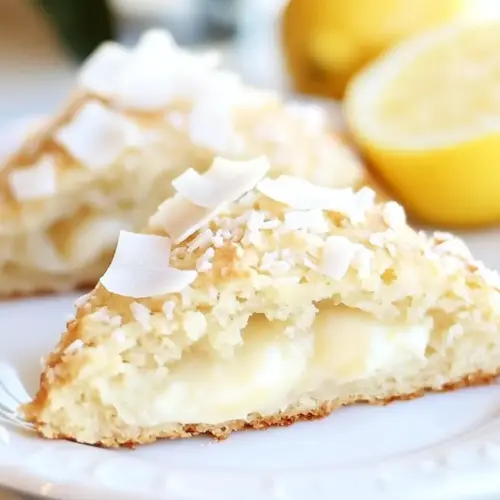
I love how Toasted Coconut Lemon Scones marry bright citrus with toasty nuttiness. The lemon zest and juice lift the sweetness, while the toasted coconut adds depth and a satisfying crunch. When I bite into one warm scone, the aroma hits first, then that contrast of tender crumb and crunchy topping makes the experience memorable.
Texture that sings
These scones deliver a tender, buttery interior with a lightly crisp exterior. The technique of using cold butter and minimal handling ensures flaky layers. I’ve found that keeping the dough cool and not overworking it preserves air pockets, which results in that coveted lift and delicate crumb.
Quick and approachable
Even though they feel bakery worthy, Toasted Coconut Lemon Scones come together quickly. From mixing to oven is straightforward, and while I enjoy the small rituals, the recipe is forgiving for home bakers. I often make them for unexpected guests because the prep is short and the payoff is large.
Customizable finishing
The lemon glaze and toasted coconut on top let you decide how sweet or crunchy you want your scones. I like a glossy drizzle and a generous sprinkle of toasted coconut for contrast, but if you prefer subtler sweetness, a light glaze does the trick. That flexibility makes these scones adaptable to different tastes and occasions.
Perfect for gatherings
These scones travel well and keep for a couple of days in an airtight container. I enjoy making a batch for brunches, tea times, or lazy weekend breakfasts. Each component is simple, yet together they feel celebratory, which is why they often become the centerpiece of our little get togethers.
Ingredients to Make Toasted Coconut Lemon Scones
These ingredients are chosen to create a tender, flavorful scone with both bright citrus notes and toasty, nutty texture. The core players are the dry base of flour and baking powder, which provide structure and lift; cold butter that creates flaky layers; and the combination of lemon and coconut for contrasting flavors. The glaze brings everything together with a sweet, tangy finish.
- 2 cups all-purpose flour: Provide structure and body to the scones by forming the base dry component; sifted or whisked to remove lumps, it creates the tender crumb when mixed with fats and liquids. Measure accurately to maintain proper dough consistency and ensure even rise during baking.
- 1 tablespoon baking powder: Leaven the scones by releasing carbon dioxide when heated, creating lift and a light texture; distribute evenly through the flour so pockets of rise are consistent. Use fresh baking powder for maximum effectiveness and avoid overworking the dough after adding.
- 3 tablespoons granulated sugar: Add subtle sweetness and assist in browning the exterior during baking; dissolves into the dough to balance tart lemon flavors and toasted coconut. Sprinkle into the dry mixture for even distribution so flavor is consistent throughout each scone.
- Zest of 2 lemons: Provide concentrated citrus aroma and bright flavor to cut through richness; finely grate only the yellow outer layer to avoid bitterness from the pith. Stir into the dry ingredients or butter to infuse the dough with fresh lemon character.
- 1/2 teaspoons salt: Enhance overall flavor by balancing sweetness and boosting dough development; helps control gluten formation when used in small amounts. Mix thoroughly into the dry ingredients to ensure even seasoning throughout the scone dough.
- 1/2 cups sweetened flake coconut: Contribute chewy texture and pronounced coconut flavor; use sweetened flaked coconut to add moisture and bite that complements toasted flakes in the topping. Fold into the dough gently to distribute without overmixing, preserving tender scone structure.
- 6 tablespoons cold unsalted butter, cut into 1/4-inch cubes: Create flakiness and richness by coating flour particles and creating steam during baking; cold butter in small cubes yields pockets that form the scone’s layered texture. Work quickly to incorporate until pea-sized pieces remain, preventing the butter from melting into the flour.
- 1 cup heavy cream plus 1 tablespoon, divided: Provide richness and hydration to the dough while contributing to a tender crumb; reserve one tablespoon for brushing to promote browning. Add gradually to achieve a slightly sticky but manageable dough that bakes to a moist interior.
- 1 tablespoon fresh lemon juice: Contribute bright acidity and fresh lemon flavor while activating slight chemical reactions with baking powder; enhances aroma and balances sweetness. Stir into the wet ingredients to distribute citrus notes evenly without overmixing the dough.
- 3/4 teaspoon coconut extract: Enhance the coconut profile with concentrated, aromatic notes that boost overall flavor intensity; use sparingly to avoid overpowering fresh lemon. Combine with the wet ingredients so the extract is evenly dispersed throughout the dough.
- 1/2 teaspoon vanilla extract: Round out and deepen overall aroma by adding warm, familiar vanilla notes; pairs with lemon and coconut to create complexity. Mix into the cream or wet ingredients to evenly integrate the flavor without creating pockets of extract.
- 1 cup powdered sugar: Create a sweet, smooth glaze that adds surface sweetness and a tender finish; powdered sugar dissolves easily for a glossy coating. Whisk with lemon juice to desired thickness and drizzle over cooled scones for an attractive presentation.
- 1/2 teaspoon lemon zest: Provide a concentrated burst of lemon oil and bright flavor for the glaze or finishing touch; use a small, measured amount to avoid bitterness. Zest finely and fold into the glaze to enhance citrus aroma and visual appeal.
- Juice of 1 lemon: Supply acidic liquid to balance sweetness and create a pourable glaze; fresh lemon juice yields brightness and helps set the glaze as it dries. Whisk with powdered sugar until smooth and adjust thickness to desired coating consistency.
- 1/2 cup toasted coconut flakes or coconut chips: Add a crunchy, toasty finish and intensified coconut flavor as a topping; toasted coconut flakes or chips deliver texture contrast to the tender scone interior. Scatter or press onto glazed scones to amplify aroma and provide a decorative, flavorful garnish.
How to Cook Toasted Coconut Lemon Scones
Follow these steps with a relaxed, attentive approach. Baking scones rewards small routines that protect the integrity of the ingredients, especially keeping things cool and avoiding over mixing. Read each step fully before you start to ensure smooth transitions from mixing to baking and glazing.
- Preheat oven to 400 degrees F. Line a large baking sheet with parchment paper or a Silpat and set aside.: As you step into this stage you will notice a warm wave of habit forming, the ritual of setting the oven matters because consistent heat is what gives the scones even rise and a crisp exterior. The oven should be fully preheated so the moment the dough hits the hot pan it begins to set and lift, which encourages flakiness. If the oven is cooler than expected, scones can spread instead of rising. One common mistake is not using an oven thermometer; I recommend one to confirm the dial matches the actual temperature.
- In a large bowl, whisk together flour, baking powder, sugar, lemon zest, salt and coconut. Quickly cut in the butter, using your hands, two knives, or a pastry blender. Mix until mixture resembles coarse meal, with a feel larger butter lumps.: The sound of parchment settling onto the sheet is oddly satisfying and prevents sticking while promoting even browning. Preparing the sheet ahead keeps your process seamless when the dough is ready to transfer. If you skip lining, the bottoms can brown too fast or adhere to the pan, so take the extra moment to line it properly. Watch for greasy spots if reusing pans that are not well cleaned, which can cause uneven color.
- In a small bowl, whisk together 1 cup of heavy cream, lemon juice, coconut extract, and vanilla extract. Pour mixture over the ingredients and stir with a spatula until dough begins to form. Don't over mix.: When you whisk these dry ingredients the aroma of lemon zest and coconut begins to unfold, a fragrant preview of what is to come. Even distribution of baking powder and salt ensures consistent rise and balanced flavor. A dry whisking step avoids pockets of leavening that could make some scones dense. A common mishap is failing to zest the lemon finely, which can leave large pieces that feel bitter in a bite.
- Transfer dough to a floured countertop and knead dough by hand just until it forms a ball. Form scones by patting the dough into a 3/4-inch thick circle. Cut the scones into 8 triangles.: Right after you cut in the chilled butter you will feel the mixture change texture, coarse and sandy with visible butter bits. Those little pieces are essential because they melt and steam while baking, creating pockets that give flakiness. Keep the butter cold and work quickly to avoid warming it with your hands. A frequent error is letting the butter get too soft, which yields dense scones rather than tender layers.
- Place scones on prepared baking sheet. Using a pastry brush, brush scones lightly with the additional heavy cream. Bake scones for 15-18 minutes, or until scones are light brown. Cool scones on a wire cooling rack.: The mixture should look irregular with tiny specks and some pea sized lumps of butter , which translates into a light interior after baking. This visual cue is key to know you have the right texture before adding liquid. If you overwork it until completely uniform, you lose those steam pockets and the scones will be less flaky. Avoid the temptation to pulverize everything; a bit of roughness is desirable.
- While the scones are cooling, make the lemon glaze. In a small bowl, whisk together powdered sugar, lemon zest, and lemon juice. Whisk until smooth. Drizzle glaze over the scones. Top with toasted coconut. Serve!: Whisking these wet elements releases fragrant citrus and coconut aromas that will permeate the dough. The combination of heavy cream and lemon juice hydrates and enriches the mixture, while extracts add a concentrated layer of flavor. Ensure the heavy cream is cold to keep the dough from warming. A typical slip is using lukewarm cream, which can soften the butter prematurely.
- Note-Scones will keep in an air-tight container for up to 2-3 days, but they really are best eaten the day they are made. I used Meyer lemons, but regular lemons will work too! Lemon juicing tip-roll a room temperature lemon on the counter a few times to maximize the amount of juice.: At this moment you will see the dry mix start to cling, and the smell of citrus will deepen. Stir just enough so the dough gathers, leaving some loose flour visible, because that means you did not overwork the dough. Over mixing activates gluten and leads to tough scones, so pull back once you see the dough starting to come together. A good sign is when the spatula gathers a mass that holds shape but still yields to gentle pressure.
- Transfer dough to a floured countertop and knead dough by hand just until it forms a ball: As you fold and press the dough a few times it becomes cohesive, and the tactile feedback tells you when to stop. Kneading too much makes the crumb tight, so keep this brief. The dough should feel cool, slightly tacky, and spring back a little when pressed. A common error is over kneading, which removes the flaky texture; two to three gentle folds is usually enough.
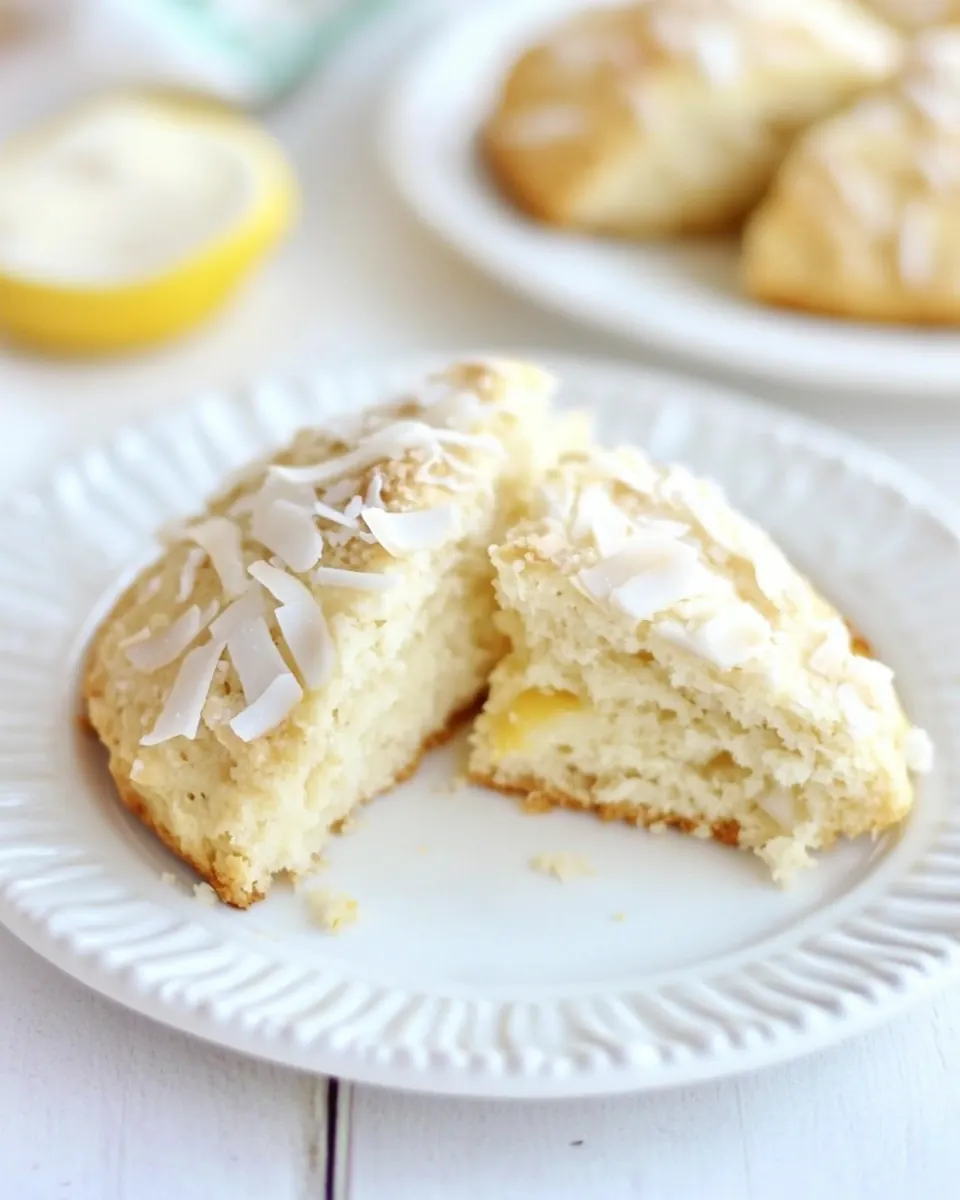
- Form scones by patting the dough into a 3/4-inch thick circle: Patting the dough gives a uniform thickness that supports even baking. You should be able to see the flecks of coconut and lemon zest across the surface. The 3/4 inch thickness yields a tender center with a nicely browned edge; thinner discs will bake faster and can dry out. Make sure the circle is even to avoid uneven baking, a common oversight that leads to some wedges being underdone.
- Cut the scones into 8 triangles: Cutting clean, confident wedges prevents dragging that would seal edges and inhibit rise. Use a sharp knife or pastry cutter and press straight down in one motion. If the dough sticks, dip the blade in flour between cuts. One mistake is twisting the knife, which can seal the layers and diminish lift, so keep cuts vertical and steady.
- Place scones on prepared baking sheet: Lay the wedges with space between them to allow heat circulation and browning. You will notice a subtle difference in color where they touch; spacing prevents uneven edges. Transferring carefully helps maintain the scone shape, and using a thin spatula can assist. Avoid crowding the pan, which causes steaming rather than crisping.
- Using a pastry brush, brush scones lightly with the additional heavy cream: Brushing with the reserved tablespoon of heavy cream encourages a golden, slightly glossy crust and helps the glaze adhere later. A light, even coat is enough; too much will pool and make soggy spots. If you skip this step the tops may stay pale and lose a bit of that bakery finish.
- Bake scones for 15 to 18 minutes, or until scones are light brown: During baking you will hear a faint, comforting hush as edges set and the center firms, and the aroma will be a warm mix of coconut and lemon . Look for a light golden color around the edges and a set center; an inserted toothpick should come out clean. Overbaking dries them out, so start checking at the earlier time. If your oven runs hot, reduce time slightly to avoid overly browned tops.
- Cool scones on a wire cooling rack: Cooling on a rack prevents the bottoms from steaming and keeps the texture crisp. As they cool, the crumb firms slightly which makes them easier to glaze without smearing. Let them rest until just warm to the touch for the best glaze application. A common slip is glazing when they are too hot, which causes the glaze to slide off instead of setting.
- While the scones are cooling, make the lemon glaze: The glaze smooths and brightens the final bites, and whisking powdered sugar , lemon zest, and lemon juice yields a glossy finish. Aim for a pourable but not watery consistency so it clings to the scones. If it is too thin add more powdered sugar , if too thick add a few drops of lemon juice.
- In a small bowl, whisk together powdered sugar, lemon zest, and lemon juice: This blends into a silky glaze that brightens each bite with citrus tang. The powdered sugar dissolves to give a smooth surface that sets slightly when cooled. Taste and adjust, but remember the scones already have sweetness from the dough and sweetened coconut .
- Whisk until smooth: A smooth glaze means even coverage and a professional looking finish, and the whisking process removes any lumps and aerates the mixture slightly. Proper texture ensures it will drizzle attractively and set with a thin crust. If you see grit, sift the powdered sugar before mixing to avoid grainy spots.
- Drizzle glaze over the scones: When you drizzle the glaze, it should form a thin glossy coat and settle into crevices, adding a sweet tangy kiss to each wedge. Use a spoon or a small spatula to control the motion, and work quickly before the glaze sets. A mistake is applying too much glaze which can overwhelm the flavor balance, so aim for a delicate drizzle.
- Top with toasted coconut: The final sprinkle of toasted coconut adds contrast in texture and a toasty aroma that complements the lemon. Press lightly so it adheres to the glaze. If the coconut is not toasted, quickly toast it in a dry pan until golden for the best flavor. Avoid burning the coconut as it can turn bitter fast.
- Serve: the scones warm or at room temperature, and notice how the layers and glaze present together. They pair nicely with tea or coffee and make a welcoming treat for guests. One trap is storing them while still warm in a sealed container, which creates steam and softens the exterior, so cool completely before storing.
Helpful Hints
These hints are small practices I rely on when making Toasted Coconut Lemon Scones. They keep the process smooth and the results consistent, whether you are baking for a crowd or a quiet morning at home.
- Measure flour properly, spoon the flour into the cup and level it off rather than scooping directly from the bag, which can pack it and dry out the dough. Accurate flour measurement ensures a tender scone rather than a dense one.
- Chill your tools, if your kitchen is warm chill the bowl and cutter briefly to keep the butter cold. Cold tools reduce the risk of the butter softening and maintain those desirable layers.
- Use room temperature lemons for easier juicing, roll them on the counter to release juice before cutting. That makes extracting the most juice simpler, especially when you need precise amounts for the glaze.
- Test oven temperature with an oven thermometer, many ovens run hot or cool, and accurate heat gives the right rise and color. Adjust times accordingly if your oven is off by more than a few degrees.
- Cool before storing, once the scones are completely cool, store them in an airtight container at room temperature for up to three days to preserve texture. If stacking, separate layers with parchment to prevent sticking.
Perfect Matches for Toasted Coconut Lemon Scones
These scones are lovely for breakfast, brunch, or an afternoon treat. They pair with light beverages and fit a variety of occasions from casual coffee breaks to springtime gatherings. Their citrus and coconut profile makes them especially suited to warm weather menus.
- Serve with tea or coffee, the bright lemon cuts through rich drinks and the flaky scone complements a warm cup perfectly. Choose a delicate tea or a milder roast coffee to avoid overpowering the flavors.
- Brunch centerpiece, arrange a platter of Toasted Coconut Lemon Scones alongside fruit and yogurt for a balanced spread that looks inviting and tastes fresh. They hold up well at room temperature for guests to help themselves.
- Seasonal gatherings, spring events are ideal because the citrus notes feel fresh and celebratory. These scones also work well for holiday breakfasts when you want something bright and not overly rich.
- Storage tips, keep cooled scones in an airtight container for up to three days. For longer storage freeze individually wrapped scones and thaw at room temperature, then refresh briefly in a low oven if desired.
- Occasion styling, top with extra toasted coconut just before serving for added texture and visual appeal, and arrange with lemon slices for a pretty presentation. This small detail elevates the experience for guests.
FAQ
Conclusion
What makes these scones special is the bright interplay of fresh lemon and toasty coconut, combined with a tender, flaky texture that feels both homey and refined. Give them a try the next time you want an easy yet impressive bake; they come together quickly and deliver big in flavor. I hope these Toasted Coconut Lemon Scones become a small ritual in your kitchen, a treat that brightens mornings and invites company.
Toasted Coconut Lemon Scones
Equipment
- Mixing Bowl
- Pastry blender
- Baking Sheet
- Parchment Paper
- wire cooling rack
Ingredients
- 2 cups all-purpose flour Provide structure and body to the scones by forming the base dry component; sifted or whisked to remove lumps, it creates the tender crumb when mixed with fats and liquids. Measure accurately to maintain proper dough consistency and ensure even rise during baking.
- 1 tablespoon baking powder Leaven the scones by releasing carbon dioxide when heated, creating lift and a light texture; distribute evenly through the flour so pockets of rise are consistent. Use fresh baking powder for maximum effectiveness and avoid overworking the dough after adding.
- 3 tablespoons granulated sugar Add subtle sweetness and assist in browning the exterior during baking; dissolves into the dough to balance tart lemon flavors and toasted coconut. Sprinkle into the dry mixture for even distribution so flavor is consistent throughout each scone.
- Zest of 2 lemons Provide concentrated citrus aroma and bright flavor to cut through richness; finely grate only the yellow outer layer to avoid bitterness from the pith. Stir into the dry ingredients or butter to infuse the dough with fresh lemon character.
- 1/2 teaspoons salt Enhance overall flavor by balancing sweetness and boosting dough development; helps control gluten formation when used in small amounts. Mix thoroughly into the dry ingredients to ensure even seasoning throughout the scone dough.
- 1/2 cups sweetened flake coconut Contribute chewy texture and pronounced coconut flavor; use sweetened flaked coconut to add moisture and bite that complements toasted flakes in the topping. Fold into the dough gently to distribute without overmixing, preserving tender scone structure.
- 6 tablespoons cold unsalted butter, cut into 1/4-inch cubes Create flakiness and richness by coating flour particles and creating steam during baking; cold butter in small cubes yields pockets that form the scone’s layered texture. Work quickly to incorporate until pea-sized pieces remain, preventing the butter from melting into the flour.
- 1 cup heavy cream plus 1 tablespoon, divided Provide richness and hydration to the dough while contributing to a tender crumb; reserve one tablespoon for brushing to promote browning. Add gradually to achieve a slightly sticky but manageable dough that bakes to a moist interior.
- 1 tablespoon fresh lemon juice Contribute bright acidity and fresh lemon flavor while activating slight chemical reactions with baking powder; enhances aroma and balances sweetness. Stir into the wet ingredients to distribute citrus notes evenly without overmixing the dough.
- 3/4 teaspoon coconut extract Enhance the coconut profile with concentrated, aromatic notes that boost overall flavor intensity; use sparingly to avoid overpowering fresh lemon. Combine with the wet ingredients so the extract is evenly dispersed throughout the dough.
- 1/2 teaspoon vanilla extract Round out and deepen overall aroma by adding warm, familiar vanilla notes; pairs with lemon and coconut to create complexity. Mix into the cream or wet ingredients to evenly integrate the flavor without creating pockets of extract.
- 1 cup powdered sugar Create a sweet, smooth glaze that adds surface sweetness and a tender finish; powdered sugar dissolves easily for a glossy coating. Whisk with lemon juice to desired thickness and drizzle over cooled scones for an attractive presentation.
- 1/2 teaspoon lemon zest Provide a concentrated burst of lemon oil and bright flavor for the glaze or finishing touch; use a small, measured amount to avoid bitterness. Zest finely and fold into the glaze to enhance citrus aroma and visual appeal.
- Juice of 1 lemon Supply acidic liquid to balance sweetness and create a pourable glaze; fresh lemon juice yields brightness and helps set the glaze as it dries. Whisk with powdered sugar until smooth and adjust thickness to desired coating consistency.
- 1/2 cup toasted coconut flakes or coconut chips Add a crunchy, toasty finish and intensified coconut flavor as a topping; toasted coconut flakes or chips deliver texture contrast to the tender scone interior. Scatter or press onto glazed scones to amplify aroma and provide a decorative, flavorful garnish.
Instructions
- Preheat oven to 400 degrees F. Line a large baking sheet with parchment paper or a Silpat and set aside.: As you step into this stage you will notice a warm wave of habit forming, the ritual of setting the oven matters because consistent heat is what gives the scones even rise and a crisp exterior. The oven should be fully preheated so the moment the dough hits the hot pan it begins to set and lift, which encourages flakiness. If the oven is cooler than expected, scones can spread instead of rising. One common mistake is not using an oven thermometer; I recommend one to confirm the dial matches the actual temperature.
- In a large bowl, whisk together flour, baking powder, sugar, lemon zest, salt and coconut. Quickly cut in the butter, using your hands, two knives, or a pastry blender. Mix until mixture resembles coarse meal, with a feel larger butter lumps.: The sound of parchment settling onto the sheet is oddly satisfying and prevents sticking while promoting even browning. Preparing the sheet ahead keeps your process seamless when the dough is ready to transfer. If you skip lining, the bottoms can brown too fast or adhere to the pan, so take the extra moment to line it properly. Watch for greasy spots if reusing pans that are not well cleaned, which can cause uneven color.
- In a small bowl, whisk together 1 cup of heavy cream, lemon juice, coconut extract, and vanilla extract. Pour mixture over the ingredients and stir with a spatula until dough begins to form. Don't over mix.: When you whisk these dry ingredients the aroma of lemon zest and coconut begins to unfold, a fragrant preview of what is to come. Even distribution of baking powder and salt ensures consistent rise and balanced flavor. A dry whisking step avoids pockets of leavening that could make some scones dense. A common mishap is failing to zest the lemon finely, which can leave large pieces that feel bitter in a bite.
- Transfer dough to a floured countertop and knead dough by hand just until it forms a ball. Form scones by patting the dough into a 3/4-inch thick circle. Cut the scones into 8 triangles.: Right after you cut in the chilled butter you will feel the mixture change texture, coarse and sandy with visible butter bits. Those little pieces are essential because they melt and steam while baking, creating pockets that give flakiness. Keep the butter cold and work quickly to avoid warming it with your hands. A frequent error is letting the butter get too soft, which yields dense scones rather than tender layers.
- Place scones on prepared baking sheet. Using a pastry brush, brush scones lightly with the additional heavy cream. Bake scones for 15-18 minutes, or until scones are light brown. Cool scones on a wire cooling rack.: The mixture should look irregular with tiny specks and some pea sized lumps of butter , which translates into a light interior after baking. This visual cue is key to know you have the right texture before adding liquid. If you overwork it until completely uniform, you lose those steam pockets and the scones will be less flaky. Avoid the temptation to pulverize everything; a bit of roughness is desirable.
- While the scones are cooling, make the lemon glaze. In a small bowl, whisk together powdered sugar, lemon zest, and lemon juice. Whisk until smooth. Drizzle glaze over the scones. Top with toasted coconut. Serve!: Whisking these wet elements releases fragrant citrus and coconut aromas that will permeate the dough. The combination of heavy cream and lemon juice hydrates and enriches the mixture, while extracts add a concentrated layer of flavor. Ensure the heavy cream is cold to keep the dough from warming. A typical slip is using lukewarm cream, which can soften the butter prematurely.
- Note-Scones will keep in an air-tight container for up to 2-3 days, but they really are best eaten the day they are made. I used Meyer lemons, but regular lemons will work too! Lemon juicing tip-roll a room temperature lemon on the counter a few times to maximize the amount of juice.: At this moment you will see the dry mix start to cling, and the smell of citrus will deepen. Stir just enough so the dough gathers, leaving some loose flour visible, because that means you did not overwork the dough. Over mixing activates gluten and leads to tough scones, so pull back once you see the dough starting to come together. A good sign is when the spatula gathers a mass that holds shape but still yields to gentle pressure.
- Transfer dough to a floured countertop and knead dough by hand just until it forms a ball: As you fold and press the dough a few times it becomes cohesive, and the tactile feedback tells you when to stop. Kneading too much makes the crumb tight, so keep this brief. The dough should feel cool, slightly tacky, and spring back a little when pressed. A common error is over kneading, which removes the flaky texture; two to three gentle folds is usually enough.
- Form scones by patting the dough into a 3/4-inch thick circle: Patting the dough gives a uniform thickness that supports even baking. You should be able to see the flecks of coconut and lemon zest across the surface. The 3/4 inch thickness yields a tender center with a nicely browned edge; thinner discs will bake faster and can dry out. Make sure the circle is even to avoid uneven baking, a common oversight that leads to some wedges being underdone.
- Cut the scones into 8 triangles: Cutting clean, confident wedges prevents dragging that would seal edges and inhibit rise. Use a sharp knife or pastry cutter and press straight down in one motion. If the dough sticks, dip the blade in flour between cuts. One mistake is twisting the knife, which can seal the layers and diminish lift, so keep cuts vertical and steady.
- Place scones on prepared baking sheet: Lay the wedges with space between them to allow heat circulation and browning. You will notice a subtle difference in color where they touch; spacing prevents uneven edges. Transferring carefully helps maintain the scone shape, and using a thin spatula can assist. Avoid crowding the pan, which causes steaming rather than crisping.
- Using a pastry brush, brush scones lightly with the additional heavy cream: Brushing with the reserved tablespoon of heavy cream encourages a golden, slightly glossy crust and helps the glaze adhere later. A light, even coat is enough; too much will pool and make soggy spots. If you skip this step the tops may stay pale and lose a bit of that bakery finish.
- Bake scones for 15 to 18 minutes, or until scones are light brown: During baking you will hear a faint, comforting hush as edges set and the center firms, and the aroma will be a warm mix of coconut and lemon . Look for a light golden color around the edges and a set center; an inserted toothpick should come out clean. Overbaking dries them out, so start checking at the earlier time. If your oven runs hot, reduce time slightly to avoid overly browned tops.
- Cool scones on a wire cooling rack: Cooling on a rack prevents the bottoms from steaming and keeps the texture crisp. As they cool, the crumb firms slightly which makes them easier to glaze without smearing. Let them rest until just warm to the touch for the best glaze application. A common slip is glazing when they are too hot, which causes the glaze to slide off instead of setting.
- While the scones are cooling, make the lemon glaze: The glaze smooths and brightens the final bites, and whisking powdered sugar , lemon zest, and lemon juice yields a glossy finish. Aim for a pourable but not watery consistency so it clings to the scones. If it is too thin add more powdered sugar , if too thick add a few drops of lemon juice.
- In a small bowl, whisk together powdered sugar, lemon zest, and lemon juice: This blends into a silky glaze that brightens each bite with citrus tang. The powdered sugar dissolves to give a smooth surface that sets slightly when cooled. Taste and adjust, but remember the scones already have sweetness from the dough and sweetened coconut .
- Whisk until smooth: A smooth glaze means even coverage and a professional looking finish, and the whisking process removes any lumps and aerates the mixture slightly. Proper texture ensures it will drizzle attractively and set with a thin crust. If you see grit, sift the powdered sugar before mixing to avoid grainy spots.
- Drizzle glaze over the scones: When you drizzle the glaze, it should form a thin glossy coat and settle into crevices, adding a sweet tangy kiss to each wedge. Use a spoon or a small spatula to control the motion, and work quickly before the glaze sets. A mistake is applying too much glaze which can overwhelm the flavor balance, so aim for a delicate drizzle.
- Top with toasted coconut: The final sprinkle of toasted coconut adds contrast in texture and a toasty aroma that complements the lemon. Press lightly so it adheres to the glaze. If the coconut is not toasted, quickly toast it in a dry pan until golden for the best flavor. Avoid burning the coconut as it can turn bitter fast.
- Serve: the scones warm or at room temperature, and notice how the layers and glaze present together. They pair nicely with tea or coffee and make a welcoming treat for guests. One trap is storing them while still warm in a sealed container, which creates steam and softens the exterior, so cool completely before storing.
Notes
- Measure flour properly, spoon the flour into the cup and level it off rather than scooping directly from the bag, which can pack it and dry out the dough. Accurate flour measurement ensures a tender scone rather than a dense one.
- Chill your tools, if your kitchen is warm chill the bowl and cutter briefly to keep the butter cold. Cold tools reduce the risk of the butter softening and maintain those desirable layers.
- Use room temperature lemons for easier juicing, roll them on the counter to release juice before cutting. That makes extracting the most juice simpler, especially when you need precise amounts for the glaze.
- Test oven temperature with an oven thermometer, many ovens run hot or cool, and accurate heat gives the right rise and color. Adjust times accordingly if your oven is off by more than a few degrees.
- Cool before storing, once the scones are completely cool, store them in an airtight container at room temperature for up to three days to preserve texture. If stacking, separate layers with parchment to prevent sticking.