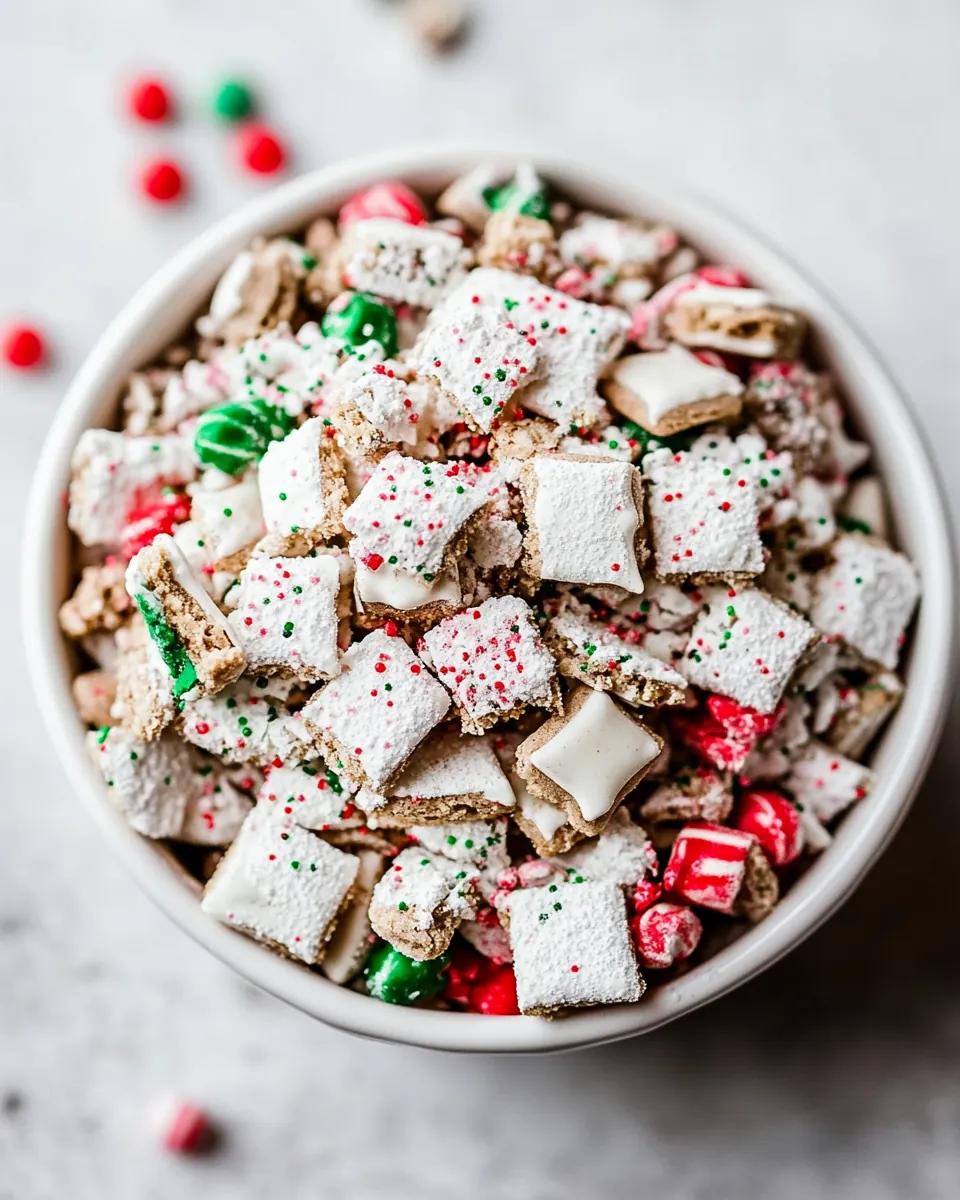
Sugar Cookie Snack Mix
Sugar Cookie Snack Mix is the kind of festive, sweet snack I reach for when I want something that feels celebratory without being fussy.
I first made this while hosting a tiny holiday movie night with close friends, and I remember the way the kitchen smelled of bubbling brown sugar and warm vanilla as the cereal toasted in the syrup. Each bite was a little crunchy, a little sweet, and studded with colorful candy that made everyone grin. That night I learned that this mix travels well to a neighbor, it disappears quickly at a party, and it keeps its personality even when stored for a couple of days.
Over the years I have tweaked the technique so the coating is evenly distributed and not clumpy, and I always try to make a double batch when I know we will be snacking for hours. There is something playful about shaking the cereal with powdered sugar in a big bag, and piping white chocolate across the top feels oddly therapeutic. When you make Sugar Cookie Snack Mix, you are really making memories as much as you are making treats, and I always smile when someone asks for the recipe.
Recipe Snapshot
30 mins
20 mins
10 mins
Medium
250 kcal
American
Gluten-Free, Low FODMAP
Desserts
Large sheet pan (15 x 21 inch), Parchment paper or aluminum foil or a silicone baking mat, Medium pot
The Magic of This Sugar Cookie Snack Mix
Crunchy Texture That Holds Up
I love that Sugar Cookie Snack Mix starts with Rice Chex cereal, which soaks up just enough syrup to become crispy and slightly chewy without turning soggy. I’m always impressed by how a thin, even coating transforms the cereal into a snack that stays crunchy for days when stored properly.
Balanced Sweetness and Vanilla Notes
The combination of light brown sugar, granulated sugar, and powdered sugar gives layers of sweetness, from deep molasses warmth to bright scoopable sweetness. Adding vanilla extract lifts those sugars into something that tastes like a sugar cookie, not just candy, which is why I keep this in regular rotation during the holidays.
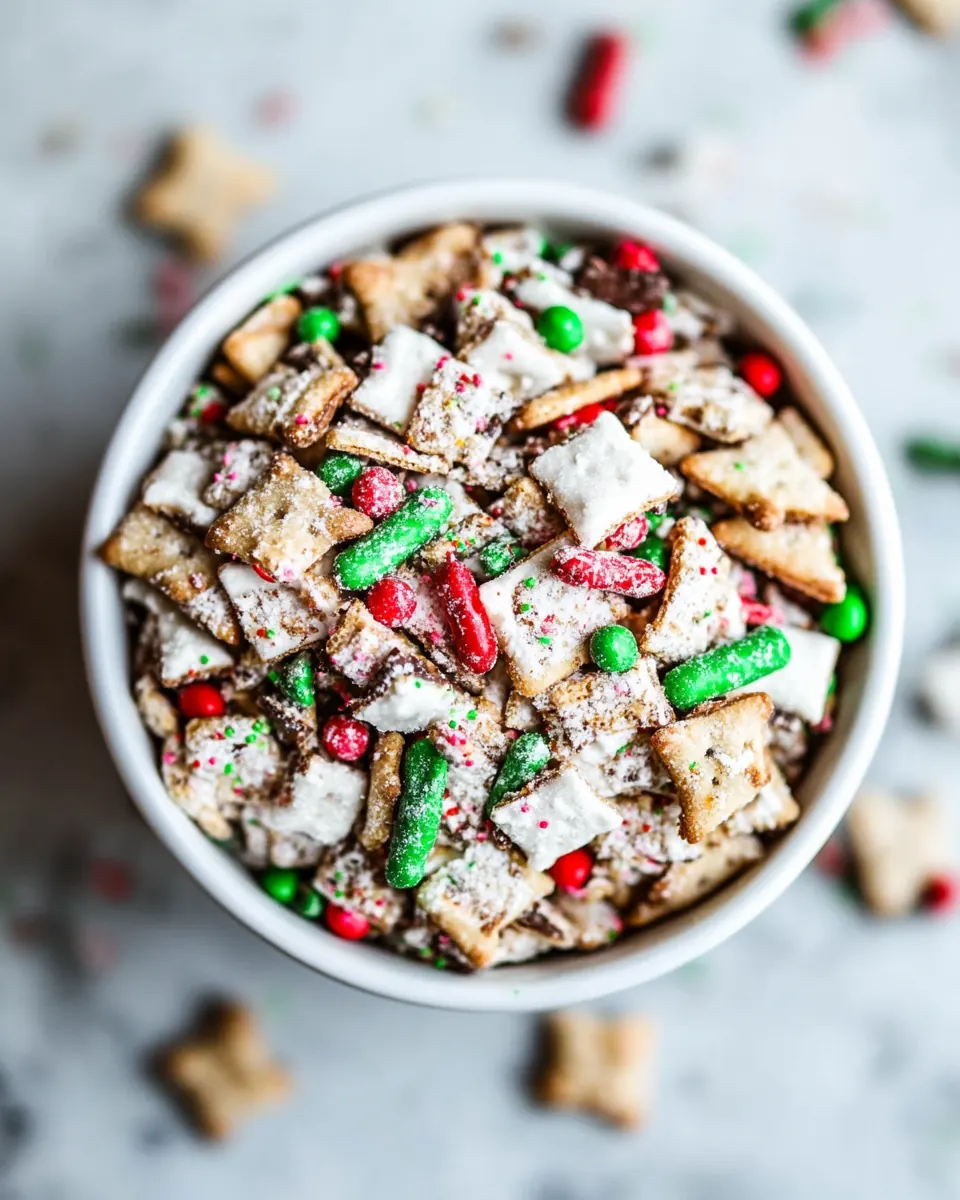
Visual Appeal and Fun Mix Ins
Including a bag of Sugar Cookie M&M’s and Christmas nonpareil sprinkles makes this snack mix look like a party. I use colorful mix ins to signal occasion and to add little pops of chocolate and texture in every handful, which always draws compliments.
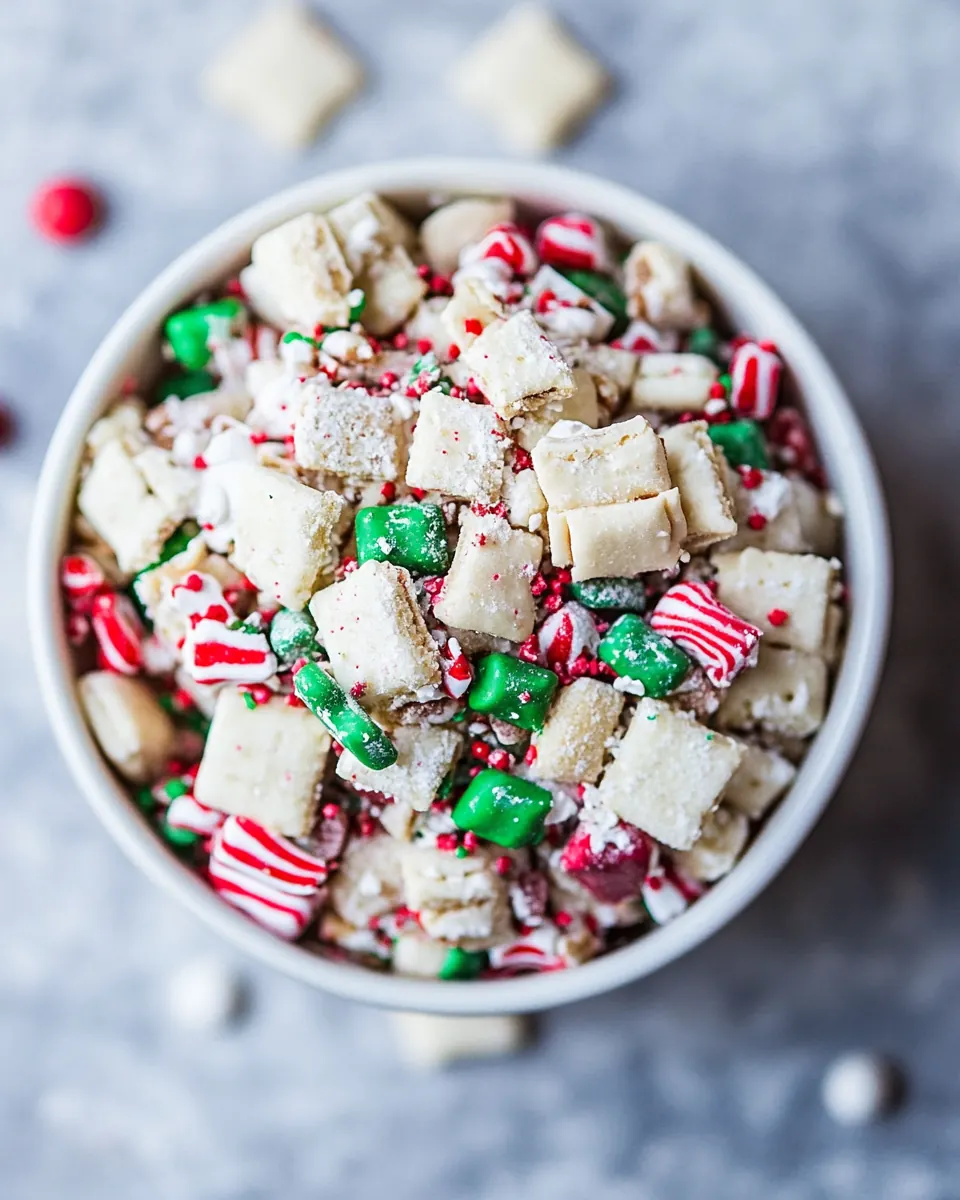
Flexible Finish with White Chocolate
Melting white chocolate chips with a touch of coconut oil creates a glossy drizzle that adds sweetness and helps the sprinkles and M&M’s stick. I enjoy how the drizzle creates delicate ribbons of sweetness without overwhelming the cereal base.
Easy to Scale and Share
This recipe scales beautifully, so whether I am making a single tray for a cozy night or a double batch for gifts, the method stays the same. It’s convenient, portable, and always gets devoured, which is why I keep it in my entertaining toolkit.
Recipe Ingredients for Sugar Cookie Snack Mix
These ingredients are chosen to recreate the beloved profile of a sugar cookie in snack form. The Rice Chex cereal is the structure, the sugars and unsalted butter form a sticky, toffee like coating, and the finishing elements like powdered sugar, Sugar Cookie M&M’s, and white chocolate chips add sweetness, color, and a creamy finish. Together they produce a crunchy, flavorful snack that feels like a cookie but is perfectly snackable.
- 8 cups Rice Chex cereal: Provide a light, crunchy base for the snack mix that soaks up coatings evenly; Rice Chex offers a neutral, crisp texture that pairs well with sweet coatings and mix-ins. Use full cups to ensure sufficient volume for coating and serving, and gently stir to avoid crushing the cereal. Its low-fat profile helps the sugary coating adhere without becoming greasy.
- 1/2 cup unsalted butter cut into 1 tablespoon pieces: Add a rich, buttery flavor and help form a caramel-like coating when melted with sugar; cut into tablespoon pieces to ensure even melting and prevent browning. Melt slowly over low heat to combine with the syrups and sugar for an even, glossy coating. Unsalted butter allows precise control of overall saltiness in the final mix.
- 1 cup light brown sugar firmly packed: Provide deep molasses notes and sweetness while contributing to the chewy caramel coating when cooked with butter and syrup; pack firmly to ensure accurate measure. Brown sugar also helps the mixture brown slightly and develop a toffee-like depth. Stir thoroughly while heating to dissolve any lumps for a smooth texture.
- 1/4 cup light corn syrup: Act as a liquid sweetener and binder that helps create a sticky, shiny coating without overpowering flavor; light corn syrup prevents crystallization of the sugar mixture. Measure carefully to balance viscosity so the coating clings to the cereal. Warm gently with butter and brown sugar for an even, cohesive glaze.
- 1/4 teaspoon baking soda: React with acidic components to promote lightness in the coating and help with slight browning; baking soda also creates tiny bubbles that lighten texture when combined and heated. Use the small amount specified to avoid soapy or metallic flavors. Dissolve into the warm syrup mixture for even distribution.
- 1/4 teaspoon salt: Balance sweetness and enhance overall flavor while controlling the savory-sweet contrast; salt rounds out and intensifies the other ingredients. Use the stated amount to avoid over-salting, which would overshadow delicate cookie-like flavors. Mix into the syrup or coating so the salt disperses uniformly.
- 1 teaspoon vanilla extract: Contribute aromatic warmth and familiar baked-cookie notes to mimic sugar cookie flavor; vanilla extract elevates and ties the other sweet components together. Add after cooking off heat to preserve delicate aroma and brightness. Quality vanilla enhances perceived sweetness without additional sugar.
- 1/2 cup granulated sugar: Provide a granular coating to create a sugary outer layer and add immediate sweet crunch when tossed with the coated cereal. Use granulated sugar for texture contrast and to help the powdered sugar adhere. Sprinkle or toss while the coating is tacky for best adhesion.
- 1/2 cup powdered sugar: Supply a fine, snowy dusting that mimics powdered sugar decorations on sugar cookies and creates a pleasant melt-in-mouth finish. Powdered sugar also helps absorb excess stickiness and creates an even sweet exterior. Sift or shake over the mix to avoid clumps and ensure uniform coverage.
- 1 bag Sugar Cookie M&M’s: Introduce colorful, cookie-inspired candy pieces that add bursts of chocolate and festive hues; Sugar Cookie M&M’s contribute sweetness, texture, and theme authenticity. Fold in after coating has cooled slightly to prevent melting the candy shells. Their small size distributes flavor and color evenly throughout the mix.
- 1 cup white chocolate chips: Add creamy, sweet pockets of white chocolate that enhance richness and mimic frosting-like elements in the snack mix. Gently melt with coconut oil for a smooth drizzle or fold in as chips for pockets of texture. Use good-quality chips to avoid waxy aftertaste and ensure pleasant melt.
- 1 teaspoon coconut oil: Assist in melting and smoothing white chocolate for a glossy drizzle that binds small inclusions; coconut oil thins white chocolate and prevents seizing. Measure sparingly to achieve desired flow without making the mix greasy. Add just enough while warming the chocolate to create a sleek coating.
- 3 tablespoons Christmas nonpareil sprinkles (optional): Provide optional festive crunch and visual appeal reminiscent of decorated sugar cookies; Christmas nonpareil sprinkles add tiny bursts of color and slight texture. Sprinkle on after coating has set slightly to preserve shape and prevent color bleed. Use sparingly to maintain balanced sweetness and avoid becoming cloying.
Directions for Sugar Cookie Snack Mix
These directions walk you through building crisp, evenly coated cereal, finishing it with powdered sugar and a white chocolate drizzle. The method uses quick, attentive steps to ensure even coating and a beautiful final texture, so take your time and enjoy the process.
- Preheat oven to 350°F. Line a 15×21-inch sheet pan (or 2 smaller ones) with foil, parchment paper, or a silicone baking mat and generously grease with cooking spray.: The warm oven offers gentle heat that helps set the syrup on the Rice Chex cereal , creating a toasted aroma and a slightly caramelized surface. As the oven comes to temperature you will notice a dry, warm air that helps crisp the cereal, so make sure the rack is centered for even heat. One common mistake is not preheating fully, which can lead to uneven bake and sticky spots, so wait until the oven reads the full temperature before proceeding.
- Add Rice Chex cereal to the lined tray and spread in an even layer.: A prepared pan prevents sticking and makes cleanup easy, and a lined surface reflects heat to brown the coating evenly. When you spread the cereal later, it will slide smoothly on the lined surface, and you will hear a light rasp as pieces settle. Avoid skipping the lining, because the sticky syrup can adhere to bare metal, making separation difficult.
- In a heavy, medium pot, add butter (cut into tablespoons), brown sugar, and corn syrup. Place over medium to medium-high heat and stir constantly, until mixture comes to a rapid boil. Boil for 1 minute, stirring constantly, and remove from heat. Add baking soda and salt. Add vanilla extract and stir to combine. Pour over cereal on the sheet pan and, working quickly, stir until cereal is evenly coated in the syrup mixture.: Spreading the cereal into a single layer ensures each piece gets the same exposure to the syrup and oven heat, which leads to uniform crisping and color. As you distribute the pieces, watch for clumps and gently tease them apart so air can circulate. If you leave it uneven, some clusters will overcook while others stay underdone.
- Sprinkle granulated sugar evenly over the syrup coated cereal. (Don’t toss to coat): You will smell the sugars melting and see the mixture become glossy as the butter emulsifies with the syrup, creating a toffee like aroma. Stirring constantly prevents burning on the bottom and encourages even melting, which produces a smooth syrup that will adhere to the cereal. A frequent error is using too high heat and burning the sugars, so maintain a steady medium to medium high setting.
- Bake 5 minutes, remove from oven, and toss using a metal spatula. Spread mixture again in an even layer. Return to oven and bake 4 more minutes. Remove from oven and toss again. Spread in an even layer and let cool 15 minutes.: The brief, controlled boil concentrates the sugars and ensures the mixture will set properly on the cereal, and you may notice it thicken slightly and bubble energetically. Removing from heat at the right moment prevents over caramelization which would make the coating too hard. Over boiling is a common misstep that leads to a brittle coating rather than a crisp one.
- Transfer snack mix into a 2-gallon sized resealable plastic bag. Add powdered sugar. Seal the bag (do not squeeze air out), then shake to coat the cereal in the mix. It may seem like not enough powdered sugar, but keep shaking; it will coat the cereal. Once cereal is generously coated, pour it back on the sheet pan in a single layer. Sprinkle M&M’s evenly over the coated cereal.: Adding baking soda aerates the syrup and lightens the texture, while the salt balances the sweetness and the vanilla extract brightens the flavor. You will see the mixture foam lightly when baking soda is incorporated, which creates a lighter, more brittle coating that is easier to bite. A mistake here is adding these too early or while the pot is still on high heat, which can dissipate the vanilla aroma.
- In a medium microwave-safe bowl, combine white chocolate chips and 1 teaspoon coconut oil. Melt, in bursts of 15 seconds, stirring between each burst for 15 seconds, or until white chocolate is fully melted and smooth. Transfer melted chocolate to a small resealable plastic bag and seal without any air. Cut off the very tip with scissors and pipe evenly over the snack mix until all the mix is coated. Immediately add sprinkles if using. Let stand 30 minutes to an hour to harden.: When the syrup hits the cereal you will hear a soft sizzle and see each piece glaze in a warm shine, which is the cue to stir rapidly so the coating spreads before it sets. Use a sturdy spatula and fold rather than beat, ensuring each piece is covered. Working too slowly allows patches to set and form clumps, so move efficiently.
- Sprinkle granulated sugar evenly over the syrup coated cereal do not toss to coat: The granulated sugar adds a crystalline bite and an extra layer of sweetness that bakes into a slightly crunchy crust, and you should notice a faint sparkle across the surface. Resist the urge to toss because the sugar is meant to bake on top to create contrast, and tossing now will displace it and reduce the intended texture. A common error is uneven sprinkling, which leads to sections that are bland or overly sweet.
- Bake 5 minutes remove from oven and toss using a metal spatula spread mixture again in an even layer: The first bake sets the syrup and caramelizes the sugar slightly, releasing a toasty aroma and a golden tint on the cereal. Tossing at this stage exposes unbaked sides and promotes uniform color, so use a metal spatula to separate any forming clusters. Don’t skip the toss, because sections left untouched can remain sticky.
- Return to oven and bake 4 more minutes remove from oven and toss again spread in an even layer and let cool 15 minutes: The second bake finishes the crisping process and deepens flavor, and as it cools you will notice the mix firm up and go from glossy to set. Cooling for 15 minutes helps the pieces stabilize so they do not break when moved. A pitfall is trying to coat or bag while still hot, which can melt the powdered sugar or make the pieces stick together.
- Transfer snack mix into a 2 gallon sized resealable plastic bag add powdered sugar seal the bag do not squeeze air out then shake to coat the cereal in the mix: The tactile shaking distributes powdered sugar evenly, forming a soft dusting reminiscent of cookie icing, and you will hear the cereal clinking as it tumbles. Hold the bag gently and keep shaking until pieces look uniformly coated, because under shaking results in patchy coverage. Overfilling the bag reduces movement, so use a container size that allows tumbling.
- Once cereal is generously coated pour it back on the sheet pan in a single layer sprinkle M M M s evenly over the coated cereal: Spreading the coated cereal out lets any excess powdered sugar fall away and creates a neat canvas for the Sugar Cookie M&M’s , which should be distributed so every handful gets a colorful piece. Place the candies on top rather than mixing in, to avoid melting. A common mistake is folding the candies in too early in warm conditions, causing them to soften.
- In a medium microwave safe bowl combine white chocolate chips and 1 teaspoon coconut oil melt in bursts of 15 seconds stirring between each burst until white chocolate is fully melted and smooth: Melting gently produces a glossy, pourable drizzle, and you will see the chips soften then coalesce into a creamy pool. Stirring after short bursts prevents overheating and graininess, and the addition of coconut oil ensures a smoother texture and softer set. Overheating white chocolate is the usual misstep, which results in grainy, separated chocolate.
- Transfer melted chocolate to a small resealable plastic bag seal without any air cut off the very tip with scissors and pipe evenly over the snack mix until all the mix is coated: Piping gives you control to create pretty ribbons, and you will watch the white chocolate set into delicate lines that harden to a gentle snap. Work steadily and keep the stream thin for even coverage. If the chocolate thickens while you work, place the bag briefly in warm water to loosen it; trying to force thick chocolate will cause clumps.
- Immediately add sprinkles if using let stand 30 minutes to an hour to harden: Adding the Christmas nonpareil sprinkles while the chocolate is still tacky ensures they adhere, and as the drizzle hardens you will notice a satisfying change from glossy wet to matte set. Allow enough time for the chocolate to firm, or the mix can stick together when stored. A mistake is bagging too soon, which traps moisture and ruins the crisp texture.
Ways to Adapt This Recipe
This section offers practical adaptations so you can customize Sugar Cookie Snack Mix for occasions and preferences. Below are usable ideas to change texture, flavor, and presentation while keeping the core method intact.
- Swap the cereal Consider using the same volume of a similar light cereal to change texture while maintaining the coating behavior, but keep the ratio of coating to cereal consistent so the mix sets correctly.
- Adjust the sweetness Reduce the granulated sugar sprinkle step slightly if you prefer a less crystalline bite, but know that this will affect the overall balance and the final crunch.
- Make it nut free This recipe is naturally free of nuts if you keep the mix ins as specified, making it a good option for shared settings where nut allergies might be a concern.
- Change the candy Swap the Sugar Cookie M&M’s for another small candy of the same size to create different color themes without impacting texture or assembly.
- Prepare ahead You can bake and powder coat the mix up to two days ahead and drizzle chocolate just before serving for a freshly finished appearance and firmer candy elements.
How to Enjoy Sugar Cookie Snack Mix
This mix is wonderfully versatile for gifting, parties, and casual snacking. Below are serving ideas and storage suggestions to keep it tasting its best across occasions.
- Holiday party bowls Display it in a large bowl with small scoops around so guests can help themselves; it pairs well with warm beverages and provides a sweet counterpoint to savory appetizers.
- Gifting in jars Layer it in clear jars or cellophane bags and tie with ribbon for a festive homemade gift that travels well to neighbors and friends.
- Movie night snack Portion into small paper cones or cups for an easy, shareable treat during a cozy movie evening with family.
- Storage tips Keep in an airtight container at room temperature for up to a week, best within three to four days; freezing is possible for up to three months but expect slight texture loss after thawing.
- Occasion pairings Serve for Christmas gatherings, cookie exchanges, or anytime you want a playful sweet snack; the colors and sprinkles make it especially suited to seasonal celebrations.
FAQ
Conclusion
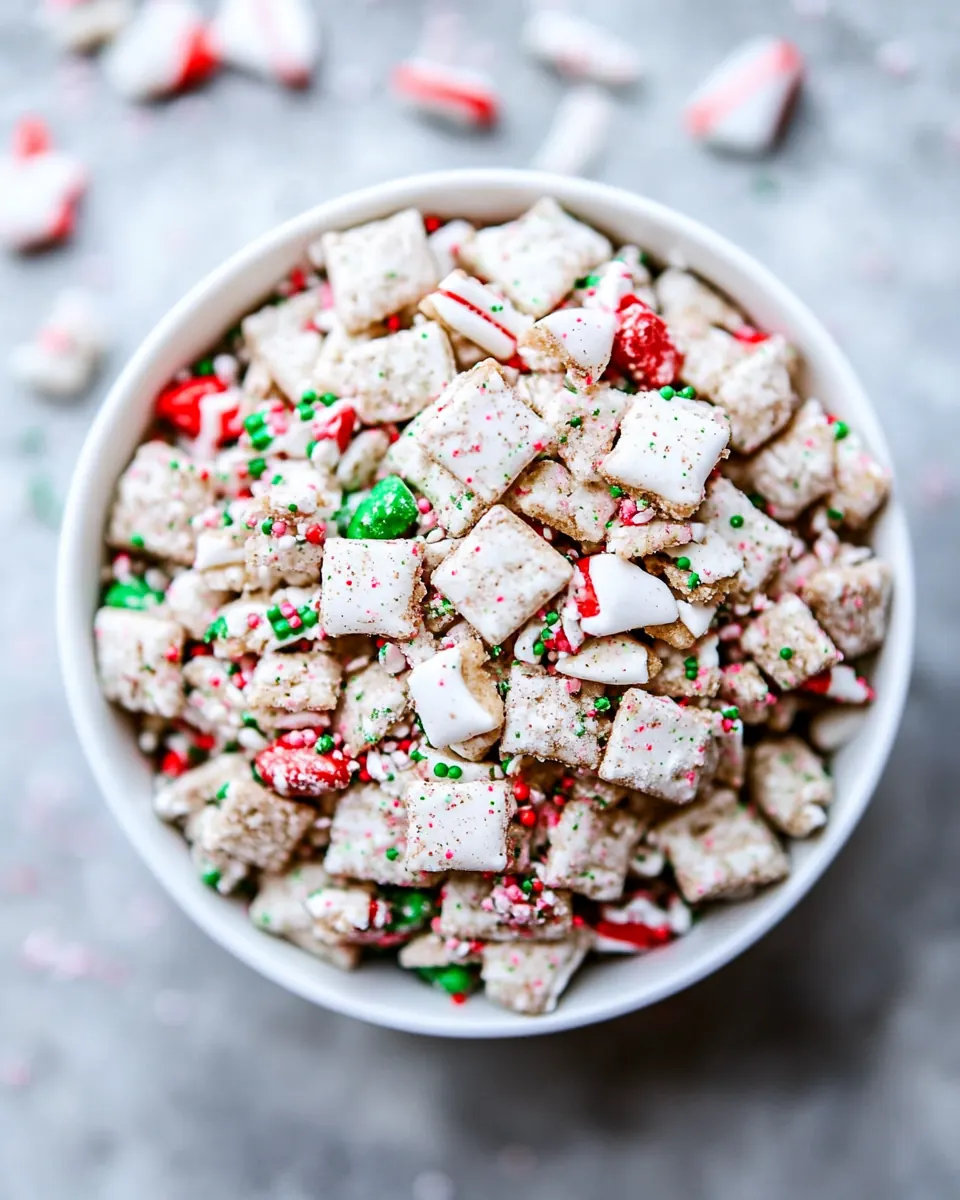
This Sugar Cookie Snack Mix shines because it captures the comforting flavors of a sugar cookie in a crunchy, shareable snack. It brings holiday color, warm vanilla, and a crisp sweet coating together into an easy to make treat that is perfect for parties, gifting, or casual nibbling. Give it a try at your next gathering, and watch how quickly it disappears; I always find that it sparks conversations and brings a bit of festive joy to the table.

Sugar Cookie Snack Mix
Equipment
- Large sheet pan (15 x 21 inch)
- Parchment paper or aluminum foil or a silicone baking mat
- Medium Pot
Ingredients
- 8 cups Rice Chex cereal Provide a light, crunchy base for the snack mix that soaks up coatings evenly; Rice Chex offers a neutral, crisp texture that pairs well with sweet coatings and mix-ins. Use full cups to ensure sufficient volume for coating and serving, and gently stir to avoid crushing the cereal. Its low-fat profile helps the sugary coating adhere without becoming greasy.
- 1/2 cup unsalted butter cut into 1 tablespoon pieces Add a rich, buttery flavor and help form a caramel-like coating when melted with sugar; cut into tablespoon pieces to ensure even melting and prevent browning. Melt slowly over low heat to combine with the syrups and sugar for an even, glossy coating. Unsalted butter allows precise control of overall saltiness in the final mix.
- 1 cup light brown sugar firmly packed Provide deep molasses notes and sweetness while contributing to the chewy caramel coating when cooked with butter and syrup; pack firmly to ensure accurate measure. Brown sugar also helps the mixture brown slightly and develop a toffee-like depth. Stir thoroughly while heating to dissolve any lumps for a smooth texture.
- 1/4 cup light corn syrup Act as a liquid sweetener and binder that helps create a sticky, shiny coating without overpowering flavor; light corn syrup prevents crystallization of the sugar mixture. Measure carefully to balance viscosity so the coating clings to the cereal. Warm gently with butter and brown sugar for an even, cohesive glaze.
- 1/4 teaspoon baking soda React with acidic components to promote lightness in the coating and help with slight browning; baking soda also creates tiny bubbles that lighten texture when combined and heated. Use the small amount specified to avoid soapy or metallic flavors. Dissolve into the warm syrup mixture for even distribution.
- 1/4 teaspoon salt Balance sweetness and enhance overall flavor while controlling the savory-sweet contrast; salt rounds out and intensifies the other ingredients. Use the stated amount to avoid over-salting, which would overshadow delicate cookie-like flavors. Mix into the syrup or coating so the salt disperses uniformly.
- 1 teaspoon vanilla extract Contribute aromatic warmth and familiar baked-cookie notes to mimic sugar cookie flavor; vanilla extract elevates and ties the other sweet components together. Add after cooking off heat to preserve delicate aroma and brightness. Quality vanilla enhances perceived sweetness without additional sugar.
- 1/2 cup granulated sugar Provide a granular coating to create a sugary outer layer and add immediate sweet crunch when tossed with the coated cereal. Use granulated sugar for texture contrast and to help the powdered sugar adhere. Sprinkle or toss while the coating is tacky for best adhesion.
- 1/2 cup powdered sugar Supply a fine, snowy dusting that mimics powdered sugar decorations on sugar cookies and creates a pleasant melt-in-mouth finish. Powdered sugar also helps absorb excess stickiness and creates an even sweet exterior. Sift or shake over the mix to avoid clumps and ensure uniform coverage.
- 1 bag Sugar Cookie M&M’s Introduce colorful, cookie-inspired candy pieces that add bursts of chocolate and festive hues; Sugar Cookie M&M’s contribute sweetness, texture, and theme authenticity. Fold in after coating has cooled slightly to prevent melting the candy shells. Their small size distributes flavor and color evenly throughout the mix.
- 1 cup white chocolate chips Add creamy, sweet pockets of white chocolate that enhance richness and mimic frosting-like elements in the snack mix. Gently melt with coconut oil for a smooth drizzle or fold in as chips for pockets of texture. Use good-quality chips to avoid waxy aftertaste and ensure pleasant melt.
- 1 teaspoon coconut oil Assist in melting and smoothing white chocolate for a glossy drizzle that binds small inclusions; coconut oil thins white chocolate and prevents seizing. Measure sparingly to achieve desired flow without making the mix greasy. Add just enough while warming the chocolate to create a sleek coating.
- 3 tablespoons Christmas nonpareil sprinkles optional Provide optional festive crunch and visual appeal reminiscent of decorated sugar cookies; Christmas nonpareil sprinkles add tiny bursts of color and slight texture. Sprinkle on after coating has set slightly to preserve shape and prevent color bleed. Use sparingly to maintain balanced sweetness and avoid becoming cloying.
Instructions
- Preheat oven to 350°F. Line a 15×21-inch sheet pan (or 2 smaller ones) with foil, parchment paper, or a silicone baking mat and generously grease with cooking spray.: The warm oven offers gentle heat that helps set the syrup on the Rice Chex cereal , creating a toasted aroma and a slightly caramelized surface. As the oven comes to temperature you will notice a dry, warm air that helps crisp the cereal, so make sure the rack is centered for even heat. One common mistake is not preheating fully, which can lead to uneven bake and sticky spots, so wait until the oven reads the full temperature before proceeding.
- Add Rice Chex cereal to the lined tray and spread in an even layer.: A prepared pan prevents sticking and makes cleanup easy, and a lined surface reflects heat to brown the coating evenly. When you spread the cereal later, it will slide smoothly on the lined surface, and you will hear a light rasp as pieces settle. Avoid skipping the lining, because the sticky syrup can adhere to bare metal, making separation difficult.
- In a heavy, medium pot, add butter (cut into tablespoons), brown sugar, and corn syrup. Place over medium to medium-high heat and stir constantly, until mixture comes to a rapid boil. Boil for 1 minute, stirring constantly, and remove from heat. Add baking soda and salt. Add vanilla extract and stir to combine. Pour over cereal on the sheet pan and, working quickly, stir until cereal is evenly coated in the syrup mixture.: Spreading the cereal into a single layer ensures each piece gets the same exposure to the syrup and oven heat, which leads to uniform crisping and color. As you distribute the pieces, watch for clumps and gently tease them apart so air can circulate. If you leave it uneven, some clusters will overcook while others stay underdone.
- Sprinkle granulated sugar evenly over the syrup coated cereal. (Don’t toss to coat): You will smell the sugars melting and see the mixture become glossy as the butter emulsifies with the syrup, creating a toffee like aroma. Stirring constantly prevents burning on the bottom and encourages even melting, which produces a smooth syrup that will adhere to the cereal. A frequent error is using too high heat and burning the sugars, so maintain a steady medium to medium high setting.
- Bake 5 minutes, remove from oven, and toss using a metal spatula. Spread mixture again in an even layer. Return to oven and bake 4 more minutes. Remove from oven and toss again. Spread in an even layer and let cool 15 minutes.: The brief, controlled boil concentrates the sugars and ensures the mixture will set properly on the cereal, and you may notice it thicken slightly and bubble energetically. Removing from heat at the right moment prevents over caramelization which would make the coating too hard. Over boiling is a common misstep that leads to a brittle coating rather than a crisp one.
- Transfer snack mix into a 2-gallon sized resealable plastic bag. Add powdered sugar. Seal the bag (do not squeeze air out), then shake to coat the cereal in the mix. It may seem like not enough powdered sugar, but keep shaking; it will coat the cereal. Once cereal is generously coated, pour it back on the sheet pan in a single layer. Sprinkle M&M’s evenly over the coated cereal.: Adding baking soda aerates the syrup and lightens the texture, while the salt balances the sweetness and the vanilla extract brightens the flavor. You will see the mixture foam lightly when baking soda is incorporated, which creates a lighter, more brittle coating that is easier to bite. A mistake here is adding these too early or while the pot is still on high heat, which can dissipate the vanilla aroma.
- In a medium microwave-safe bowl, combine white chocolate chips and 1 teaspoon coconut oil. Melt, in bursts of 15 seconds, stirring between each burst for 15 seconds, or until white chocolate is fully melted and smooth. Transfer melted chocolate to a small resealable plastic bag and seal without any air. Cut off the very tip with scissors and pipe evenly over the snack mix until all the mix is coated. Immediately add sprinkles if using. Let stand 30 minutes to an hour to harden.: When the syrup hits the cereal you will hear a soft sizzle and see each piece glaze in a warm shine, which is the cue to stir rapidly so the coating spreads before it sets. Use a sturdy spatula and fold rather than beat, ensuring each piece is covered. Working too slowly allows patches to set and form clumps, so move efficiently.
- Sprinkle granulated sugar evenly over the syrup coated cereal do not toss to coat: The granulated sugar adds a crystalline bite and an extra layer of sweetness that bakes into a slightly crunchy crust, and you should notice a faint sparkle across the surface. Resist the urge to toss because the sugar is meant to bake on top to create contrast, and tossing now will displace it and reduce the intended texture. A common error is uneven sprinkling, which leads to sections that are bland or overly sweet.
- Bake 5 minutes remove from oven and toss using a metal spatula spread mixture again in an even layer: The first bake sets the syrup and caramelizes the sugar slightly, releasing a toasty aroma and a golden tint on the cereal. Tossing at this stage exposes unbaked sides and promotes uniform color, so use a metal spatula to separate any forming clusters. Don’t skip the toss, because sections left untouched can remain sticky.
- Return to oven and bake 4 more minutes remove from oven and toss again spread in an even layer and let cool 15 minutes: The second bake finishes the crisping process and deepens flavor, and as it cools you will notice the mix firm up and go from glossy to set. Cooling for 15 minutes helps the pieces stabilize so they do not break when moved. A pitfall is trying to coat or bag while still hot, which can melt the powdered sugar or make the pieces stick together.
- Transfer snack mix into a 2 gallon sized resealable plastic bag add powdered sugar seal the bag do not squeeze air out then shake to coat the cereal in the mix: The tactile shaking distributes powdered sugar evenly, forming a soft dusting reminiscent of cookie icing, and you will hear the cereal clinking as it tumbles. Hold the bag gently and keep shaking until pieces look uniformly coated, because under shaking results in patchy coverage. Overfilling the bag reduces movement, so use a container size that allows tumbling.
- Once cereal is generously coated pour it back on the sheet pan in a single layer sprinkle M M M s evenly over the coated cereal: Spreading the coated cereal out lets any excess powdered sugar fall away and creates a neat canvas for the Sugar Cookie M&M’s , which should be distributed so every handful gets a colorful piece. Place the candies on top rather than mixing in, to avoid melting. A common mistake is folding the candies in too early in warm conditions, causing them to soften.
- In a medium microwave safe bowl combine white chocolate chips and 1 teaspoon coconut oil melt in bursts of 15 seconds stirring between each burst until white chocolate is fully melted and smooth: Melting gently produces a glossy, pourable drizzle, and you will see the chips soften then coalesce into a creamy pool. Stirring after short bursts prevents overheating and graininess, and the addition of coconut oil ensures a smoother texture and softer set. Overheating white chocolate is the usual misstep, which results in grainy, separated chocolate.
- Transfer melted chocolate to a small resealable plastic bag seal without any air cut off the very tip with scissors and pipe evenly over the snack mix until all the mix is coated: Piping gives you control to create pretty ribbons, and you will watch the white chocolate set into delicate lines that harden to a gentle snap. Work steadily and keep the stream thin for even coverage. If the chocolate thickens while you work, place the bag briefly in warm water to loosen it; trying to force thick chocolate will cause clumps.
- Immediately add sprinkles if using let stand 30 minutes to an hour to harden: Adding the Christmas nonpareil sprinkles while the chocolate is still tacky ensures they adhere, and as the drizzle hardens you will notice a satisfying change from glossy wet to matte set. Allow enough time for the chocolate to firm, or the mix can stick together when stored. A mistake is bagging too soon, which traps moisture and ruins the crisp texture.
Notes
- Swap the cereal Consider using the same volume of a similar light cereal to change texture while maintaining the coating behavior, but keep the ratio of coating to cereal consistent so the mix sets correctly.
- Adjust the sweetness Reduce the granulated sugar sprinkle step slightly if you prefer a less crystalline bite, but know that this will affect the overall balance and the final crunch.
- Make it nut free This recipe is naturally free of nuts if you keep the mix ins as specified, making it a good option for shared settings where nut allergies might be a concern.
- Change the candy Swap the Sugar Cookie M&M’s for another small candy of the same size to create different color themes without impacting texture or assembly.
- Prepare ahead You can bake and powder coat the mix up to two days ahead and drizzle chocolate just before serving for a freshly finished appearance and firmer candy elements.