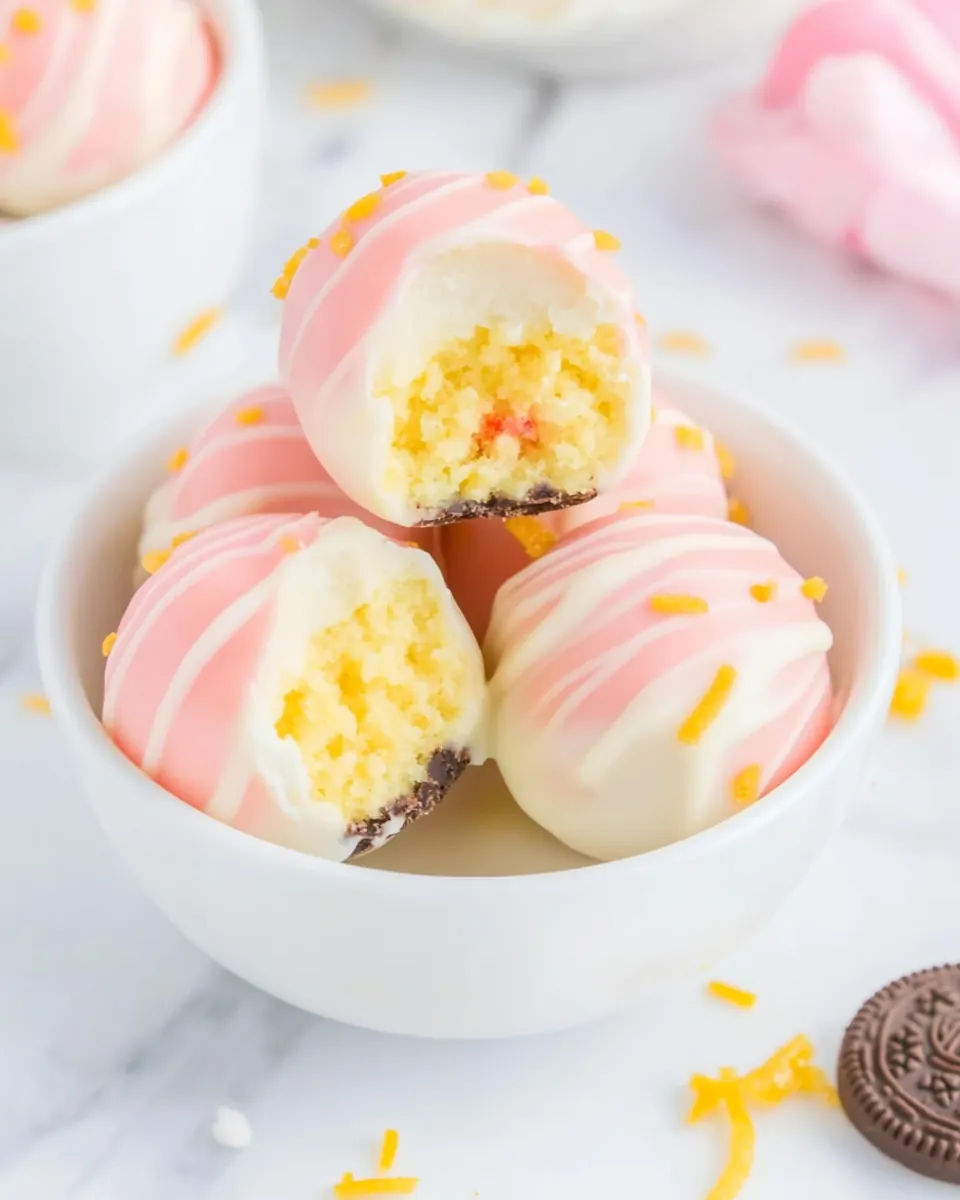
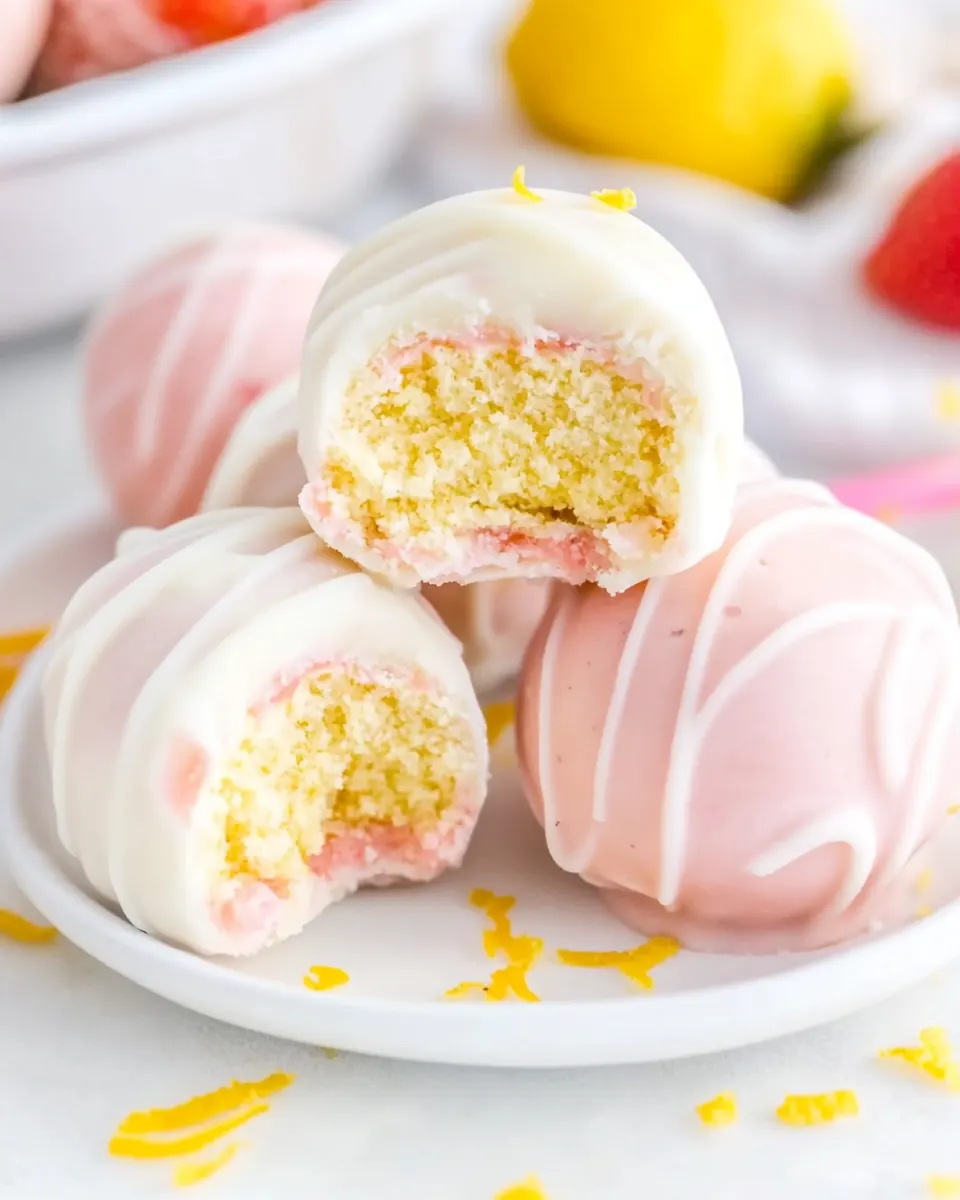
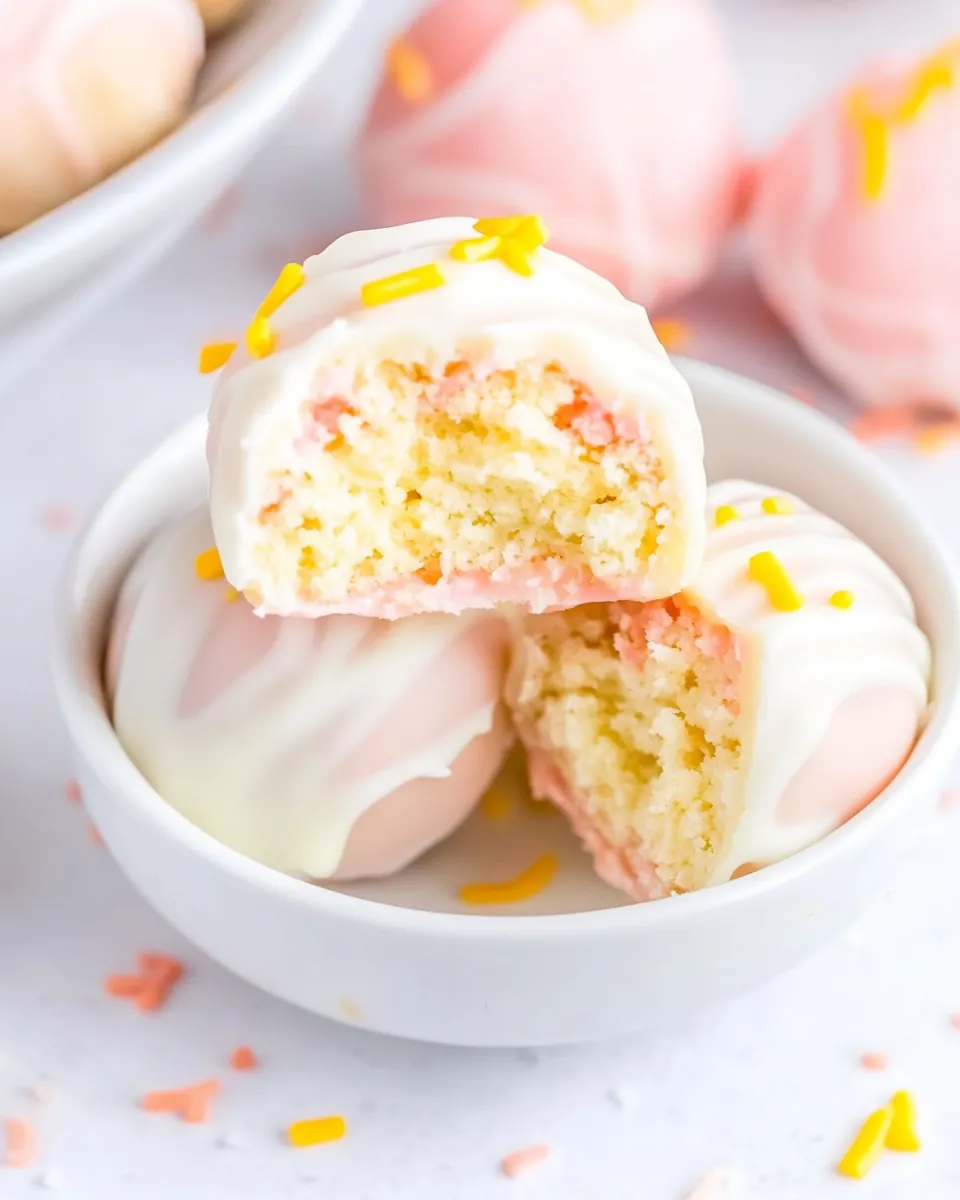
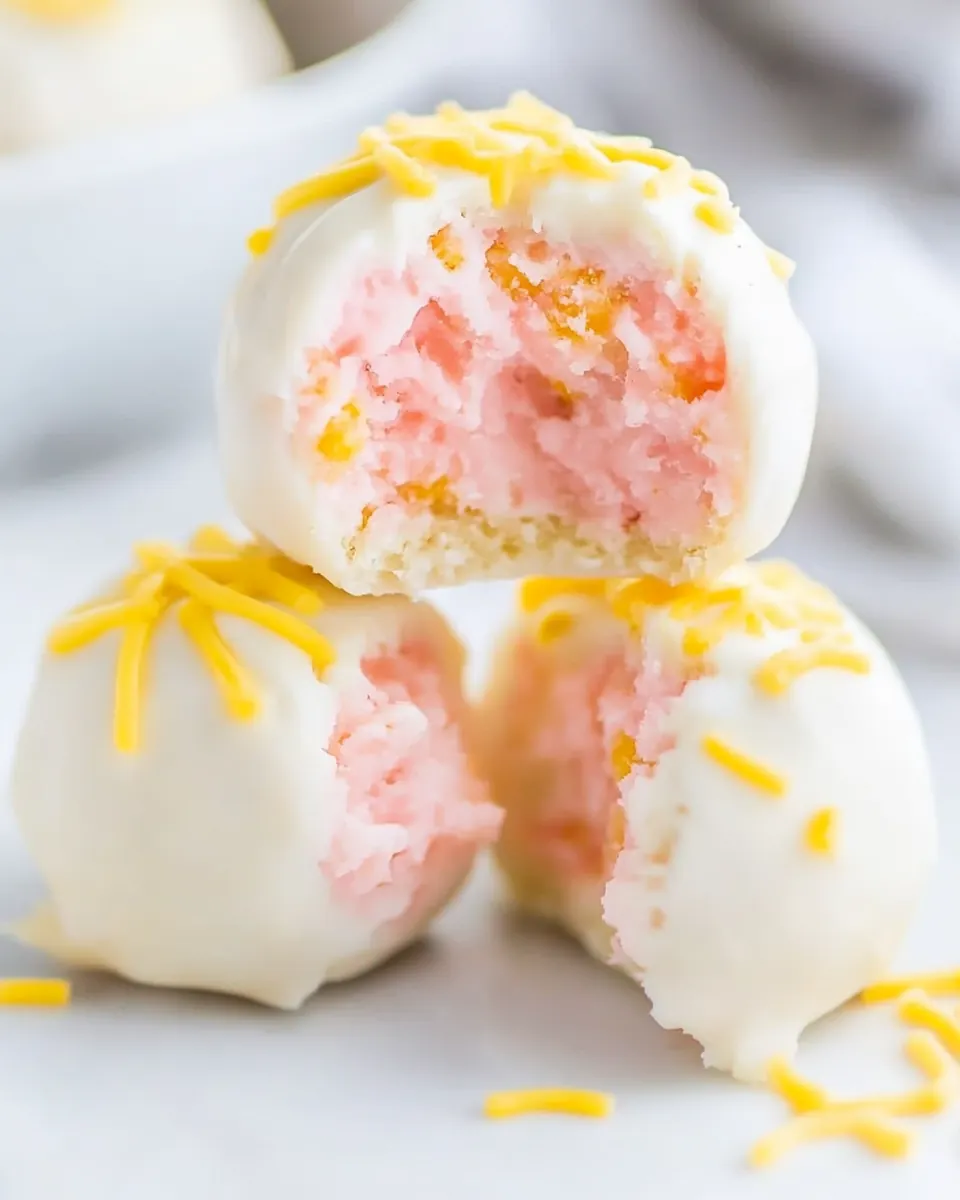
Strawberry Lemonade Truffles
Strawberry Lemonade Truffles started as a kitchen experiment on a sticky summer afternoon when I had a bag of Golden Oreos and an overripe packet of strawberry cream cheese daring me to get creative. I remember the bright burst of lemon juice against the soft, creamy strawberry cream cheese as if the recipe nudged me toward something playful and memorable. I wanted treats that felt like sunshine in a bite, and these little truffles delivered exactly that with a crunchy cookie base and a silky white chocolate coat.
That first batch disappeared faster than I could plate them, which taught me something simple about flavor balance. The interplay of crumbly golden Oreos and the tang from the lemon juice kept the sweetness of the white chocolate chips from becoming cloying. I tweaked the proportions over a couple of tries, adjusting the cream cheese amount and adding a touch of coconut oil to make the coating satiny. Each test felt like a small victory when friends reached for seconds.
Recipe Snapshot
35 mins
30 mins
5 mins
Medium
150 kcal
American
Keto, Gluten-Free
Desserts
Food processor, Microwave safe bowl, Parchment paper, Baking sheet, Fork
The Appeal of This Strawberry Lemonade Truffles
Bright fresh flavor contrast
I love how Strawberry Lemonade Truffles marry bright citrus with soft berry notes. The lemon zest and lemon juice cut through the creaminess of the strawberry cream cheese, so every bite tastes lively rather than overly sweet. When I make these, I always notice how the flavors pop on the palate, which is why they stand out at summer gatherings.
Textural play
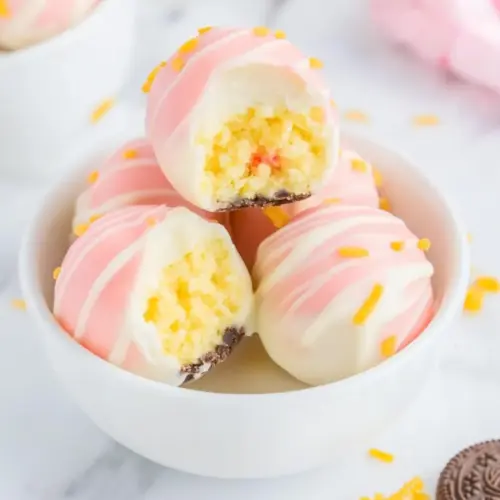
The texture is a big reason I keep returning to this recipe. The base made from crushed golden Oreos gives a gentle crunch and body, while the truffle center is soft and creamy. Coating them in melted white chocolate chips creates a crisp shell that snaps pleasingly, providing a proper candy experience. I find that mouthfeel keeps people coming back for more.
Simple technique, impressive results
What I enjoy most is how approachable these truffles are. You do not need professional equipment, and even without a food processor you can make the crumbs by hand, as I often do when I do not want to wash extra bowls. The method rewards careful attention to temperature when melting chocolate, and that makes the final finish look polished and bakery worthy.
Adaptable presentation
These truffles are easy to dress up. A drizzle of melted pink candy melts and a sprinkle of lemon zest turns them into charming treats for occasions like Valentine’s Day or summer parties. I like customizing the garnish depending on who I am serving them to, and the visual contrast always earns compliments.
Make ahead friendly
One of the reasons I recommend this recipe is how well it stores. You can freeze the truffles after shaping, then dip them later for fresh-coated results. I often prepare the centers in advance when I know friends are visiting, and it saves time without sacrificing flavor. The make ahead flexibility makes these truffles a go to for unexpected guests.
Ingredients You’ll Need for Strawberry Lemonade Truffles
These ingredients are deliberately simple and complementary. The crushed golden Oreos form a sturdy, flavorful base that pairs perfectly with the tang of lemon juice and the sweet, fruity strawberry cream cheese. The white chocolate chips and a little coconut oil create a smooth coating, while optional pink candy melts and extra lemon zest give the truffles a festive finish.
- 36 g golden Oreos 14.3 ounce package: Crush finely to create a sweet, crunchy base for the truffle centers; provide structure and a cookie-like texture when mixed with cream cheese and shaped into balls. Balance sweetness with a subtle vanilla note that complements the strawberry and lemon flavors in the recipe.
- 7.5 ounces strawberry cream cheese softened, you can use 7.5 to 8 ounces strawberry cream cheese: Soften thoroughly to allow smooth incorporation with crushed cookies, forming the creamy binding that shapes the truffle centers; contribute a pronounced strawberry flavor and creamy mouthfeel. Adjust amount slightly if using a different package size to maintain proper consistency for rolling.
- 3 tablespoons lemon zest garnish (optional): Zest finely and use sparingly as an optional garnish to add bright citrus aroma and a concentrated lemon oil burst on the finished truffles. Sprinkle just before serving to preserve freshness and visual appeal without overwhelming the strawberry notes.
- 3 tablespoons lemon juice juice from 1 1/2 large lemons: Juice freshly and measure to provide tart acidity that balances the sweetness from the cookies and white chocolate; incorporate into the cream cheese mixture or drizzle lightly for lemon brightness. Use juice from ripe lemons and strain if desired to avoid pulp in the smooth truffle centers.
- 11 12 ounces white chocolate chips 1 1/2 cups: Melt gently to form a silky coating or ganache component that binds and envelops the truffle centers; contribute sweetness and a creamy white chocolate flavor that pairs with strawberry and lemon. Temper or cool carefully to achieve the right dipping viscosity and a smooth finish.
- 1 tablespoon coconut oil: Melt with the white chocolate or use to thin coatings slightly, adding shine and a smoother texture to the chocolate shell; contribute a small amount of fat for better flow and setting. Use sparingly to avoid making the coating too soft at room temperature.
- 1 cup pink candy melts garnish (optional): Melt and use as an optional colorful coating or drizzle to finish the truffles, providing visual appeal and a sweet candy exterior; match color theme and add a festive pink hue. Temper or cool properly for a firm snap and to prevent bloom or streaking on the finished candies.
Cooking Method for Strawberry Lemonade Truffles
I like to approach the assembly like a relaxed afternoon project, with music and a spacious counter. Keep your tools ready, and remember that chilling is your friend for clean shapes and shiny coatings. Below are the steps from the recipe rewritten with sensory details and troubleshooting notes to guide you through each stage.
- Line a rimmed baking sheet with parchment paper.: The scent of clean parchment under bright kitchen light sets a calm tone, and laying down the paper prevents sticking and preserves the glossy underside of the truffles. This step matters because once the chocolate sets you want to lift the truffles easily without tearing the coating. A common mistake is skipping the parchment and then struggling to separate truffles from a hot tray, so prepare your sheet ahead of time.
- Place cookies in food processor and mix until cookies turn into fine crumbs. See notes if you don’t have a food processor.: As the cookies pulverize you will hear a steady mechanical hum and see the pieces collapse into a sand like mass with tiny flecks of filling. The fine crumb texture is essential because it helps the crumbs bind uniformly with the softened cream cheese, creating a smooth dough instead of a lumpy mixture. If you do not have a food processor, crush the cookies in a sturdy zip top bag with a rolling pin. Avoid over processing, which can heat the crumbs slightly and change their texture.
- Zest then juice the lemons. Add lemon juice, lemon zest and cream cheese to the cookie crumbs. Mix with a silicone spatula until a dough forms. Do not mix the mixture in the food processor as the cream cheese mixture can become too liquidy.: The citrus aroma will fill the kitchen as you zest and juice, bright and slightly floral. Folding the lemon juice , lemon zest , and softened strawberry cream cheese in with the crumbs by hand preserves the right consistency, and the spatula lets you feel when the dough is cohesive. The reason to avoid the food processor at this stage is that aggressive blending can warm the mixture and make it runny, which ruins the texture. If the mixture feels too wet after adding juice, chill briefly to help it firm up before shaping. A frequent pitfall here is using cream cheese that is not softened enough, which yields uneven mixing.
- Roll the lemon truffle dough balls, about one tablespoon per truffle. I like to use this cookie scoop set, for this recipe you'll need the small cookie scoop. Place each truffle on the parchment paper lined baking sheet so they are not touching. Freeze the truffles for at least 15 minutes.: As you roll the dough the surface will look satin smooth and slightly tacky, and using a small scoop keeps the truffles uniform so they set consistently. Setting them a little apart on the tray prevents the coatings from bonding if they touch. Freezing for at least 15 minutes firms the centers so they hold their shape when dipped, and it also helps the coating set quickly. Avoid making them too large because oversized truffles are harder to coat neatly and may require longer freezing time.
- Add the white chocolate and coconut oil (optional) to a heatproof bowl. Place the bowl in the microwave and heat for a minute at half power, then stir. Continue heating the white chocolate in thirty second increments until it forms a smooth white chocolate sauce.: When the white chocolate begins to melt, you will see glossy streaks form as you stir, and the aroma will be sweet and milky. Warming gently at half power prevents scorching, which produces a grainy texture and unpleasant burnt notes. The small addition of coconut oil loosens the chocolate and creates a mirror like finish, improving coverage. A common error is overheating the chocolate, which causes it to seize and become grainy, so err on the side of shorter bursts and frequent stirring.
- Remove truffles from the freezer. Place truffle balls into white chocolate one at a time to coat, using a fork so excess chocolate can drip off.: The moment you dip a cold truffle into the warm coating the surface will steam slightly and the chocolate will glide over the exterior, creating a thin shell. Using a fork helps excess chocolate drip back into the bowl and keeps the coating even. Immediately tapping the fork on the rim helps encourage drips to fall away, preventing puddling. Avoid leaving the truffles in the chocolate too long, as over exposure will melt the center and distort the shape.
- Place each white chocolate-coated ball on parchment paper so they are not touching each other.: Each coated truffle will glisten under your kitchen light and settle into a neat dome on the parchment. Spacing is important because it prevents adjacent truffles from fusing as the chocolate sets. The cooled coating will develop a pleasant snap as it hardens if the ambient temperature is cool enough. A common mistake is placing them too close together which leads to sticking and damaged finishes when separated.
- Melt the pink candy melts in the microwave for a minute at half power, then stir. Continue heating the pink candy melts in thirty-second increments until it forms a smooth pink chocolate sauce.: The pink candy melts will transform from solid chips into a glossy ribbon like sauce as you stir. Their scent is sugary and slightly vanilla like, and they are perfect for piping decorative lines. Keep the heat gentle because candy melts can seize if overheated. If the consistency becomes too thick, a whisper of neutral oil will loosen it, but add very sparingly to avoid thinning it too much.
- Drizzle the top of each truffle with the pink chocolate candy melts, then top with lemon zest immediately. Place the pan in the freezer for 15 minutes to help the chocolate to fully harden, then enjoy!: As you drizzle, the pink lines will set quickly against the firm white shell, creating a cheerful contrast. Sprinkling lemon zest right away ensures the oils adhere to the warm drizzle and release fragrance, enhancing both aroma and flavor. The final freeze for 15 minutes locks everything in and gives you a crisp bite. Avoid stacking trays in the freezer, which can mar the surface of the truffles, and allow them to rest in a single layer for best results.
Ways to Customize
These truffles are a fun canvas for small changes that make the recipe feel personal. Below I share proven variations and helpful tricks that keep the original flavor intact while letting you tailor texture and presentation. Each tip starts with a short bold phrase to make it easy to scan while you work.
- Swap the candy melts, try different colored candy melts for seasonal themes, they melt similarly and provide the same decorative benefits while letting you coordinate to holidays or parties.
- Use a different coating, substitute tempered white chocolate for a more professional snap, but tempering requires precise temperature control to maintain the shine and texture.
- Add a citrus twist, fold a pinch more lemon zest into the dough for an extra pop of brightness, tasting as you go to avoid overpowering the strawberry cream cheese.
- Adjust sweetness, if you prefer less sugary treats reduce the amount of white chocolate chips in the coating and rely more on a thin drizzle of candy melts for decoration.
- Try different cookie bases, although this recipe calls for golden Oreos, swapping to other sandwich cookies will alter the flavor profile, so choose accordingly and expect textural differences.
How to Enjoy Strawberry Lemonade Truffles
These truffles shine as small celebratory bites, and they transition nicely from casual to more formal settings. Here are ways I like to serve them and when they work best.
- Party platter, arrange Strawberry Lemonade Truffles on a platter with contrasting garnishes like extra lemon zest for bright visuals, perfect for baby showers and summer gatherings.
- Dessert table, include them among small pastries and chocolates at a dessert table, they pair well with light fruit tarts because of their concentrated flavors and small portion size.
- Gift boxes, pack truffles in small boxes lined with parchment paper, they make thoughtful edible gifts for Valentine’s Day or hostess presents when tied with a ribbon.
- Storage tips, keep them refrigerated for up to two weeks or frozen for up to three months, and thaw in the refrigerator overnight before serving for the best texture and flavor.
- Seasonal pairing, these truffles are ideal for warm weather because the citrus notes feel refreshing, and they also brighten winter holidays when paired with festive sprinkles.
FAQ
Conclusion
What makes these truffles special is their bright, balanced combination of creamy strawberry and zesty lemon, all built on a buttery cookie base and wrapped in a glossy white chocolate shell. Give them a try because they are approachable to make, visually charming, and perfect for sharing at summer gatherings or for a festive Valentine’s Day treat. I hope you enjoy the playful contrast of textures and flavors as much as I do, and that these little bites become a quick favorite for gifting and entertaining.
Strawberry Lemonade Truffles
Equipment
- Food Processor
- Microwave-safe Bowl
- Parchment Paper
- Baking Sheet
- Fork
Ingredients
- 36 g golden Oreos 14.3 ounce package Crush finely to create a sweet, crunchy base for the truffle centers; provide structure and a cookie-like texture when mixed with cream cheese and shaped into balls. Balance sweetness with a subtle vanilla note that complements the strawberry and lemon flavors in the recipe.
- 7.5 ounces strawberry cream cheese softened, you can use 7.5 to 8 ounces strawberry cream cheese Soften thoroughly to allow smooth incorporation with crushed cookies, forming the creamy binding that shapes the truffle centers; contribute a pronounced strawberry flavor and creamy mouthfeel. Adjust amount slightly if using a different package size to maintain proper consistency for rolling.
- 3 tablespoons lemon zest optional garnish Zest finely and use sparingly as an optional garnish to add bright citrus aroma and a concentrated lemon oil burst on the finished truffles. Sprinkle just before serving to preserve freshness and visual appeal without overwhelming the strawberry notes.
- 3 tablespoons lemon juice juice from 1 1/2 large lemons Juice freshly and measure to provide tart acidity that balances the sweetness from the cookies and white chocolate; incorporate into the cream cheese mixture or drizzle lightly for lemon brightness. Use juice from ripe lemons and strain if desired to avoid pulp in the smooth truffle centers.
- 11 -12 ounces white chocolate chips 1 1/2 cups Melt gently to form a silky coating or ganache component that binds and envelops the truffle centers; contribute sweetness and a creamy white chocolate flavor that pairs with strawberry and lemon. Temper or cool carefully to achieve the right dipping viscosity and a smooth finish.
- 1 tablespoon coconut oil Melt with the white chocolate or use to thin coatings slightly, adding shine and a smoother texture to the chocolate shell; contribute a small amount of fat for better flow and setting. Use sparingly to avoid making the coating too soft at room temperature.
- 1 cup pink candy melts optional garnish Melt and use as an optional colorful coating or drizzle to finish the truffles, providing visual appeal and a sweet candy exterior; match color theme and add a festive pink hue. Temper or cool properly for a firm snap and to prevent bloom or streaking on the finished candies.
Instructions
- Line a rimmed baking sheet with parchment paper.: The scent of clean parchment under bright kitchen light sets a calm tone, and laying down the paper prevents sticking and preserves the glossy underside of the truffles. This step matters because once the chocolate sets you want to lift the truffles easily without tearing the coating. A common mistake is skipping the parchment and then struggling to separate truffles from a hot tray, so prepare your sheet ahead of time.
- Place cookies in food processor and mix until cookies turn into fine crumbs. See notes if you don’t have a food processor.: As the cookies pulverize you will hear a steady mechanical hum and see the pieces collapse into a sand like mass with tiny flecks of filling. The fine crumb texture is essential because it helps the crumbs bind uniformly with the softened cream cheese, creating a smooth dough instead of a lumpy mixture. If you do not have a food processor, crush the cookies in a sturdy zip top bag with a rolling pin. Avoid over processing, which can heat the crumbs slightly and change their texture.
- Zest then juice the lemons. Add lemon juice, lemon zest and cream cheese to the cookie crumbs. Mix with a silicone spatula until a dough forms. Do not mix the mixture in the food processor as the cream cheese mixture can become too liquidy.: The citrus aroma will fill the kitchen as you zest and juice, bright and slightly floral. Folding the lemon juice , lemon zest , and softened strawberry cream cheese in with the crumbs by hand preserves the right consistency, and the spatula lets you feel when the dough is cohesive. The reason to avoid the food processor at this stage is that aggressive blending can warm the mixture and make it runny, which ruins the texture. If the mixture feels too wet after adding juice, chill briefly to help it firm up before shaping. A frequent pitfall here is using cream cheese that is not softened enough, which yields uneven mixing.
- Roll the lemon truffle dough balls, about one tablespoon per truffle. I like to use this cookie scoop set, for this recipe you'll need the small cookie scoop. Place each truffle on the parchment paper lined baking sheet so they are not touching. Freeze the truffles for at least 15 minutes.: As you roll the dough the surface will look satin smooth and slightly tacky, and using a small scoop keeps the truffles uniform so they set consistently. Setting them a little apart on the tray prevents the coatings from bonding if they touch. Freezing for at least 15 minutes firms the centers so they hold their shape when dipped, and it also helps the coating set quickly. Avoid making them too large because oversized truffles are harder to coat neatly and may require longer freezing time.
- Add the white chocolate and coconut oil (optional) to a heatproof bowl. Place the bowl in the microwave and heat for a minute at half power, then stir. Continue heating the white chocolate in thirty second increments until it forms a smooth white chocolate sauce.: When the white chocolate begins to melt, you will see glossy streaks form as you stir, and the aroma will be sweet and milky. Warming gently at half power prevents scorching, which produces a grainy texture and unpleasant burnt notes. The small addition of coconut oil loosens the chocolate and creates a mirror like finish, improving coverage. A common error is overheating the chocolate, which causes it to seize and become grainy, so err on the side of shorter bursts and frequent stirring.
- Remove truffles from the freezer. Place truffle balls into white chocolate one at a time to coat, using a fork so excess chocolate can drip off.: The moment you dip a cold truffle into the warm coating the surface will steam slightly and the chocolate will glide over the exterior, creating a thin shell. Using a fork helps excess chocolate drip back into the bowl and keeps the coating even. Immediately tapping the fork on the rim helps encourage drips to fall away, preventing puddling. Avoid leaving the truffles in the chocolate too long, as over exposure will melt the center and distort the shape.
- Place each white chocolate-coated ball on parchment paper so they are not touching each other.: Each coated truffle will glisten under your kitchen light and settle into a neat dome on the parchment. Spacing is important because it prevents adjacent truffles from fusing as the chocolate sets. The cooled coating will develop a pleasant snap as it hardens if the ambient temperature is cool enough. A common mistake is placing them too close together which leads to sticking and damaged finishes when separated.
- Melt the pink candy melts in the microwave for a minute at half power, then stir. Continue heating the pink candy melts in thirty-second increments until it forms a smooth pink chocolate sauce.: The pink candy melts will transform from solid chips into a glossy ribbon like sauce as you stir. Their scent is sugary and slightly vanilla like, and they are perfect for piping decorative lines. Keep the heat gentle because candy melts can seize if overheated. If the consistency becomes too thick, a whisper of neutral oil will loosen it, but add very sparingly to avoid thinning it too much.
- Drizzle the top of each truffle with the pink chocolate candy melts, then top with lemon zest immediately. Place the pan in the freezer for 15 minutes to help the chocolate to fully harden, then enjoy!: As you drizzle, the pink lines will set quickly against the firm white shell, creating a cheerful contrast. Sprinkling lemon zest right away ensures the oils adhere to the warm drizzle and release fragrance, enhancing both aroma and flavor. The final freeze for 15 minutes locks everything in and gives you a crisp bite. Avoid stacking trays in the freezer, which can mar the surface of the truffles, and allow them to rest in a single layer for best results.
Notes
- Swap the candy melts, try different colored candy melts for seasonal themes, they melt similarly and provide the same decorative benefits while letting you coordinate to holidays or parties.
- Use a different coating, substitute tempered white chocolate for a more professional snap, but tempering requires precise temperature control to maintain the shine and texture.
- Add a citrus twist, fold a pinch more lemon zest into the dough for an extra pop of brightness, tasting as you go to avoid overpowering the strawberry cream cheese.
- Adjust sweetness, if you prefer less sugary treats reduce the amount of white chocolate chips in the coating and rely more on a thin drizzle of candy melts for decoration.
- Try different cookie bases, although this recipe calls for golden Oreos, swapping to other sandwich cookies will alter the flavor profile, so choose accordingly and expect textural differences.