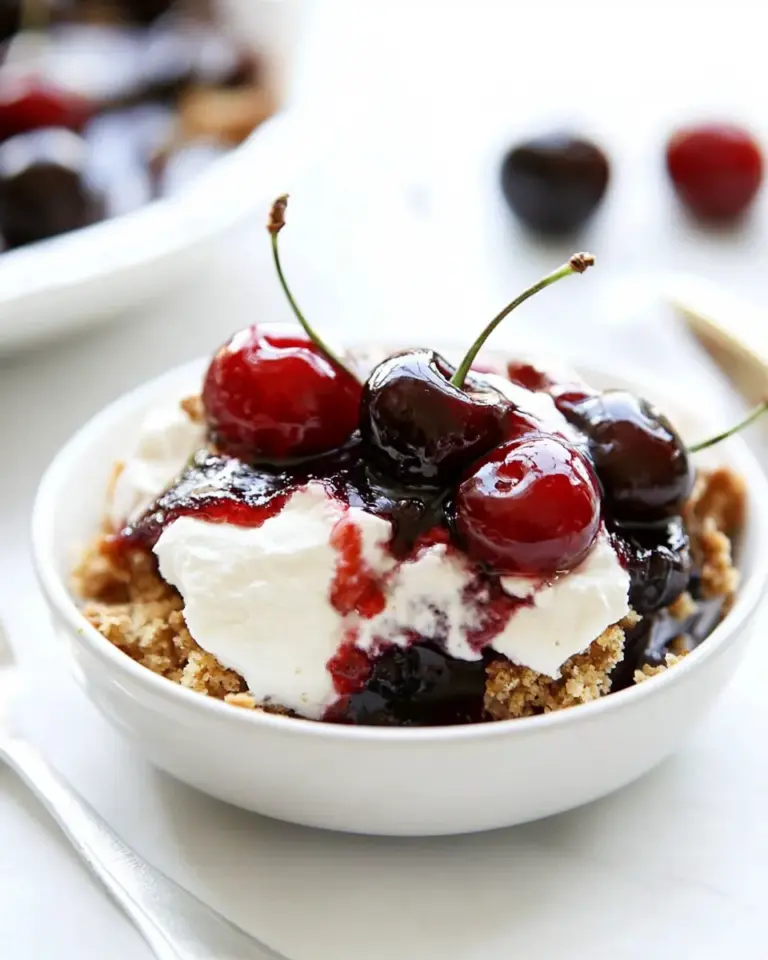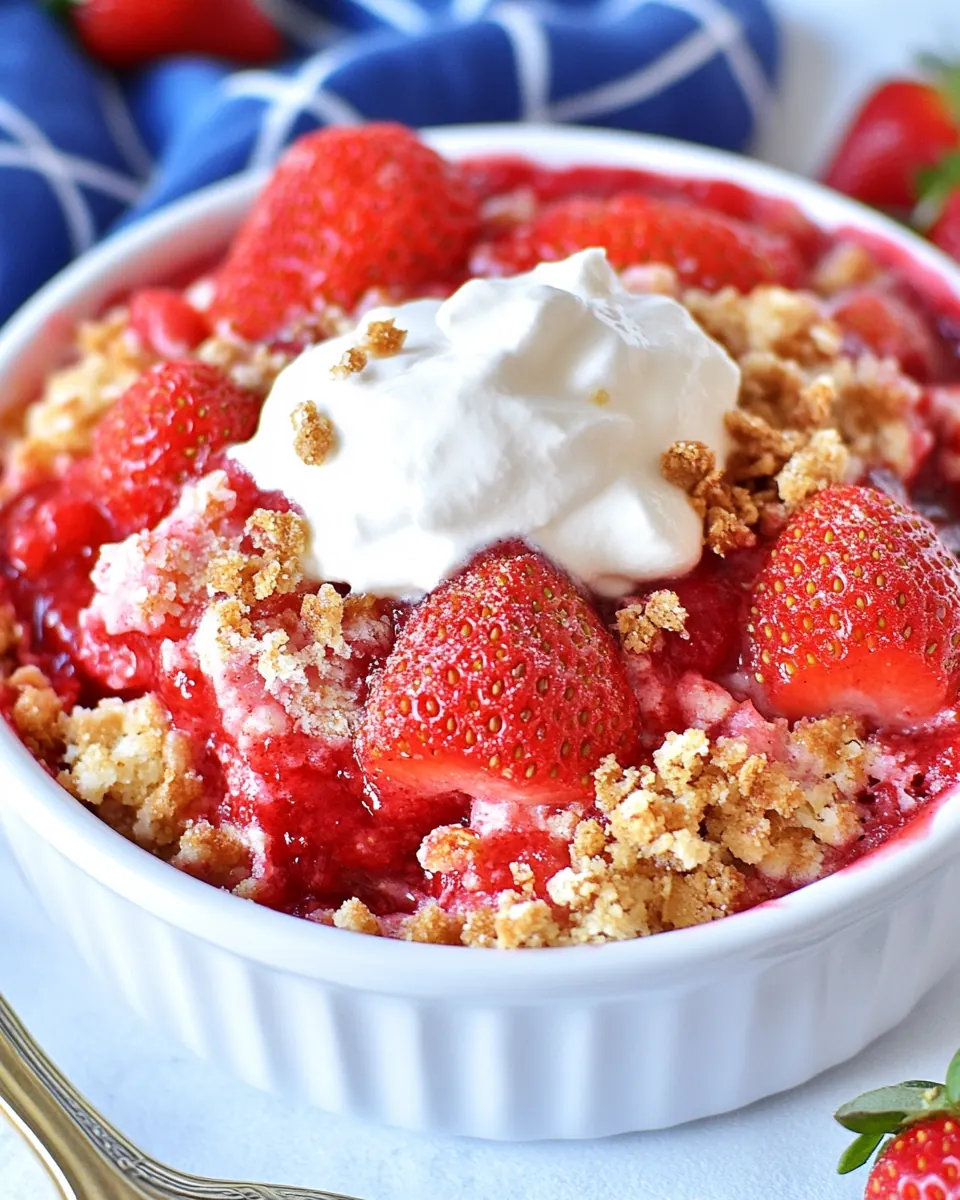
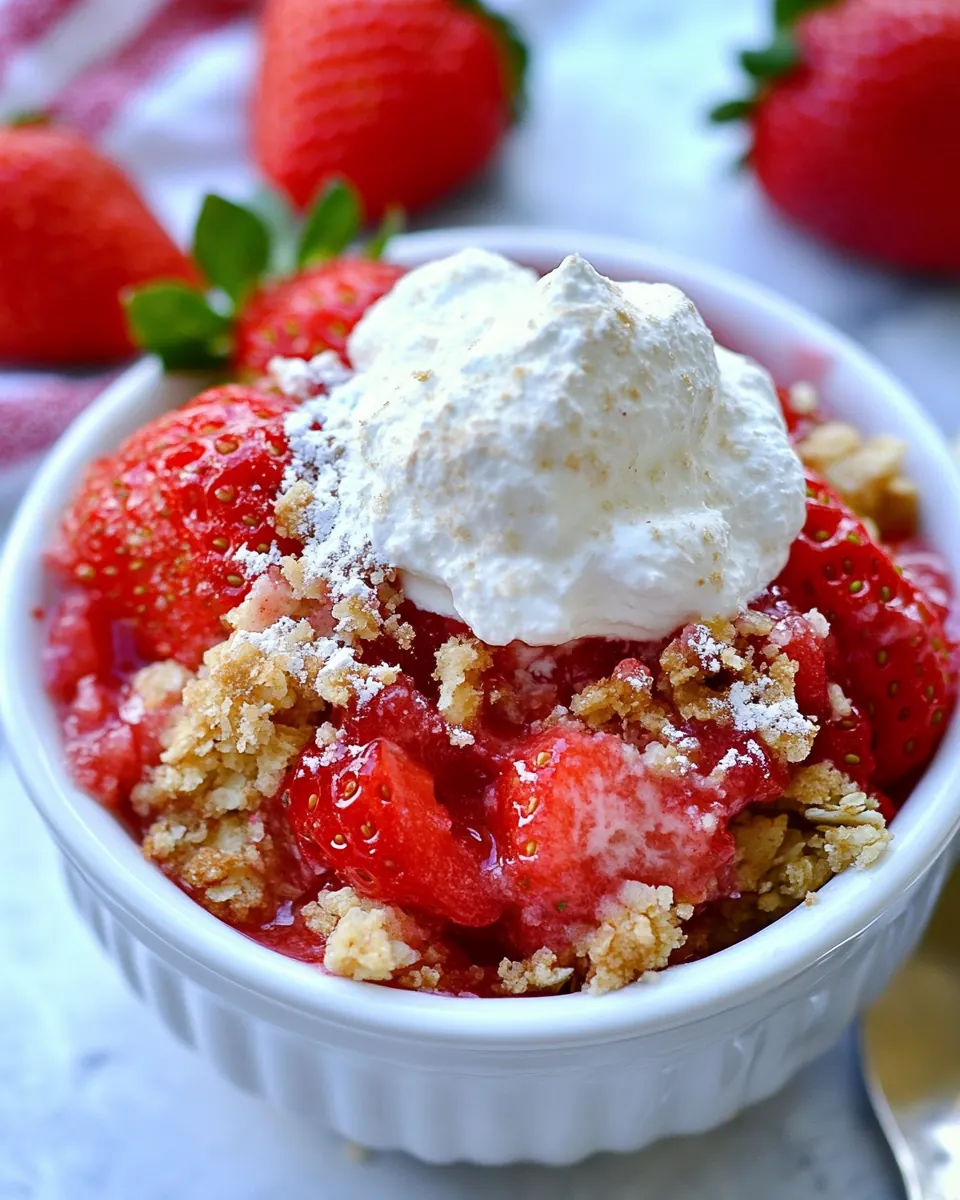
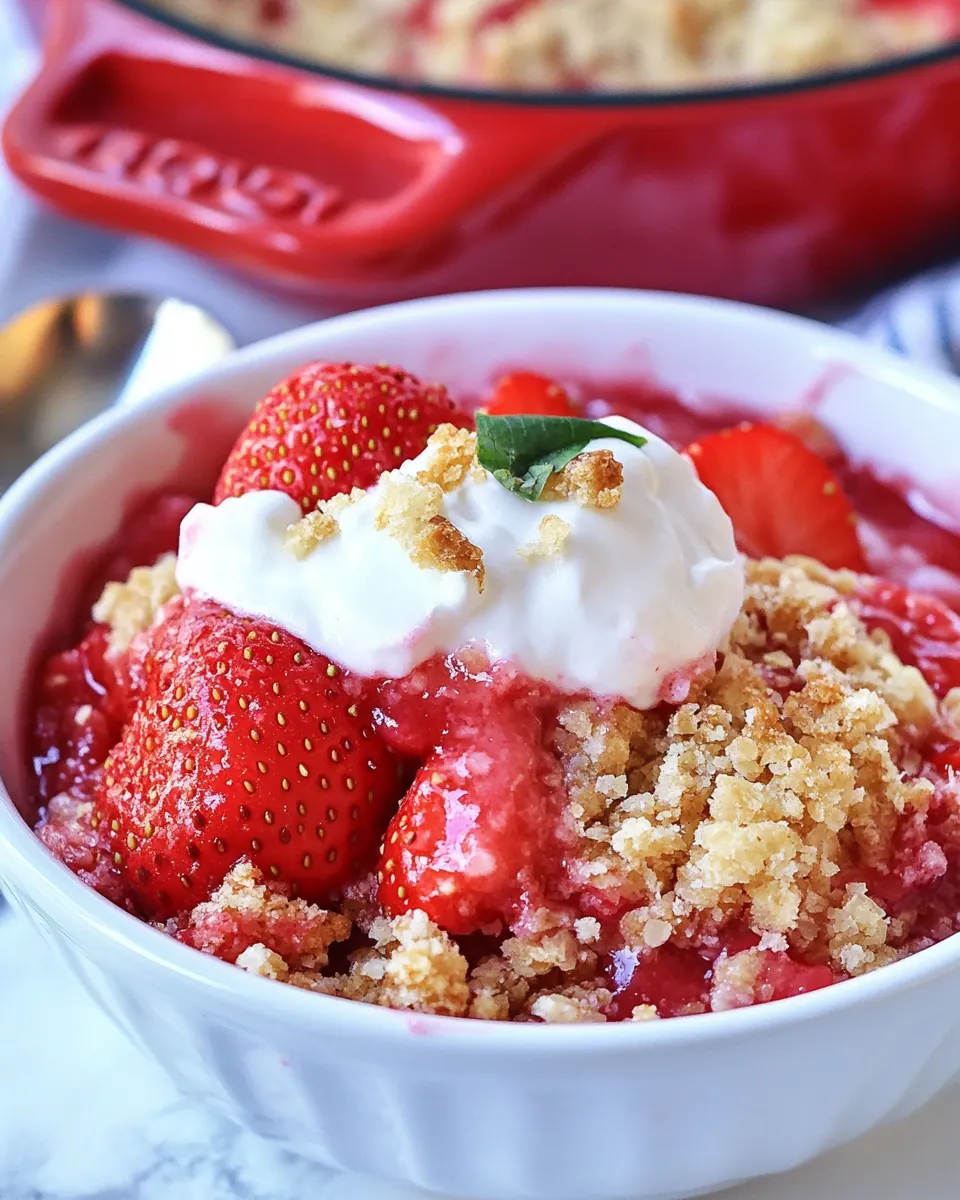
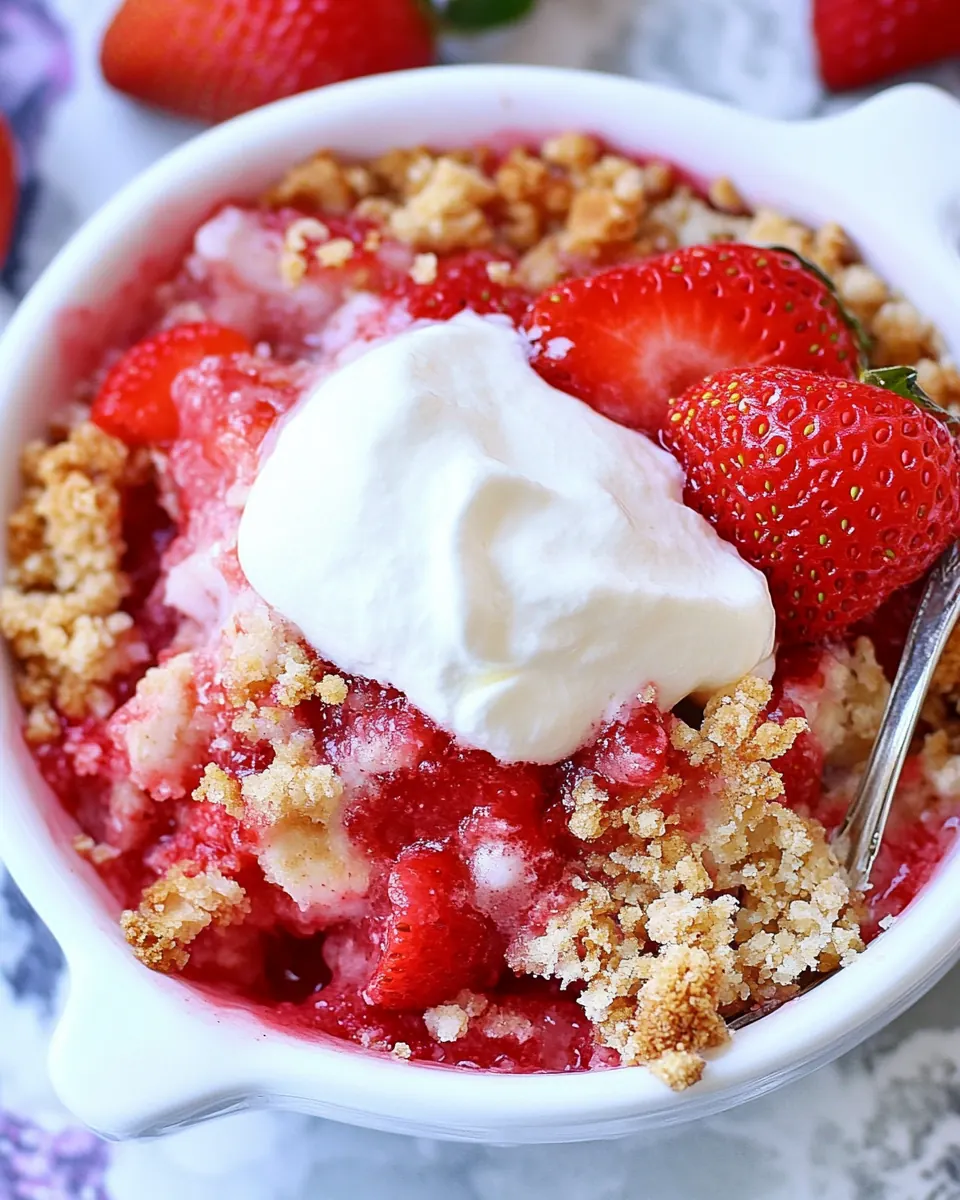
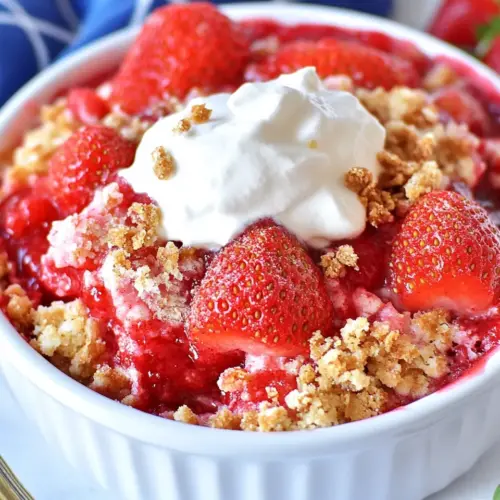
Strawberry Crisp
Strawberry Crisp is the kind of dessert I reach for when late spring berries are loud and joyful at the farmers market.
One weekend I ended up with a crate of strawberries after I lingered too long chatting with the grower, and I wanted something that felt like summer but was effortless enough for a weeknight. I tossed halved, juicy strawberries with a touch of lemon juice, vanilla extract, and a whisper of granulated sugar, then hid that bubbling fruit under a warm, toasty blanket of old fashioned oats and melted unsalted butter. The result was comforting, bright, and impossibly simple to share.
I love that Strawberry Crisp needs only pantry staples and a short baking window, yet serves up contrast in texture and temperature. The berries become syrupy and perfume the kitchen with citrus and vanilla, while the topping turns golden and crisp. I serve it warm with a scoop of cold Vanilla ice cream because the contrast never gets old for me. If you are bringing dessert to a casual gathering, this is one of those recipes that feels homemade without demanding your full evening.
Recipe Snapshot
50 mins
20 mins
30 mins
Medium
250 kcal
American
Gluten-Free, Low FODMAP
Desserts
9 1/2-inch deep dish pie plate or similar baking dish, Large mixing bowls, Fork, Oven
The Magic of This Strawberry Crisp
Bright seasonal flavor
I love how Strawberry Crisp showcases strawberries without masking them. The simple filling keeps the fruit front and center, so you taste sunny, fresh berry flavor with every spoonful. When the berries break down, they create a naturally sweet sauce that needs just a hint of sugar and lemon zest to sing.
Easy, forgiving technique
We can all appreciate a recipe that tolerates a little improvisation. The topping for Strawberry Crisp mixes in a bowl in moments, and whether you press it together or sprinkle it loosely, it still becomes golden and crunchy. That forgiving nature means you can make it for unexpected guests and still look composed.
Texture play that feels luxe
The contrast between the bubbling, tender strawberries and the nutty, browned old fashioned oats topping is irresistible. I love the way the topping crackles and gives way to juicy berry pockets, and adding a scoop of cold Vanilla ice cream creates a hot and cold sensation that always elicits a smile.
Minimal equipment and fuss
There is no delicate tempering, no exacting dough to roll, just a baking dish and a bowl. That simplicity makes Strawberry Crisp perfect for busy weeknights, last minute potlucks, or casual family dinners. You get a dessert that feels special without a special trip to the store.
Customizable and crowd friendly
I often tweak the sugar level or lemon brightness depending on how sweet the strawberries are, and friends appreciate that you can scale this up for more people. It travels well, reheats nicely, and is one of those desserts people request on repeat.
What to Buy for Strawberry Crisp
This topping and filling lineup is focused on balance. The key players are juicy strawberries for brightness, a little lemon juice and lemon zest for acidity, and a crunchy oat based topping built from old fashioned oats, two kinds of flour, and butter to create texture and richness. The sugars help the fruit macerate and the topping caramelize, while a pinch of salt and warm ground cinnamon lift the flavors.
- 2 lbs fresh strawberries halved: Halved to release juices and provide a tender, fruity base that softens during baking while offering bright strawberry flavor throughout the crisp.
- 2 tablespoons lemon juice: Added to brighten the fruit filling and balance sweetness by providing acidity that helps macerate the strawberries and enhance overall tartness.
- 1 teaspoon vanilla extract: Stirred into the filling to deepen flavor complexity and offer a warm, familiar aroma that complements the fruit without overpowering it.
- 1/4 cup granulated sugar: Sprinkled into the strawberry mixture to sweeten and help draw out juices, contributing to a syrupy base as the fruit bakes.
- 1/4 cup all-purpose flour: Combined with the fruit to slightly thicken the filling, absorbing excess liquid so the crisp sets with a pleasant texture rather than becoming runny.
- 1 cup old fashioned oats: Mixed into the topping to provide hearty texture and chew, adding rustic body and nutty flavor that contrasts with the soft berries.
- 2/3 cup all-purpose flour: Incorporated into the topping to create structure and bind oats and sugars, producing a crumbly, golden crust when baked.
- 1/3 cup brown sugar: Added to the topping to provide deep, caramel-like sweetness and moisture that enhances the crisp’s rich, toasty notes.
- 1/4 cup granulated sugar: Used in the topping to boost overall sweetness and help caramelize the surface for a pleasing, lightly crisp finish.
- 1/4 teaspoons salt: Sprinkled into the topping to sharpen flavors and balance sweetness, ensuring the crust tastes well-rounded rather than overly sweet.
- 1/4 teaspoon ground cinnamon: Mixed into the topping to add warm, fragrant spice that complements the fruit and enhances the baked aroma of the dessert.
- 1 tablespoon lemon zest: Zested over the fruit to infuse bright citrus oils that elevate the strawberry flavor and add a zesty, fragrant lift to the filling.
- 1/2 cup unsalted butter melted: Melted and blended into the topping to bind dry ingredients, encourage browning, and produce a rich, buttery mouthfeel in the crisp.
- Vanilla ice cream: Served alongside warm portions to provide a cool, creamy contrast that melts into the fruit and topping, completing the dessert experience.
Recipe Steps for Strawberry Crisp
This is a relaxed, hands on recipe that moves quickly once your strawberries are prepped. Read each step before you begin so you can have bowls and a baking dish ready, and feel free to taste and adjust as you go.
- Preheat oven to 350°F.: As the oven warms, notice the quiet hum and the steady climb of temperature that will coax the juices from strawberries and brown the topping. Preheating ensures even baking and correct timing, so do not skip this. A common slip is starting with a cold oven which can lead to soggy topping and uneven bubbling, so wait until the oven reaches the full temperature.
- Grease a 9 1/2-inch deep dish pie plate or a similar-sized baking dish. Set aside.: The act of greasing the dish prevents sticking and helps the browned edges release cleanly. Rub a little softened unsalted butter or use a neutral bake spray, focusing on corners for easy serving later. If you skip greasing, the fruit juices can glue to the pan and make serving difficult, so be thorough.
- In a large bowl, combine all of the filling ingredients and stir gently. Dump the mixture into the prepared baking dish and distribute it evenly.: You will see strawberries shimmer as the granulated sugar and lemon juice mingle, and the vanilla extract scents the mixture. Stirring gently prevents bruising the berries while ensuring the small amount of all purpose flour disperses evenly to thicken the filling as it bakes. A common mistake is overmixing which can pulverize berries, resulting in a too thin sauce, so be gentle and even when spreading in the dish.
- In a large bowl, combine oats, flour, both sugars, salt, cinnamon, and lemon zest. Pour melted butter on top and stir with a fork until well combined.: The dry ingredients should look sandy before the butter arrives; once the melted unsalted butter hits the bowl, steam and a buttery aroma will rise and the mixture will clump into small clusters. These clumps are what bake into crisp, golden pockets. Stirring until the oats are coated ensures even browning. If you overwork the mixture you can dissolve the sugar too much or make it soggy, so stop as soon as clusters form.
- Sprinkle the topping over the strawberry mixture.: As you scatter the oat topping, notice how it sits atop the berries, creating islands that will brown at different rates, producing variation in texture. Drop larger clumps for crunch and fine crumbs for a delicate finish. Pressing the topping down will create a denser crust, while leaving it loose yields a crumbly texture. A mistake is piling too thin a layer which can burn quickly, so aim for even coverage.
- Bake for 30-40 minutes or until the fruit is bubbling and juicy and the topping is light golden brown.: During baking you will hear tiny pops as juices bubble and see steam escaping, and the topping will change color from pale to golden, smelling nutty and caramelized. These visual and olfactory cues tell you the dish is ready. Avoid underbaking which leaves the oats raw, or overbaking which can dry out the fruit and toughen the topping. If the top is browning too fast, tent with foil for the final minutes to protect it while the filling finishes bubbling.
- Cool slightly, and serve warm with vanilla ice cream.: Letting the crisp rest for a short time allows the filling to set so you can spoon tidy portions, while still warm enough to melt a scoop of Vanilla ice cream . The aroma will be rich with toasted oats, cinnamon, and lemon, and the contrast between hot fruit and cold ice cream is part of the magic. Serving it piping hot can cause the ice cream to melt too quickly, so wait a modest five to ten minutes for best texture.
How to Switch It Up
There are many small changes you can make to nudge this crisp toward your taste or the season. Below are practical, tested options that keep the core method intact while offering variety in texture, sweetness, and presentation.
- Less sugar for tart berries Reduce the granulated sugar in the filling by one to two tablespoons if your strawberries are especially sweet, which preserves bright berry flavor without cloying sweetness.
- More crunch Stir in a handful of chopped nuts into the topping with the old fashioned oats for an added toasty crunch and deeper mouthfeel, taking care not to overpower the fruit.
- Extra lemon brightness Add an extra half teaspoon of lemon zest to the filling if you want more citrus lift, which enhances the berry aroma and cuts through richness.
- Bigger clumps Press some of the oat topping into handful clumps before baking to create distinct crunchy islands that contrast with tender crumbs.
- Make it ahead Assemble the crisp through the topping stage and refrigerate for a few hours before baking; allow an extra five to ten minutes in the oven if starting cold from the fridge.
- Serve warmed Reheat individual portions in a 350°F oven for 8 to 10 minutes to revive crispness and gently warm the filling before adding a scoop of Vanilla ice cream.
What to Pair With Strawberry Crisp
Strawberry Crisp is versatile for casual gatherings and quiet evenings alike. The warm fruit and oat topping pairs beautifully with cold creamy elements and light beverages, and it can fit into dessert spreads, brunch menus, or seasonal picnics.
- Classic accompaniment Serve with a generous scoop of Vanilla ice cream to add creaminess and temperature contrast that enhances both textures and flavors.
- Coffee and tea A cup of medium roast coffee or a fragrant green tea complements the crisp, the former matching caramel notes, the latter refreshing the palate between bites.
- Occasions This recipe is ideal for spring gatherings, casual dinner parties, or a relaxed holiday dessert when you want something approachable and crowd pleasing.
- Leftover storage Cool completely, then cover and refrigerate for up to three days. Reheat in a 350°F oven to revive the topping before serving.
- Seasonal pairings In spring and early summer, pair with light salads and grilled fruit for a menu that keeps things bright and simple.
FAQ
Conclusion
Strawberry Crisp shines because it pairs bright, juicy strawberries with a buttery, oat based topping that is both quick and comforting. It is the kind of recipe that feels special while staying forgiving and approachable, perfect for spring gatherings or a simple family dessert. Try it when berries are in season for the best flavor, and remember that small adjustments to sugar and zest let you fine tune sweetness and brightness. I hope you enjoy making it as much as I do, and that it becomes one of your go to desserts whenever fresh berries are abundant.
Strawberry Crisp
Equipment
- 9 1/2-inch deep dish pie plate or similar baking dish
- Large mixing bowls
- Fork
- Oven
Ingredients
- 2 lbs fresh strawberries halved Halved to release juices and provide a tender, fruity base that softens during baking while offering bright strawberry flavor throughout the crisp.
- 2 tablespoons lemon juice Added to brighten the fruit filling and balance sweetness by providing acidity that helps macerate the strawberries and enhance overall tartness.
- 1 teaspoon vanilla extract Stirred into the filling to deepen flavor complexity and offer a warm, familiar aroma that complements the fruit without overpowering it.
- 1/4 cup granulated sugar Sprinkled into the strawberry mixture to sweeten and help draw out juices, contributing to a syrupy base as the fruit bakes.
- 1/4 cup all-purpose flour Combined with the fruit to slightly thicken the filling, absorbing excess liquid so the crisp sets with a pleasant texture rather than becoming runny.
- 1 cup old fashioned oats Mixed into the topping to provide hearty texture and chew, adding rustic body and nutty flavor that contrasts with the soft berries.
- 2/3 cup all-purpose flour Incorporated into the topping to create structure and bind oats and sugars, producing a crumbly, golden crust when baked.
- 1/3 cup brown sugar Added to the topping to provide deep, caramel-like sweetness and moisture that enhances the crisp’s rich, toasty notes.
- 1/4 cup granulated sugar Used in the topping to boost overall sweetness and help caramelize the surface for a pleasing, lightly crisp finish.
- 1/4 teaspoons salt Sprinkled into the topping to sharpen flavors and balance sweetness, ensuring the crust tastes well-rounded rather than overly sweet.
- 1/4 teaspoon ground cinnamon Mixed into the topping to add warm, fragrant spice that complements the fruit and enhances the baked aroma of the dessert.
- 1 tablespoon lemon zest Zested over the fruit to infuse bright citrus oils that elevate the strawberry flavor and add a zesty, fragrant lift to the filling.
- 1/2 cup unsalted butter melted Melted and blended into the topping to bind dry ingredients, encourage browning, and produce a rich, buttery mouthfeel in the crisp.
- Vanilla ice cream Served alongside warm portions to provide a cool, creamy contrast that melts into the fruit and topping, completing the dessert experience.
Instructions
- Preheat oven to 350°F.: As the oven warms, notice the quiet hum and the steady climb of temperature that will coax the juices from strawberries and brown the topping. Preheating ensures even baking and correct timing, so do not skip this. A common slip is starting with a cold oven which can lead to soggy topping and uneven bubbling, so wait until the oven reaches the full temperature.
- Grease a 9 1/2-inch deep dish pie plate or a similar-sized baking dish. Set aside.: The act of greasing the dish prevents sticking and helps the browned edges release cleanly. Rub a little softened unsalted butter or use a neutral bake spray, focusing on corners for easy serving later. If you skip greasing, the fruit juices can glue to the pan and make serving difficult, so be thorough.
- In a large bowl, combine all of the filling ingredients and stir gently. Dump the mixture into the prepared baking dish and distribute it evenly.: You will see strawberries shimmer as the granulated sugar and lemon juice mingle, and the vanilla extract scents the mixture. Stirring gently prevents bruising the berries while ensuring the small amount of all purpose flour disperses evenly to thicken the filling as it bakes. A common mistake is overmixing which can pulverize berries, resulting in a too thin sauce, so be gentle and even when spreading in the dish.
- In a large bowl, combine oats, flour, both sugars, salt, cinnamon, and lemon zest. Pour melted butter on top and stir with a fork until well combined.: The dry ingredients should look sandy before the butter arrives; once the melted unsalted butter hits the bowl, steam and a buttery aroma will rise and the mixture will clump into small clusters. These clumps are what bake into crisp, golden pockets. Stirring until the oats are coated ensures even browning. If you overwork the mixture you can dissolve the sugar too much or make it soggy, so stop as soon as clusters form.
- Sprinkle the topping over the strawberry mixture.: As you scatter the oat topping, notice how it sits atop the berries, creating islands that will brown at different rates, producing variation in texture. Drop larger clumps for crunch and fine crumbs for a delicate finish. Pressing the topping down will create a denser crust, while leaving it loose yields a crumbly texture. A mistake is piling too thin a layer which can burn quickly, so aim for even coverage.
- Bake for 30-40 minutes or until the fruit is bubbling and juicy and the topping is light golden brown.: During baking you will hear tiny pops as juices bubble and see steam escaping, and the topping will change color from pale to golden, smelling nutty and caramelized. These visual and olfactory cues tell you the dish is ready. Avoid underbaking which leaves the oats raw, or overbaking which can dry out the fruit and toughen the topping. If the top is browning too fast, tent with foil for the final minutes to protect it while the filling finishes bubbling.
- Cool slightly, and serve warm with vanilla ice cream.: Letting the crisp rest for a short time allows the filling to set so you can spoon tidy portions, while still warm enough to melt a scoop of Vanilla ice cream . The aroma will be rich with toasted oats, cinnamon, and lemon, and the contrast between hot fruit and cold ice cream is part of the magic. Serving it piping hot can cause the ice cream to melt too quickly, so wait a modest five to ten minutes for best texture.
Notes
- Less sugar for tart berries Reduce the granulated sugar in the filling by one to two tablespoons if your strawberries are especially sweet, which preserves bright berry flavor without cloying sweetness.
- More crunch Stir in a handful of chopped nuts into the topping with the old fashioned oats for an added toasty crunch and deeper mouthfeel, taking care not to overpower the fruit.
- Extra lemon brightness Add an extra half teaspoon of lemon zest to the filling if you want more citrus lift, which enhances the berry aroma and cuts through richness.
- Bigger clumps Press some of the oat topping into handful clumps before baking to create distinct crunchy islands that contrast with tender crumbs.
- Make it ahead Assemble the crisp through the topping stage and refrigerate for a few hours before baking; allow an extra five to ten minutes in the oven if starting cold from the fridge.
- Serve warmed Reheat individual portions in a 350°F oven for 8 to 10 minutes to revive crispness and gently warm the filling before adding a scoop of Vanilla ice cream.