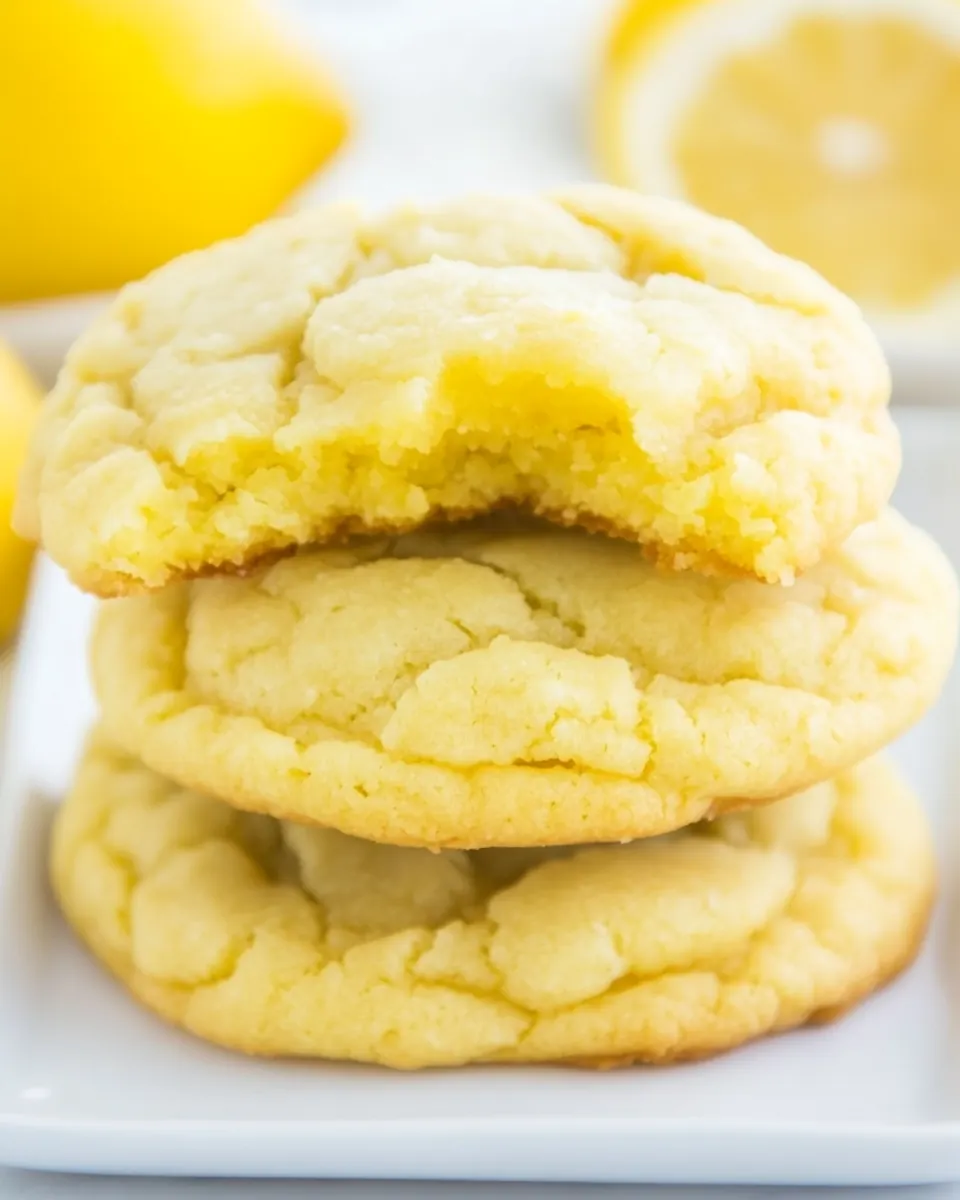
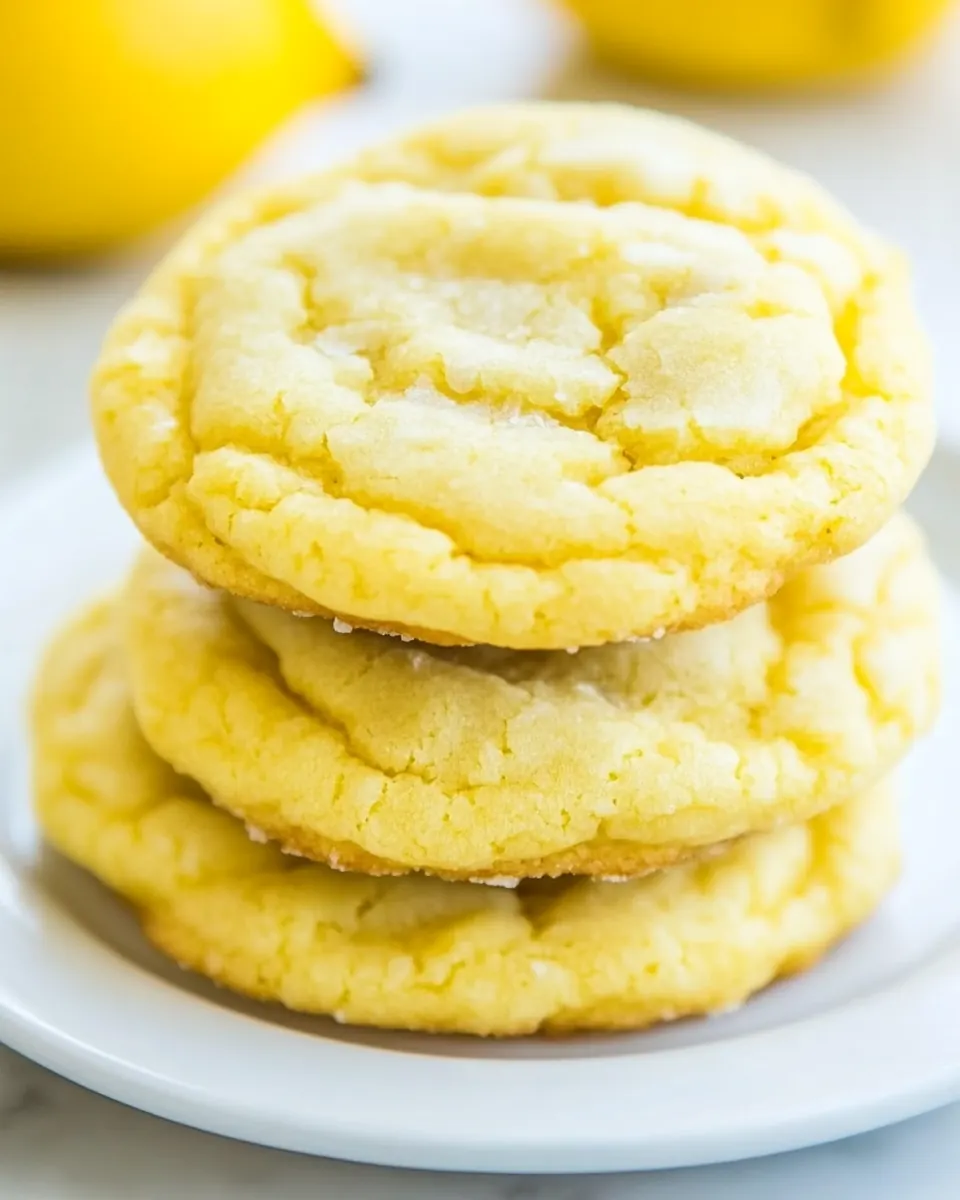
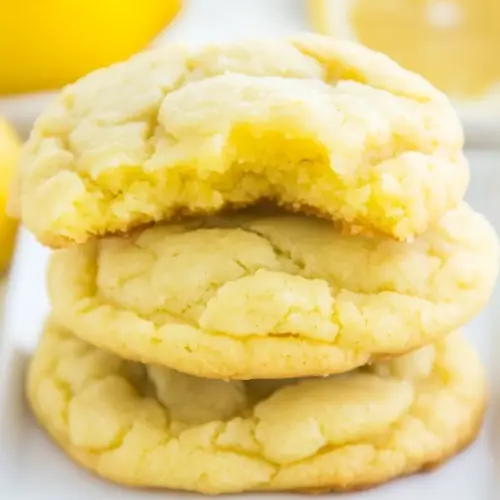
Soft and Chewy Lemon Cookies
Soft and Chewy Lemon Cookies are the kind of treat I reach for when I want a sunny, nostalgic bite that still feels grown up. The first time I made these, I was chasing a memory of a bakery cookie that was tender in the center yet held a delicate chew at the edges, and the lemon really sang without being shrill. From that first batch I learned how small adjustments make a huge difference, and these cookies became my go to for tea time, a last minute gift, or when I need a citrus lift on a gray afternoon.
One afternoon I found myself with a surplus of lemons and a slow oven. I mixed up a batter using unsalted butter and a touch of honey to add depth, and I let the dough rest in the fridge while I cleaned up the kitchen. When they came out of the oven the house smelled like a lemon grove, and I loved how the centers stayed soft while the edges offered a gentle chew. Over time I’ve tweaked the zesty notes and the resting time to get that perfect texture.
Recipe Snapshot
25 mins
15 mins
10 mins
Medium
150 kcal
American
Gluten-Free, Low FODMAP
Desserts
Stand Mixer, large cookie scoop, Baking Sheet
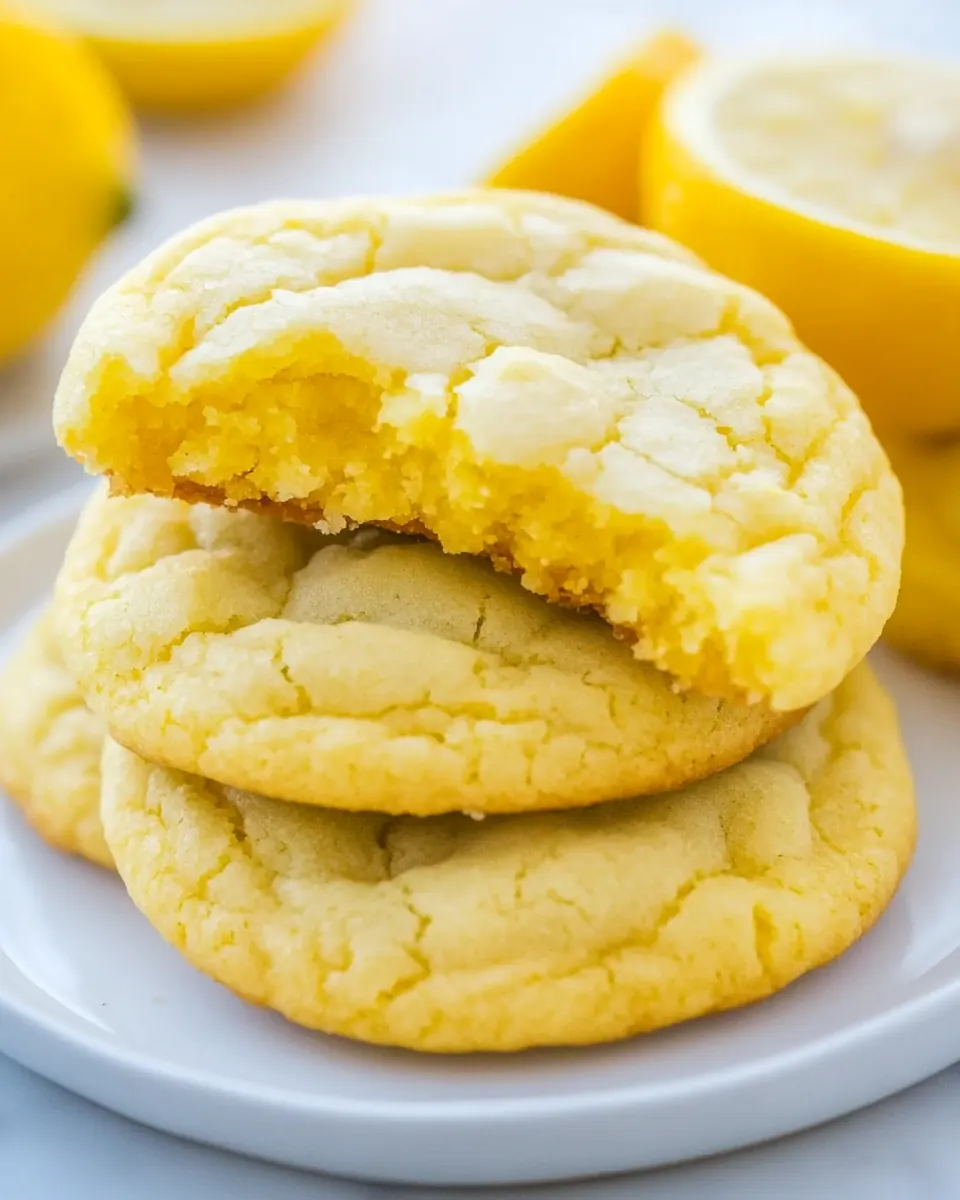
Why You’ll Love This Soft and Chewy Lemon Cookies
Bright but Balanced Flavor
I love that Soft and Chewy Lemon Cookies deliver a clear lemon presence without overpowering sweetness. The combination of lemon zest, lemon juice, and a touch of lemon extract layers citrus notes so each bite evolves from zingy to mellow.
Texture That Feels Intentional
We get a soft center and slightly chewy edge because of the mix of flour and cornstarch, plus chilling the dough. I rely on the fridge rest to let the fats solidify and the flavors marry, which keeps spreading in check and produces that tender crumb.
Simple Ingredients, Big Payoff
I appreciate recipes that use pantry staples yet taste special. With unsalted butter, granulated sugar, and a single egg, these cookies feel accessible but impressive. The optional honey and confectioners’ sugar or glaze let you dial up complexity if you want.
Flexible and Make Ahead Friendly
These cookies are forgiving. You can chill the dough for hours or days and still get excellent results. I often make dough on a weeknight and bake fresh cookies for guests, which saves time and keeps the final texture ideal.
Perfect for Many Occasions
From casual coffee breaks to spring gatherings, Soft and Chewy Lemon Cookies feel at home. Their bright flavor pairs well with light teas and simple desserts, and the dusting or glaze options let you dress them up for special occasions.
What You’ll Need for Soft and Chewy Lemon Cookies
These ingredients work together to create a cookie that is tender, zesty, and reliably textured. The key players are the butter for richness, the sugars for structure and sweetness, and the trio of lemon components for bright citrus character. The cornstarch helps soften the crumb while the baking soda provides lift when activated by acid.
- 1/2 cup unsalted butter, softened: Creamed to create a tender base and provide rich flavor and moisture; softened texture helps incorporate air when beaten with sugars, contributing to cookie lift and chewiness.
- 3/4 cup granulated sugar: Sweetens the dough and promotes browning; granulated sugar helps create a crisp edge while balancing the tart lemon components for overall flavor harmony.
- 2 tablespoons light brown sugar, packed: Adds deeper, caramel-like sweetness and aids in moisture retention; packed light brown sugar contributes chewiness and enhances the cookie's golden color.
- 1 large egg: Bind and structure the dough while adding moisture and richness; beaten egg helps emulsify fats and liquids for an even, cohesive crumb.
- 1 tablespoon lemon extract: Provides concentrated lemon aroma and bright citrus notes; small amount intensifies lemon flavor without adding extra acidity or liquid.
- 2 tablespoons lemon zest: Delivers fresh, intense citrus oils and vibrant fragrance; finely grated zest infuses natural lemon flavor and complements both the extract and juice.
- 1 tablespoon honey: Imparts subtle natural sweetness and glossy mouthfeel; honey also helps retain moisture and can slightly deepen the cookie flavor profile.
- yellow food coloring, and as desired (optional): Enhances visual appeal by intensifying color when desired; a few drops create a sunny hue without affecting flavor when used sparingly.
- 2 cups flour: Forms the dry structure and bulk of the dough; all-purpose flour provides gluten and starch that set during baking to give cookie shape and texture.
- 2 teaspoons cornstarch: Lightens the texture by tenderizing the crumb and absorbing moisture; cornstarch helps produce a soft, delicate, melt-in-your-mouth consistency.
- pinch salt, and to taste (optional): Balances and enhances overall flavor when used to taste; a pinch of salt accentuates sweetness and rounds the lemon notes without making the cookies salty.
- 1 teaspoon baking soda: Leavens quickly to create subtle lift and spread control; baking soda reacts with acidic ingredients like lemon juice to produce light, airy texture.
- 2 tablespoons lemon juice: Adds fresh acidity and bright citrus flavor while reacting with baking soda; lemon juice contributes both tang and essential liquid to the dough.
- confectioners’ sugar for dusting or lemon glaze + lemon zest (optional): Finishes presentation and adds optional sweetness or extra lemon intensity; dusting with confectioners’ sugar or glazing with lemon and zest enhances appearance and flavor.
Step by Step Guide for Soft and Chewy Lemon Cookies
These directions take you from creaming to cooling with close attention to texture. Read through the sensory cues so you can tell when each stage is just right, and remember that patience at chilling time pays off with superior cookies.
- To the bowl of a stand mixer fitted with the paddle attachment (or large mixing bowl and electric mixer) combine the butter, sugars, egg, lemon extract, and beat on medium-high speed until creamed, light, fluffy, and well combined, about 4 minutes.: The bowl will gradually become lighter in color and the mixture should look airy, almost mousse like, as tiny air pockets from the butter and sugar form; you will hear a steady, smooth whirr from the mixer and feel the weight lighten when you lift the paddle. This aeration is critical because it yields a tender crumb and helps the cookies rise subtly while baking. A common mistake is under creaming, which yields dense cookies, or over creaming, which can introduce too much air and cause excessive spread. If the mixture seems curdled, scrape the sides and continue briefly on low to reincorporate.
- Stop, scrape down the sides of the bowl, add the lemon zest, honey, optional food coloring, and beat on medium-high speed until well combined, about 2 minutes. I used 1 teaspoon gel food coloring; add drops or gel to desired shade. One teaspoon gel makes the batter quite yellow but it mellows slightly after adding the dry ingredients.: After scraping, the bright flecks of lemon zest will disperse and release oils, perfuming the batter with citrus; the sound of a slightly lighter, smoother mix indicates integration. The honey will add glossy sheen to the dough and a touch of chew, while gel food coloring (if used) deepens the visual appeal without thinning the batter. Be mindful not to over color and to stop mixing as soon as the ingredients are uniform, otherwise you risk breaking down the air structure created earlier. If streaks of zest remain, fold briefly by hand to avoid overworking the batter.
- Stop, scrape down the sides of the bowl and add the flour, cornstarch, optional salt, and baking soda (keep the baking soda in a nice little mound rather than sprinkling it).: When the dry mix hits the wet base, the noise from the mixer softens and the dough begins to thicken; visually the batter changes from glossy to dough like, slightly tacky to the touch. The cornstarch is barely visible but it calms the structure, giving a fine, tender crumb, while the mound of baking soda ensures a localized reaction with the lemon juice later. A typical pitfall is adding all dry ingredients too aggressively and overmixing, which tightens the gluten and yields a tougher cookie. Use a low speed and stop when just incorporated to keep the texture soft.
- Add the lemon juice directly on top of the baking soda. It will bubble and foam, which means the baking soda has been activated and this is good; if your soda doesn’t bubble it’s old and expired. Beat on low speed until just combined, about 1 minute.: As soon as the lemon juice hits the mound of baking soda , you should see a lively bubbling and foaming action, and you may catch a bright citrus aroma rising from the bowl; this indicates activation and helps the cookies gain gentle lift and a tender crumb. The immediate fizz is a visual cue that the chemical reaction is working, so if nothing happens the baking soda may be stale and should be replaced. Beat on low speed until just combined, about 1 minute, but avoid long mixing which can flatten the bubbliness important for texture.
- Stop, scrape down the sides of the bowl, and using a large cookie scoop, 1/4-cup measure, or your hands, form approximately 12 equal-sized mounds of dough, roll into balls, and flatten slightly.: The dough will feel soft and slightly tacky, with yellow flecks from the lemon zest . You should notice a pleasant citrus perfume as you shape each mound, and flattening them a touch ensures even baking and that chewy edge to soft center contrast. An uneven scoop size leads to inconsistent bake times, so take care to make them equal; a common slip is making some too large which then bake unevenly.
- Place mounds on a large plate or tray, cover with plastic wrap, and refrigerate for at least 3 hours, up to 5 days. Do not bake with unchilled dough because cookies will bake thinner, flatter, and be more prone to spreading.: The refrigerated dough will firm up and the butter will solidify, which reduces spreading in the oven and concentrates flavors. You will notice the dough becomes denser to the touch and the lemon aroma mellows and integrates with the sugars, yielding deeper flavor. Skipping chilling is a frequent error, resulting in flatter cookies that lose their signature soft center, so resist the urge to bake immediately.
- Preheat oven to 350 F, line a baking sheet with a Silpat or spray with cooking spray. Place dough mounds on baking sheet, spaced at least 2 inches apart (I bake 8 cookies per sheet).: As the oven warms you may catch a warm, dry scent from the heating elements and your kitchen will start to feel cozy; setting it to 350 F ensures moderate heat that sets edges without overbrowning the tops. Lining with a Silpat or nonstick surface gives even heat transfer and prevents sticking. A mistake is crowding the pan; leave space so air circulates and the cookies bake evenly.
- Bake for about 10 minutes, or until edges have set and tops are just set, even if slightly undercooked, pale, and glossy in the center; don’t overbake or undersides could become too browned. Cookies firm up as they cool.: Spacing prevents cookies from merging as they spread slightly, and you will hear a faint sizzle as the fat begins to soften during early bake minutes. The initial stage shows pale, glossy centers and edges just starting to set, which is the cue to avoid opening the oven too early. If placed too close, cookies can fuse and lose their shape, so allow adequate room.
- Allow cookies to cool on baking sheet for about 10 minutes before serving. I let them cool on the baking sheet and don’t use a rack.: During baking you will notice a soft lemon scent, and the edges will turn from dough colored to a very light golden note while the centers remain slightly glossy; this is perfect because the cookies continue to firm as they cool. Overbaking dries them out and removes the soft chew, while underbaking too much leaves a raw center. Trust the visual cues more than the clock.
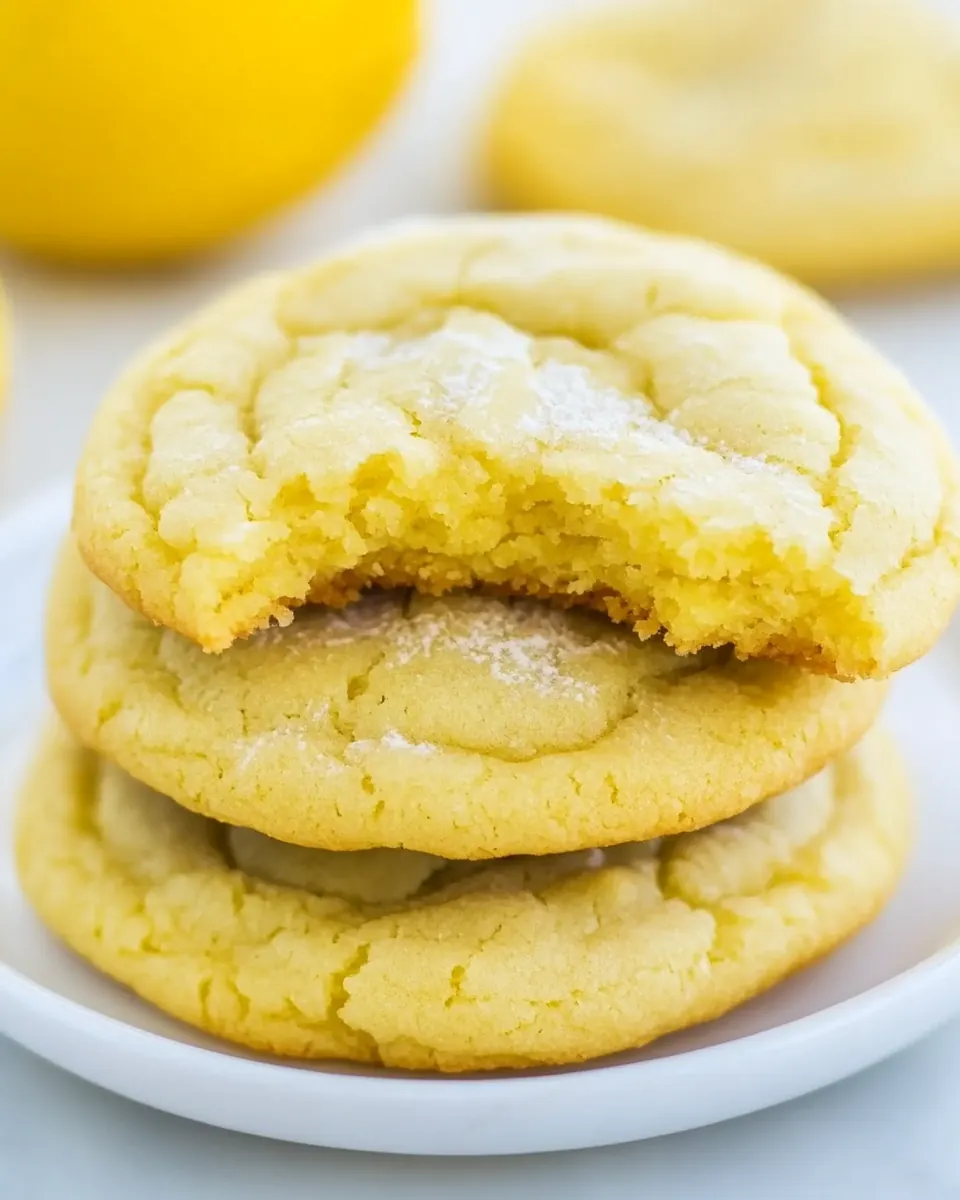
- Optionally, dust with confectioners’ sugar. Or, for increased lemon intensity, make the lemon glaze and then sprinkle with additional lemon zest.: Cooling on the sheet lets residual heat finish the set up, and you will feel the texture change from fragile to pleasantly yielding as the centers stabilize. Moving them too soon can cause them to break, while leaving them too long on a hot tray may further brown the undersides. I prefer cooling on the sheet for a gently crisp edge and tender middle.
- Optionally, dust with confectioners’ sugar. Or, for increased lemon intensity, make the lemon glaze and then sprinkle with additional lemon zest: A light dusting of confectioners’ sugar adds a delicate sweet finish, while a thin lemon glaze brings concentrated citrus and sheen; extra lemon zest on top boosts aroma. When glazing, watch for pooling which can soak the bottom, and if dusting, wait until completely cool to prevent melting.
Pro Tips and Tweaks
I like to treat these tips like tools in my pastry kit, small moves that yield big improvements. These suggestions will help you get consistent texture, brighter lemon flavor, and better presentation.
- Chill thoughtfully Keep dough refrigerated for at least 3 hours and up to 5 days to control spread and deepen flavor, which helps produce that signature soft center and chew at the edges.
- Use fresh citrus Fresh lemon zest and lemon juice offer volatile oils and brightness that bottled alternatives cannot match, making the cookies taste vibrant rather than flat.
- Measure flour correctly Spoon and level your flour rather than scooping from the bag to avoid packing and resulting toughness in the finished cookie.
- Mind the baking soda Add the baking soda in a small mound and pour the lemon juice on top to get an immediate reaction, ensuring a little lift and a tender crumb.
- Finish for effect Dust with confectioners’ sugar or brush with a light lemon glaze for shine and intensified citrus, letting any glaze set before stacking.
- Freeze extra dough Portion dough into mounds and freeze on a tray, then transfer to a container for baking fresh cookies later, which preserves texture and flavor.
What to Serve With Soft and Chewy Lemon Cookies
These cookies are versatile and pair well with light beverages or as part of a dessert spread. Serve them warm or cooled depending on the occasion, and think about seasonal matches for spring or afternoon gatherings.
- Tea service Pair with a delicate green or Earl Grey tea to complement the citrus without overpowering it; serve on a small platter for casual tea time.
- Brunch table Include them on a brunch spread alongside fruit and yogurt for a sweet citrus note that refreshes the palate.
- Party platter Add to a cookie assortment for showers or spring events, placing them near nutty or vanilla sweets to balance flavors.
- Storage tips Store airtight at room temperature for up to 1 week or freeze for up to 6 months, wrapping layers with parchment to preserve shape and texture.
- Seasonal pairing Serve in spring with light floral iced teas or lemonade; their bright profile suits outdoor gatherings and celebrations.
FAQ
Conclusion
These Soft and Chewy Lemon Cookies stand out because they combine bright citrus with a tender interior and slightly chewy edges. They are straightforward to make yet feel special thanks to the layering of lemon zest, juice, and extract, and the textural boost from cornstarch and a proper chill. I encourage you to give them a try, experiment with a light glaze or a dusting of confectioners’ sugar, and enjoy the way a simple cookie can lift a moment. Baking them is an easy way to bring sunny flavor into your kitchen and share something both comforting and spirited.
Soft and Chewy Lemon Cookies
Equipment
- Stand mixer
- large cookie scoop
- Baking Sheet
Ingredients
- 1/2 cup unsalted butter, softened Creamed to create a tender base and provide rich flavor and moisture; softened texture helps incorporate air when beaten with sugars, contributing to cookie lift and chewiness.
- 3/4 cup granulated sugar Sweetens the dough and promotes browning; granulated sugar helps create a crisp edge while balancing the tart lemon components for overall flavor harmony.
- 2 tablespoons light brown sugar, packed Adds deeper, caramel-like sweetness and aids in moisture retention; packed light brown sugar contributes chewiness and enhances the cookie's golden color.
- 1 large egg Bind and structure the dough while adding moisture and richness; beaten egg helps emulsify fats and liquids for an even, cohesive crumb.
- 1 tablespoon lemon extract Provides concentrated lemon aroma and bright citrus notes; small amount intensifies lemon flavor without adding extra acidity or liquid.
- 2 tablespoons lemon zest Delivers fresh, intense citrus oils and vibrant fragrance; finely grated zest infuses natural lemon flavor and complements both the extract and juice.
- 1 tablespoon honey Imparts subtle natural sweetness and glossy mouthfeel; honey also helps retain moisture and can slightly deepen the cookie flavor profile.
- yellow food coloring, optional and as desired Enhances visual appeal by intensifying color when desired; a few drops create a sunny hue without affecting flavor when used sparingly.
- 2 cups flour Forms the dry structure and bulk of the dough; all-purpose flour provides gluten and starch that set during baking to give cookie shape and texture.
- 2 teaspoons cornstarch Lightens the texture by tenderizing the crumb and absorbing moisture; cornstarch helps produce a soft, delicate, melt-in-your-mouth consistency.
- pinch salt, optional and to taste Balances and enhances overall flavor when used to taste; a pinch of salt accentuates sweetness and rounds the lemon notes without making the cookies salty.
- 1 teaspoon baking soda Leavens quickly to create subtle lift and spread control; baking soda reacts with acidic ingredients like lemon juice to produce light, airy texture.
- 2 tablespoons lemon juice Adds fresh acidity and bright citrus flavor while reacting with baking soda; lemon juice contributes both tang and essential liquid to the dough.
- confectioners’ sugar for dusting or lemon glaze + lemon zest, optional Finishes presentation and adds optional sweetness or extra lemon intensity; dusting with confectioners’ sugar or glazing with lemon and zest enhances appearance and flavor.
Instructions
- To the bowl of a stand mixer fitted with the paddle attachment (or large mixing bowl and electric mixer) combine the butter, sugars, egg, lemon extract, and beat on medium-high speed until creamed, light, fluffy, and well combined, about 4 minutes.: The bowl will gradually become lighter in color and the mixture should look airy, almost mousse like, as tiny air pockets from the butter and sugar form; you will hear a steady, smooth whirr from the mixer and feel the weight lighten when you lift the paddle. This aeration is critical because it yields a tender crumb and helps the cookies rise subtly while baking. A common mistake is under creaming, which yields dense cookies, or over creaming, which can introduce too much air and cause excessive spread. If the mixture seems curdled, scrape the sides and continue briefly on low to reincorporate.
- Stop, scrape down the sides of the bowl, add the lemon zest, honey, optional food coloring, and beat on medium-high speed until well combined, about 2 minutes. I used 1 teaspoon gel food coloring; add drops or gel to desired shade. One teaspoon gel makes the batter quite yellow but it mellows slightly after adding the dry ingredients.: After scraping, the bright flecks of lemon zest will disperse and release oils, perfuming the batter with citrus; the sound of a slightly lighter, smoother mix indicates integration. The honey will add glossy sheen to the dough and a touch of chew, while gel food coloring (if used) deepens the visual appeal without thinning the batter. Be mindful not to over color and to stop mixing as soon as the ingredients are uniform, otherwise you risk breaking down the air structure created earlier. If streaks of zest remain, fold briefly by hand to avoid overworking the batter.
- Stop, scrape down the sides of the bowl and add the flour, cornstarch, optional salt, and baking soda (keep the baking soda in a nice little mound rather than sprinkling it).: When the dry mix hits the wet base, the noise from the mixer softens and the dough begins to thicken; visually the batter changes from glossy to dough like, slightly tacky to the touch. The cornstarch is barely visible but it calms the structure, giving a fine, tender crumb, while the mound of baking soda ensures a localized reaction with the lemon juice later. A typical pitfall is adding all dry ingredients too aggressively and overmixing, which tightens the gluten and yields a tougher cookie. Use a low speed and stop when just incorporated to keep the texture soft.
- Add the lemon juice directly on top of the baking soda. It will bubble and foam, which means the baking soda has been activated and this is good; if your soda doesn’t bubble it’s old and expired. Beat on low speed until just combined, about 1 minute.: As soon as the lemon juice hits the mound of baking soda , you should see a lively bubbling and foaming action, and you may catch a bright citrus aroma rising from the bowl; this indicates activation and helps the cookies gain gentle lift and a tender crumb. The immediate fizz is a visual cue that the chemical reaction is working, so if nothing happens the baking soda may be stale and should be replaced. Beat on low speed until just combined, about 1 minute, but avoid long mixing which can flatten the bubbliness important for texture.
- Stop, scrape down the sides of the bowl, and using a large cookie scoop, 1/4-cup measure, or your hands, form approximately 12 equal-sized mounds of dough, roll into balls, and flatten slightly.: The dough will feel soft and slightly tacky, with yellow flecks from the lemon zest . You should notice a pleasant citrus perfume as you shape each mound, and flattening them a touch ensures even baking and that chewy edge to soft center contrast. An uneven scoop size leads to inconsistent bake times, so take care to make them equal; a common slip is making some too large which then bake unevenly.
- Place mounds on a large plate or tray, cover with plastic wrap, and refrigerate for at least 3 hours, up to 5 days. Do not bake with unchilled dough because cookies will bake thinner, flatter, and be more prone to spreading.: The refrigerated dough will firm up and the butter will solidify, which reduces spreading in the oven and concentrates flavors. You will notice the dough becomes denser to the touch and the lemon aroma mellows and integrates with the sugars, yielding deeper flavor. Skipping chilling is a frequent error, resulting in flatter cookies that lose their signature soft center, so resist the urge to bake immediately.
- Preheat oven to 350 F, line a baking sheet with a Silpat or spray with cooking spray. Place dough mounds on baking sheet, spaced at least 2 inches apart (I bake 8 cookies per sheet).: As the oven warms you may catch a warm, dry scent from the heating elements and your kitchen will start to feel cozy; setting it to 350 F ensures moderate heat that sets edges without overbrowning the tops. Lining with a Silpat or nonstick surface gives even heat transfer and prevents sticking. A mistake is crowding the pan; leave space so air circulates and the cookies bake evenly.
- Bake for about 10 minutes, or until edges have set and tops are just set, even if slightly undercooked, pale, and glossy in the center; don’t overbake or undersides could become too browned. Cookies firm up as they cool.: Spacing prevents cookies from merging as they spread slightly, and you will hear a faint sizzle as the fat begins to soften during early bake minutes. The initial stage shows pale, glossy centers and edges just starting to set, which is the cue to avoid opening the oven too early. If placed too close, cookies can fuse and lose their shape, so allow adequate room.
- Allow cookies to cool on baking sheet for about 10 minutes before serving. I let them cool on the baking sheet and don’t use a rack.: During baking you will notice a soft lemon scent, and the edges will turn from dough colored to a very light golden note while the centers remain slightly glossy; this is perfect because the cookies continue to firm as they cool. Overbaking dries them out and removes the soft chew, while underbaking too much leaves a raw center. Trust the visual cues more than the clock.
- Optionally, dust with confectioners’ sugar. Or, for increased lemon intensity, make the lemon glaze and then sprinkle with additional lemon zest.: Cooling on the sheet lets residual heat finish the set up, and you will feel the texture change from fragile to pleasantly yielding as the centers stabilize. Moving them too soon can cause them to break, while leaving them too long on a hot tray may further brown the undersides. I prefer cooling on the sheet for a gently crisp edge and tender middle.
- Optionally, dust with confectioners’ sugar. Or, for increased lemon intensity, make the lemon glaze and then sprinkle with additional lemon zest: A light dusting of confectioners’ sugar adds a delicate sweet finish, while a thin lemon glaze brings concentrated citrus and sheen; extra lemon zest on top boosts aroma. When glazing, watch for pooling which can soak the bottom, and if dusting, wait until completely cool to prevent melting.
Notes
- Chill thoughtfully Keep dough refrigerated for at least 3 hours and up to 5 days to control spread and deepen flavor, which helps produce that signature soft center and chew at the edges.
- Use fresh citrus Fresh lemon zest and lemon juice offer volatile oils and brightness that bottled alternatives cannot match, making the cookies taste vibrant rather than flat.
- Measure flour correctly Spoon and level your flour rather than scooping from the bag to avoid packing and resulting toughness in the finished cookie.
- Mind the baking soda Add the baking soda in a small mound and pour the lemon juice on top to get an immediate reaction, ensuring a little lift and a tender crumb.
- Finish for effect Dust with confectioners’ sugar or brush with a light lemon glaze for shine and intensified citrus, letting any glaze set before stacking.
- Freeze extra dough Portion dough into mounds and freeze on a tray, then transfer to a container for baking fresh cookies later, which preserves texture and flavor.