Snowball Cookies
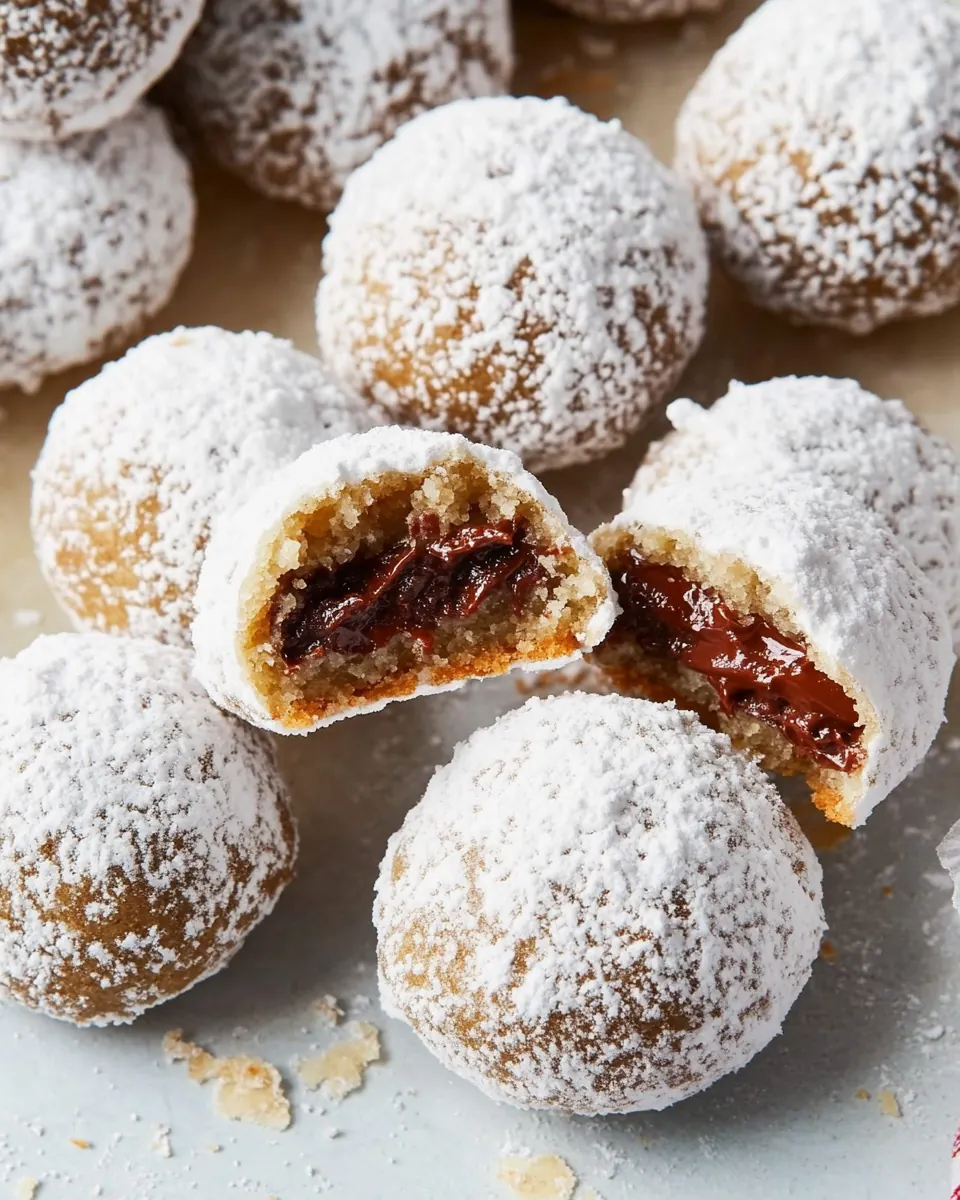
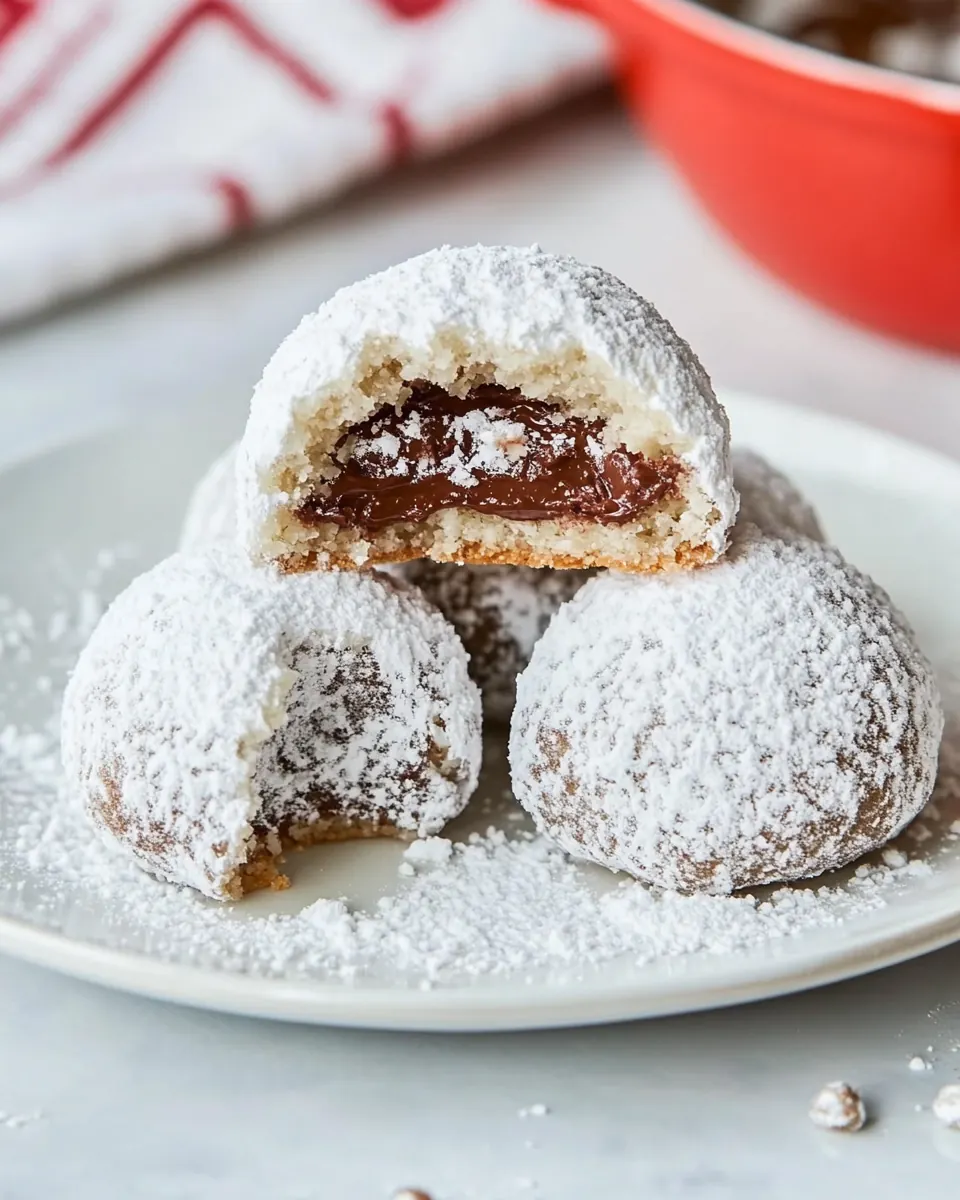
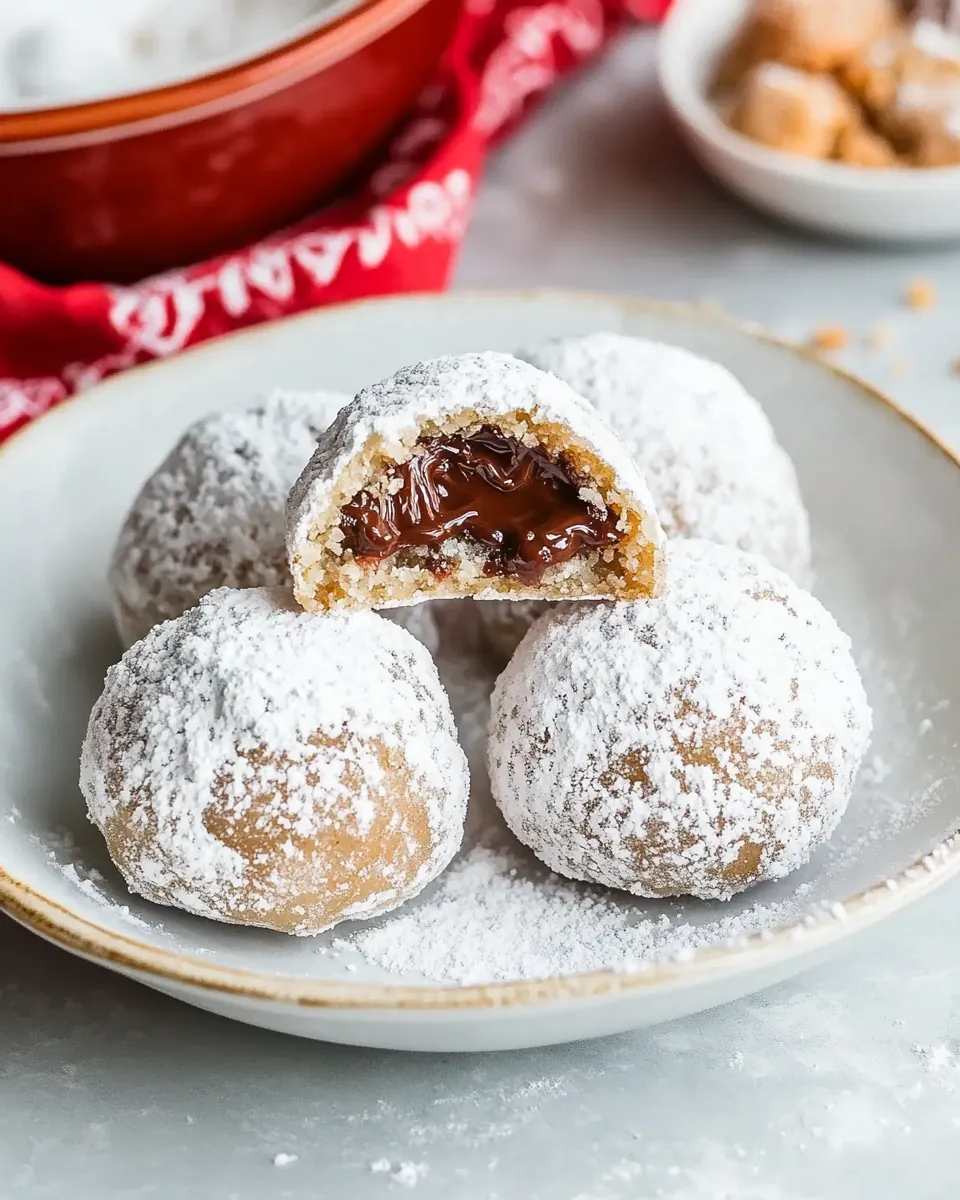
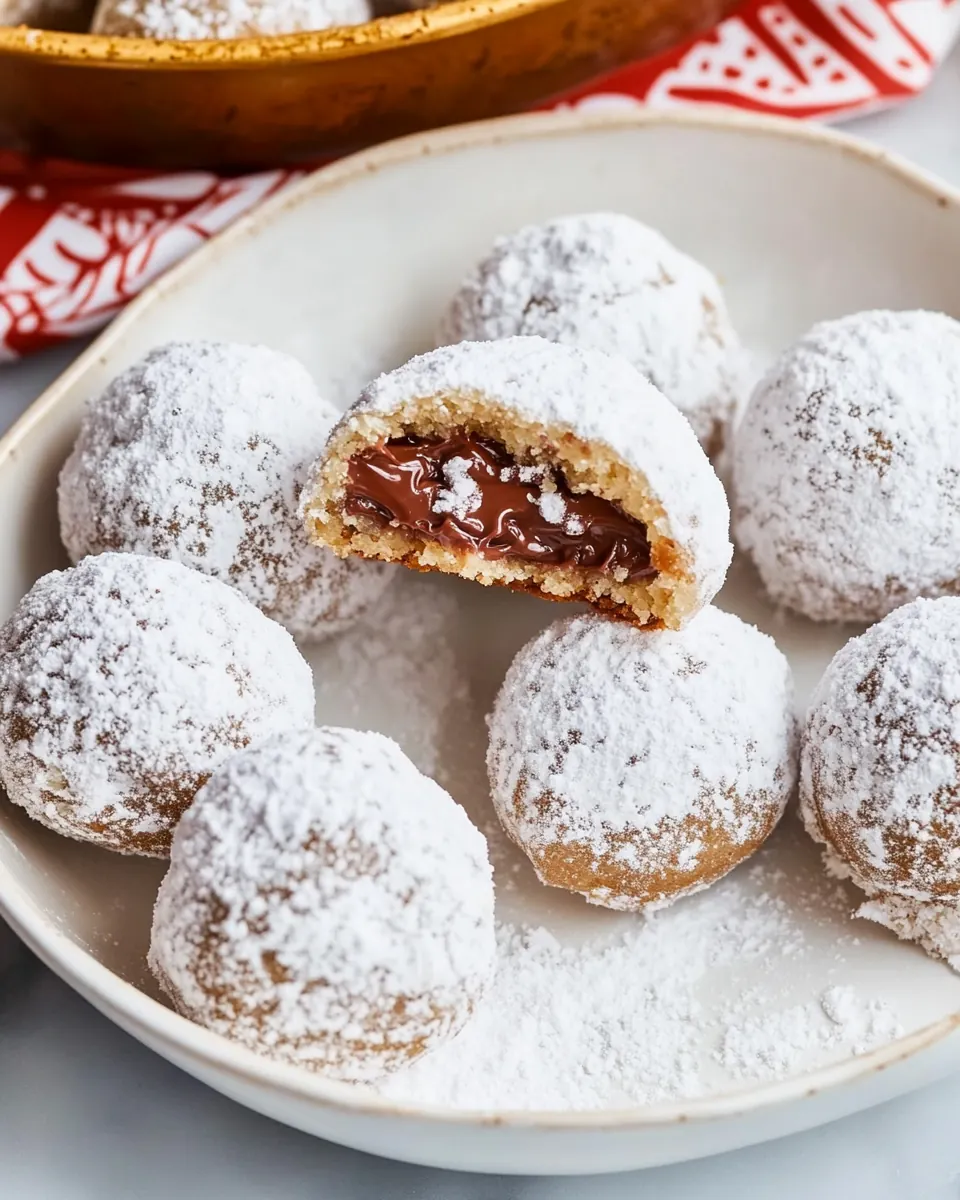
Snowball Cookies are the kind of treat I reach for when I want something tender, nutty, and a little secret inside to surprise friends at a holiday gathering.
Years ago I learned these while helping a neighbor wrap gifts and we baked late into the night, trading stories and shaping dough. The ritual of rolling those tiny frozen centers into soft dough, then watching powdered sugar bloom over the warm cookies, stuck with me. I still recall the faint crackle of the oven and the warm nutty aroma that filled the kitchen as they baked.
Once, I brought a tin of these to a snowy afternoon book club and everyone asked for the recipe after the first bite. I like how the cookies feel delicate yet substantial, and how a hidden center of spread creates a fun contrast. The process rewards patience, because keeping the dough and filling cold is what makes the cookies hold their shape and remain pleasantly pillowy.
Recipe Snapshot
46 mins
30 mins
16 mins
Medium
150 kcal
American
Gluten-Free, Low FODMAP
Desserts
Kitchen Scale (optional), Baking Sheet, Food Processor (optional), Stand Mixer
The Best Thing About This Snowball Cookies
Classic holiday nostalgia
I adore how Snowball Cookies trigger memories. They have that old fashioned charm, where every bite tastes like a kitchen full of family. The texture, a crumbly exterior that yields to a melt in the mouth center, is what keeps me coming back.
Contrast of textures
The interplay between the tender, buttery dough and the slightly denser, nutty coating is irresistible. I find the powdered sugar finish adds a soft first impression that gives way to a crisp edge, then a delicate interior. That mouthfeel makes them stand out among other cookies.
Customizable stuffing
One reason I recommend these cookies is how forgiving they are to variations. While Nutella is decadent and familiar, you can experiment with different spreads if you like. That flexibility makes them perfect for gifting, because you can tailor them to someones taste without changing the core method.
Impressive but approachable
They look like something a pro would make, yet the technique is straightforward. I love serving them when I want to impress without stress. A little chill time and thoughtful assembly go a long way, and you still get reliable results even if this is your first time preparing filled cookies.
Great for make ahead
These cookies travel well and keep their charm after being stored. I often make a batch a day ahead, then dust them again for a fresh finish. That convenience, combined with an elegant appearance, makes them a holiday staple in my kitchen.
Snowball Cookies Ingredients
The ingredients for Snowball Cookies keep things simple and focused on texture and balance. Each item plays a clear role: the fat and sugar create tenderness, the flour gives structure, and the pecans introduce a toasty note and crunchy contrast. The tiny amount of salt and vanilla extract lift the flavors, while the powdered sugar provides the signature snowy coating that defines the cookie.
- 1/4 1/2 cup Nutella 68-135 grams: Provides a rich, chocolate-hazelnut center and optional flavor boost; adds moisture and decadent taste when used at the lower end, or a stronger Nutella presence when the larger amount is chosen. Helps create a soft, slightly gooey interior while complementing the nutty pecan coating for classic snowball contrast.
- 3/4 cup very finely chopped or ground pecans 63 grams: Adds delicate crunch and toasted, buttery flavor when finely chopped or ground; helps create the characteristic nutty exterior that defines snowball cookies. Contributes texture contrast to the tender cookie and pairs well with powdered sugar for a snowy finish.
- 8 1/2 tablespoons unsalted butter 120 grams, room temperature and cubed: Provides richness and tenderness to the dough when creamed with sugar; fat coats flour proteins to limit gluten formation, resulting in a melt-in-your-mouth crumb. Room–temperature cubed butter ensures even incorporation and stable dough structure for shaping.
- 1 1/2 cups powdered sugar 170 grams, divided into 1/2 cup (57 grams) and 1 cup (113 grams) portions: Sweetens and helps create a powdered sugar coating as well as tenderizing the dough; divided use reserves enough for the outer dusting while the rest is creamed into the dough for structure and sweetness. Contributes to the cookies' signature sweet, snowy appearance and delicate texture.
- 1/2 teaspoon pure vanilla extract 2 grams: Adds a warm, aromatic note that enhances the cookie's overall flavor profile; small amount concentrates the sweet components and balances richness. Infuses subtle vanilla character without overpowering the delicate nutty and chocolate elements.
- 1/4 teaspoon kosher salt: Balances and enhances the sweetness while brightening the flavors; small salt amount rounds out the taste and prevents the cookies from tasting flat. Helps highlight the complexity of the nuts, chocolate, and vanilla in the finished cookie.
- 1 1/4 cups all-purpose flour 150 grams: Provides the structure and bulk of the cookie dough; flour forms the framework that traps fat and air to create the final crumb. Proper measurement yields a tender, delicate cookie that holds its shape while remaining soft and slightly crumbly.
How to Cook Snowball Cookies
This method walks you through chilling, shaping, and baking so the centers stay intact and the cookies emerge tender and lightly golden. I like to keep the workspace organized because the chilled Nutella and dough require quick assembly. Grab two baking sheets and plan for short bursts of work and several cooling pauses.
- Line 2 baking sheets with parchment paper.: The scent of fresh parchment is subtle, but the real win is in prevention of sticking, so the cookies slide off cleanly once baked. Use parchment to protect the underside from over browning. A common error is skipping this and then scraping the bottoms, which damages the cookies.
- Spray another baking sheet with nonstick spray. Divide the Nutella into 1/2-teaspoon-sized balls and place the balls on the sprayed baking sheet. Be sure they aren’t touching. Freeze for at least 30 minutes.: When the Nutella is frozen it becomes easier to encase, and the cold center helps the cookie maintain shape during baking. You will hear the faint click of a tray as you tap frozen balls into place. Avoid clustering them together, otherwise they can freeze into one mass and become difficult to work with.
- Chop the pecans in a food processor until fine. Don’t process too much or the nuts will turn oily. Set aside. (If a food processor isn’t available, place the pecans in a resealable bag and roll or pound until the nuts are finely chopped.): The smell of freshly chopped pecans is toasty and fragrant. The aim is a texture like fine crumbs, which blends smoothly into the dough. Over processing releases oils and creates a paste, which makes the dough greasy and alters the cookie structure.
- In the bowl of a stand mixer, beat the butter and 1/2 cup powdered sugar on medium-high speed until the mixture is light. Add in the vanilla extract, salt, and ground pecans.: You ll notice the color lighten and the mixture fluff slightly, a sign that air has been incorporated for tenderness. The aroma will be buttery and warm with nutty notes. If you underbeat, the cookies may be dense; overbeat and the texture could become too loose, so aim for a soft, airy cream.
- Add the flour and mix on low speed until the flour has been incorporated. Roll the dough onto a clean work surface and knead gently for 30 seconds. Form the dough into a ball, cover loosely with plastic wrap, press gently to flatten into a disc, and place in the refrigerator for 30 minutes to firm up.: The dough should feel slightly cool and cohesive after kneading. Cooling firms the butter , making the dough easier to handle and preventing spreading. A common slip is skipping the chill time, which leads to flatter cookies with less defined texture.
- Preheat oven to 375°F.: You will smell warmth as the oven comes up to temperature, and setting the right heat ensures the cookies bake through while forming a light outer set. An oven that is too cool will result in pale, underbaked centers; too hot and the exteriors will brown before the inside is properly set.
- Remove the Nutella balls and cookie dough from the fridge. (If the Nutella balls start to soften, place them in the freezer for a few minutes.) Pinch off a 2-inch piece of the dough and divide it in half. Slightly flatten one half in the palm of your hand and place a Nutella ball in the middle of the dough. Top it with the other dough half and wrap the 2 sides together around the Nutella ball. Gently roll the cookie in your hands to seal the edges and to form a ball. Place the cookie ball on a parchment-lined cookie sheet, 2 inches apart, and repeat until all cookies are made.: When you shape the cookies you should feel cool dough yielding without sticking to your hands, and the hidden Nutella should stay encapsulated. The sound of gentle rolling is quiet, but your hands will sense the seam sealing. If the dough becomes warm, pop it back in the fridge; warm dough offers poor structure and may leak during baking.
- Place the trays of cookies in the refrigerator for 30 minutes.: This chilling step firms both dough and filling. The air in the fridge will slightly dry the surface, making for a delicate outer crust once baked. Skipping this makes the cookies prone to spreading and can lead to misshapen results.
- After 30 minutes, place the cookies in the hot oven and bake 14-16 minutes or until they are light golden brown and firm to the touch. Remove from the oven and let rest 3 minutes on the baking sheet.: During baking you ll notice a subtle nutty aroma and edges turning a faint golden hue. The cookies will feel set when gently pressed. Baking too long makes them dry, while underbaking leaves centers too soft, so watch for that delicate firm feel.
- Place 1/2 cup powdered sugar in a bowl and roll the warm cookies, one-at-a-time, in the sugar. Return them to the still-hot baking sheet to cool another 5 minutes. Roll the cookies with a second coating of powdered sugar. Allow to completely dry.: The first coating adheres to the warm surface and begins to form the snowy finish. You should see a matte dusting that deepens after the second roll. If you wait too long to roll, the sugar may not stick as well and the classic look will be diminished.
- If a third coat of powdered sugar is desired, place powdered sugar in a small wire sieve and sprinkle it over the cookies.: The gentle dusting from a sieve creates a delicate, even snowfall effect. The final appearance is visually pleasing and feels soft on the tongue. Overdoing it may create a cloying sweetness, so dust sparingly if you want a balanced finish.
Variations to Try
These variations let you put a personal spin on Snowball Cookies while keeping the technique intact. I enjoy trying one new twist each season so the core method stays familiar.
- Swap the filling Be brave and try peanut butter or cookie butter for a different flavor profile, remembering to freeze small portions first so they behave like the original filling.
- Try different nuts Use walnuts or hazelnuts instead of pecans to shift the aroma and texture, finely chopping them to maintain dough integrity.
- Press a pattern Gently press the top with the back of a fork before chilling for a subtle decorative finish that survives baking.
- Make miniatures Portion the dough smaller and use 1/4 teaspoon fillings for bite sized cookies that are perfect for platters and sampling.
- Extra snowy coating Sift one final light dusting of powdered sugar with a small sieve for an elegant, uniform look before serving.
Serving Ideas for Snowball Cookies
I love presenting Snowball Cookies as part of a winter cookie assortment, where their snowy finish adds visual contrast. They suit holiday platters, casual coffee gatherings, and make thoughtful gifts. Store extras carefully to preserve texture, and consider pairing them with warm beverages for serving.
- Holiday cookie tray Arrange alongside a variety of shapes and textures to create a balanced platter for Christmas parties or winter gatherings.
- Gift tins Layer with parchment and include a small note, these cookies travel well and are ideal for neighbor gifts during the season.
- Tea or coffee service Serve with a warm cup at a casual afternoon visit, the powdered sugar pairs nicely with a slightly bitter drink.
- Make ahead storage Keep in an airtight container at room temperature for several days or refrigerate for longer storage, returning them to room temperature before serving.
- Seasonal pairing Use them at winter celebrations or anytime you want a cozy, nostalgic dessert option that photographs beautifully.
FAQ
Conclusion
Snowball Cookies shine because they combine a tender, buttery dough with a nutty crunch and a hidden creamy center, finished in a soft, snowy coating. Give this recipe a try when you want an elegant, nostalgic cookie that rewards patience with delightful texture contrasts. Share them with friends and family, and enjoy the warm reactions when they bite into that little secret center.

Snowball Cookies
Equipment
- Kitchen Scale (optional)
- Baking Sheet
- Food Processor (optional)
- Stand mixer
Ingredients
- 1/4 -1/2 cup Nutella 68-135 grams Provides a rich, chocolate-hazelnut center and optional flavor boost; adds moisture and decadent taste when used at the lower end, or a stronger Nutella presence when the larger amount is chosen. Helps create a soft, slightly gooey interior while complementing the nutty pecan coating for classic snowball contrast.
- 3/4 cup very finely chopped or ground pecans 63 grams Adds delicate crunch and toasted, buttery flavor when finely chopped or ground; helps create the characteristic nutty exterior that defines snowball cookies. Contributes texture contrast to the tender cookie and pairs well with powdered sugar for a snowy finish.
- 8 1/2 tablespoons unsalted butter 120 grams, room temperature and cubed Provides richness and tenderness to the dough when creamed with sugar; fat coats flour proteins to limit gluten formation, resulting in a melt-in-your-mouth crumb. Room-temperature cubed butter ensures even incorporation and stable dough structure for shaping.
- 1 1/2 cups powdered sugar 170 grams, divided into 1/2 cup (57 grams) and 1 cup (113 grams) portions Sweetens and helps create a powdered sugar coating as well as tenderizing the dough; divided use reserves enough for the outer dusting while the rest is creamed into the dough for structure and sweetness. Contributes to the cookies' signature sweet, snowy appearance and delicate texture.
- 1/2 teaspoon pure vanilla extract 2 grams Adds a warm, aromatic note that enhances the cookie's overall flavor profile; small amount concentrates the sweet components and balances richness. Infuses subtle vanilla character without overpowering the delicate nutty and chocolate elements.
- 1/4 teaspoon kosher salt Balances and enhances the sweetness while brightening the flavors; small salt amount rounds out the taste and prevents the cookies from tasting flat. Helps highlight the complexity of the nuts, chocolate, and vanilla in the finished cookie.
- 1 1/4 cups all-purpose flour 150 grams Provides the structure and bulk of the cookie dough; flour forms the framework that traps fat and air to create the final crumb. Proper measurement yields a tender, delicate cookie that holds its shape while remaining soft and slightly crumbly.
Instructions
- Line 2 baking sheets with parchment paper.: The scent of fresh parchment is subtle, but the real win is in prevention of sticking, so the cookies slide off cleanly once baked. Use parchment to protect the underside from over browning. A common error is skipping this and then scraping the bottoms, which damages the cookies.
- Spray another baking sheet with nonstick spray. Divide the Nutella into 1/2-teaspoon-sized balls and place the balls on the sprayed baking sheet. Be sure they aren’t touching. Freeze for at least 30 minutes.: When the Nutella is frozen it becomes easier to encase, and the cold center helps the cookie maintain shape during baking. You will hear the faint click of a tray as you tap frozen balls into place. Avoid clustering them together, otherwise they can freeze into one mass and become difficult to work with.
- Chop the pecans in a food processor until fine. Don’t process too much or the nuts will turn oily. Set aside. (If a food processor isn’t available, place the pecans in a resealable bag and roll or pound until the nuts are finely chopped.): The smell of freshly chopped pecans is toasty and fragrant. The aim is a texture like fine crumbs, which blends smoothly into the dough. Over processing releases oils and creates a paste, which makes the dough greasy and alters the cookie structure.
- In the bowl of a stand mixer, beat the butter and 1/2 cup powdered sugar on medium-high speed until the mixture is light. Add in the vanilla extract, salt, and ground pecans.: You ll notice the color lighten and the mixture fluff slightly, a sign that air has been incorporated for tenderness. The aroma will be buttery and warm with nutty notes. If you underbeat, the cookies may be dense; overbeat and the texture could become too loose, so aim for a soft, airy cream.
- Add the flour and mix on low speed until the flour has been incorporated. Roll the dough onto a clean work surface and knead gently for 30 seconds. Form the dough into a ball, cover loosely with plastic wrap, press gently to flatten into a disc, and place in the refrigerator for 30 minutes to firm up.: The dough should feel slightly cool and cohesive after kneading. Cooling firms the butter , making the dough easier to handle and preventing spreading. A common slip is skipping the chill time, which leads to flatter cookies with less defined texture.
- Preheat oven to 375°F.: You will smell warmth as the oven comes up to temperature, and setting the right heat ensures the cookies bake through while forming a light outer set. An oven that is too cool will result in pale, underbaked centers; too hot and the exteriors will brown before the inside is properly set.
- Remove the Nutella balls and cookie dough from the fridge. (If the Nutella balls start to soften, place them in the freezer for a few minutes.) Pinch off a 2-inch piece of the dough and divide it in half. Slightly flatten one half in the palm of your hand and place a Nutella ball in the middle of the dough. Top it with the other dough half and wrap the 2 sides together around the Nutella ball. Gently roll the cookie in your hands to seal the edges and to form a ball. Place the cookie ball on a parchment-lined cookie sheet, 2 inches apart, and repeat until all cookies are made.: When you shape the cookies you should feel cool dough yielding without sticking to your hands, and the hidden Nutella should stay encapsulated. The sound of gentle rolling is quiet, but your hands will sense the seam sealing. If the dough becomes warm, pop it back in the fridge; warm dough offers poor structure and may leak during baking.
- Place the trays of cookies in the refrigerator for 30 minutes.: This chilling step firms both dough and filling. The air in the fridge will slightly dry the surface, making for a delicate outer crust once baked. Skipping this makes the cookies prone to spreading and can lead to misshapen results.
- After 30 minutes, place the cookies in the hot oven and bake 14-16 minutes or until they are light golden brown and firm to the touch. Remove from the oven and let rest 3 minutes on the baking sheet.: During baking you ll notice a subtle nutty aroma and edges turning a faint golden hue. The cookies will feel set when gently pressed. Baking too long makes them dry, while underbaking leaves centers too soft, so watch for that delicate firm feel.
- Place 1/2 cup powdered sugar in a bowl and roll the warm cookies, one-at-a-time, in the sugar. Return them to the still-hot baking sheet to cool another 5 minutes. Roll the cookies with a second coating of powdered sugar. Allow to completely dry.: The first coating adheres to the warm surface and begins to form the snowy finish. You should see a matte dusting that deepens after the second roll. If you wait too long to roll, the sugar may not stick as well and the classic look will be diminished.
- If a third coat of powdered sugar is desired, place powdered sugar in a small wire sieve and sprinkle it over the cookies.: The gentle dusting from a sieve creates a delicate, even snowfall effect. The final appearance is visually pleasing and feels soft on the tongue. Overdoing it may create a cloying sweetness, so dust sparingly if you want a balanced finish.
Notes
- Swap the filling Be brave and try peanut butter or cookie butter for a different flavor profile, remembering to freeze small portions first so they behave like the original filling.
- Try different nuts Use walnuts or hazelnuts instead of pecans to shift the aroma and texture, finely chopping them to maintain dough integrity.
- Press a pattern Gently press the top with the back of a fork before chilling for a subtle decorative finish that survives baking.
- Make miniatures Portion the dough smaller and use 1/4 teaspoon fillings for bite sized cookies that are perfect for platters and sampling.
- Extra snowy coating Sift one final light dusting of powdered sugar with a small sieve for an elegant, uniform look before serving.