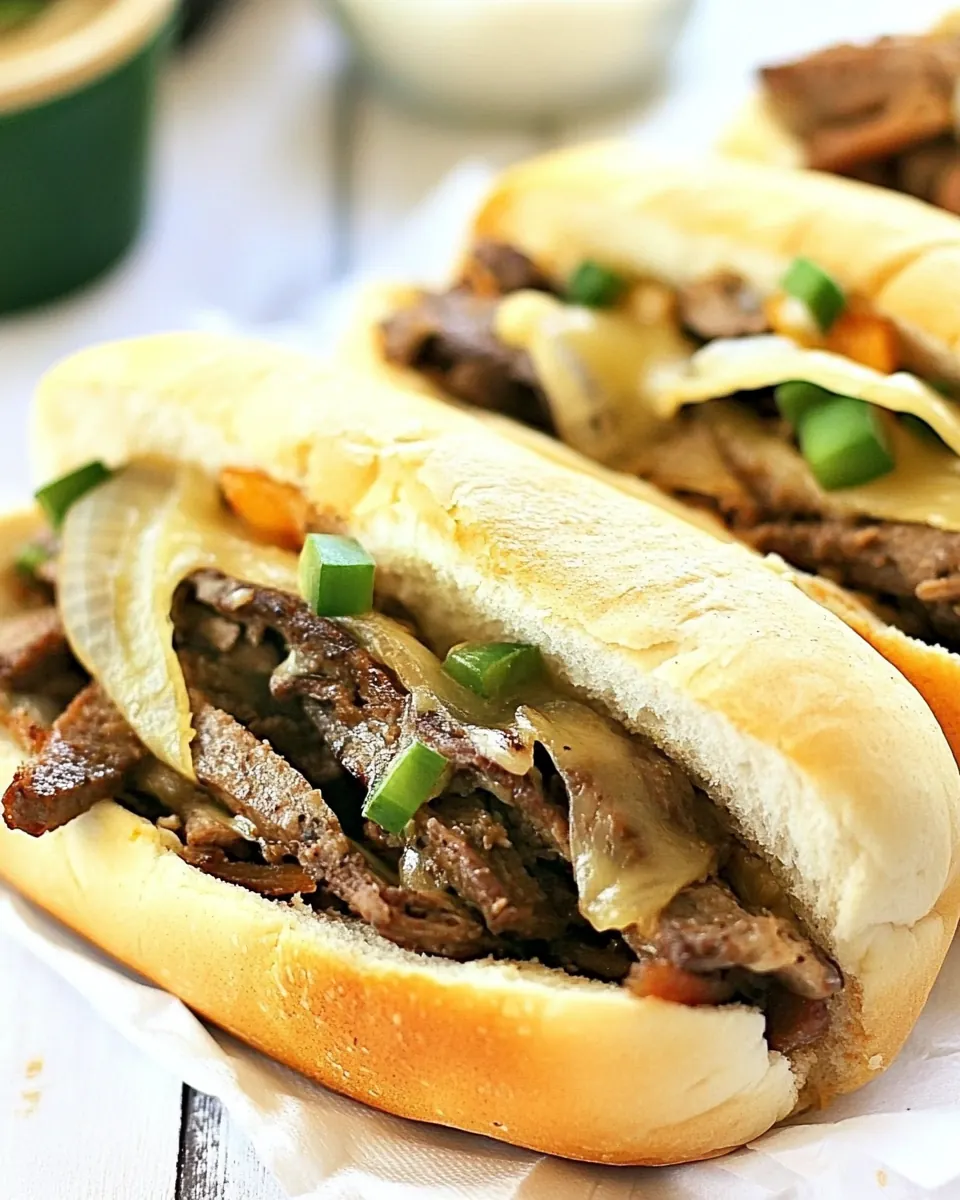
Slow Cooker Philly Cheesesteaks
Slow Cooker Philly Cheesesteaks is the kind of recipe I reach for when the week has been long and everyone needs a comforting, hands off meal.
I remember the first time I tried this version, a chilly evening when the house smelled of simmering broth and softened onion. I was skeptical that a slow cooker could reproduce the classic sizzle of a street cart, yet the result surprised me. The round steak melted into tender ribbons, the aroma of the broth filled the kitchen, and the softened bell pepper added a bright counterpoint. That night we ate with our hands, tearing into warm rolls filled with gooey cheese, and laughed about how easy it was to feed a crowd.
I like how adaptable this recipe is. Sometimes I prepare the filling in the morning, let it cook while I go about my day, and finish the rolls just before dinner. Other times I serve it for a casual game night, letting friends assemble their own sandwiches while the cheese bubbles under the broiler. There is a comforting rhythm to the process: a quick rub of spices on the round steak, a slow, patient braise, then the satisfying final minutes of toasting the rolls and melting the cheese. It feels like a small ritual that yields big flavors, and it has become a weeknight favorite in my rotation.
Recipe Snapshot
7 hr 10 mins
10 mins
420 mins
Hard
550 kcal
American
Keto, Gluten-Free
Dinner
Slow Cooker, Oven, Tongs
The Charm of This Slow Cooker Philly Cheesesteaks
Rich, slow cooked flavor without fuss
I love that the Slow Cooker Philly Cheesesteaks builds deep beef flavor by relying on time rather than technique. The long, gentle cooking of the round steak in beef broth teases out collagen and savory richness, so you get that juicy, almost shredded texture without standing over a hot pan.
Hands off cooking for busy days
Because you set it and forget it, this recipe frees you up to run errands, work from home, or relax. I appreciate having a meal that practically makes itself while I handle other tasks, and it consistently delivers tender meat and well melded flavors at serving time.
Family friendly and crowd pleasing
Everyone can customize their sandwich, which makes it perfect for gatherings. I like that the cheese melts over the meat and vegetables, creating a comforting, kid approved sandwich. The simple assembly reduces stress when you have company.
Flexible and forgiving
I’ve found this recipe is forgiving of timing and thickness of slices. If you slice the round steak thinner, cooking time drops, and if you end up running late you can keep it warm in the cooker. That flexibility makes it a reliable choice when plans shift.
Great value and simple ingredients
With pantry staples like beef broth, basic spices, and a few fresh vegetables, this dish stretches a modest amount of meat into satisfying sandwiches. I often pick up good rolls and decent cheese to elevate the result without adding complexity.
What You’ll Need for Slow Cooker Philly Cheesesteaks
These ingredients come together to create a balanced, slow cooked sandwich filling. The key players are the tender round steak for meaty depth, the aromatics like onion and bell pepper for brightness, and the low sodium beef broth which keeps the meat moist while concentrating savory notes. The rolls and cheese finish the experience, giving you a portable, melty sandwich with satisfying texture contrasts.
- 1.5 lbs round steak 1.5 to 2 lbs – thinly sliced (the more thinly they are sliced, the less cooking time is required): Slice thinly and provide the primary beefy base for the sandwiches; cooks until tender in the slow cooker and soaks up the broth and seasonings. Ensure slices are as thin as possible to reduce cooking time and yield more tender meat. Can be seared briefly before slow cooking to develop extra brown flavor.
- 1/2 tsp pepper: Season lightly to add sharp heat and balance the savory flavors; distributes evenly over the meat for a subtle peppery bite. Use freshly ground for brighter flavor and adjust to taste before serving.
- 1/2 tsp garlic powder: Season gently to introduce warm, aromatic garlic notes that complement the beef and vegetables; mixes into the broth for even flavor infusion. Sprinkle evenly for consistent taste without overpowering the other spices.
- 1 onion sliced: Slice into rings or strips to contribute sweet, caramelized depth and body to the filling; softens in the slow cooker and melds with the meat and broth. Caramelization before adding can enhance sweetness and overall complexity.
- 1 bell pepper sliced: Slice into strips to add bright, slightly sweet, and crisp vegetable texture; softens during cooking and pairs well with onions and beef. Choose any color for sweetness variance and slice uniformly for even cooking.
- 32 oz low-sodium beef broth: Pour to supply a savory cooking liquid that tenderizes the meat and creates a flavorful sauce; low-sodium helps control overall saltiness in the finished filling. Use enough to nearly cover the meat and vegetables for thorough braising.
- 6 French rolls: Split and hold the sandwiches while providing a soft, sturdy vessel for the hot filling; toasts well if desired for added texture. Choose rolls large enough to contain the meat and melted cheese without falling apart.
- 12 slices Provolone American, or other cheese: Layer on top to introduce creamy, melty richness that binds the filling and adds a signature cheesesteak finish; use slices to melt directly over hot meat for best results. Mix Provolone and American for a balance of tang and meltability.
Step by Step Guide for Slow Cooker Philly Cheesesteaks
This guide walks you through each moment of building the filling and finishing the sandwiches so you get tender meat, softened vegetables, and perfectly melted cheese. I will expand each direction with sensory cues, the reason behind the technique, and a troubleshooting tip so you can be confident while cooking.
- Rub the steak with pepper and garlic powder. Place in the slow cooker.: The air will be perfumed with a raw, peppery scent that quickly mellows as heat reaches the meat, creating an initial savory coating that helps every piece develop flavor while braising. Rubbing spices into the round steak ensures the seasoning is distributed rather than sitting on the surface, which allows the aromatics to infuse during the long cook. You should feel the slight grain of the meat beneath your fingers as you press the spices in, and visually the pieces will take on an even, lightly speckled appearance. If you skip rubbing and instead drop spices in loose, the seasoning can clump and leave pockets of over seasoned or bland meat. A common mistake is using too much pepper here, which can dominate the broth; measure the pepper and garlic powder so the beef's natural flavor remains center stage.
- Add onion, bell pepper and beef broth.: As you add the sliced onion and sliced bell pepper , their raw edges and crisp textures contrast with the meat, and once submerged in the warm beef broth they begin to soften and add sweetness to the cooking liquid. Pouring the warm or room temperature broth over the meat creates an immediate surface gloss that helps transmit heat evenly; you'll notice the broth taking on a faint red tint as juices begin to leach from the round steak , which is a good sign that flavors are marrying. This step matters because the vegetables become the aromatic backbone of the filling, balancing beef richness with gentle sweetness. Avoid crowding the cooker with large, uneven vegetable pieces, because that leads to some bits becoming mushy while others remain underdone.
- Stir to mix.: When you stir the contents gently, you'll hear a soft slosh as the broth circulates and the slices of round steak settle into the liquid, ensuring spices, onion , and bell pepper are relatively evenly distributed. The surface will show a thin film of seasoning and the colors will shift to a unified, appetizing hue. This mixing helps heat reach every piece more uniformly, so no area becomes overcooked while another stays cold. A typical error is stirring too vigorously, which can tear delicate meat slices and create a less pleasing texture; use slow, deliberate motions instead.
- Cook on low for 5-7 hours or until meat is tender.: Over several hours the cooker will slowly coax collagen from the round steak , turning the texture from chewy to tender and producing a savory broth that smells deeply meaty. You'll notice a change in aroma from bright and raw to rich and rounded, and the meat will begin to fall into ribbon like strands when prodded. This gentle, extended cook is essential for transforming economical cuts into luxurious sandwich filling, because slow heat breaks down connective tissue without drying the meat. The main mistake here is impatience; lifting the lid frequently releases heat and prolongs cooking, so resist the urge to check too often. If the meat still feels firm at the low end of the time range, let it continue until it softly separates under a fork.
- Preheat oven to 350 F.: Heating the oven to 350 F creates the optimal environment for toasting the rolls and melting the cheese without burning the bread. When the oven reaches temperature you'll feel a warm, dry wave as you open it; that dry heat helps crisp the exterior of the rolls quickly while keeping the crumb moist. This temperature is a sweet spot because it browns the rolls without collapsing them. A common error is setting the oven too high which can crisp the crust before the interior warms and the cheese melts, leaving a cold filling under a hard shell.
- Toast open rolls for several minutes until slightly crusty.: As the rolls toast, the scent of warm bread becomes prominent and the exterior evolves from soft to slightly crackly, providing a tactile contrast to the tender filling. Toasting also helps form a barrier so juices do not saturate the crumb and become soggy. Press lightly with a spatula after a few minutes; the top should give a little but still spring back. Avoid skipping this step, because untoasted rolls will absorb juices quickly and lose structure, resulting in a limp sandwich.
- Lay a piece of cheese on both sides of the roll.: Placing a slice of cheese on each open face creates an envelope of melting richness that embraces the filling and binds the sandwich components. The cheese will soften and start to sag within seconds under heat, and when the sandwich is returned to the oven it will bubble and spread into a glossy, melty layer. This technique ensures each bite has creamy continuity rather than pockets of dry bread. One mistake is using a cheese that does not melt well, which prevents the cohesive, gooey texture that makes the sandwich so satisfying.
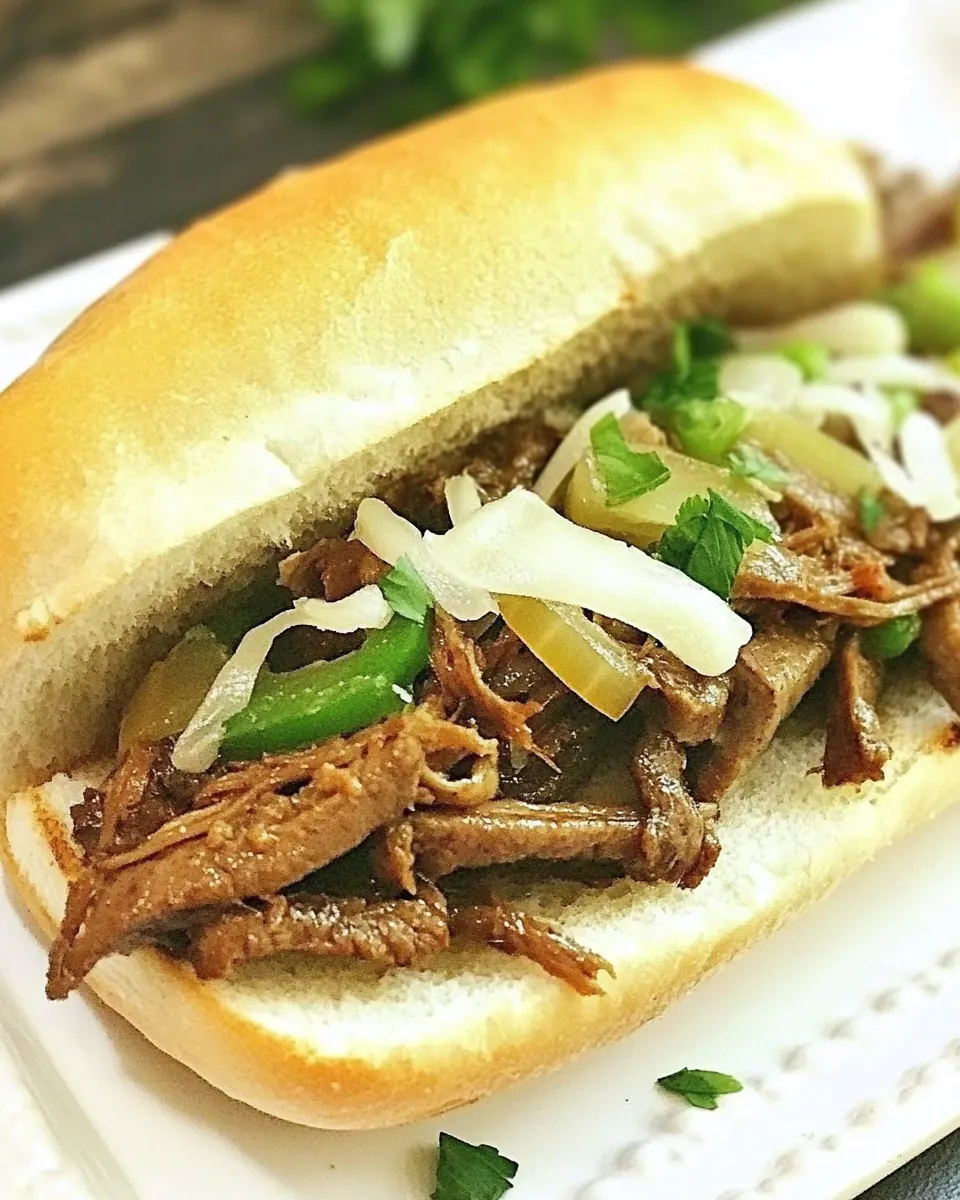
- Use tongs to remove meat, onions and bell pepper from slow cooker (letting juices drip off) and pile on top of rolls.: When you lift the filling with tongs, the meat should come away in tender ribbons and the vegetables will be limp and fragrant, glossy from the braising liquid. Letting excess juices drip back into the cooker prevents the rolls from becoming sodden, while the retained moisture inside the meat keeps it succulent. Spread the filling so each roll receives a generous mound, and notice the steam rising and the savory aroma intensifying. A common pitfall is scooping too much liquid along with the solids, which leads to a soggy sandwich; allow a moment to let the juices return to the cooker before plating.
- Return to the oven to melt cheese.: Back in the oven the cheese will quickly transform into a molten blanket, often bubbling slightly at the edges and developing a subtle browned sheen if left a touch longer. This final heat melds the flavors, and the sight of the cheese stretching as you lift the sandwich is deeply satisfying. Timing matters because leaving it in too long can over toast the rolls, while too short a time will leave the cheese just softened but not fully melted. Keep a close eye during this step so you achieve the ideal gooey layer.
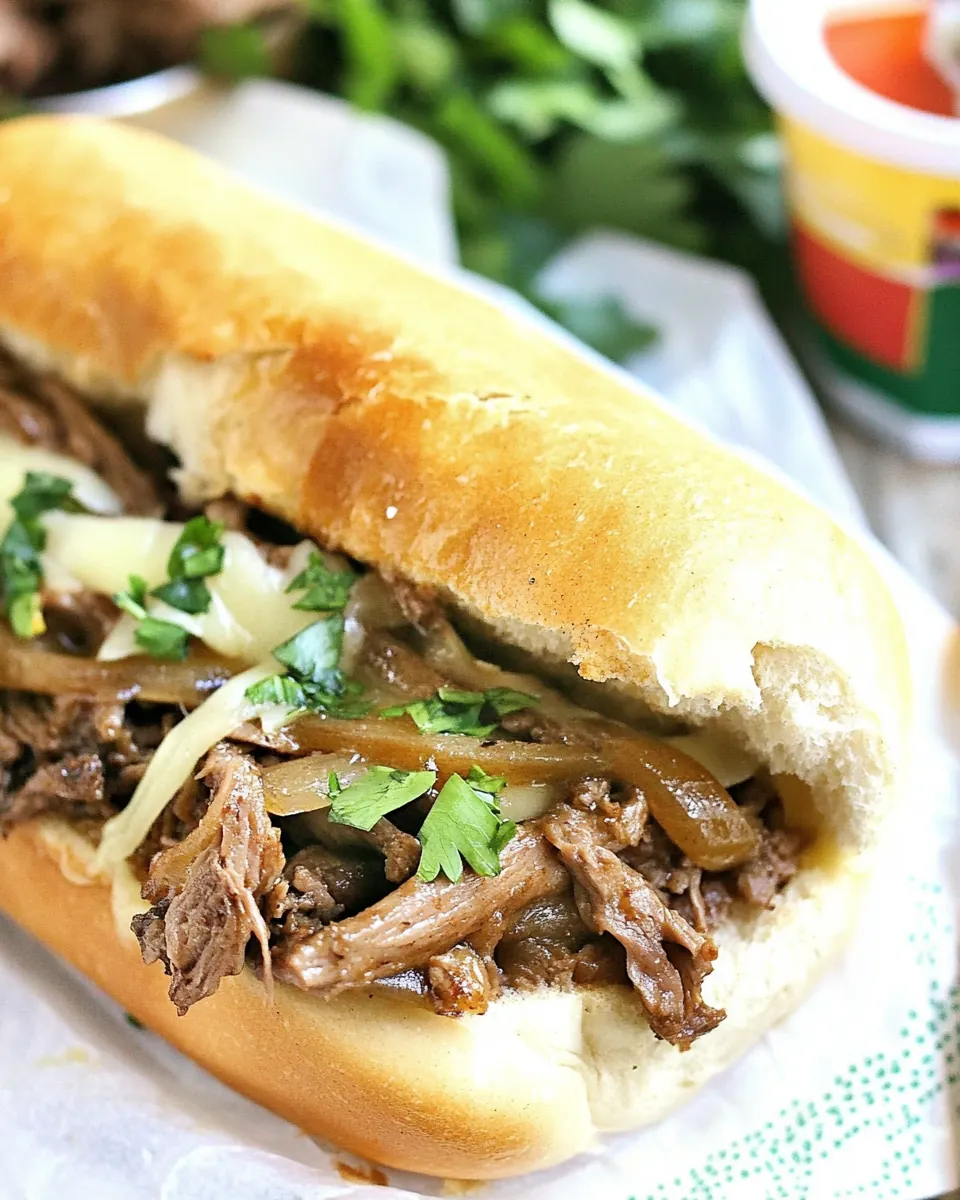
- Serve hot!: When you serve, the sandwich should be steaming, with warm, melty cheese and tender ribbons of round steak . The first bite should combine the crisped roll, creamy cheese, and savory meat in a balanced mouthful. Serve immediately so textures remain distinct and the contrast between crust and filling is at its peak. A frequent mistake is allowing sandwiches to sit too long which causes the roll to absorb moisture and the cheese to firm up, diminishing the eat in experience.
Substitutions and Tips
This section expands practical tips and substitutions to help you succeed with Slow Cooker Philly Cheesesteaks. I include workable swaps, timing notes, and serving suggestions so you can adapt the recipe without losing its soul.
- Thin slicing matters, slice the round steak against the grain as thinly as possible to ensure tenderness and easy shredding after slow cooking.
- Broth choice, use low sodium beef broth so you can adjust salt at the end rather than having an overly seasoned final dish.
- Cheese flexibility, Provolone or American melt beautifully, but any good melting cheese will work; choose one you enjoy and that melts uniformly.
- Vegetable consistency, slice the onion and bell pepper evenly so they soften at the same rate and provide consistent texture across sandwiches.
- Keep juices controlled, let the filling drain briefly on a slotted spoon or tongs to avoid pouring too much liquid onto the rolls.
- Timing buffer, the recipe is forgiving so if your schedule changes extend low cooking time rather than increasing heat for better texture.
Accompaniments for Slow Cooker Philly Cheesesteaks
These serving ideas enhance the sandwich, whether you are making a casual weeknight dinner or feeding a group. Think about crunchy sides, pickled contrasts, and warming accompaniments that complement the rich filling.
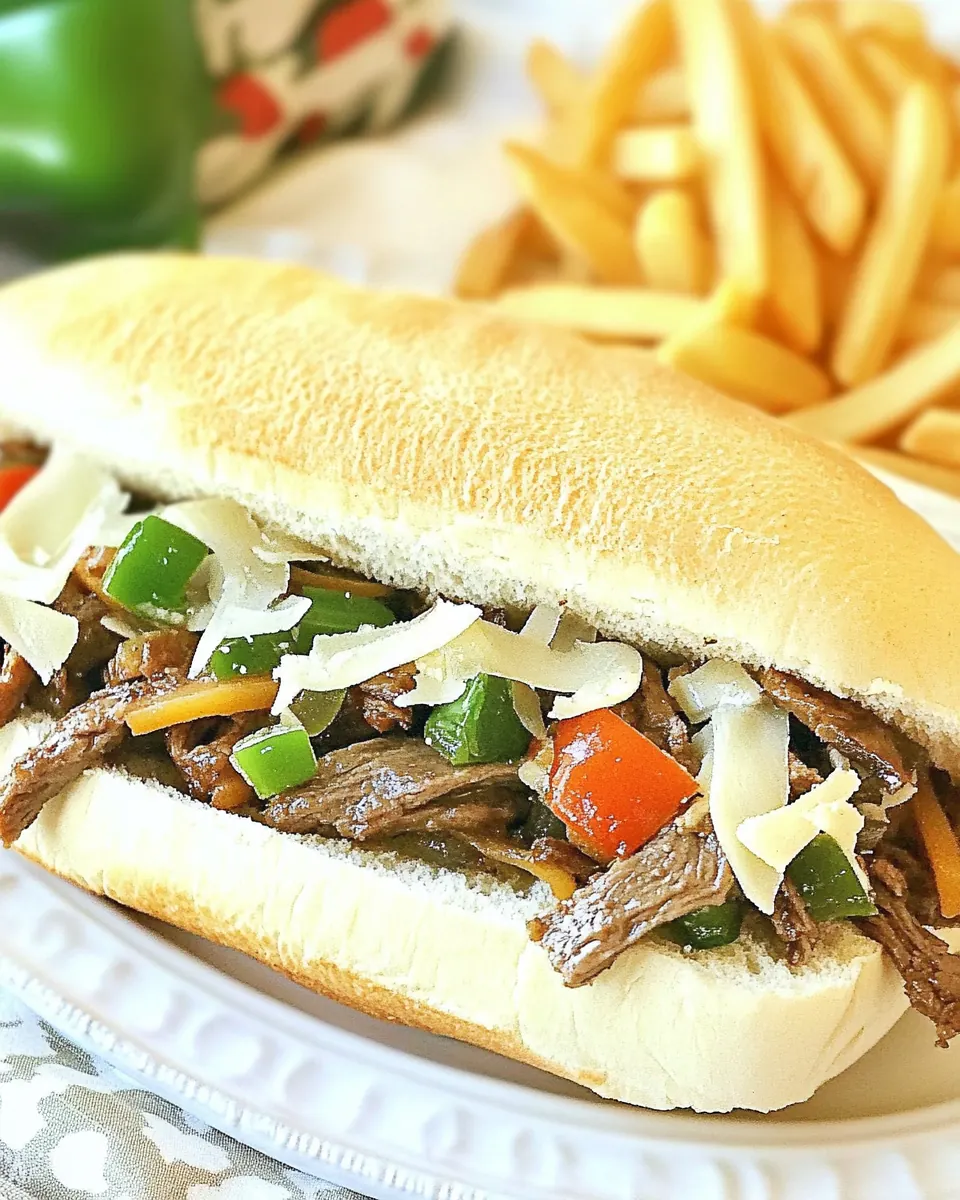
- Crisp fries or potato wedges — Serve with a side of golden fries for a classic pairing that offers crunchy contrast to the tender filling, perfect for casual dinners and game nights.
- Pickles or pickled vegetables — A tangy pickle brightens each bite and cuts through the richness, making this ideal for heavier winter meals when you want an acid lift.
- Simple green salad — A light, peppery salad dressed with a bright vinaigrette adds freshness and balances the savory sandwich, good for a weeknight family meal.
- Potato salad or coleslaw — Creamy sides provide a cool counterpoint to the hot sandwich, and they work well for gatherings and potlucks.
- Storage tips — Keep leftover filling in an airtight container refrigerated for up to three days, and reheat gently to preserve tenderness; store rolls separately to avoid sogginess.
- Occasions — Ideal for casual dinners, game day spreads, or a comforting winter supper when you want minimal hands on time and big flavors.
- Seasonal pairing — This recipe shines in colder months like winter, when hearty, warming dishes feel most satisfying.
FAQ
Conclusion
This recipe shines because it turns simple ingredients into an indulgent, comforting sandwich with minimal hands on work. The slow braise yields tender ribbons of beef, the softened onions and peppers add sweetness and texture, and the melted cheese ties everything together into a satisfying handheld meal. I encourage you to try making these sandwiches the next time you want something effortless yet deeply flavorful; the combination of toasted rolls, hot filling, and stretchy cheese is reliably crowd pleasing and surprisingly easy to pull off at home.
Slow Cooker Philly Cheesesteaks
Equipment
- Slow Cooker
- Oven
- Tongs
Ingredients
- 1.5 lbs round steak 1.5 to 2 lbs - thinly sliced (the more thinly they are sliced, the less cooking time is required) Slice thinly and provide the primary beefy base for the sandwiches; cooks until tender in the slow cooker and soaks up the broth and seasonings. Ensure slices are as thin as possible to reduce cooking time and yield more tender meat. Can be seared briefly before slow cooking to develop extra brown flavor.
- 1/2 tsp pepper Season lightly to add sharp heat and balance the savory flavors; distributes evenly over the meat for a subtle peppery bite. Use freshly ground for brighter flavor and adjust to taste before serving.
- 1/2 tsp garlic powder Season gently to introduce warm, aromatic garlic notes that complement the beef and vegetables; mixes into the broth for even flavor infusion. Sprinkle evenly for consistent taste without overpowering the other spices.
- 1 onion sliced Slice into rings or strips to contribute sweet, caramelized depth and body to the filling; softens in the slow cooker and melds with the meat and broth. Caramelization before adding can enhance sweetness and overall complexity.
- 1 bell pepper sliced Slice into strips to add bright, slightly sweet, and crisp vegetable texture; softens during cooking and pairs well with onions and beef. Choose any color for sweetness variance and slice uniformly for even cooking.
- 32 oz low-sodium beef broth Pour to supply a savory cooking liquid that tenderizes the meat and creates a flavorful sauce; low-sodium helps control overall saltiness in the finished filling. Use enough to nearly cover the meat and vegetables for thorough braising.
- 6 French rolls Split and hold the sandwiches while providing a soft, sturdy vessel for the hot filling; toasts well if desired for added texture. Choose rolls large enough to contain the meat and melted cheese without falling apart.
- 12 slices Provolone American, or other cheese Layer on top to introduce creamy, melty richness that binds the filling and adds a signature cheesesteak finish; use slices to melt directly over hot meat for best results. Mix Provolone and American for a balance of tang and meltability.
Instructions
- Rub the steak with pepper and garlic powder. Place in the slow cooker.: The air will be perfumed with a raw, peppery scent that quickly mellows as heat reaches the meat, creating an initial savory coating that helps every piece develop flavor while braising. Rubbing spices into the round steak ensures the seasoning is distributed rather than sitting on the surface, which allows the aromatics to infuse during the long cook. You should feel the slight grain of the meat beneath your fingers as you press the spices in, and visually the pieces will take on an even, lightly speckled appearance. If you skip rubbing and instead drop spices in loose, the seasoning can clump and leave pockets of over seasoned or bland meat. A common mistake is using too much pepper here, which can dominate the broth; measure the pepper and garlic powder so the beef's natural flavor remains center stage.
- Add onion, bell pepper and beef broth.: As you add the sliced onion and sliced bell pepper , their raw edges and crisp textures contrast with the meat, and once submerged in the warm beef broth they begin to soften and add sweetness to the cooking liquid. Pouring the warm or room temperature broth over the meat creates an immediate surface gloss that helps transmit heat evenly; you'll notice the broth taking on a faint red tint as juices begin to leach from the round steak , which is a good sign that flavors are marrying. This step matters because the vegetables become the aromatic backbone of the filling, balancing beef richness with gentle sweetness. Avoid crowding the cooker with large, uneven vegetable pieces, because that leads to some bits becoming mushy while others remain underdone.
- Stir to mix.: When you stir the contents gently, you'll hear a soft slosh as the broth circulates and the slices of round steak settle into the liquid, ensuring spices, onion , and bell pepper are relatively evenly distributed. The surface will show a thin film of seasoning and the colors will shift to a unified, appetizing hue. This mixing helps heat reach every piece more uniformly, so no area becomes overcooked while another stays cold. A typical error is stirring too vigorously, which can tear delicate meat slices and create a less pleasing texture; use slow, deliberate motions instead.
- Cook on low for 5-7 hours or until meat is tender.: Over several hours the cooker will slowly coax collagen from the round steak , turning the texture from chewy to tender and producing a savory broth that smells deeply meaty. You'll notice a change in aroma from bright and raw to rich and rounded, and the meat will begin to fall into ribbon like strands when prodded. This gentle, extended cook is essential for transforming economical cuts into luxurious sandwich filling, because slow heat breaks down connective tissue without drying the meat. The main mistake here is impatience; lifting the lid frequently releases heat and prolongs cooking, so resist the urge to check too often. If the meat still feels firm at the low end of the time range, let it continue until it softly separates under a fork.
- Preheat oven to 350 F.: Heating the oven to 350 F creates the optimal environment for toasting the rolls and melting the cheese without burning the bread. When the oven reaches temperature you'll feel a warm, dry wave as you open it; that dry heat helps crisp the exterior of the rolls quickly while keeping the crumb moist. This temperature is a sweet spot because it browns the rolls without collapsing them. A common error is setting the oven too high which can crisp the crust before the interior warms and the cheese melts, leaving a cold filling under a hard shell.
- Toast open rolls for several minutes until slightly crusty.: As the rolls toast, the scent of warm bread becomes prominent and the exterior evolves from soft to slightly crackly, providing a tactile contrast to the tender filling. Toasting also helps form a barrier so juices do not saturate the crumb and become soggy. Press lightly with a spatula after a few minutes; the top should give a little but still spring back. Avoid skipping this step, because untoasted rolls will absorb juices quickly and lose structure, resulting in a limp sandwich.
- Lay a piece of cheese on both sides of the roll.: Placing a slice of cheese on each open face creates an envelope of melting richness that embraces the filling and binds the sandwich components. The cheese will soften and start to sag within seconds under heat, and when the sandwich is returned to the oven it will bubble and spread into a glossy, melty layer. This technique ensures each bite has creamy continuity rather than pockets of dry bread. One mistake is using a cheese that does not melt well, which prevents the cohesive, gooey texture that makes the sandwich so satisfying.
- Use tongs to remove meat, onions and bell pepper from slow cooker (letting juices drip off) and pile on top of rolls.: When you lift the filling with tongs, the meat should come away in tender ribbons and the vegetables will be limp and fragrant, glossy from the braising liquid. Letting excess juices drip back into the cooker prevents the rolls from becoming sodden, while the retained moisture inside the meat keeps it succulent. Spread the filling so each roll receives a generous mound, and notice the steam rising and the savory aroma intensifying. A common pitfall is scooping too much liquid along with the solids, which leads to a soggy sandwich; allow a moment to let the juices return to the cooker before plating.
- Return to the oven to melt cheese.: Back in the oven the cheese will quickly transform into a molten blanket, often bubbling slightly at the edges and developing a subtle browned sheen if left a touch longer. This final heat melds the flavors, and the sight of the cheese stretching as you lift the sandwich is deeply satisfying. Timing matters because leaving it in too long can over toast the rolls, while too short a time will leave the cheese just softened but not fully melted. Keep a close eye during this step so you achieve the ideal gooey layer.
- Serve hot!: When you serve, the sandwich should be steaming, with warm, melty cheese and tender ribbons of round steak . The first bite should combine the crisped roll, creamy cheese, and savory meat in a balanced mouthful. Serve immediately so textures remain distinct and the contrast between crust and filling is at its peak. A frequent mistake is allowing sandwiches to sit too long which causes the roll to absorb moisture and the cheese to firm up, diminishing the eat in experience.
Notes
- Thin slicing matters, slice the round steak against the grain as thinly as possible to ensure tenderness and easy shredding after slow cooking.
- Broth choice, use low sodium beef broth so you can adjust salt at the end rather than having an overly seasoned final dish.
- Cheese flexibility, Provolone or American melt beautifully, but any good melting cheese will work; choose one you enjoy and that melts uniformly.
- Vegetable consistency, slice the onion and bell pepper evenly so they soften at the same rate and provide consistent texture across sandwiches.
- Keep juices controlled, let the filling drain briefly on a slotted spoon or tongs to avoid pouring too much liquid onto the rolls.
- Timing buffer, the recipe is forgiving so if your schedule changes extend low cooking time rather than increasing heat for better texture.