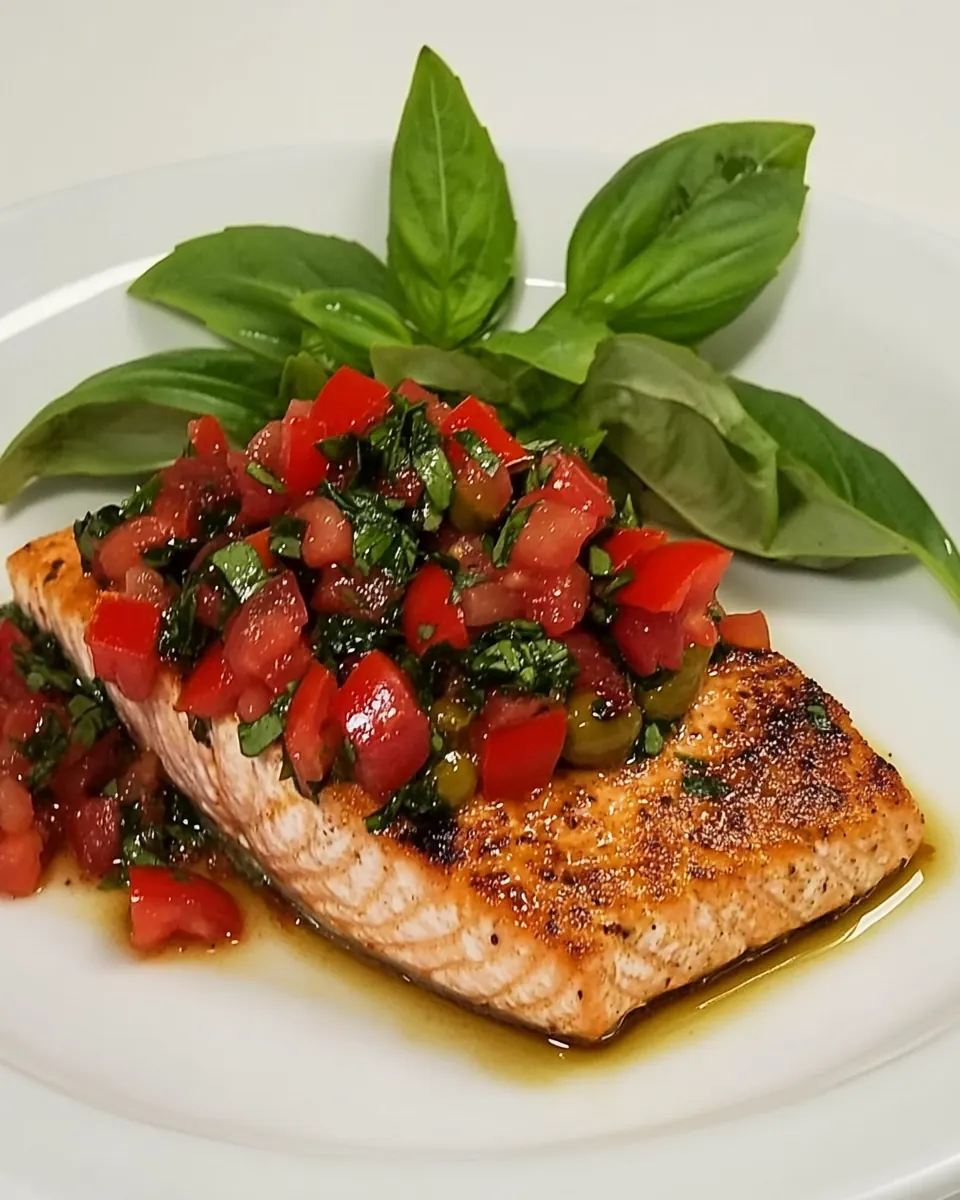
Salmon Recipe with Tomato Olive Relish
Salmon Recipe with Tomato Olive Relish started showing up on my dinner table the summer I moved into my first tiny apartment, when a neighbor handed me a jar of something bright and chunky and insisted I try it on fish.
I remember that evening clearly, the humid air nearly still, and the sound of the grill pan as it met the first piece of salmon. The relish was a revelation, a balance of briny and bright that made the whole meal feel celebratory even though it was just Tuesday. Over the years I tinkered with quantities, learned when to pulse ingredients in the food processor and when to chop by hand, and discovered a few small tweaks that make the relish sing with the salmon.
What I love most about this Salmon Recipe with Tomato Olive Relish is how hands on it is without being fussy. You get the pleasure of crisscrossed grill marks, the sizzle as the fish hits hot metal, and then that vibrant spoonful of relish that wakes up the palate. Friends started asking for the recipe after one backyard dinner, and now it’s my go to for warm weather gatherings where I want to look like I tried harder than I did.
Every time I make this dish I think about pacing, texture, and timing. The relish can be prepared ahead, so you finish with a hot, perfectly textured salmon and a cool, punchy topping. It’s a routine I’ve come to trust, and it always delivers on flavor and simplicity.
Recipe Snapshot
30 mins
15 mins
15 mins
Medium
350 kcal
American
Keto, Paleo
Dinner
Grill or grill pan, Air Fryer, Food processor or knife
Why This Salmon Recipe with Tomato Olive Relish Shines
Fresh bright contrast
I love how the Tomato Olive Relish provides a lively counterpoint to tender salmon. The tomatoes bring acidity, the olives bring salt and umami, and together they lift the whole plate. Every bite feels layered, not flat, which is why I keep this relish in my rotation.
Fast and flexible
This recipe is fast to pull together, which matters on weeknights when I want something impressive without fuss. You can grill or use an air fryer, so it adapts to whatever equipment you trust. I often vary the texture slightly based on time and mood, and it still shines.
Hands on technique that teaches
Working with salmon this way teaches you how to read fish by sight and touch. You get grill marks, a bit of resistance when pressed, and that tender flake. I enjoy guiding friends through these small sensory checks, it makes cooking feel more like a craft than a chore.
Big flavor from simple parts
The ingredients are straightforward, yet combined they taste far more elaborate than they are. A little olive oil, a squeeze of lemon, and capers or green onion change everything. I love recipes that reward attention to basic techniques, and this one does just that.
Entertaining made easy
When I host, this dish sits comfortably on a buffet or a plated course. The relish can be made ahead, letting me focus on timing the fish. It’s one of those recipes that lets you be present with guests instead of stuck at the stove, which I value highly.
Ingredients for Salmon Recipe with Tomato Olive Relish
These ingredients are built around a simple philosophy: let high quality salmon be the star, support it with bright, briny accents, and use fat and acid to bind everything. The key players are the salmon for texture and richness, the tomatoes for acidity, and the olives and capers for savory punch. Together they create contrast in every bite.
- 4 salmon fillets: Rub to coat the salmon evenly, helping seasoning adhere and promoting a flavorful crust during searing or grilling. Apply a thin layer to ensure even browning and to protect the fish from drying out. Works as the base for additional seasonings and enhances texture.
- 1 T olive oil, for rubbing salmon: Brush to provide a light layer of fat that aids in heat transfer and prevents sticking to the cooking surface. Distribute evenly over the fillets before applying rub or seasoning for balanced cooking. Adds subtle richness and helps achieve a glossy finish.
- 2 tsp . Szeged Fish Rub, for rubbing salmon: Season to add a bold savory and mildly spicy flavor profile that complements the natural richness of salmon. Massage into the fillets so aromatics and salt penetrate slightly, enhancing taste throughout the flesh. Creates a seasoned crust that contrasts with the tender interior when cooked.
Preparation Steps for Salmon Recipe with Tomato Olive Relish
These directions guide you through making the relish and cooking the salmon whether you choose a grill, grill pan, or air fryer. Read through once, then follow the sensory cues for best results.
- Start by letting the fish come to room temperature while you rub the grill with oil or spray with nonstick grilling spray and preheat to medium-high heat.: The air around the salmon should feel slightly cool but not icy, which helps it cook evenly from edge to center. As the salmon warms, prepare the cooking surface so it is slick and hot, which will produce immediate contact noise and a satisfying sizzle when the fish hits the pan. You will notice a faint smell of cooking oil as the surface heats, and that sizzle indicates good pan seasoning. The why here is even cooking and a nicely seared exterior, which enhances texture and flavor. A common mistake is skipping this rest, which leads to overcooked edges and an undercooked center.
- For the Air Fryer, preheat to 400 F/200 C if your Air Fryer recommends it.: When the basket is preheated you will hear the fan and sense warm air circulating, creating a crisp exterior on contact. Preheating ensures the salmon begins cooking immediately, locking in juices. If you skip preheating you may get uneven color and longer cook times. One pitfall is crowding the basket, which reduces airflow and prevents crisping.
- Then rub both sides of the salmon with olive oil and season with a generous amount of Szeged Fish Rub. I like this fish rub so much I buy it in packages of six at Amazom. com and give it away to friends, but use any fish rub you prefer.: As you rub the olive oil into the salmon , you’ll see the flesh take on a light sheen and the rub adhere evenly, which helps form a flavorful crust. The aroma of the rub will bloom as it warms, promising savory notes when cooked. This technique matters because surface seasoning creates direct flavor and texture contrast; too much rub can become bitter, so use a measured hand.
- Chop up the tomatoes, olives, green onion, and parsley, and measure out the capers.: Fresh chopping releases juices and aromas, especially from the tomatoes and herbs, and those scents are a sign the relish will be vibrant. Take note of the texture as you cut: tomatoes should be juicy but not pulpy, while olives and capers add firm, salty bites. The why here is to balance textures so the relish complements the soft salmon . A common error is overmashing the tomatoes, which makes the relish watery.
- I used my Food Processor to chop together the relish ingredients, but we agreed that you could chop this up by hand.: Pulsing in a processor gives rapid, consistent pieces and a quick clean up, while hand chopping offers more control over chunk size. You will hear short bursts from the processor and see the ingredients come together visually, which is satisfying and fast. This method matters for achieving a texture that sits nicely on the salmon . Avoid over processing, which yields a paste rather than a relish.
- Start by putting tomatoes, olives, green onion, capers and parsley into the food processor and process in short pulses, about 8 times.: Short pulses create small, distinct pieces that provide texture contrast to the salmon . You will notice the mixture becoming uniformly chopped but not pureed, and the colors remain identifiable. This technique maintains freshness and prevents a soupy consistency, which is crucial for a relish that should top rather than soak the fish. A misstep is continuous processing, which eliminates the pleasant chunkiness.
- Then add lemon juice, olive oil, salt, and pepper and process until ingredients are as finely chopped as you prefer. This was less than 30 seconds for me.: Adding acid and oil at this stage helps bind the relish while brightening flavors; the lemon scent will become more pronounced as you pulse. The mixture should glisten and hold together lightly, with an immediate floral citrus note. The why is that acid lifts fat and salts to create balance, ensuring each bite of salmon is lively. Be cautious with salt, as capers and olives already contribute brine.
- Transfer the relish to a bowl or large measuring cup.: Moving the relish into a bowl lets you taste and adjust seasoning easily, and the vessel will show you the texture clearly. You might notice tiny pockets of oil or juice that can be stirred back in, and the relish will continue to meld flavors over a short rest. This transfer matters because it gives you control for final seasoning tweaks. Avoid leaving it in the processor, which can continue to warm and soften the mixture.
- To cook salmon on the grill or on a stove-top grill pan, lay fish on an angle and cook until you see grill marks when you lift the corner of one piece, about 3 minutes.: The initial contact should produce a steady sizzle and the aroma of Maillard browning, signaling flavor development. Laying the salmon on an angle helps create attractive grill marks; when you lift a corner and see those lines, you know the surface has seared. The why is that searing adds texture and depth of flavor. Don’t flip too early or you will tear the flesh.
- Then rotate the fish so it's at an angle in the other direction and cook 3 minutes more on the same side until you have criss-cross grill marks.: Rotating creates a crisscross pattern and ensures even contact with hot grill ridges, adding visual appeal and extra caramelization points. You will observe darker seared lines and smell richer, toasted notes, which indicate the surface is developing complexity. This technique enhances presentation and flavor through additional browning. A common mistake is excessive movement, which prevents proper mark formation.
- Carefully turn the fish over and cook just until it's barely firm on the second side. Cooking time will be not more than 10 minutes, depending on how thick the salmon is and how done you prefer your fish.: When you press the top with a finger it should resist slightly and then spring back, a tactile cue that the inside remains moist. The second side typically needs less time, and watching for that barely firm feel prevents overcooking. This step matters because it preserves the tender, flaky interior. Overcooking here is easy and will dry out the salmon .
- For Air Fryer, turn air fryer to 400 F/200 C if you aren't already preheating.: Thicker pieces take longer, and you can tell doneness by the color shift from translucent to opaque and the slight flake between the layers. Trust these visual cues over a strict clock, as fish thickness varies. The why is to avoid a dry texture while ensuring safe, enjoyable eating. One pitfall is relying only on a timer and not the fish's feel.
- Put salmon pieces in Air Fryer basket. I can fit four pieces in my Cuisinart Convection Air Fryer Toaster Oven, which is one reason I love it so much.: The hot circulating air crisps the exterior while keeping the interior tender, and you will notice a warm, roasted scent as the unit reaches temperature. This matters because the air fryer creates a quick crust without excess oil. A common error is using a lower temp which yields a limp texture.
- Cook the fish 6 minutes, then check for doneness by pressing down on the fish with a finger. It should feel barely firm but not hard when it’s done. Thicker pieces of fish might take a minute or two longer to cook.: Arrange the salmon so air flows between pieces, and you will hear the fan working as it circulates heat that crisps the surface. The result should be even color and a firm but not hard texture when pressed. Proper spacing matters for even cooking. Crowding causes uneven doneness.
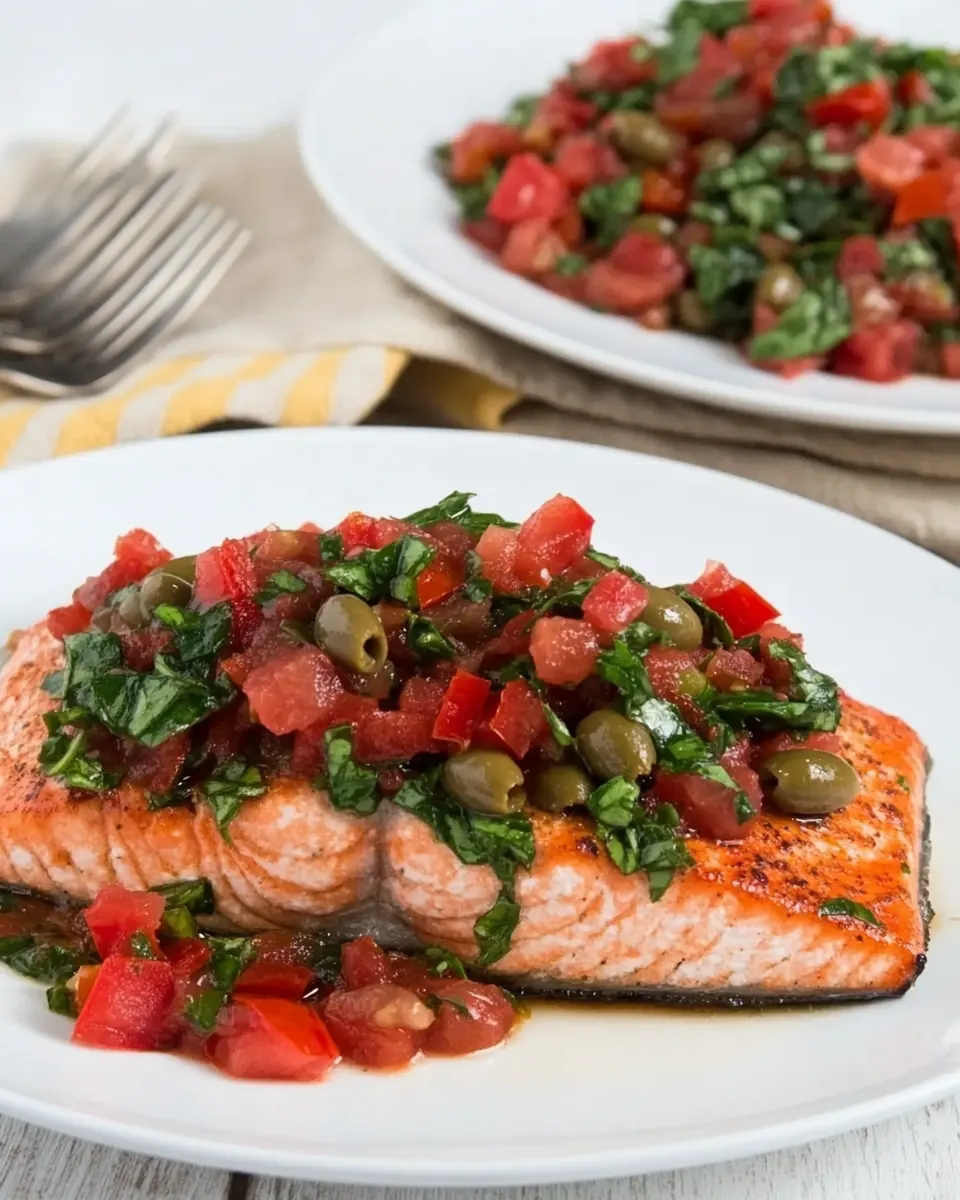
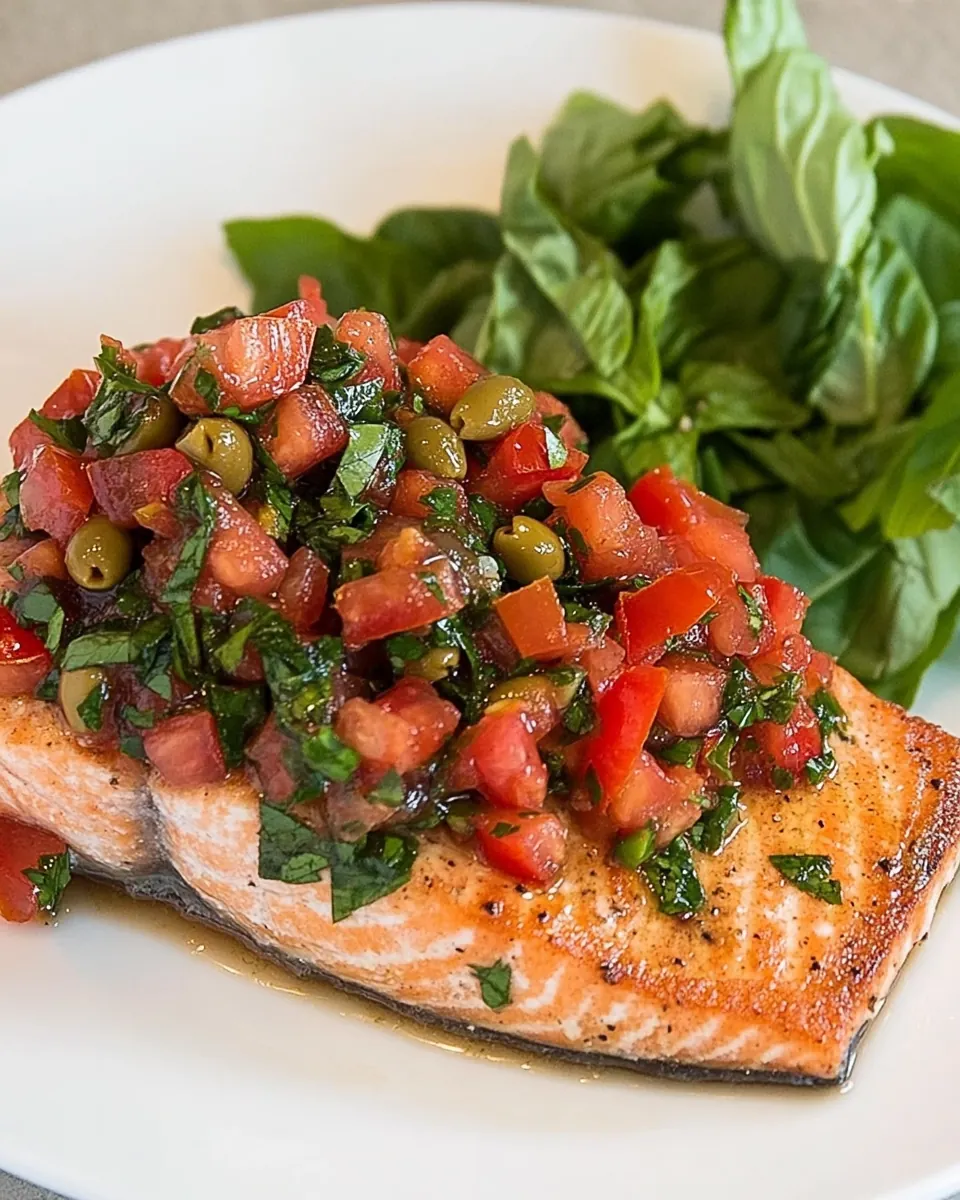
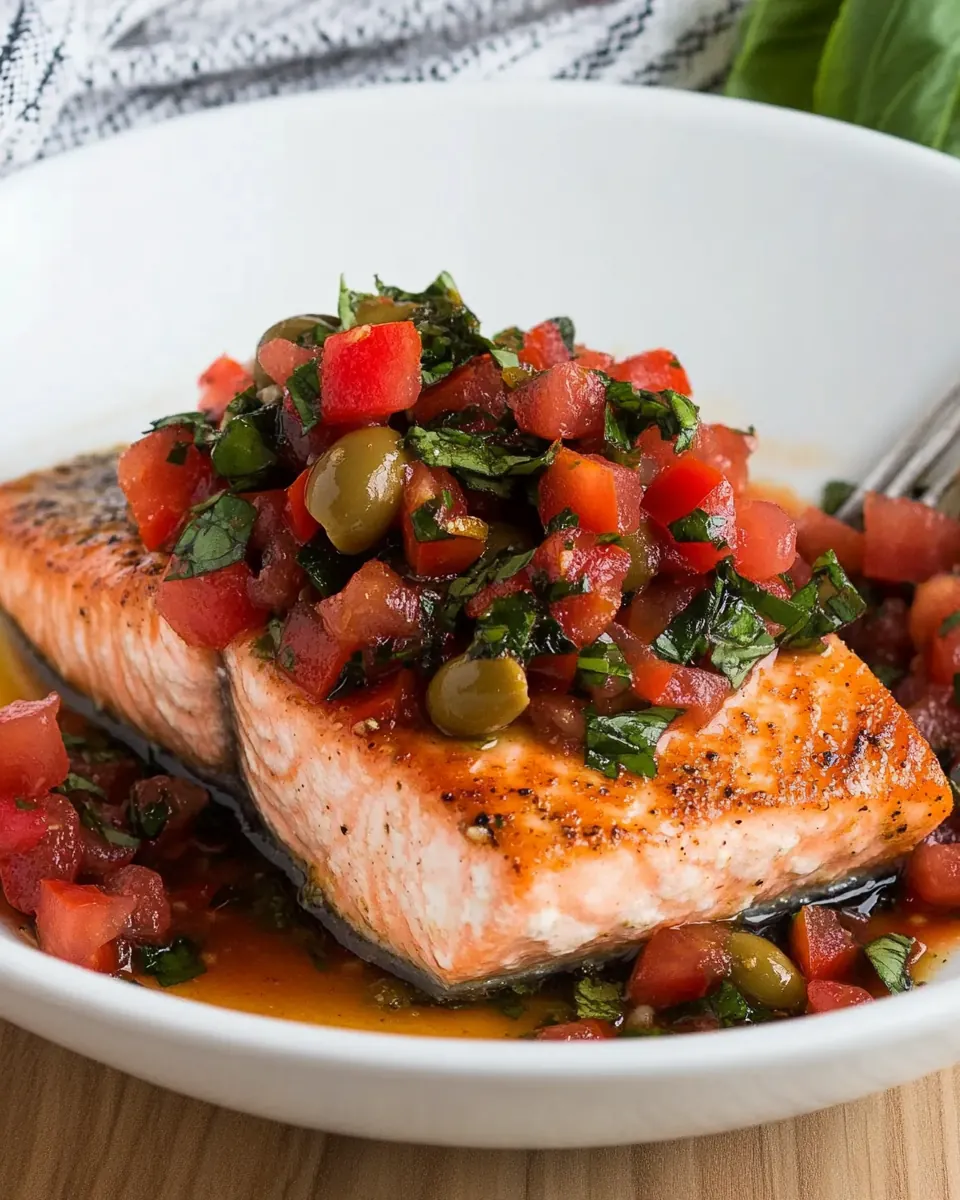
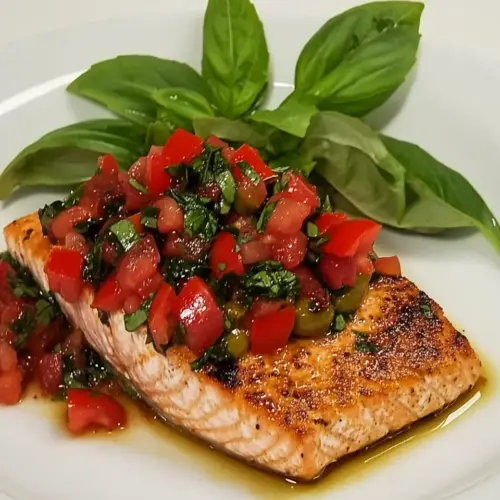
- Serve the grilled or Air Fryer salmon hot, with a generous amount of the Tomato Olive Relish spooned over the fish.: After the initial cook you will see the top turn opaque and the edges flake slightly, and pressing reveals whether the interior is set. This sensory check helps you avoid overcooking and adapt for thicker fillets that may need a minute or two more. The why is that feel is a reliable guide to doneness. A mistake is skipping the check and following time alone.
- Thicker pieces of fish might take a minute or two longer to cook: As the salmon thickness increases you will notice slower color change and a firmer feel. Adjusting cooking time based on thickness ensures a perfect interior without drying. The why is to match heat penetration to flesh thickness. One common misstep is assuming all fillets cook like the ones you used last time.
- Serve the grilled or Air Fryer salmon hot, with a generous amount of the Tomato Olive Relish spooned over the fish: The contrast of hot, slightly crisped salmon and cool, tangy relish is immediate in aroma and texture, which delights the palate. Spoon the relish so each bite gets a balance of tomato brightness and olive brine, and watch the colors pop on the plate. Serving hot matters to maintain texture contrast. A final mistake is letting the fish sit too long, which softens the crust and mutes flavors.
Recipe Notes about Salmon Recipe with Tomato Olive Relish
This section collects practical notes that I refer to every time I make the dish. They cover timing, texture, and small adjustments that make the final plate sing. Read them before you start so you breeze through prep.
- Chopping vs processing: If you prefer a chunkier relish, chop by hand using a sharp knife to preserve distinct pieces and prevent excess juice release.
- Oil control: Use just enough olive oil to coat the salmon, too much can cause smoking or flare ups on a hot grill.
- Seasoning balance: Because the relish contains olives and capers, taste before adding extra salt to avoid oversalting the dish.
- Air Fryer spacing: Arrange the fillets with space around them so hot air circulates and the exterior crisps evenly.
- Make ahead relish: The relish can be made a few hours ahead and held refrigerated, which lets flavors meld without losing brightness.
- Visual doneness check: Look for the flesh to change from translucent to opaque and test with a light press to ensure a tender interior.
How to Serve Salmon Recipe with Tomato Olive Relish
Serving this dish is about contrast and balance, pairing the warm, tender salmon with bright, briny relish and simple sides. Consider timing and presentation so each plate looks and tastes fresh.
- Family weeknight dinner: Plate the hot salmon with a generous spoonful of relish on top and a simple grain like steamed rice or couscous to soak up juices.
- Alfresco lunch: Serve the salmon warm with the relish and a crisp green salad dressed lightly with lemon and oil, making it easy to enjoy outdoors.
- Entertaining: For guests, arrange fillets on a platter, spoon relish over, and garnish with extra parsley so people can help themselves while you mingle.
- Ramadan or special dinners: This dish works well as a main protein, paired with roasted vegetables and flatbread, offering a satisfying and elegant option.
- Storage tips: Keep leftover salmon and relish in separate airtight containers in the refrigerator for up to two days, reheating the fish gently to preserve texture.
- Seasonal pairing: In summer, serve with more fresh herbs and citrus to emphasize brightness; in cooler months, lean on heartier grains to make the meal feel comforting.
FAQ
Conclusion
This Salmon Recipe with Tomato Olive Relish stands out because it pairs tender, simply seared fish with a bold, briny relish that elevates every bite. Give it a try the next time you want a meal that feels both effortless and thoughtfully composed. I hope you enjoy the mix of textures and the bright flavor contrast as much as I do, and that it becomes one of your reliable go to dishes for warm evenings or casual entertaining.
Salmon Recipe with Tomato Olive Relish
Equipment
- Grill or Grill Pan
- Air Fryer
- Food processor or knife
Ingredients
- 4 salmon fillets Rub to coat the salmon evenly, helping seasoning adhere and promoting a flavorful crust during searing or grilling. Apply a thin layer to ensure even browning and to protect the fish from drying out. Works as the base for additional seasonings and enhances texture.
- 1 T olive oil, for rubbing salmon Brush to provide a light layer of fat that aids in heat transfer and prevents sticking to the cooking surface. Distribute evenly over the fillets before applying rub or seasoning for balanced cooking. Adds subtle richness and helps achieve a glossy finish.
- 2 tsp . Szeged Fish Rub, for rubbing salmon Season to add a bold savory and mildly spicy flavor profile that complements the natural richness of salmon. Massage into the fillets so aromatics and salt penetrate slightly, enhancing taste throughout the flesh. Creates a seasoned crust that contrasts with the tender interior when cooked.
Instructions
- Start by letting the fish come to room temperature while you rub the grill with oil or spray with nonstick grilling spray and preheat to medium-high heat.: The air around the salmon should feel slightly cool but not icy, which helps it cook evenly from edge to center. As the salmon warms, prepare the cooking surface so it is slick and hot, which will produce immediate contact noise and a satisfying sizzle when the fish hits the pan. You will notice a faint smell of cooking oil as the surface heats, and that sizzle indicates good pan seasoning. The why here is even cooking and a nicely seared exterior, which enhances texture and flavor. A common mistake is skipping this rest, which leads to overcooked edges and an undercooked center.
- For the Air Fryer, preheat to 400 F/200 C if your Air Fryer recommends it.: When the basket is preheated you will hear the fan and sense warm air circulating, creating a crisp exterior on contact. Preheating ensures the salmon begins cooking immediately, locking in juices. If you skip preheating you may get uneven color and longer cook times. One pitfall is crowding the basket, which reduces airflow and prevents crisping.
- Then rub both sides of the salmon with olive oil and season with a generous amount of Szeged Fish Rub. I like this fish rub so much I buy it in packages of six at Amazom. com and give it away to friends, but use any fish rub you prefer.: As you rub the olive oil into the salmon , you’ll see the flesh take on a light sheen and the rub adhere evenly, which helps form a flavorful crust. The aroma of the rub will bloom as it warms, promising savory notes when cooked. This technique matters because surface seasoning creates direct flavor and texture contrast; too much rub can become bitter, so use a measured hand.
- Chop up the tomatoes, olives, green onion, and parsley, and measure out the capers.: Fresh chopping releases juices and aromas, especially from the tomatoes and herbs, and those scents are a sign the relish will be vibrant. Take note of the texture as you cut: tomatoes should be juicy but not pulpy, while olives and capers add firm, salty bites. The why here is to balance textures so the relish complements the soft salmon . A common error is overmashing the tomatoes, which makes the relish watery.
- I used my Food Processor to chop together the relish ingredients, but we agreed that you could chop this up by hand.: Pulsing in a processor gives rapid, consistent pieces and a quick clean up, while hand chopping offers more control over chunk size. You will hear short bursts from the processor and see the ingredients come together visually, which is satisfying and fast. This method matters for achieving a texture that sits nicely on the salmon . Avoid over processing, which yields a paste rather than a relish.
- Start by putting tomatoes, olives, green onion, capers and parsley into the food processor and process in short pulses, about 8 times.: Short pulses create small, distinct pieces that provide texture contrast to the salmon . You will notice the mixture becoming uniformly chopped but not pureed, and the colors remain identifiable. This technique maintains freshness and prevents a soupy consistency, which is crucial for a relish that should top rather than soak the fish. A misstep is continuous processing, which eliminates the pleasant chunkiness.
- Then add lemon juice, olive oil, salt, and pepper and process until ingredients are as finely chopped as you prefer. This was less than 30 seconds for me.: Adding acid and oil at this stage helps bind the relish while brightening flavors; the lemon scent will become more pronounced as you pulse. The mixture should glisten and hold together lightly, with an immediate floral citrus note. The why is that acid lifts fat and salts to create balance, ensuring each bite of salmon is lively. Be cautious with salt, as capers and olives already contribute brine.
- Transfer the relish to a bowl or large measuring cup.: Moving the relish into a bowl lets you taste and adjust seasoning easily, and the vessel will show you the texture clearly. You might notice tiny pockets of oil or juice that can be stirred back in, and the relish will continue to meld flavors over a short rest. This transfer matters because it gives you control for final seasoning tweaks. Avoid leaving it in the processor, which can continue to warm and soften the mixture.
- To cook salmon on the grill or on a stove-top grill pan, lay fish on an angle and cook until you see grill marks when you lift the corner of one piece, about 3 minutes.: The initial contact should produce a steady sizzle and the aroma of Maillard browning, signaling flavor development. Laying the salmon on an angle helps create attractive grill marks; when you lift a corner and see those lines, you know the surface has seared. The why is that searing adds texture and depth of flavor. Don’t flip too early or you will tear the flesh.
- Then rotate the fish so it's at an angle in the other direction and cook 3 minutes more on the same side until you have criss-cross grill marks.: Rotating creates a crisscross pattern and ensures even contact with hot grill ridges, adding visual appeal and extra caramelization points. You will observe darker seared lines and smell richer, toasted notes, which indicate the surface is developing complexity. This technique enhances presentation and flavor through additional browning. A common mistake is excessive movement, which prevents proper mark formation.
- Carefully turn the fish over and cook just until it's barely firm on the second side. Cooking time will be not more than 10 minutes, depending on how thick the salmon is and how done you prefer your fish.: When you press the top with a finger it should resist slightly and then spring back, a tactile cue that the inside remains moist. The second side typically needs less time, and watching for that barely firm feel prevents overcooking. This step matters because it preserves the tender, flaky interior. Overcooking here is easy and will dry out the salmon .
- For Air Fryer, turn air fryer to 400 F/200 C if you aren't already preheating.: Thicker pieces take longer, and you can tell doneness by the color shift from translucent to opaque and the slight flake between the layers. Trust these visual cues over a strict clock, as fish thickness varies. The why is to avoid a dry texture while ensuring safe, enjoyable eating. One pitfall is relying only on a timer and not the fish's feel.
- Put salmon pieces in Air Fryer basket. I can fit four pieces in my Cuisinart Convection Air Fryer Toaster Oven, which is one reason I love it so much.: The hot circulating air crisps the exterior while keeping the interior tender, and you will notice a warm, roasted scent as the unit reaches temperature. This matters because the air fryer creates a quick crust without excess oil. A common error is using a lower temp which yields a limp texture.
- Cook the fish 6 minutes, then check for doneness by pressing down on the fish with a finger. It should feel barely firm but not hard when it’s done. Thicker pieces of fish might take a minute or two longer to cook.: Arrange the salmon so air flows between pieces, and you will hear the fan working as it circulates heat that crisps the surface. The result should be even color and a firm but not hard texture when pressed. Proper spacing matters for even cooking. Crowding causes uneven doneness.
- Serve the grilled or Air Fryer salmon hot, with a generous amount of the Tomato Olive Relish spooned over the fish.: After the initial cook you will see the top turn opaque and the edges flake slightly, and pressing reveals whether the interior is set. This sensory check helps you avoid overcooking and adapt for thicker fillets that may need a minute or two more. The why is that feel is a reliable guide to doneness. A mistake is skipping the check and following time alone.
- Thicker pieces of fish might take a minute or two longer to cook: As the salmon thickness increases you will notice slower color change and a firmer feel. Adjusting cooking time based on thickness ensures a perfect interior without drying. The why is to match heat penetration to flesh thickness. One common misstep is assuming all fillets cook like the ones you used last time.
- Serve the grilled or Air Fryer salmon hot, with a generous amount of the Tomato Olive Relish spooned over the fish: The contrast of hot, slightly crisped salmon and cool, tangy relish is immediate in aroma and texture, which delights the palate. Spoon the relish so each bite gets a balance of tomato brightness and olive brine, and watch the colors pop on the plate. Serving hot matters to maintain texture contrast. A final mistake is letting the fish sit too long, which softens the crust and mutes flavors.
Notes
- Chopping vs processing: If you prefer a chunkier relish, chop by hand using a sharp knife to preserve distinct pieces and prevent excess juice release.
- Oil control: Use just enough olive oil to coat the salmon, too much can cause smoking or flare ups on a hot grill.
- Seasoning balance: Because the relish contains olives and capers, taste before adding extra salt to avoid oversalting the dish.
- Air Fryer spacing: Arrange the fillets with space around them so hot air circulates and the exterior crisps evenly.
- Make ahead relish: The relish can be made a few hours ahead and held refrigerated, which lets flavors meld without losing brightness.
- Visual doneness check: Look for the flesh to change from translucent to opaque and test with a light press to ensure a tender interior.