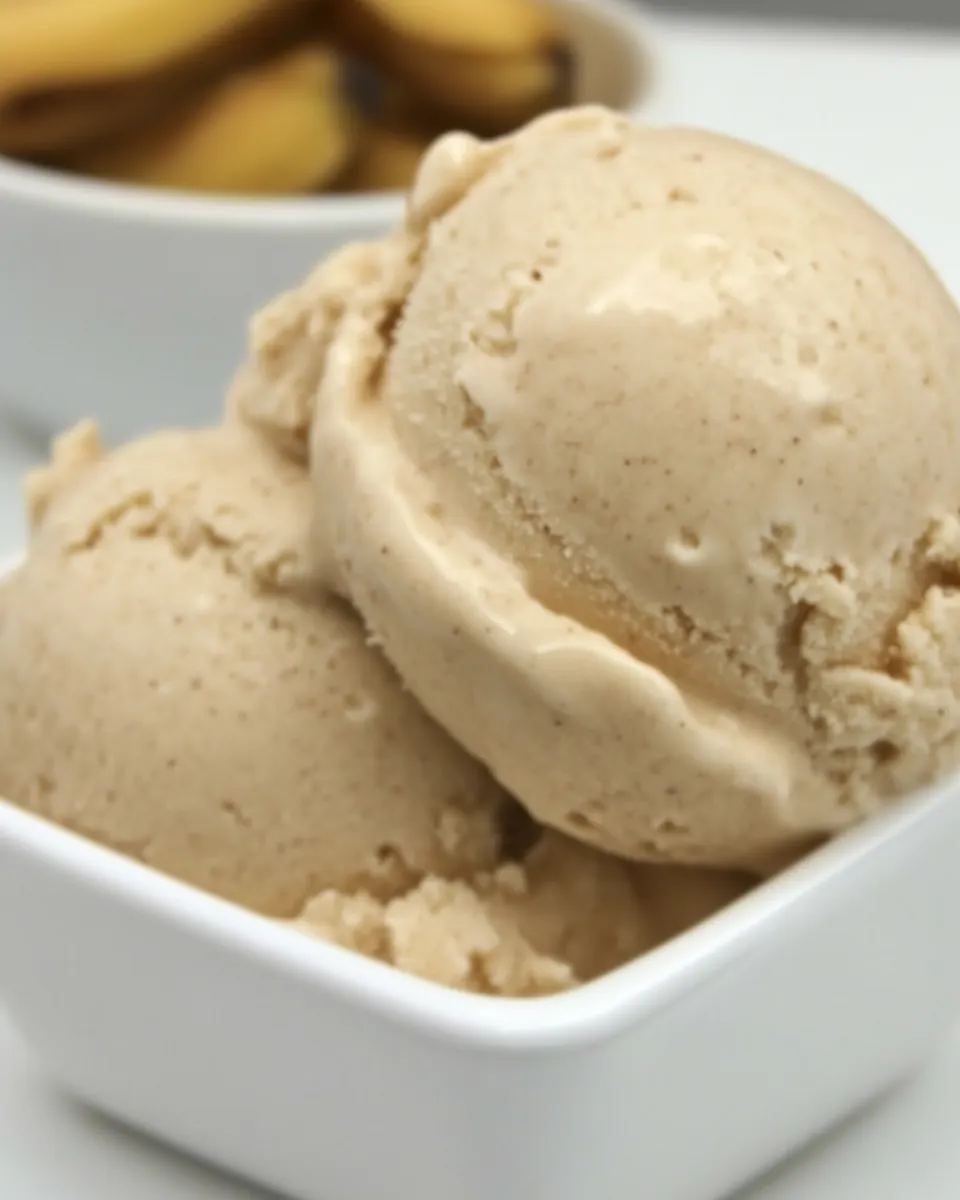
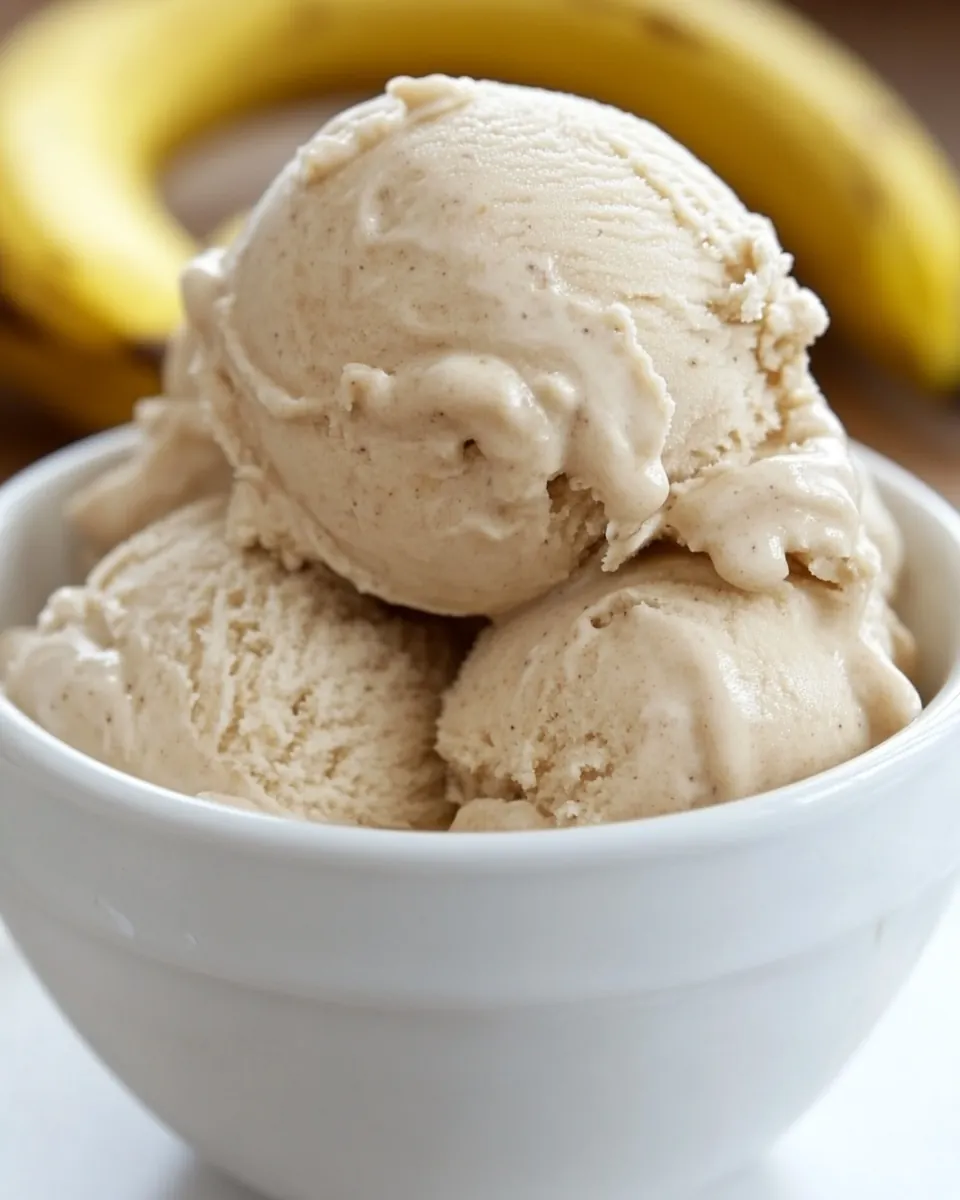
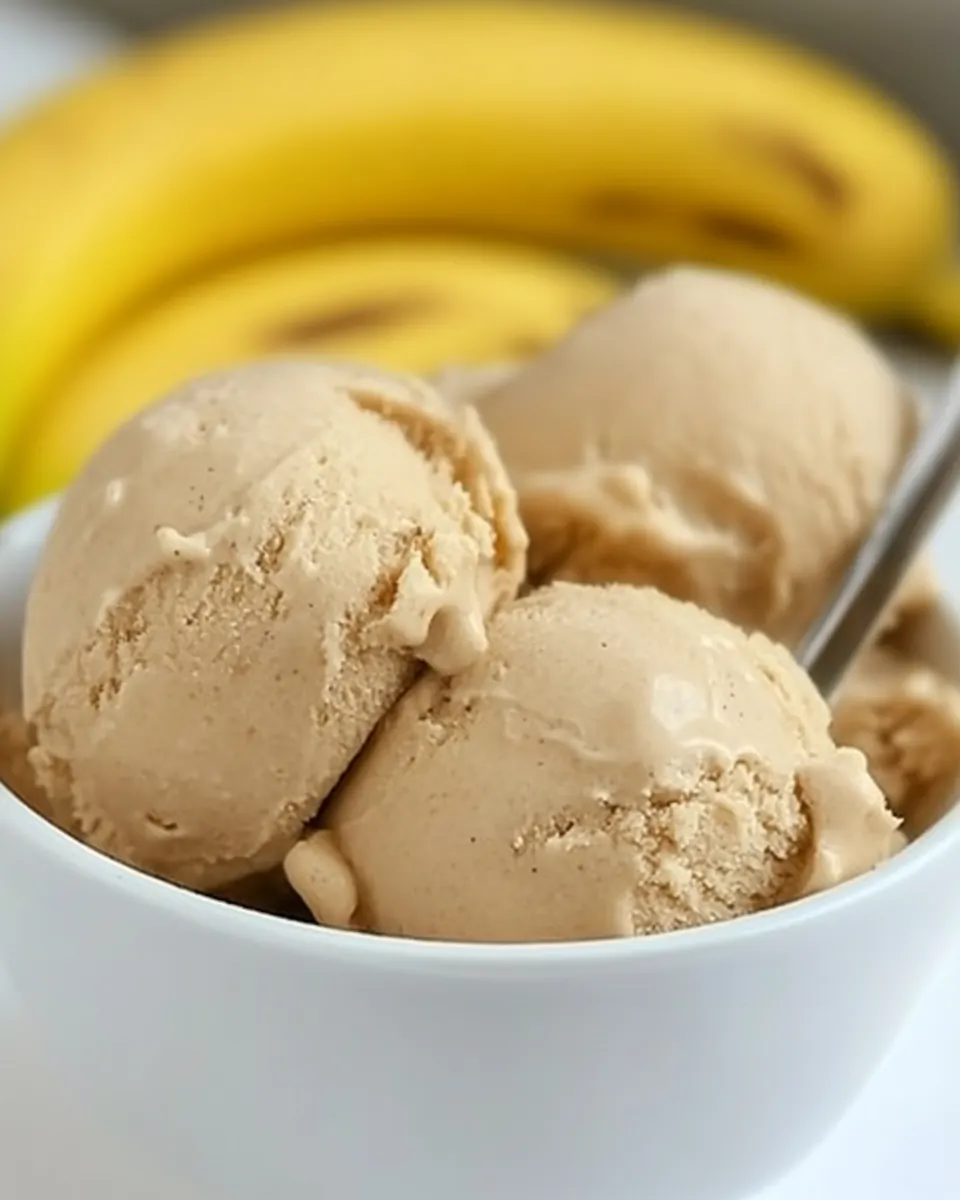
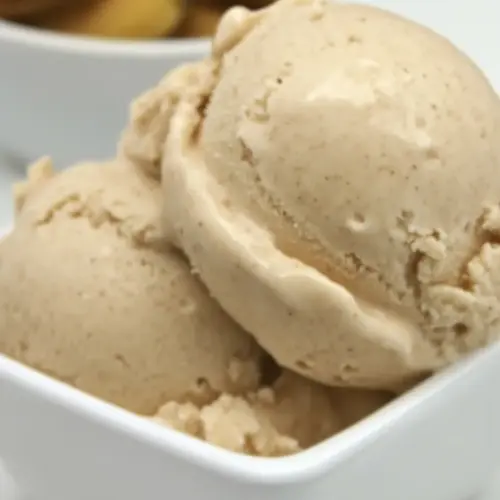
Roasted Banana Ice Cream
Roasted Banana Ice Cream arrived in my life on a sticky summer afternoon when I had more ripe banana than patience, and I was desperate for something cold and honest. I remember pulling a small baking dish from my cabinet and deciding to coax those brown spotted banana into caramelized glory, watching as the kitchen filled with a warm, brown sugar perfume that made me feel instantly calmer. That first spoonful, velvet and slightly smoky, tasted like a warm memory folded into something silky and chilled.
Over the years I have turned to Roasted Banana Ice Cream whenever I wanted to salvage overripe banana or create a dessert that feels thoughtful with almost no fuss. The roasting concentrates sweetness and adds roasted notes that a plain mashed banana can never match. I often make it when friends drop by unexpectedly because it travels well from freezer to bowl, and it pairs beautifully with simple toppings that let the star shine. Each batch tells a small story, and I love how the kitchen smells like summer and small comforts.
Recipe Snapshot
1 hr 10 mins
30 mins
40 mins
Medium
250 kcal
American
Gluten-Free, Low FODMAP
Desserts
Oven, 2 quart baking dish, Blender or food processor, Ice cream maker
Why You Need This Roasted Banana Ice Cream
Why the roasting matters
I adore the way roasting converts the natural sugars in banana into a deep, almost caramel aroma. When I roast the banana, the surface browns and the inside becomes jammy, so the ice cream gains a complexity that raw fruit lacks. It makes the final texture richer and the flavor more concentrated, which means you need less added sugar for balance.
Simple ingredients, big payoff
There is a gentle magic in combining plain pantry staples like brown sugar, butter, and milk with roasted banana. I appreciate recipes that do more with less, and this one rewards you with layers of flavor from minimal effort. The small cast of ingredients keeps the focus on the roasted fruit, and you can taste each element clearly without anything masking the core profile.
Texture that tempts
I love the contrast here: the roasted banana purée gives a creamy, custard like mouthfeel, while chilling and churning in an ice cream machine silkens it into scoopable bliss. The process creates a dense, velvety result rather than a light, icy finish, so every spoon feels indulgent. For me, that mouthfeel is the reason this keeps showing up in my warm weather rotation.
Make ahead and stress free
This recipe is inherently forgiving. You can roast the banana in advance, chill the base, and let the ice cream machine do its work when you are ready. I often prep the mixture the night before a gathering, which frees me to focus on main courses and company. The ability to prepare parts in advance makes it ideal for casual entertaining.
Kid friendly, grown up flavors
Finally, the flavor profile bridges the gap between childhood comfort and adult taste. The banana brings a familiar sweetness, while browned butter notes and a hint of lemon juice elevate it just enough for adults. I’ve watched picky eaters and seasoned food lovers finish the same bowl, and that always feels like a small victory.
Essential Ingredients for Roasted Banana Ice Cream

These ingredients are deliberately simple and purposeful. I choose each item to either deepen sweetness, build creaminess, or balance flavor. The roasted banana is the centerpiece, the brown sugar caramelizes with it, the butter adds richness, and the milk and granulated sugar create the body of the frozen base. Small touches like lemon juice and coarse salt sharpen the sweetness so the profile never becomes cloying.
- 3 medium-sized ripe bananas, peeled: Mashed and roasted to deepen sweetness and caramelize natural sugars, provides the primary banana flavor and creamy base for the ice cream. Adds body and contributes moisture and a smooth texture when blended into the custard.
- 1/3 cup (73.33 g) light brown sugar: Sprinkled over bananas before roasting to enhance caramelization and provide a rich, molasses-like sweetness that complements the fruit. Balances acidity and deepens overall flavor while helping create a slightly sticky, caramelized surface.
- 1 tablespoon butter, salted or unsalted, cut into small pieces: Melted onto the pan or bananas to promote browning and add a rich, buttery flavor that complements roasted fruit. Contributes subtle fat that improves mouthfeel and helps dissolve sugars for even caramelization.
- 1 1/2 cups (366 ml) whole milk: Stirred into the custard to provide liquid, richness, and lactose for a creamy texture and mouthfeel. Carries flavor, helps dissolve sugars, and contributes to the overall body and smoothness of the frozen dessert.
- 2 tablespoons granulated sugar: Dissolved into the milk mixture to adjust overall sweetness and assist in creating a balanced frozen dessert. Helps control freezing point slightly to keep the ice cream scoopable and enhances flavor brightness.
- 1/2 teaspoon (0.5 teaspoon) vanilla extract: Added near the end of mixing to impart a warm, aromatic note and round out the sweetness without overpowering the banana. Contributes subtle floral and vanilla complexity that elevates the overall flavor profile.
- 1 1/2 teaspoons (1.5 teaspoons) lemon juice: Squeezed into the mixture to brighten flavors and add a slight tang that balances sweetness from sugars and roasted bananas. Enhances overall flavor contrast and prevents the dessert from tasting cloying.
- 1/4 teaspoon (0.25 teaspoon) coarse salt: Sprinkled into the base to season and intensify flavors, helping to balance sweetness and highlight natural banana and caramel notes. Aids in amplifying aroma and rounding out the overall taste.
How to Cook Roasted Banana Ice Cream
The process is wonderfully straightforward, and the sensory cues are delightful. Roasting the banana develops aroma, blending turns the mixture silken, chilling lets flavors meld, and churning transforms it into ice cream. Take your time at each stage and pay attention to smell and texture for best results.
- Preheat oven to 400 degrees F.: The dry heat of a properly preheated oven produces even caramelization on the banana surface, filling your kitchen with that warm, toasty sugar scent that tells you things are turning golden. You will smell a gentle sweetness as the temperature climbs, and a consistent oven temp prevents patchy browning. Avoid placing the dish too close to the heating element, or edges may burn before the centers are jammy.
- Slice the bananas into 1/2-inch pieces and toss them with the brown sugar and butter in a 2-quart baking dish. Bake for 40 minutes, stirring once during baking, until the bananas are browned and cooked through.: As the banana cooks, the brown sugar melts and mingles with the butter to form a glossy syrup, and you will see bubbling at the edges and pockets of deep golden color across the fruit. Stirring once helps ensure even browning and prevents hot spots where caramel can over darken. A common misstep is skipping the stir, which leads to uneven texture and burnt patches. The finished fruit should be deeply colored and slightly jammy when pressed with a spoon.
- Scrape the bananas and the thick syrup in the baking dish into a blender or food processor. Add the milk, granulated sugar, vanilla, lemon juice and salt, and purée until smooth.: Once blended, the mixture will have a glossy, velvety sheen and a sweet, toasted aroma with a hint of citrus from the lemon juice . Puréeing until very smooth eliminates fibrous bits and ensures a silky mouthfeel after churning. If you stop too soon, small lumps of cooked banana can create an inconsistent texture in the ice cream. Blend until the mixture moves smoothly, and scrape the sides as needed for uniformity.
- Chill the mixture for at least 8 hours (or overnight) in the refrigerator, then freeze it in your ice cream maker according to the manufacturer's instructions. If the chilled mixture is too thick to pour into your machine, whisk it to thin it out.: Chilling allows the flavors to meld and the base to fully cool, which improves churn texture and reduces ice crystal formation. The mixture will smell rounder and taste more integrated after resting. If you rush this step, the machine has to work harder and the texture can become icy. A good indicator that the mixture is ready is when it feels pleasantly cold and slightly thickened in the bowl, but still pourable after a gentle whisk.
Ways to Adapt This Recipe
This recipe is wonderfully flexible while staying true to the roasted fruit focus. Below are practical adaptations and small adjustments I use when I want to tweak texture, sweetness, or flavor intensity. Each tip starts with a short highlighted phrase to help you scan quickly.
- Make it richer: Increase the fat by substituting part of the milk with a higher fat option to create a more indulgent mouthfeel. Doing so will give a creamier result, though the recipe as written already yields a luxurious texture.
- Tweak sweetness: If your banana are exceptionally sweet, reduce the granulated sugar slightly and rely on the roasted fruit syrup to carry the profile. Taste the chilled base before churning to adjust safely.
- Advance prep: Roast the banana and store the puréed base in the fridge for up to 24 hours before churning. This saves time on the day you plan to serve the ice cream and actually improves flavor melding.
- Adjust brightness: Add a touch more lemon juice if the base tastes cloying after roasting. Acid lifts the flavors and keeps the profile lively without making it tart.
- Pan temperature tip: Use a mid sized baking dish so the banana cook evenly; overcrowding can lead to steaming rather than roasting, which reduces caramelization.
- Salt control: If you used salted butter, reduce added coarse salt slightly to avoid over seasoning. Taste the puréed base before final salting.
Serving Ideas for Roasted Banana Ice Cream
This ice cream is wonderfully versatile for serving. Whether you want a simple bowl after dinner, a plated dessert for company, or a casual treat for a summer gathering, small accompaniments can elevate the experience. Below are thoughtful serving options, storage pointers, and occasion suggestions that highlight the ice cream’s strengths.
- Simple scoops: Serve the ice cream in chilled bowls for the purest experience, letting the roasted banana shine. Garnish with a tiny pinch of flaky salt to heighten flavor contrast.
- Sundae style: Add a drizzle of warm caramel or a scattering of chopped toasted nuts for texture contrast. The warm sauce against the cold ice cream creates a lovely temperature play.
- Family gatherings: Make double batches and transfer to lidded containers for easy scooping. Label with the date and keep in the back of the freezer for best texture retention.
- Picnic or potluck: Pack the churned ice cream into a lined insulated container with ice packs for transport. Serve quickly upon arrival to maintain scoopable texture.
- Seasonal pairing: This recipe is perfect for summer evenings when ripe banana are abundant, but it also works through late season fruit when you want a comforting frozen dessert.
- Storage tip: Press a piece of parchment directly onto the surface of the ice cream before sealing the container to reduce ice crystal formation and preserve creaminess.
FAQ
Conclusion
Roasted Banana Ice Cream stands out because it transforms simple ripe bananas into a layered, caramelized frozen dessert with minimal fuss. If you love rich, creamy textures and warm fruity notes, this recipe is an easy way to turn overripe fruit into something memorable. Give it a try when you have a basket of soft bananas, and enjoy how a few pantry staples and a bit of roasting can create an ice cream that feels both homey and elevated. I hope it becomes one of those recipes you reach for again and again.
Roasted Banana Ice Cream
Equipment
- Oven
- 2 quart baking dish
- Blender or food processor
- Ice Cream Maker
Ingredients
- 3 medium-sized ripe bananas, peeled Mashed and roasted to deepen sweetness and caramelize natural sugars, provides the primary banana flavor and creamy base for the ice cream. Adds body and contributes moisture and a smooth texture when blended into the custard.
- 1/3 cup (73.33 g) light brown sugar Sprinkled over bananas before roasting to enhance caramelization and provide a rich, molasses-like sweetness that complements the fruit. Balances acidity and deepens overall flavor while helping create a slightly sticky, caramelized surface.
- 1 tablespoon butter, salted or unsalted, cut into small pieces Melted onto the pan or bananas to promote browning and add a rich, buttery flavor that complements roasted fruit. Contributes subtle fat that improves mouthfeel and helps dissolve sugars for even caramelization.
- 1 1/2 cups (366 ml) whole milk Stirred into the custard to provide liquid, richness, and lactose for a creamy texture and mouthfeel. Carries flavor, helps dissolve sugars, and contributes to the overall body and smoothness of the frozen dessert.
- 2 tablespoons granulated sugar Dissolved into the milk mixture to adjust overall sweetness and assist in creating a balanced frozen dessert. Helps control freezing point slightly to keep the ice cream scoopable and enhances flavor brightness.
- 1/2 teaspoon (0.5 teaspoon) vanilla extract Added near the end of mixing to impart a warm, aromatic note and round out the sweetness without overpowering the banana. Contributes subtle floral and vanilla complexity that elevates the overall flavor profile.
- 1 1/2 teaspoons (1.5 teaspoons) lemon juice Squeezed into the mixture to brighten flavors and add a slight tang that balances sweetness from sugars and roasted bananas. Enhances overall flavor contrast and prevents the dessert from tasting cloying.
- 1/4 teaspoon (0.25 teaspoon) coarse salt Sprinkled into the base to season and intensify flavors, helping to balance sweetness and highlight natural banana and caramel notes. Aids in amplifying aroma and rounding out the overall taste.
Instructions
- Preheat oven to 400 degrees F.: The dry heat of a properly preheated oven produces even caramelization on the banana surface, filling your kitchen with that warm, toasty sugar scent that tells you things are turning golden. You will smell a gentle sweetness as the temperature climbs, and a consistent oven temp prevents patchy browning. Avoid placing the dish too close to the heating element, or edges may burn before the centers are jammy.
- Slice the bananas into 1/2-inch pieces and toss them with the brown sugar and butter in a 2-quart baking dish. Bake for 40 minutes, stirring once during baking, until the bananas are browned and cooked through.: As the banana cooks, the brown sugar melts and mingles with the butter to form a glossy syrup, and you will see bubbling at the edges and pockets of deep golden color across the fruit. Stirring once helps ensure even browning and prevents hot spots where caramel can over darken. A common misstep is skipping the stir, which leads to uneven texture and burnt patches. The finished fruit should be deeply colored and slightly jammy when pressed with a spoon.
- Scrape the bananas and the thick syrup in the baking dish into a blender or food processor. Add the milk, granulated sugar, vanilla, lemon juice and salt, and purée until smooth.: Once blended, the mixture will have a glossy, velvety sheen and a sweet, toasted aroma with a hint of citrus from the lemon juice . Puréeing until very smooth eliminates fibrous bits and ensures a silky mouthfeel after churning. If you stop too soon, small lumps of cooked banana can create an inconsistent texture in the ice cream. Blend until the mixture moves smoothly, and scrape the sides as needed for uniformity.
- Chill the mixture for at least 8 hours (or overnight) in the refrigerator, then freeze it in your ice cream maker according to the manufacturer's instructions. If the chilled mixture is too thick to pour into your machine, whisk it to thin it out.: Chilling allows the flavors to meld and the base to fully cool, which improves churn texture and reduces ice crystal formation. The mixture will smell rounder and taste more integrated after resting. If you rush this step, the machine has to work harder and the texture can become icy. A good indicator that the mixture is ready is when it feels pleasantly cold and slightly thickened in the bowl, but still pourable after a gentle whisk.
Notes
- Make it richer: Increase the fat by substituting part of the milk with a higher fat option to create a more indulgent mouthfeel. Doing so will give a creamier result, though the recipe as written already yields a luxurious texture.
- Tweak sweetness: If your banana are exceptionally sweet, reduce the granulated sugar slightly and rely on the roasted fruit syrup to carry the profile. Taste the chilled base before churning to adjust safely.
- Advance prep: Roast the banana and store the puréed base in the fridge for up to 24 hours before churning. This saves time on the day you plan to serve the ice cream and actually improves flavor melding.
- Adjust brightness: Add a touch more lemon juice if the base tastes cloying after roasting. Acid lifts the flavors and keeps the profile lively without making it tart.
- Pan temperature tip: Use a mid sized baking dish so the banana cook evenly; overcrowding can lead to steaming rather than roasting, which reduces caramelization.
- Salt control: If you used salted butter, reduce added coarse salt slightly to avoid over seasoning. Taste the puréed base before final salting.