
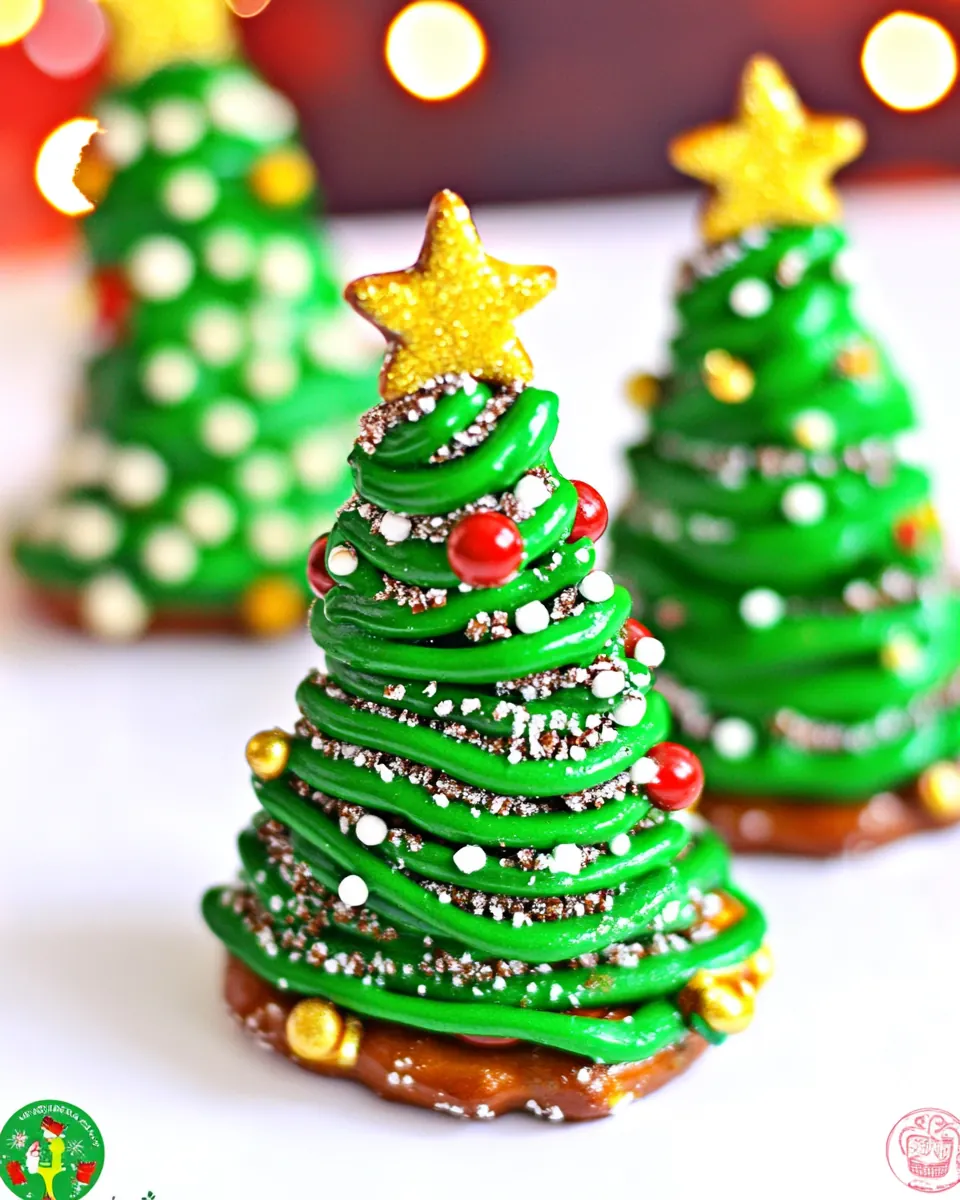
Pretzel Christmas Trees
Pretzel Christmas Trees have been my favorite quick holiday craft to make with friends and family, ever since I first stood at a crowded kitchen counter with a mug of cocoa and sticky fingers. The first sentence says it all, because these tiny edible decorations are as much about the memory as they are about the treat itself. I remember the sound of candy melts sizzling gently when they touched the warm bowl, and the giggles as someone tried to pipe a perfectly shaped tree that looked more like modern art. Over the years, I learned little tricks, like working in batches and keeping the melts warm, that keep the whole session moving and joyful.
I like to set up an assembly line when I make Pretzel Christmas Trees, because the process is social and slightly messy in the best way. Someone melts the candy, another person snips the bag and pipes the trees, while a third sprinkles and places the stars. Each role feels important, and the end result is tiny decorations that double as snacks or cupcake toppers. I always plan for a few test trees because the first ones are practice, and that relaxed approach lets creativity win out over perfection. These treats are approachable for all ages, and I often bring them to holiday gatherings as a festive, crunchy, sweet conversation starter.
Recipe Snapshot
30 mins
20 mins
10 mins
Medium
150 kcal
American
Vegan, Gluten-Free
Desserts
Parchment Paper, Baking Sheet
The Beauty of This Pretzel Christmas Trees
Easy and Fun for All Ages
I love how Pretzel Christmas Trees are approachable for everyone. Kids can handle most of the decorating, while adults manage the melting, so it becomes a real group activity. The short ingredient list and minimal tools mean you can pull this together on a whim, and I keep coming back to this recipe when I want a quick, festive project that looks like you spent much longer on it.
Crunch and Sweetness in One Bite
The combination of crunchy pretzel sticks with creamy candy melts and the sparkle of sprinkles creates a delightful contrast that guests always comment on. I enjoy that the salt from the pretzel sticks cuts the sweetness, giving each bite a balanced taste profile. It is a tiny treat with big flavor, and I often serve a platter so people can graze as they chat.
Versatile Holiday Decor
One reason I adore these is their multifunctional nature. Once hardened, Pretzel Christmas Trees double as cupcake or cake toppers, stocking stuffers, or party favors. I like to tuck a few into goodie bags or use them as place setting accents. Their visual appeal adds a festive touch without much effort.
Fast and Stress Free
Time is often limited during the holiday season, and this recipe respects that. With a short melt and decorate rhythm, I can make a big batch in under an hour. I find working in small sets helps keep the candy from stiffening, and that approach prevents wasted ingredients and frustration. It is a go to when I want a quick win that still feels thoughtful.
Customizable and Kid Friendly
I value recipes that invite experimentation, and Pretzel Christmas Trees are perfect for that. I’ll change sprinkle mixes or swap star toppers to match a party theme, and guests love choosing their own embellishments. This flexibility means the recipe never gets stale in my rotation.
What Goes Into Pretzel Christmas Trees
The ingredient list for Pretzel Christmas Trees is intentionally simple. A small number of pantry friendly items combine to create texture, color, and that satisfying sweet and salty bite. The key players are the crunchy pretzel sticks which form the structure, the smooth candy melts which act as both glue and coating, and the decorative elements like coarse white sugar, candy stars, and sprinkles that bring the holiday look to life. Together they deliver a playful treat that is visually festive and texturally interesting.
- 24 pretzel sticks: Provide structure and crunch for the trees; arrange three pretzel sticks in tiers to form the classic triangular tree shape, and break as needed for smaller tiers. Offer a sturdy base so decorations and melted candy adhere without collapsing, and contribute salty contrast to the sweet toppings.
- 12 oz . candy melts: Melt smoothly into a glossy coating that binds the pretzel tiers together when drizzled or dipped, and can be tinted for festive colors. Serve as edible 'glue' that hardens to hold sprinkles and stars in place while adding creamy sweetness.
- coarse white sugar: Add a sugary sparkle to mimic snow or frost on the trees; sprinkle over wet candy melts so crystals stick and create a wintery effect. Provide subtle additional crunch and visual brightness without altering the overall flavor profile significantly.
- candy stars: Give a focal decorative accent resembling a tree topper; press gently into still-wet candy melts so the star secures as a shining crown. Offer color and shape contrast that enhances the holiday theme and completes each pretzel tree design.
- sprinkles: Contribute varied color, texture, and visual interest when scattered over melted coatings, helping each tree look festive and playful. Allow customization by using different shapes and colors for seasonal themes while adding slight crunch and sweetness.
How to Assemble Pretzel Christmas Trees
Assembling these is gratifying and social, so I like to create a relaxed pace. Lay out your tools, melt gently, and work in small batches to keep the candy pliable. Below I expand each original direction into detailed, sensory rich steps that will help you get consistent results and avoid common mishaps.
- Line a baking sheet with parchment paper. You will most likely need more than one baking sheet so trees can be spread out and decorated.: The parchment gives a slick surface so the piped candy peels away cleanly, and using multiple sheets prevents crowding, which can smudge decorations. You will notice a quiet rustle as you smooth the paper, and the blank white surface makes colors pop. This step matters because crowded pieces will stick together, ruining the finish. A typical mistake is skipping parchment and using foil, which can cause sticking and uneven bottoms.
- Place half of the candy melts into a microwave-safe bowl and microwave for 60 seconds at 50% power. Stir well and repeat until smooth.: As the candy melts heat, they will go from stiff chips to glossy ribbons when stirred, and you will see the transformation in texture and sheen. Stirring distributes heat, preventing hot spots, and the lower power setting protects against burning. The aroma is sweet and mildly vanilla like if the melts contain flavoring. If your melts look grainy, they may have overheated; stop microwaving and stir until smooth or start with smaller bursts of time.
- Pour melted chocolate into a resealable sandwich bag and seal shut. A pastry bag and small tip may be used as well.: Transferring the warm candy to a bag turns the mixture into a simple piping tool, and you will feel the bag warm in your hands. The convenience outweighs a pastry bag for messy setups, though a disposable pastry bag offers more control. Make sure the bag seal is secure to avoid leaks. A common issue is overfilling the bag, which makes piping awkward and increases risk of spills.
- Snip a small corner of the ziplock bag and place a small dollop of melted chocolate onto the parchment paper.: A tiny corner creates a controlled opening for delicate lines, and when you squeeze, you will hear a soft hiss of air as the glossy candy flows. The first dollop acts as an anchor for the pretzel sticks , keeping them from rolling. If the opening is too large, the chocolate will flood and make blobs, so start small and enlarge if necessary.
- Press the pretzel into the chocolate. This will just keep the pretzel from rolling around on the baking sheet.: When you press a pretzel stick into the anchor, it settles with a quiet click and stands more securely. This little foundation is key because a rolling stick makes it hard to pipe neat tree layers. Position the pretzel upright and press gently to avoid cracking. Avoid pressing too hard, which can snap the pretzel or cause the base to spread too thin.
- Drizzle chocolate into a tree shape and add a star on top and candy sprinkles. Repeat until you have 24 trees. Let stand to harden.: As you pipe, the candy should flow in smooth ribbons, building triangular layers that suggest branches. The glossy green will set to a satin finish, and adding a candy star at the top gives that final whimsical note. Sprinkles catch in the still wet candy and settle with a satisfying click. This technique matters for the final silhouette, and impatience is the usual culprit for messy trees, so pace yourself and let each layer set slightly before adding heavy decorations.
- It's best to make about 3 trees and then decorate them or the chocolate will begin to harden.: Working in micro batches keeps the melted candy warm and pipeable, and you will notice a change in viscosity if you try to do too many at once. By rotating between piping and decorating, you maintain consistent texture and finish. If you try to assemble everything at once, the candy will firm up and you will end up with brittle, clumpy lines instead of smooth branches.
- Once all trees are completed and hardened, use them to decorate cupcakes or cakes or store for later.: When the candy has fully set the surface becomes matte to satin and you can hear a tiny snap when you lift a tree, indicating readiness. These little pieces add instant festive charm to desserts or gift boxes. Store carefully to prevent breakage, and avoid stacking without parchment between layers. A typical mistake is moving them too soon, which can smudge tips and dislodge decorations.
Customization Ideas
I love how adaptable Pretzel Christmas Trees are, and a few simple swaps can change the look and flavor. Below are practical, detailed tips to help you personalize the treats while maintaining structure and flavor integrity.
- Swap candy melt colors to match your party theme, using pastel greens for a whimsical brunch or deep forest green for a classic table setting.
- Mix sprinkle sizes to add depth, combining tiny nonpareils with slightly larger confetti for visual contrast on each tree.
- Use star placement variety by alternating the orientation of candy stars so some trees feel more rustic while others look polished.
- Adjust anchor dollop size depending on your pretzel sticks, a slightly larger base helps when using heavier decorations so nothing tilts.
- Work with a pastry bag if you want precision, it gives more control for thin, consistent lines though a snipped sandwich bag works fine for casual gatherings.
- Store properly, layering with parchment between rows prevents decoration damage and preserves the crisp texture of the pretzel sticks.
Perfect Pairings for Pretzel Christmas Trees
These little trees shine in many serving scenarios, from casual cookie plates to dessert tables at parties. They pair especially well with soft frosted cupcakes, light tea sandwiches, or simple hot beverages. Below I describe specific serving ideas, storage pointers, and occasions to showcase the trees.
- Holiday dessert platters, arrange Pretzel Christmas Trees alongside cookies and bars to add height and a festive shape to your spread. They act as visual anchors and conversation starters for guests moving through the buffet.
- Cupcake toppers, press a finished tree into frosted cupcakes for an instant holiday makeover that feels handmade. The crunch of the pretzel sticks contrasts with soft cake and creamy frosting for a pleasing bite.
- Party favors, bag three to four trees in clear cellophane with ribbon for guests to take home. They travel well when stored in an airtight container and become a sweet reminder of the gathering.
- Table decorations, tuck a few trees into place cards or use them as edible accents on individual plates at a family dinner. Their small size means they won’t overpower the table but will add charm.
- Storage tips, keep in an airtight container at room temperature if consuming within a few days, or refrigerate for up to two weeks, letting them return to room temperature before serving for best texture.
- Occasions, perfect for holiday cookie swaps, classroom parties, or Ramadan if you want a festive, non alcoholic treat to share after gatherings. Their portable size makes them ideal for any celebration.
FAQ
Conclusion
Pretzel Christmas Trees stand out because they blend crunchy texture with sweet, decorative charm in a way that is fast and approachable. I encourage you to gather a few friends or family members, set up a small assembly line, and enjoy the laughs and tasty results that come from making them together. These little trees are forgiving, customizable, and double as festive decor or edible favors, so they are perfect when you want something that looks special without a lot of fuss. Give them a try and savor the simple, nostalgic pleasure of a homemade holiday treat.
Pretzel Christmas Trees
Equipment
- Parchment Paper
- Baking Sheet
Ingredients
- 24 pretzel sticks Provide structure and crunch for the trees; arrange three pretzel sticks in tiers to form the classic triangular tree shape, and break as needed for smaller tiers. Offer a sturdy base so decorations and melted candy adhere without collapsing, and contribute salty contrast to the sweet toppings.
- 12 oz . candy melts Melt smoothly into a glossy coating that binds the pretzel tiers together when drizzled or dipped, and can be tinted for festive colors. Serve as edible 'glue' that hardens to hold sprinkles and stars in place while adding creamy sweetness.
- coarse white sugar Add a sugary sparkle to mimic snow or frost on the trees; sprinkle over wet candy melts so crystals stick and create a wintery effect. Provide subtle additional crunch and visual brightness without altering the overall flavor profile significantly.
- candy stars Give a focal decorative accent resembling a tree topper; press gently into still-wet candy melts so the star secures as a shining crown. Offer color and shape contrast that enhances the holiday theme and completes each pretzel tree design.
- sprinkles Contribute varied color, texture, and visual interest when scattered over melted coatings, helping each tree look festive and playful. Allow customization by using different shapes and colors for seasonal themes while adding slight crunch and sweetness.
Instructions
- Line a baking sheet with parchment paper. You will most likely need more than one baking sheet so trees can be spread out and decorated.: The parchment gives a slick surface so the piped candy peels away cleanly, and using multiple sheets prevents crowding, which can smudge decorations. You will notice a quiet rustle as you smooth the paper, and the blank white surface makes colors pop. This step matters because crowded pieces will stick together, ruining the finish. A typical mistake is skipping parchment and using foil, which can cause sticking and uneven bottoms.
- Place half of the candy melts into a microwave-safe bowl and microwave for 60 seconds at 50% power. Stir well and repeat until smooth.: As the candy melts heat, they will go from stiff chips to glossy ribbons when stirred, and you will see the transformation in texture and sheen. Stirring distributes heat, preventing hot spots, and the lower power setting protects against burning. The aroma is sweet and mildly vanilla like if the melts contain flavoring. If your melts look grainy, they may have overheated; stop microwaving and stir until smooth or start with smaller bursts of time.
- Pour melted chocolate into a resealable sandwich bag and seal shut. A pastry bag and small tip may be used as well.: Transferring the warm candy to a bag turns the mixture into a simple piping tool, and you will feel the bag warm in your hands. The convenience outweighs a pastry bag for messy setups, though a disposable pastry bag offers more control. Make sure the bag seal is secure to avoid leaks. A common issue is overfilling the bag, which makes piping awkward and increases risk of spills.
- Snip a small corner of the ziplock bag and place a small dollop of melted chocolate onto the parchment paper.: A tiny corner creates a controlled opening for delicate lines, and when you squeeze, you will hear a soft hiss of air as the glossy candy flows. The first dollop acts as an anchor for the pretzel sticks , keeping them from rolling. If the opening is too large, the chocolate will flood and make blobs, so start small and enlarge if necessary.
- Press the pretzel into the chocolate. This will just keep the pretzel from rolling around on the baking sheet.: When you press a pretzel stick into the anchor, it settles with a quiet click and stands more securely. This little foundation is key because a rolling stick makes it hard to pipe neat tree layers. Position the pretzel upright and press gently to avoid cracking. Avoid pressing too hard, which can snap the pretzel or cause the base to spread too thin.
- Drizzle chocolate into a tree shape and add a star on top and candy sprinkles. Repeat until you have 24 trees. Let stand to harden.: As you pipe, the candy should flow in smooth ribbons, building triangular layers that suggest branches. The glossy green will set to a satin finish, and adding a candy star at the top gives that final whimsical note. Sprinkles catch in the still wet candy and settle with a satisfying click. This technique matters for the final silhouette, and impatience is the usual culprit for messy trees, so pace yourself and let each layer set slightly before adding heavy decorations.
- It's best to make about 3 trees and then decorate them or the chocolate will begin to harden.: Working in micro batches keeps the melted candy warm and pipeable, and you will notice a change in viscosity if you try to do too many at once. By rotating between piping and decorating, you maintain consistent texture and finish. If you try to assemble everything at once, the candy will firm up and you will end up with brittle, clumpy lines instead of smooth branches.
- Once all trees are completed and hardened, use them to decorate cupcakes or cakes or store for later.: When the candy has fully set the surface becomes matte to satin and you can hear a tiny snap when you lift a tree, indicating readiness. These little pieces add instant festive charm to desserts or gift boxes. Store carefully to prevent breakage, and avoid stacking without parchment between layers. A typical mistake is moving them too soon, which can smudge tips and dislodge decorations.
Notes
- Swap candy melt colors to match your party theme, using pastel greens for a whimsical brunch or deep forest green for a classic table setting.
- Mix sprinkle sizes to add depth, combining tiny nonpareils with slightly larger confetti for visual contrast on each tree.
- Use star placement variety by alternating the orientation of candy stars so some trees feel more rustic while others look polished.
- Adjust anchor dollop size depending on your pretzel sticks, a slightly larger base helps when using heavier decorations so nothing tilts.
- Work with a pastry bag if you want precision, it gives more control for thin, consistent lines though a snipped sandwich bag works fine for casual gatherings.
- Store properly, layering with parchment between rows prevents decoration damage and preserves the crisp texture of the pretzel sticks.