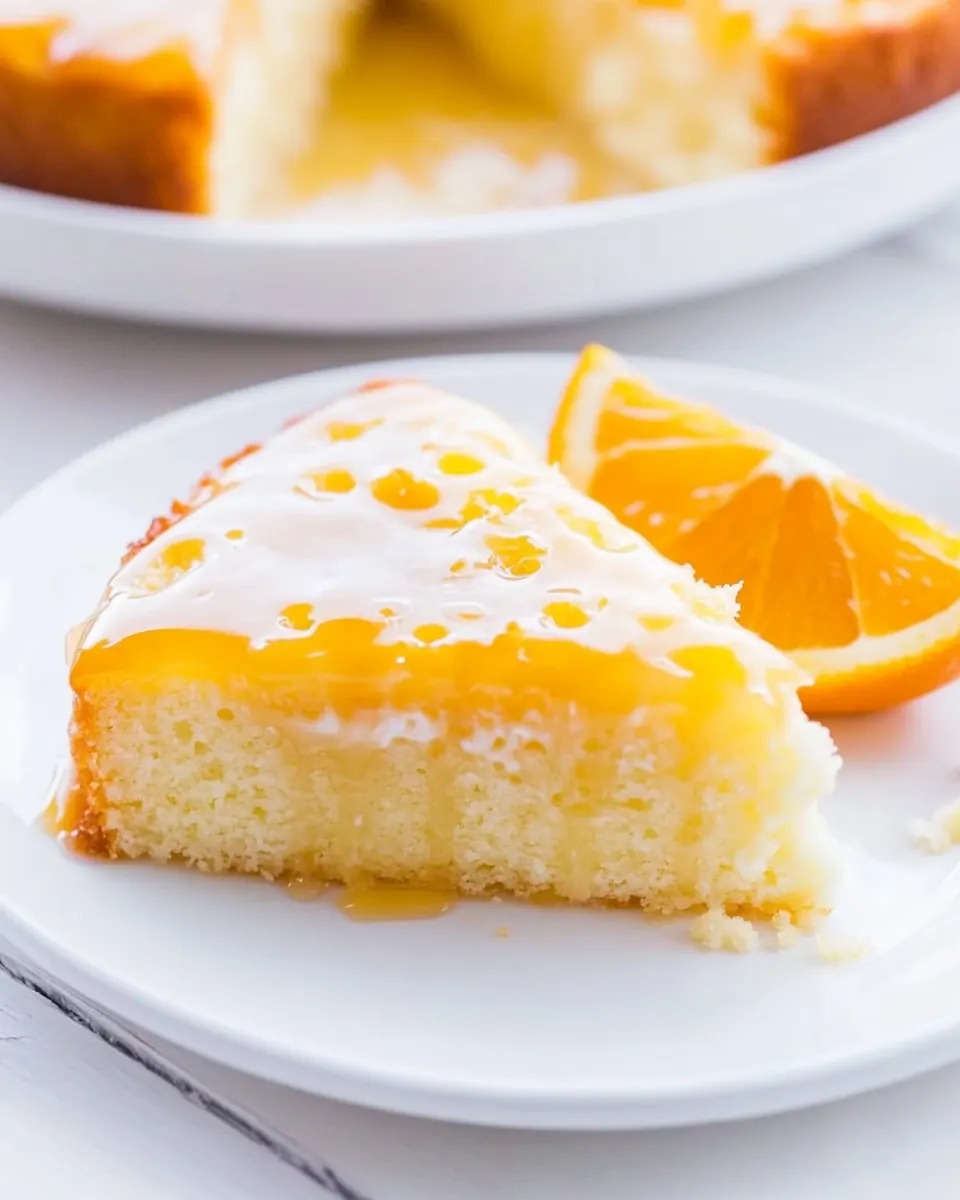
Orange Poke Cake with Honey Orange Glaze
Orange Poke Cake with Honey Orange Glaze is one of those cakes I keep coming back to when I want something bright, tender, and just a little bit nostalgic. The first time I made this cake I was chasing sunshiny flavors after a long week, and the combination of orange juice and zest with a soft, pillowy crumb felt like comfort and celebration rolled into one. I remember the sticky sweetness of the glaze soaking into those little holes, each bite releasing a burst of citrus that felt like a secret.
That batch also taught me a few lessons about patience and timing. While the cake is forgiving, letting the glaze settle for a while changes the texture in a way that’s subtle but important, and I’ll often prep the glaze while the cake cools so everything comes together naturally. When friends arrive, I slice it slowly to keep that pretty edge of glaze on each piece, and it always disappears fast. If you want a dessert that feels both simple and special, this recipe becomes a reliable friend you turn to again and again.
Recipe Snapshot
40 mins
10 mins
30 mins
Medium
250 kcal
American
Gluten-Free, Low FODMAP
Desserts
8 by 8 inch baking pan, Mixing bowls, Wire rack
What’s Great About This Orange Poke Cake with Honey Orange Glaze
Bright citrus flavor that feels fresh
I love how orange shines in every bite. The zest and juice bring a layered citrus profile, not a flat sweet note, and it cuts through the cake’s richness so it never feels cloying. I find that the little pockets of glaze mean each forkful varies slightly in intensity, which keeps you coming back.
Texture that balances soft and silky
This cake has a tender crumb from the buttermilk and oil, while the poke holes let the glaze sink in for a moist, almost custardy bite. I appreciate how the cake is never dry, and it holds together nicely for clean slices at gatherings.
Quick and approachable baking
I often reach for this when I want an easy crowd pleaser. The method is straightforward, and most steps are forgiving. Even if you mix a little more vigorously, the end result stays pleasant as long as you avoid overbaking.
The glaze adds sophistication without fuss
The honey in the glaze introduces a floral warmth that deepens the orange juice. It is smooth and pourable, sinking into the cake and creating a gentle shine on top. I like how it keeps the cake soft, so you don’t need any complicated frosting techniques.
Flexible and reliable for many occasions
I’ll bring this to brunches, casual dinners, or weekend tea because it travels well and tastes fresh the next day. It stores nicely at room temperature in an airtight container, so I often make it ahead and enjoy the flavor development that happens overnight.
Ingredients to Make Orange Poke Cake with Honey Orange Glaze
This ingredient list is designed to create harmony between tender cake crumb and a glossy, citrus infused glaze. The key players are the all purpose flour and leavening agents that build structure, the dairy and fats that tenderize the crumb, and the orange components that provide fresh, aromatic lift. The glaze ingredients are simple but strategic, with honey adding viscosity and depth, while confectioners‘ sugar gives body and sweetness.
- 1 1/4 cups all-purpose flour: Provide structure and bulk to the cake batter, yielding a tender crumb when properly mixed; combine with leaveners and liquids to form the cake’s base. Use spoon-and-level measuring for accuracy and avoid overmixing to keep the cake light.
- 3/4 cup granulated sugar: Add sweetness and help with browning during baking; dissolves into the batter to contribute moisture and texture. Adjust slightly if a less-sweet result is desired, but maintain balance with other wet ingredients.
- 2 teaspoons baking powder: Leaven the cake by producing carbon dioxide during baking, creating lift and a light texture; distribute evenly through the dry ingredients before adding liquids. Ensure freshness for reliable rising and avoid under- or over-measuring.
- 1/2 teaspoons salt: Enhance overall flavor by balancing sweetness and strengthening gluten control slightly; helps bring out the citrus and other flavors in the batter. Measure carefully, as too much can tighten the crumb and affect texture.
- 1 tablespoon orange zest: Concentrate citrus oils and aroma to provide bright orange flavor; finely grate only the colored zest to avoid bitterness. Add to batter for fragrant lift and to intensify the cake’s orange profile.
- 1 large egg: Contribute structure and richness while helping emulsify the batter for a smooth texture; beaten lightly before adding for even incorporation. Use at room temperature to promote better mixing and uniformity.
- 1/2 cup buttermilk: Add acidity and moisture while reacting with baking powder to tenderize the crumb; also contributes a subtle tang that complements the orange. Use at the specified temperature to avoid curdling and ensure even texture.
- 1/3 cups sour cream, lite is okay or plain Greek yogurt: Introduce creaminess and tang that enriches the batter and improves moisture retention; acts similarly to buttermilk in tenderizing the cake. Choose lite sour cream or plain Greek yogurt to reduce fat while preserving texture.
- 1/4 cup orange juice: Impart additional citrus flavor and liquid to thin the batter slightly while reinforcing the orange taste; use fresh juice for best brightness. Measure precisely to maintain correct batter consistency and balance with other liquids.
- 1/4 cup canola or vegetable oil: Provide fat for tenderness and moistness, aiding in a soft crumb and preventing dryness; neutral-flavored oil keeps the orange flavors forward. Use the specified oil type for high-heat stability and a neutral palette.
- 2 teaspoons orange extract, vanilla extract may be substituted: Boost concentrated citrus aroma and flavor with a small amount for pronounced orange notes; vanilla can be substituted for a milder profile. Add with the other liquids to ensure even distribution through the batter.
- 1/4 cup orange juice: Reinforce orange flavor and add moisture for the glaze mixture, mirroring the batter’s citrus notes; again use fresh juice to maintain brightness. Combine with honey and butter to form the warm glaze base.
- 3 tablespoons honey: Sweeten and add floral depth to the glaze while thinning slightly when warmed; pairs with orange juice for a glossy finish. Warm gently with butter and juice to melt and blend before whisking in sugar.
- 1 tablespoon unsalted butter: Provide richness and help emulsify the glaze, creating a smooth, shiny finish; melts into the warm honey–orange mixture for a cohesive sauce. Use unsalted butter to control overall salt level and retain sweet balance.
- about 2 to 2 1/2 cups confectioners’ sugar, or as necessary for consistency: Sweeten and thicken the glaze to a spreadable consistency while providing a silky texture; add gradually until desired thickness is reached. Sift if needed to avoid lumps and whisk thoroughly for a smooth finish.
- 1 to 3 teaspoons orange zest, or to taste: Enhance bright citrus flavor and fragrant finish for the glaze or cake topping; adjust the amount to taste for subtle or pronounced zest. Use fresh grated zest sparingly to avoid bitterness and to maximize aroma.
The Process for Making Orange Poke Cake with Honey Orange Glaze
This cake comes together with familiar baking rhythms, and I find that keeping your mise en place makes it feel effortless. Below I expand each direction into thorough, sensory rich steps so you can bake with confidence and get the texture and flavor I aim for.
- Preheat oven to 350 F. Line an 8-by-8-inch baking pan with aluminum foil, spray with cooking spray; set aside.: As the oven warms you will feel and hear the household settling into bake mode, and a faint warm note will begin to build in the kitchen. This preheating is crucial because an oven at steady 350 F gives a consistent rise and even browning across the surface, ensuring the center sets at the same rate as the edges. A properly lined and greased 8 by 8 inch baking pan prevents sticking while the foil makes it easy to lift the cake out later. Common mistakes include skipping the lining or not greasing well, leading to tearing when you remove slices, so take a moment to fit the foil smoothly and spray the surface evenly.
- To a large bowl, add the flour, granulated sugar, baking powder, salt, and whisk to combine.: When you whisk these dry ingredients together you will notice the dry mixture lighten and smell faintly of starch and sugar, and this step distributes the baking powder and salt evenly so each bite rises consistently. Using a whisk breaks up small lumps and aerates the blend, which promotes a lighter crumb. A typical pitfall at this point is uneven measuring of the flour , so I recommend leveling your cup to avoid dense results later.
- Whisk in the orange zest; set aside.: Adding the orange zest to the dry mix allows the tiny oil droplets from the zest to disperse and perfume the batter subtly, rather than concentrating in one place. You will smell a bright citrus burst as you whisk, which signals the zest is fresh and fragrant. If zest is clumped it may not distribute evenly, so rub it lightly between your fingers to break up any clusters for a balanced aroma throughout the cake.
- To a separate medium bowl, add the egg, buttermilk, sour cream, orange juice, oil, orange extract, and whisk to combine.: The wet mixture should look smooth and slightly glossy, and as you whisk you may hear a light slap of liquid against the bowl, signaling everything is incorporated. The buttermilk and sour cream give a silky thickness while the oil ensures tenderness. This emulsion helps the batter come together without lumps when combined with the dry ingredients. A common error is under whisking which leaves pockets of egg, or overwhisking which can create too much air and lead to uneven rise, so aim for an even, homogenous blend.
- Add the wet mixture to the dry, mixing lightly with a spoon or folding with a spatula until just combined. Small lumps will be present, don’t overmix or try to stir them smooth.: You will see the batter change from powdery to cohesive, with small streaks of flour disappearing as you fold. The tactile resistance of the batter softens under the spatula, and small lumps are okay because they will hydrate and disappear during baking. Overmixing activates gluten and leads to a tougher crumb, so stop folding as soon as the big dry patches are gone. If the batter seems too stiff, a few gentle strokes will do; forcing it further risks a denser texture.
- Turn batter out into prepared pan and bake for about 27 to 30 minutes, or until center is set and not jiggly, and a toothpick inserted in the center comes out clean or with a few moist crumbs, but no batter.: As the cake bakes the top will become pale golden and smell of warm citrus and sugar, the oven producing a comforting aroma that tells you time is passing. You may hear a subtle settling sound as steam escapes. The center should feel springy and the toothpick test is the best indicator; little moist crumbs are fine, but raw batter is not. A typical mistake is opening the oven early, which can make the center sink, so wait until the recommended minimum time has passed before checking.
- Using a fork, stab the cake about 50 times, making small holes all over the cake.: The act of poking creates channels for the glaze to penetrate, and you will see tiny crater-like holes across the surface that act like reservoirs. This step enhances moisture distribution and creates pockets of concentrated flavor where the glaze pools. Avoid making holes that are too large, or the cake can become overly saturated and fall apart; the goal is many small punctures rather than a few big ones.
- Place pan on a wire rack and allow cake to cool. While cake cools, make the glaze.: As the cake cools it relaxes, becoming easier to handle, and the surface loses some heat while the interior continues to set. The wire rack allows air to circulate beneath so condensation does not soften the bottom. Meanwhile the glaze can be prepared so it is warm and pourable at the right moment. If you try to glaze a piping hot cake the glaze will run off too quickly, while glazing an overly cold cake reduces absorption, so aim for a warm but not hot cake.
- To a medium microwave-safe bowl, add the orange juice, honey, butter, and heat for about 1 minute, or until butter has melted and mixture is just beginning to show signs of boiling.: Heating these glaze components together releases aroma, and you will see gentle bubbling at the edges when it is ready. The honey thins and blends seamlessly with the orange juice while the butter adds silkiness. Watch carefully to avoid rapid rolling boil which can change the flavor and texture; gentle heat is best. Stirring right after heating unifies the mixture into a glossy base for the sugar.
- Add the confectioners’ sugar and whisk until smooth. If necessary, add additional sugar to reach desired glaze consistency; glaze should be easily pourable.: As you whisk the glaze will transform into a thick, shiny emulsion, and the sugar will dissolve to give body. The goal is a glaze that pours but clings slightly, so add sugar a little at a time to avoid overthickening. If the glaze becomes too thick, a splash of orange juice thinned with a drop of water can rescue it. Lumpiness indicates hurried mixing or cold ingredients, so whisk until silky.
- Slowly and evenly pour glaze over cake (cake doesn’t have to be fully cooled), smoothing it lightly with a spatula if necessary, but glaze will likely just slide into place. Glaze will soak into the holes as time passes.: Pouring slowly lets the glaze find each poked channel, and you should see the surface gleam as the liquid sinks in and pools in the holes. The sound is quiet, a gentle swish as the glaze spreads, and visually the top becomes glossy. Avoid dumping all glaze in one spot, which can oversaturate the cake; instead use a steady circular motion for even coverage. Patience here gives the best final texture.
- Evenly sprinkle with the orange zest and allow cake to cool in pan uncovered for at least 1 hour (or overnight and cover with a sheet of foil) before slicing and serving so glaze can set up, although this is a soft glaze that doesn’t ever fully harden because of the honey.: The final zest adds a fragrant finish and a pop of color, and cooling allows the glaze to settle so slices hold together cleanly. You will notice the glaze become slightly tacky but still soft, giving a pleasant mouthfeel. Cutting too soon can smear the glaze and result in messy slices, so waiting improves presentation. If storing overnight, lightly tent with foil to prevent too much exposure while keeping the surface intact.
Ways to Customize
There are simple ways to make this cake your own without changing the core technique. Below I expand on options that maintain the cake’s balance while adding subtle twists for variety and occasion.
- Boost citrus brightness by increasing the fresh orange zest by a half teaspoon for more aromatic lift, which adds fragrance without altering texture.
- Adjust sweetness by reducing granulated sugar slightly if you prefer the glaze to dominate; remember the glaze contributes substantial sweetness so small reductions go a long way.
- Swap dairy by using plain Greek yogurt for the sour cream portion to create a slightly firmer, tangier crumb while keeping moisture levels similar.
- Control glaze thickness by adding confectioners’ sugar gradually, testing the pourability until you reach the desired cling to the cake surface.
- Make ahead strategy by baking the cake the day before and glazing the next morning to let the flavors meld and the glaze sink in overnight for a softer finish.
Great Combinations for Orange Poke Cake with Honey Orange Glaze
This cake pairs well with gentle, complementary accompaniments that respect its bright citrus profile. Below I outline serving ideas, occasions, and storage tips that help you present it beautifully and keep it tasting fresh.
- Casual brunch pairing Serve slices with simple brewed coffee or a light herbal tea, the cake’s citrus notes balancing the warm beverage and making it a lovely mid morning treat.
- After dinner dessert Offer small slices at the end of a meal, perhaps alongside a small scoop of plain chilled yogurt on the side, which gently contrasts the cake’s sweet glaze.
- Party centerpiece This cake works well for potlucks or gatherings because it slices neatly and travels in a single pan; glaze just before arrival if you want the freshest look.
- Seasonal occasions Its bright citrus flavor makes it ideal for spring celebrations, baby showers, or Eid and Ramadan gatherings where a lighter, fragrant dessert is appreciated.
- Storage tips Keep the cake in an airtight container at room temperature for up to five days to retain tenderness. For longer storage, freeze wrapped in foil and place in a sealed bag for up to six months.
FAQ
Conclusion
This cake shines because it combines a tender, tender crumb with an aromatic honey orange glaze that sinks into those poke holes, creating bursts of citrus in every bite. I always encourage you to give it a try, whether for a weekend treat or a special gathering, because it is forgiving to make and rewards patience with bright, pleasing flavors. Have fun with the process, savor a warm slice, and watch how quickly it becomes a favorite in your rotation.
Orange Poke Cake with Honey Orange Glaze
Equipment
- 8-by-8-inch baking pan
- Mixing Bowls
- Wire Rack
Ingredients
- 1 1/4 cups all-purpose flour Provide structure and bulk to the cake batter, yielding a tender crumb when properly mixed; combine with leaveners and liquids to form the cake’s base. Use spoon-and-level measuring for accuracy and avoid overmixing to keep the cake light.
- 3/4 cup granulated sugar Add sweetness and help with browning during baking; dissolves into the batter to contribute moisture and texture. Adjust slightly if a less-sweet result is desired, but maintain balance with other wet ingredients.
- 2 teaspoons baking powder Leaven the cake by producing carbon dioxide during baking, creating lift and a light texture; distribute evenly through the dry ingredients before adding liquids. Ensure freshness for reliable rising and avoid under- or over-measuring.
- 1/2 teaspoons salt Enhance overall flavor by balancing sweetness and strengthening gluten control slightly; helps bring out the citrus and other flavors in the batter. Measure carefully, as too much can tighten the crumb and affect texture.
- 1 tablespoon orange zest Concentrate citrus oils and aroma to provide bright orange flavor; finely grate only the colored zest to avoid bitterness. Add to batter for fragrant lift and to intensify the cake’s orange profile.
- 1 large egg Contribute structure and richness while helping emulsify the batter for a smooth texture; beaten lightly before adding for even incorporation. Use at room temperature to promote better mixing and uniformity.
- 1/2 cup buttermilk Add acidity and moisture while reacting with baking powder to tenderize the crumb; also contributes a subtle tang that complements the orange. Use at the specified temperature to avoid curdling and ensure even texture.
- 1/3 cups sour cream, lite is okay or plain Greek yogurt Introduce creaminess and tang that enriches the batter and improves moisture retention; acts similarly to buttermilk in tenderizing the cake. Choose lite sour cream or plain Greek yogurt to reduce fat while preserving texture.
- 1/4 cup orange juice Impart additional citrus flavor and liquid to thin the batter slightly while reinforcing the orange taste; use fresh juice for best brightness. Measure precisely to maintain correct batter consistency and balance with other liquids.
- 1/4 cup canola or vegetable oil Provide fat for tenderness and moistness, aiding in a soft crumb and preventing dryness; neutral-flavored oil keeps the orange flavors forward. Use the specified oil type for high-heat stability and a neutral palette.
- 2 teaspoons orange extract, vanilla extract may be substituted Boost concentrated citrus aroma and flavor with a small amount for pronounced orange notes; vanilla can be substituted for a milder profile. Add with the other liquids to ensure even distribution through the batter.
- 1/4 cup orange juice Reinforce orange flavor and add moisture for the glaze mixture, mirroring the batter’s citrus notes; again use fresh juice to maintain brightness. Combine with honey and butter to form the warm glaze base.
- 3 tablespoons honey Sweeten and add floral depth to the glaze while thinning slightly when warmed; pairs with orange juice for a glossy finish. Warm gently with butter and juice to melt and blend before whisking in sugar.
- 1 tablespoon unsalted butter Provide richness and help emulsify the glaze, creating a smooth, shiny finish; melts into the warm honey-orange mixture for a cohesive sauce. Use unsalted butter to control overall salt level and retain sweet balance.
- about 2 to 2 1/2 cups confectioners’ sugar, or as necessary for consistency Sweeten and thicken the glaze to a spreadable consistency while providing a silky texture; add gradually until desired thickness is reached. Sift if needed to avoid lumps and whisk thoroughly for a smooth finish.
- 1 to 3 teaspoons orange zest, or to taste Enhance bright citrus flavor and fragrant finish for the glaze or cake topping; adjust the amount to taste for subtle or pronounced zest. Use fresh grated zest sparingly to avoid bitterness and to maximize aroma.
Instructions
- Preheat oven to 350 F. Line an 8-by-8-inch baking pan with aluminum foil, spray with cooking spray; set aside.: As the oven warms you will feel and hear the household settling into bake mode, and a faint warm note will begin to build in the kitchen. This preheating is crucial because an oven at steady 350 F gives a consistent rise and even browning across the surface, ensuring the center sets at the same rate as the edges. A properly lined and greased 8 by 8 inch baking pan prevents sticking while the foil makes it easy to lift the cake out later. Common mistakes include skipping the lining or not greasing well, leading to tearing when you remove slices, so take a moment to fit the foil smoothly and spray the surface evenly.
- To a large bowl, add the flour, granulated sugar, baking powder, salt, and whisk to combine.: When you whisk these dry ingredients together you will notice the dry mixture lighten and smell faintly of starch and sugar, and this step distributes the baking powder and salt evenly so each bite rises consistently. Using a whisk breaks up small lumps and aerates the blend, which promotes a lighter crumb. A typical pitfall at this point is uneven measuring of the flour , so I recommend leveling your cup to avoid dense results later.
- Whisk in the orange zest; set aside.: Adding the orange zest to the dry mix allows the tiny oil droplets from the zest to disperse and perfume the batter subtly, rather than concentrating in one place. You will smell a bright citrus burst as you whisk, which signals the zest is fresh and fragrant. If zest is clumped it may not distribute evenly, so rub it lightly between your fingers to break up any clusters for a balanced aroma throughout the cake.
- To a separate medium bowl, add the egg, buttermilk, sour cream, orange juice, oil, orange extract, and whisk to combine.: The wet mixture should look smooth and slightly glossy, and as you whisk you may hear a light slap of liquid against the bowl, signaling everything is incorporated. The buttermilk and sour cream give a silky thickness while the oil ensures tenderness. This emulsion helps the batter come together without lumps when combined with the dry ingredients. A common error is under whisking which leaves pockets of egg, or overwhisking which can create too much air and lead to uneven rise, so aim for an even, homogenous blend.
- Add the wet mixture to the dry, mixing lightly with a spoon or folding with a spatula until just combined. Small lumps will be present, don’t overmix or try to stir them smooth.: You will see the batter change from powdery to cohesive, with small streaks of flour disappearing as you fold. The tactile resistance of the batter softens under the spatula, and small lumps are okay because they will hydrate and disappear during baking. Overmixing activates gluten and leads to a tougher crumb, so stop folding as soon as the big dry patches are gone. If the batter seems too stiff, a few gentle strokes will do; forcing it further risks a denser texture.
- Turn batter out into prepared pan and bake for about 27 to 30 minutes, or until center is set and not jiggly, and a toothpick inserted in the center comes out clean or with a few moist crumbs, but no batter.: As the cake bakes the top will become pale golden and smell of warm citrus and sugar, the oven producing a comforting aroma that tells you time is passing. You may hear a subtle settling sound as steam escapes. The center should feel springy and the toothpick test is the best indicator; little moist crumbs are fine, but raw batter is not. A typical mistake is opening the oven early, which can make the center sink, so wait until the recommended minimum time has passed before checking.
- Using a fork, stab the cake about 50 times, making small holes all over the cake.: The act of poking creates channels for the glaze to penetrate, and you will see tiny crater-like holes across the surface that act like reservoirs. This step enhances moisture distribution and creates pockets of concentrated flavor where the glaze pools. Avoid making holes that are too large, or the cake can become overly saturated and fall apart; the goal is many small punctures rather than a few big ones.
- Place pan on a wire rack and allow cake to cool. While cake cools, make the glaze.: As the cake cools it relaxes, becoming easier to handle, and the surface loses some heat while the interior continues to set. The wire rack allows air to circulate beneath so condensation does not soften the bottom. Meanwhile the glaze can be prepared so it is warm and pourable at the right moment. If you try to glaze a piping hot cake the glaze will run off too quickly, while glazing an overly cold cake reduces absorption, so aim for a warm but not hot cake.
- To a medium microwave-safe bowl, add the orange juice, honey, butter, and heat for about 1 minute, or until butter has melted and mixture is just beginning to show signs of boiling.: Heating these glaze components together releases aroma, and you will see gentle bubbling at the edges when it is ready. The honey thins and blends seamlessly with the orange juice while the butter adds silkiness. Watch carefully to avoid rapid rolling boil which can change the flavor and texture; gentle heat is best. Stirring right after heating unifies the mixture into a glossy base for the sugar.
- Add the confectioners’ sugar and whisk until smooth. If necessary, add additional sugar to reach desired glaze consistency; glaze should be easily pourable.: As you whisk the glaze will transform into a thick, shiny emulsion, and the sugar will dissolve to give body. The goal is a glaze that pours but clings slightly, so add sugar a little at a time to avoid overthickening. If the glaze becomes too thick, a splash of orange juice thinned with a drop of water can rescue it. Lumpiness indicates hurried mixing or cold ingredients, so whisk until silky.
- Slowly and evenly pour glaze over cake (cake doesn’t have to be fully cooled), smoothing it lightly with a spatula if necessary, but glaze will likely just slide into place. Glaze will soak into the holes as time passes.: Pouring slowly lets the glaze find each poked channel, and you should see the surface gleam as the liquid sinks in and pools in the holes. The sound is quiet, a gentle swish as the glaze spreads, and visually the top becomes glossy. Avoid dumping all glaze in one spot, which can oversaturate the cake; instead use a steady circular motion for even coverage. Patience here gives the best final texture.
- Evenly sprinkle with the orange zest and allow cake to cool in pan uncovered for at least 1 hour (or overnight and cover with a sheet of foil) before slicing and serving so glaze can set up, although this is a soft glaze that doesn’t ever fully harden because of the honey.: The final zest adds a fragrant finish and a pop of color, and cooling allows the glaze to settle so slices hold together cleanly. You will notice the glaze become slightly tacky but still soft, giving a pleasant mouthfeel. Cutting too soon can smear the glaze and result in messy slices, so waiting improves presentation. If storing overnight, lightly tent with foil to prevent too much exposure while keeping the surface intact.
Notes
- Boost citrus brightness by increasing the fresh orange zest by a half teaspoon for more aromatic lift, which adds fragrance without altering texture.
- Adjust sweetness by reducing granulated sugar slightly if you prefer the glaze to dominate; remember the glaze contributes substantial sweetness so small reductions go a long way.
- Swap dairy by using plain Greek yogurt for the sour cream portion to create a slightly firmer, tangier crumb while keeping moisture levels similar.
- Control glaze thickness by adding confectioners’ sugar gradually, testing the pourability until you reach the desired cling to the cake surface.
- Make ahead strategy by baking the cake the day before and glazing the next morning to let the flavors meld and the glaze sink in overnight for a softer finish.