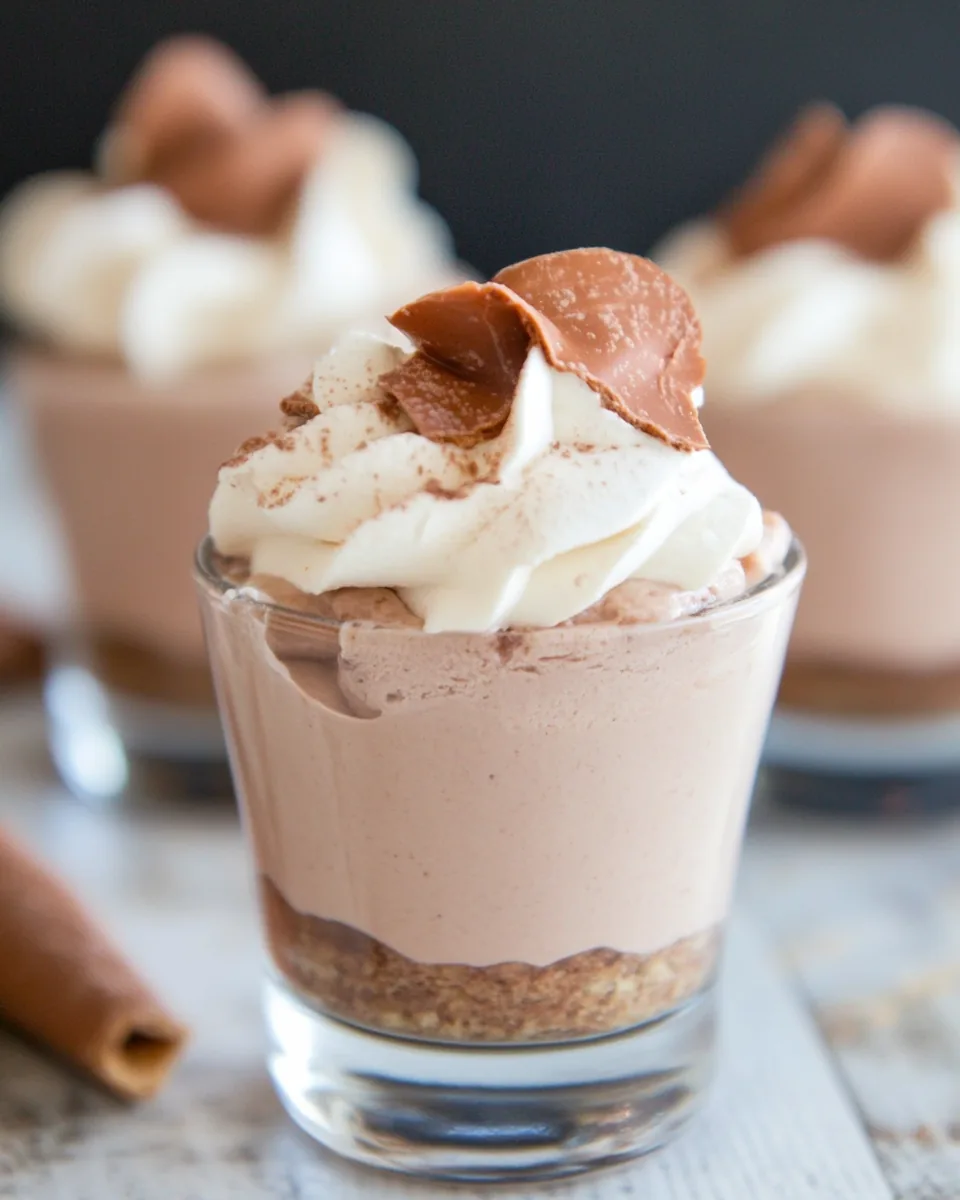
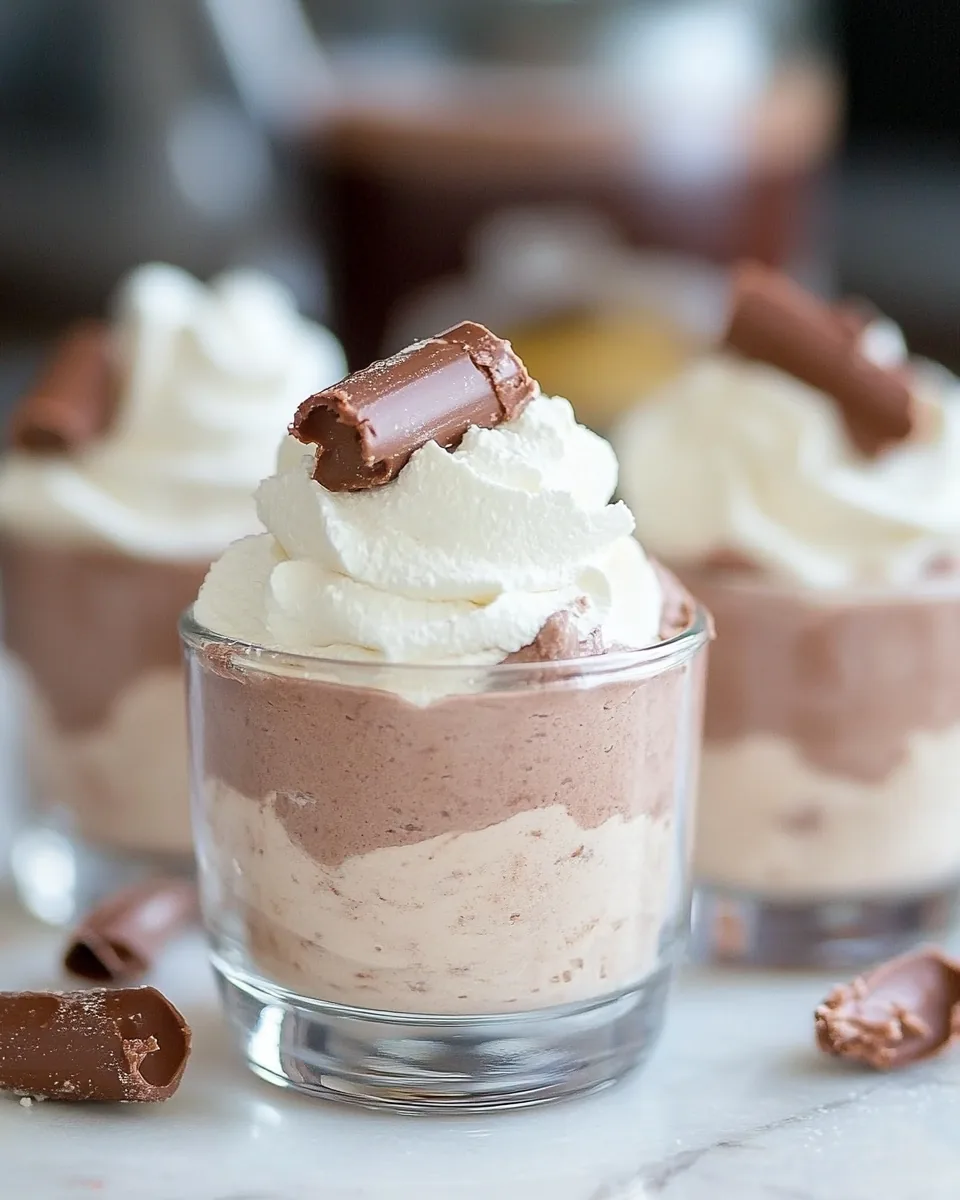
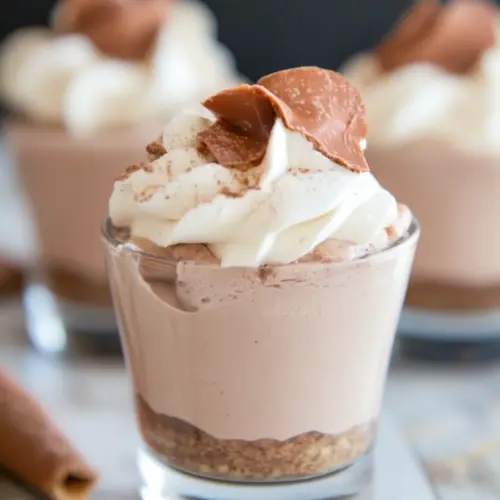
Nutella Mousse Cups
There’s something inherently joyful about dessert, especially when it involves chocolate. The Nutella Mousse Cups have been a favorite in my family for as long as I can remember. I still recall the first time I whipped them up for a gathering; the excitement was palpable as I prepared the creamy chocolate mousse and layered it with the crunchy Biscoff cookie base. Everyone was intrigued, and the moment they took their first bite, I knew I had struck dessert gold. The way the rich, velvety mousse melded with the crispiness of the crushed cookies was utterly divine. It’s one of those recipes that always brings smiles, laughter, and happy memories to our table.
Recipe Snapshot
25 mins
25 mins
0 mins
Medium
350 kcal
3 g
Gluten-Free, Low FODMAP
24 g
Food Processor, Mixing Bowl
What You’ll Enjoy About This Nutella Mousse Cups
Decadent Chocolate Flavor
When it comes to indulgence, the Nutella Mousse Cups are in a league of their own. The creamy texture of the mousse, combined with the unique flavor of Nutella, creates a heavenly experience that’s hard to resist. Each spoonful is a delightful burst of chocolate that satisfies even the most intense cravings.
Easy to Make
You don’t need to be a pastry chef to whip up these delightful treats. The recipe is straightforward and perfect for both beginners and seasoned bakers. With just a few simple steps, you can create a dessert that looks and tastes gourmet.
Perfect for Any Occasion
Whether it’s a family gathering, birthday party, or a simple weeknight treat, Nutella Mousse Cups fit right in. They are not only delicious but also visually appealing. The layers of mousse and cookie create an inviting presentation that’s sure to impress your guests.
Versatile and Customizable
One of the best things about this recipe is its flexibility. You can easily adapt the flavors or toppings to suit your taste. For a twist, consider adding fruit or different flavored spreads to the mousse. The possibilities are endless!
Kid-Friendly
This dessert is a hit with kids and adults alike! The fun of creating your own little cups of mousse makes it a great activity for the whole family. Plus, who can resist Nutella? It’s a guaranteed winner!
Make-Ahead Convenience
The Nutella Mousse Cups can be prepared ahead of time, making them a stress-free option for entertaining. You can store them in the fridge until you’re ready to serve, allowing you to enjoy the moment with your guests without any last-minute rush.
What You’ll Need for Nutella Mousse Cups

Creating the perfect Nutella Mousse Cups starts with the right ingredients. Each component plays a crucial role in achieving that rich flavor and creamy texture. The combination of cream cheese for creaminess, heavy cream for the lightness, and of course, Nutella for that irresistible chocolatey goodness, makes this dessert a standout!
- ½ package (4 oz) cream cheese: Adds a rich and creamy texture to the mousse, making it smooth and luscious.
- ½ cup Nutella: The star of the show, providing that unmistakable chocolate-hazelnut flavor.
- 1 Tbl milk: Helps to blend the cream cheese and Nutella smoothly.
- 1 cup powdered sugar: Sweetens the mousse without making it overly sugary.
- 1 container (8 oz) cool whip: Lightens the mousse and gives it a fluffy texture.
- 1½ cups heavy cream: Whipped to perfection, it adds a luxurious creaminess.
- ½ cup powdered sugar: Used for sweetening the whipped cream topping.
- ½ tsp vanilla: Enhances the overall flavor of the mousse.
- ½ package Biscoff Cookies: Crushed to create a deliciously crunchy base.
- ? cup Biscoff Spread: Adds an extra layer of flavor to the cookie base.
Cooking Instructions for Nutella Mousse Cups
Making Nutella Mousse Cups is a delightful experience that allows you to unleash your inner chef. Follow these steps to create your own delicious dessert. Trust me; it’s easier than you might think!
- Start by using a small food processor to crush the Biscoff cookies. You want them to be fine, almost like a sand consistency. This will form the base of your mousse cups.
- Once crushed, dump the cookie crumbs into a bowl and mix them with the Biscoff spread. It should come together like a wet sand mixture. This step is crucial as it will create the perfect base for your mousse.
- Take 1 to 2 tablespoons of the cookie mixture and spoon it into the bottom of 10 small glasses. Ensure you gently press the crumbs into the bottom so they hold together well.
- Now, let’s prepare the mousse. In the bowl of an electric mixer, combine the cream cheese, Nutella, and milk. Beat the mixture until it’s smooth and fully combined.
- Slowly add in the powdered sugar while mixing. This will create a deliciously sweet mousse; ensure everything is well incorporated.
- Using a spatula, carefully fold in the cool whip until it’s just combined. Be gentle to keep that airy texture.
- Now it’s time to spoon or pipe the mousse into the cups on top of the cookie base. Fill each cup generously, leaving some space at the top for whipped cream.
- To prepare the whipped cream topping, clean the bowl of the mixer and add the heavy cream. Whip for about 3 to 4 minutes until soft peaks form.
- Once soft peaks are achieved, add the second half of the powdered sugar and vanilla to the whipped cream. Continue whipping for another minute until stiff peaks form.
- Finally, dollop the whipped cream on top of each mousse cup. If you’re feeling decorative, garnish with a Biscoff cookie for an extra touch of elegance.
Things Worth Knowing
- Quality of Ingredients: Using high-quality Nutella and fresh heavy cream makes a significant difference in flavor.
- Whipping Technique: Whip the cream until stiff peaks form to ensure a light, airy mousse.
- Serving Temperature: Chill the mousse cups in the refrigerator for at least an hour before serving for the best texture.
- Presentation: Use clear cups to showcase the beautiful layers of mousse and cookie.
Recipe Notes about Nutella Mousse Cups

Here are some tips to make your experience even better when preparing Nutella Mousse Cups. These pointers will help you achieve the best results!
- Storage: Store any leftovers in the refrigerator for up to three days. Keep them covered to maintain freshness.
- Freezing: While it’s not ideal to freeze the mousse, you can freeze the cookie base separately and assemble when ready to serve.
- Variations: Consider using different flavored spreads or adding fruits like raspberries for a refreshing twist.
- Presentation: You can serve these cups in a variety of dishes, from small glasses to dessert bowls.
- Layering: Feel free to experiment with layering the mousse and cookie base for a unique presentation.
What Goes Well With This Nutella Mousse Cups
If you want to elevate your dessert experience even further, consider these fantastic pairings for your Nutella Mousse Cups. Here are some ideas:
- Fresh Berries: Serve with strawberries, raspberries, or blueberries for a pop of color and freshness.
- Espresso or Coffee: A cup of strong coffee perfectly complements the richness of chocolate.
- Whipped Cream Variations: Try flavored whipped creams, like coffee or hazelnut, for an extra layer of taste.
- Seasonal Fruit: Incorporate seasonal fruits like peaches or cherries for a delightful summer twist.
- Chocolate Shavings: Top with dark chocolate shavings for an elegant finish. They add a lovely touch and extra flavor.
- Nut Toppings: Chopped hazelnuts or almonds can provide a nice crunch that contrasts beautifully with the creamy mousse.
FAQ
Conclusion
The Nutella Mousse Cups are a delightful treat that combines rich chocolate flavor with creamy texture, creating an unforgettable dessert experience. I encourage you to try making these cups for your next gathering; they are sure to impress everyone! Enjoy the joy and smiles they bring to your table.
Nutella Mousse Cups
Equipment
- Food Processor
- Mixing Bowl
Ingredients
- ½ package (4 oz) cream cheese
- ½ cup Nutella
- 1 Tbl milk
- 1 cup powdered sugar
- 1 container (8 oz) cool whip
- 1½ cups heavy cream
- ½ cup powdered sugar
- ½ tsp vanilla
- ½ package Biscoff Cookies
- ? cup Biscoff Spread
Instructions
- Start by using a small food processor to crush the Biscoff cookies. You want them to be fine, almost like a sand consistency. This will form the base of your mousse cups.
- Once crushed, dump the cookie crumbs into a bowl and mix them with the Biscoff spread. It should come together like a wet sand mixture. This step is crucial as it will create the perfect base for your mousse.
- Take 1 to 2 tablespoons of the cookie mixture and spoon it into the bottom of 10 small glasses. Ensure you gently press the crumbs into the bottom so they hold together well.
- Now, let’s prepare the mousse. In the bowl of an electric mixer, combine the cream cheese, Nutella, and milk. Beat the mixture until it's smooth and fully combined.
- Slowly add in the powdered sugar while mixing. This will create a deliciously sweet mousse; ensure everything is well incorporated.
- Using a spatula, carefully fold in the cool whip until it’s just combined. Be gentle to keep that airy texture.
- Now it’s time to spoon or pipe the mousse into the cups on top of the cookie base. Fill each cup generously, leaving some space at the top for whipped cream.
- To prepare the whipped cream topping, clean the bowl of the mixer and add the heavy cream. Whip for about 3 to 4 minutes until soft peaks form.
- Once soft peaks are achieved, add the second half of the powdered sugar and vanilla to the whipped cream. Continue whipping for another minute until stiff peaks form.
- Finally, dollop the whipped cream on top of each mousse cup. If you’re feeling decorative, garnish with a Biscoff cookie for an extra touch of elegance.